Pentair Pentek Intellidrive Quick Start Manual
Hide thumbs
Also See for Pentek Intellidrive:
- Owner's manual (24 pages) ,
- Quick start manual (2 pages) ,
- Quick start manual (2 pages)
Advertisement
Available languages
Available languages
Quick Links
1
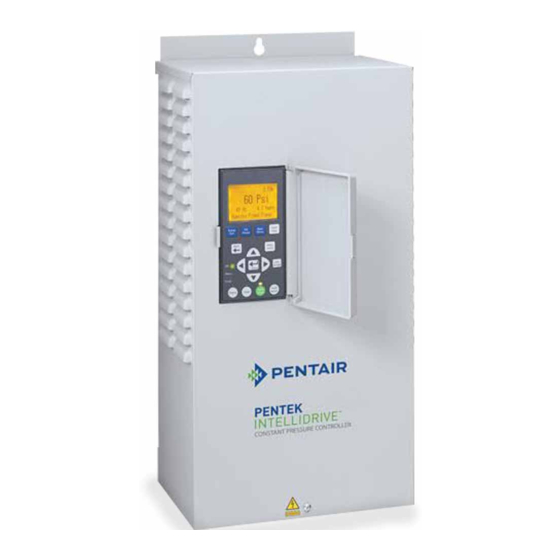
PENTEK INTELLIDRIVE
Indoor Installation Procedure
• Begin procedure by removing screw at bottom of front cover.
• Pull top of cover towards you (Fig. 1a), away from back plate to create
gap (Fig. 1b).
• Pull bottom of cover towards you (Fig. 1c); liftup on cover and remove.
• Mount the Drive vertically on post, stud, or flat surface.
• Permanently attach the Drive using top slotted hole, plus either the
three bottom holes (for flat surface mounting) or the center bottom
hole (for attaching to post or stud).
• Leave 3" clearance around the Drive for proper cooling.
NOTICE After all wiring connections in Step 2 are complete, reattach cover
by hooking it on top of back plate (be sure to leave gap). Lower bottom of
cover into place. Push cover evenly against back plate (Fig. 1d), eliminating
gap. Replace screw at bottom of front cover.
1a
1c
1b
1d
5
Initial Startup: Check List
• Ensure system has properly sized relief valve and pressure tank.
• Ensure that pressure tank's precharge is 70 percent of the drive set pressure
(42 PSI for the default set-point of 60 PSI).
• Make sure that the pump discharge is connected to the system.
• Ensure input ground, output ground, and transducer shield wire are properly
connected.
6
Initial Startup: System Start
• Open valves at the ends of lines to so that air will escape during
pressurization. Press Auto Start.
• The Drive will go into Auto Line Fill.
• Close valves at the ends of lines after all air has escaped.
• Once the Transducer senses 10 PSI , the Drive will go into Constant Pressure
Mode and maintain 60 PSI.
• If a different pressure is required, use PSI Preset to change the setpoint.
2
Typical 230VAC
Circuit Breaker
(Double Width)
5997 0412
3
Initial Startup:
Program the Drive
Apply 230V to Drive
Apply 230V power to the
PENTEK INTELLIDRIVE.
Enter Motor Phase
"Setup Guide" will appear
(1 Phase or 3 Phase)
in the display. Follow
Press Enter
the keypress sequence
1 Phase
shown here:
Connection Type
(2 Wire or 3 Wire)
Subm or Above Gnd
Press Enter
(Continued next column)
Enter Service
Factor Amps
Press Enter
Table 1 - PENTEK
Motor Service Factor Amps
®
Set Time
Rating @
PENTEK Part
230V
Motor Type
Number
Press Enter
P42B0005A2-01
Set Date
P42B0007A2-01
P42B0010A2-01
Press Enter
P42B0015A2-01
1-1/2
2-Wire
P42B0005A2-02
Setup Complete
P42B0007A2-02
P42B0010A2-02
P42B0015A2-02
1 1/2
P43B0005A2-01
P43B0007A2-01
P43B0010A2-01
CS/CR
P43B0015A2-01
1-1/2
3-Wire
P43B0005A2-02
P43B0007A2-02
P43B0010A2-02
P43B0015A2-02
1 1/2
P43B0005A3
P43B0007A3
P43B0010A3
3-Phase
P43B0015A3
1-1/2
P43B0020A3
P43B0030A3
P43B0050A3
Refer to the Owner's Manual for installation, operation, and safety information.
This guide neither supplements nor replaces the Owner's Manual.
01+ 01+
I1+ I1-
I2+ I2-
V+
V-
AI+ AI-
Red to AI+
Terminal
Black to AI–
Removable
(pull down)
Green Cable Shield/Screw
Apply 230V to Drive
Enter Motor Phase
(1 Phase or 3 Phase)
Input Power
Input
Input
Transducer Cable
Connections
Ground Screw
Ground
Connections
Press Enter
Submersible Motor: 3-Ph./ 3-W. 1-Ph., follow colors as above.
Submersible Motor: 1-Ph./ 2-W., connect to Y and B, any order.
1 Phase
3 Phase
Above-Ground Motors: L1 to R, L2 to Y, L3 to B; verify rotation.
Connection Type
Motor Type
(2 Wire or 3 Wire)
Subm or Above Gnd
Press Enter
Setup Guide
12:10p
Enter Service
Factor Amps
Service Factor Amps
Press Enter
Stopped
Set Time
3 Phase
Press Enter
Motor Type
Set Date
Press Enter
6000 0509
Setup Complete
6566 0512
NOTICE Nameplate amps may differ from these
values. For PENTEK motors, use the values
Service Factor
given here.
Amps
HP
In submersible retrofit applications with other
1/2
4.7
manufacturer's 3-wire, 1-Phase motors, use the
3/4
6.2
Cap Start/Cap Run values supplied by the motor
1
8.1
10.4
manufacturer. For 3-Phase motors use the motor
1/2
5.1
6566 0512
manufacturer's service factor amps.
3/4
6.1
For above ground motors use the highest amp value
1
8.0
given (may be listed as "max load amps" or "full
10.6
load amps.")
1/2
4.8
3/4
6.0
NOTICE See Owner's Manual for more illustrations
1
7.3
and detailed information.
10.9
1/2
4.5
For support call:
3/4
5.7
PENTEK Customer Service
1
6.8
866-9PENTEK (973-6835)
10.7
1/2
2.9
3/4
3.9
1
4.7
6.1
2
7.6
3
10.1
5
17.5
Quick Start Guide
Wiring Connections
A. Disconnect power to the circuit breaker box
before making any connections.
P
N
SD CARD
B. Connect motor wiring FIRST, transducer cable
SECOND, and power supply wires LAST.
Terminal
Removable
Inspect the Drive's interior. It must be free of
(pull down)
loose wires and other debris before closing.
C. Replace the cover and secure it with the
Red
cover screw before connecting the input
Yellow
power cable to the breaker box.
Black
NOTICE When using above ground motor
Output
Motor Connections
rated for use with the PENTEK INTELLIDRIVE,
Ground Screw
Output Ground
maximum lead length is 25 ft. See motor-specific
user manual and NEC for wire size.
4
Initial Startup: Pump Out the Well
6539 0412
Direct the pump's discharge to an appropriate location not connected to the system and
press Pump Out. The pump will run at 45 Hz. Adjust frequency as appropriate:
A. Press Enter.
B. Change frequency value.
NOTICE Above ground pumps should run at 60 Hz for this step until pump is primed.
Then adjust frequency as appropriate.
C. Press Enter again.
Run the Drive in this mode until the well discharge runs clear, then press Stop to stop
the Drive.
Risk of explosion. Can cause severe injury, property damage or death. In Pump
Out mode, the pump runs at a constant speed. Restricting flow can cause very high
pressure. Do not restrict flow.
EMI/RFI Filter
Risk of electric shock.
Can shock, burn or kill.
Risk issues to be aware of:
• Drive's internal
components retain
high voltage for up to
5 minutes after input
power is disconnected.
• EMI/RFI Filter carries
high voltage when
pump is running.
• Disconnect power and
wait 5 minutes before
opening and removing
Fan
Drive cover.
• Mount Drive on stud or
post BEFORE making
electrical connections.
• Do not touch Drive with
wet or damp hands.
• Disconnect power and
remove cover with dry
hands.
Risk of Fire. If installed with
6020 0609
incorrect circuit breaker
protection. Install the Drive on
an independent branch circuit,
with no other appliances on
the circuit and protected by a
circuit breaker as specified in
Owner's Manual.
©2015
PN958-SP (Rev. 04/23/15)
Advertisement

Related Manuals for Pentair Pentek Intellidrive


Summary of Contents for Pentair Pentek Intellidrive
- Page 1 Quick Start Guide Refer to the Owner’s Manual for installation, operation, and safety information. This guide neither supplements nor replaces the Owner’s Manual. Wiring Connections PENTEK INTELLIDRIVE Indoor Installation Procedure A. Disconnect power to the circuit breaker box • Begin procedure by removing screw at bottom of front cover. before making any connections. 01+ 01+ I1+ I1- I2+ I2-...
- Page 2 Guía Básica de Inicio Consultar el Manual del Propietario para obtener información sobre la instalación, el funcionamiento y la seguridad. Esta guía no suplementa ni sustituye el Manual del Propietario. Procedimiento de instalación del Mecanismo de Accionamiento Conexiones de los cables A. Desconectar la alimentación a la caja del disyuntor •...
Need help?
Do you have a question about the Pentek Intellidrive and is the answer not in the manual?
Questions and answers