Goodwe SDT G2 Series Quick Installation Manual
Solar inverter
Hide thumbs
Also See for SDT G2 Series:
- Quick installation manual (106 pages) ,
- User manual (77 pages) ,
- Quick installation manual (110 pages)

Related Manuals for Goodwe SDT G2 Series


Summary of Contents for Goodwe SDT G2 Series
- Page 1 Quick Installation Guide Solar Inverter SDT G2 Series (GW8KAU-DT/GW10KAU-DT/GW15KAU-DT/GW20KAU-DT/GW17KT-DT/ GW20KT-DT/GW25KT-DT/GW8000-SDT-20/GW10K-SDT-20/GW12K-SDT-20/ GW15K-SDT-20/GW17K-SDT-20/GW20K-SDT-20) V1.0-2021-10-30...
-
Page 2: Safety Precautions
• Before installations, read through the quick installation guide and the user manual to learn about the product and the precautions. • All installations should be performed by professional and knowledgeable technicians who are familiar with local standards and safety regulations. • Check the deliverables for correct model, complete contents, and intact appearance. Contact the after-sales service center if any damage is found or any component is missing. • Use insulating tools and wear personal protective equipment when operating the equipment to ensure personal safety. Wear anti-static gloves, clothes, and wrist strip when touching electron devices to protect the inverter from damage. • Strictly follow the installation, operation, and configuration instructions in this guide and user manual. The manufacturer shall not be liable for equipment damage or personal injury if you do not follow the instructions. For more warranty details, please visit http://www.goodwe.com. Safety Disclaimer Warning DC Side 1. Ensure the component frames and the bracket system are securely grounded. 2. Connect the DC cables using the delivered DC connectors and terminals. The manufacturer shall not be liable for the equipment damage if other connectors or terminals are used. 3. Ensure the DC cables are connected tightly and securely. 4. Measure the DC cable using the multimeter to avoid reverse polarity connection. Also, the voltage should be under the permissible range. AC Side 1. The voltage and frequency at the connecting point should meet the on-grid requirements. 2. An additional protective device like the circuit breaker or fuse is recommended on the AC side. Specification of the protective device should be at least 1.25 times the AC output... -
Page 3: Check Before Power On
High Voltage Hazard. Power Potential risks exist. Wear off the inverter first before any proper PPE before any operations. operations. Read through the guide before Delayed discharge. Wait until any operations. the components are totally discharged after power off. 5min High-temperature hazard. Do not touch the equipment to avoid being burnt. Check Before Power ON Check Item The inverter is firmly installed at a clean place where is well-ventilated and easy- to-operate. The PE cable, DC input cable, AC output cable, and communication cable are connected correctly and securely. Cable ties are routed properly and evenly, and no burrs. Unused ports and terminals are sealed. The voltage and frequency at the connection point meet the on-grid requirements. -
Page 4: Product Introduction
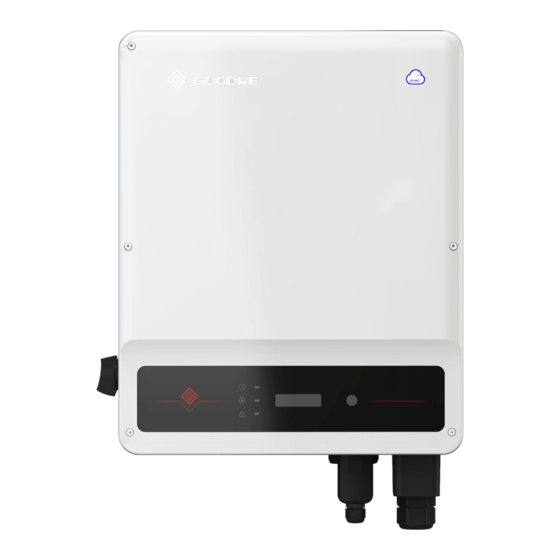
Product Introduction Product Introduction GW25KT-DT / GW8KAU-DT / GW10KAU-DT / GW17KT-DT / GW20KT-DT / GW15KAU-DT / GW20KAU-DT GW8000-SDT-20 / GW10K-SDT-20 GW12K-SDT-20 / GW15K-SDT-20 / GW17K-SDT-20 / GW20K-SDT-20 GW25KT-DT / GW8KAU-DT / GW12K-SDT-20 / GW15K-SDT-20 / GW10KAU-DT / GW17KT-DT / GW20KT- GW17K-SDT-20 / GW20K-SDT-20 DT / GW15KAU-DT / GW20KAU-DT / GW8000-SDT-20 / GW10K-SDT-20... -
Page 5: Inverter Installation
LED Indicator Button PE Terminal Mounting Plate DC Switch DC Input Terminal USB Port (USB) DC Input Terminal (PV2) (PV1) Communication Communication Communication Port ( COM2/COM1) Port ( COM1/COM2) Port ( COM3) AC Output Terminal Ventilation Valve Notice: [1]: The LCD is equipped in some models only. [2]: GW25KT-DT: 3 x PV+/PV-; other models: 2 x PV+/PV- . [3]: The Fans is equipped in some models only. Inverter Installation Packing List x 1(optional) x 1(optional) x 6(optional) N means the number of actual accessories may differ depending on different model. - Page 6 Space Requirements ≥300mm ≥200mm ≥200mm ≥300mm ≥500mm IP65 0%~100%RH Angle Requirements...
- Page 7 Installing the Inverter Avoid the water pipes and cables buried in the wall when drilling holes. 1.2~2N·m NOTICE The PV box should be installed when GW15KAU-DT or GW20KAU-DT is used in Australia only. Install the cover of the PV box after connecting the DC input cable to the equipment. Otherwise, the DC input cable cannot be connected. 1.2~2N·m...
-
Page 8: Electrical Connection
Electrical Connection Connecting the PE Cable L=L1+(1~2)mm 1.2~2N·m Connecting the DC Cable NOTICE The PV box is designed for GW15KAU-DT or GW20KAU-DT in Australia only. Install the cover of the PV box after connecting the DC input cable to the equipment. Devalan DC Connector 7~8mm 4~5mm 7~8mm 2.5mm ≤S≤4mm... - Page 9 Use a multimeter to measure the DC voltage and check the polarity of the connectors. Click Click Staubli MC4 DC Connector...
- Page 10 7~8mm 7~8mm Use a multimeter to measure the DC voltage and check the polarity of the connectors. Click Click...
- Page 11 Connecting the AC Cable (without PV box) Click Devalan DC Connector 7~8mm 7~8mm Use a multimeter to measure the DC voltage and check the polarity of the connectors. Click Click...
- Page 12 Staubli MC4 DC Connector 7~8mm 7~8mm Use a multimeter to measure the DC voltage and check the polarity of the connectors. Click Click...
- Page 13 Connecting the AC Output Cable NOTICE Connecting AC cables of GW8000-SDT-20, GW10K-SDT-20, GW12K-SDT-20, GW15K-SDT-20, GW17K-SDT-20, GW20K-SDT-20 as following shows . L=L1+(1-2)mm 10-25mm L2 L3 1.2~2N·m 0.6~0. 8 N·m...
- Page 14 NOTICE Connecting AC cables of GW8KAU-DT, GW10KAU-DT, GW15KAU-DT, GW20KAU-DT, GW17KT-DT, GW20KT-DT, GW25KT-DT as following shows . 10-12mm 10-15mm 0.6~0.8N·m 0.6~0.8N·m...
- Page 15 Connecting the Communication Cable (RS485, Meter, and DRED) RS485/ DRED Meter 6.5mm 25mm 0.3~0.4N·m RS485/Meter (COM2) DRED (COM3) 1: RS485 B 1: DRM1/5 2: RS485 B 2: DRM2/6 3: RS485 A 3: DRM3/7 4: RS485 A 4: DRM4/8 5: Meter + 5: REFGen 6: Meter - 6: Com/DRM0...
- Page 16 Connecting the Remote Shutdown (RSD) Communication Cable RS485 6.5mm 25mm +: DRM4/8 -: REFGen 0.6~0.8N·m...
- Page 17 Connecting the USB Cable Installing Communication Module NOTICE • The communication modules may look different, but installed in the same way. The following figure shows the way to install a WiFi module. • Refer to the delivered communication module user manual to get more introduction to the module. • Remove the communication module using the unlock tool. The manufacturer shall not be liable for the port damage if the module is removed without the unlock tool.
- Page 18 Power On Check the LED indicators Power ON Turn on Power OFF Turn off Commissioning Commissioning via LCD 1. Select the right safety country via LCD. Long press Short press for 2s Select Country/ China China Region 2. Wait for 20s, the inverter will set the safety country automatically and go back to the standby interface.
- Page 19 Commissioning via SolarGo APP play SolarGo App Store <10m <5m SolarGo App Bluetooth: SOL-BLE******** WiFi: SOL-WiFi******** WiFi initial password: 12345678 Scan the QR Code on the equipment if you need to use 4G or GPRS. * are the last 8 digits of the inverter SN. Initial password for Bluetooth/WiFi: 1234. Initial Password for 4G: automatically fill in. Initial Password for GPRS: the last 4 digits of the inverter bar code.
- Page 20 Monitoring via SEMS Portal App play SEMS Portal App Store SEMS Portal APP Contact after sales service or the dealer to get the Configure WiFi following account and the password. the instructions. For WiFi module only. Test...
- Page 21 For more detailed instructions, scan the QR code below to see the user manual. SDT G2 Series User Manual...
- Page 22 Offical Website GoodWe Technologies Co.,Ltd. No. 90 Zijin Rd., New District, Suzhou, 215011, China www.goodwe.com 340-00615-00 service@goodwe.com...
Need help?
Do you have a question about the SDT G2 Series and is the answer not in the manual?
Questions and answers