Sony STR-DH130 Operating Instructions Manual
Hi-fi receivers: fm stereo fm/am receiver
Hide thumbs
Also See for STR-DH130:
- Service manual (36 pages) ,
- Operating instructions manual (35 pages) ,
- Quick setup manual (2 pages)
Table of Contents
Advertisement
Advertisement
Table of Contents

Related Manuals for Sony STR-DH130


Summary of Contents for Sony STR-DH130
- Page 1 4-294-472-11(1) FM Stereo FM/AM Receiver Operating Instructions STR-DH130...
-
Page 2: Important Safety Instructions
The model and serial numbers are located on the rear of the unit. Record these numbers in the space provided below. Refer to them whenever you call upon your Sony dealer regarding this product. Model No. Serial No. This symbol is intended to alert the user to the presence of uninsulated “dangerous voltage”... - Page 3 12)Use only with the cart, stand, tripod, bracket, or table specified by the manufacturer, or sold with the apparatus. When a cart is used, use caution when moving the cart/apparatus combination to avoid injury from tip-over. 13)Unplug this apparatus during lightning storms or when unused for long periods of time.
-
Page 4: About This Manual
Notice for customers: The following information is only applicable to equipment sold in countries applying EU Directives. The manufacturer of this product is Sony Corporation, 1-7-1 Konan Minato-ku Tokyo, 108-0075 Japan. The Authorized Representative for EMC and product safety is Sony Deutschland GmbH, Hedelfinger Strasse 61, 70327 Stuttgart, Germany. -
Page 5: Table Of Contents
Table of Contents About This Manual...4 Supplied accessories...6 Description and location of parts...7 Getting started ...13 Connections 1: Installing the speakers ...13 2: Connecting the speakers ...14 3: Connecting the audio/video equipment...14 4: Connecting the antennas (aerials)...17 5: Connecting the AC power cord (mains lead) ...18 Preparing the Receiver Initializing the receiver ...18... -
Page 6: Supplied Accessories
Supplied accessories • Operating Instructions (this manual) • Quick Setup Guide • FM wire antenna (aerial) (1) • AM loop antenna (aerial) (1) • Remote control (RM-AAU130) (1) • R6 (size AA) batteries (2) Inserting batteries into the remote control Insert two R6 (size AA) batteries (supplied) by matching 3 and # on the batteries to the diagram inside the battery compartment of the... -
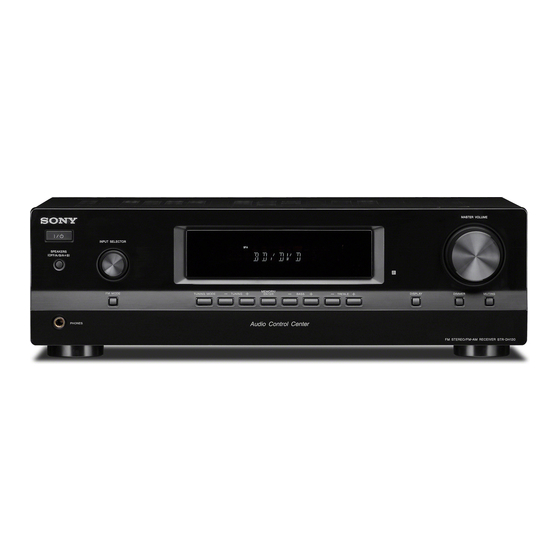
Page 7: Description And Location Of Parts
Description and location of parts Front panel Indicators on the display panel SP A SP B A ?/1 (on/standby) (page 18, 24) B SPEAKERS (OFF/A/B/A+B) (page 14, 19) C INPUT SELECTOR (page 20, 22 - 25) D Display panel E Remote control sensor Receives signals from remote control. - Page 8 N SP A/SP B Lights up according to the speaker system used (page 19). However, these indicators do not light up if the speaker output is turned off or if headphones are connected. O SLEEP Lights up when the Sleep Timer is activated (page 11).
-
Page 9: Rear Panel
Rear panel A Audio signal section (page 14, 16) White (L) AUDIO IN/OUT jacks Red (R) PORTABLE IN jack B ANTENNA section (page 17) FM ANTENNA jack AM ANTENNA terminals C SPEAKERS section (page 14) -
Page 10: Input Buttons
Remote control Use the supplied remote control to operate this receiver and other equipment. The remote control is assigned to operate Sony audio/ video equipment. You can reassign the input button to match the equipment connected to your receiver (page 27). - Page 11 **The number 5, MASTER VOL +/TV VOL +, and N buttons have tactile dots. Use the tactile dots as references when operating the receiver. To control a Sony TV Hold down TV (O), then press the button printed in orange to select the function you want.
- Page 12 To control other Sony equipment Name AV ?/1 POP UP/MENU TOP MENU ENTER/MEMORY TOOLS/OPTIONS MENU/HOME ./> REPLAY ADVANCE RETURN/EXIT O V/v/B/b DISPLAY -/-- >10/ CLEAR Numeric buttons If you press AV ?/1 (A) and ?/1 (B) simultaneously, the receiver and connected equipment will turn off (SYSTEM STANDBY).
-
Page 13: Getting Started
Getting started You can enjoy your audio/video equipment connected to the receiver by following the simple steps below. Installing and connecting the speakers (page 13, 14) Connecting the audio/video equipment (page 14, 16) Preparing the receiver See “5: Connecting the AC power cord (mains lead)”... -
Page 14: 2: Connecting The Speakers
2: Connecting the speakers Before connecting the cords, be sure to disconnect the AC power cord (mains lead). Left speaker 10 mm (13/32") Right speaker A Speaker cords (not supplied) * If you have an additional speaker system, connect them to the SPEAKERS B terminals. You can select the speakers you want to use with the SPEAKERS (OFF/A/B/A+B) button on the receiver (page 19). - Page 15 Notes • When listening to a equipment connected to the PORTABLE IN jack, sound may be distorted or interrupted. This is not a malfunction and will depend on the connected equipment. • If the sound from the equipment connected to the PORTABLE IN jack is very soft, you may increase the volume level.
-
Page 16: Connecting The Video Equipment
Connecting the video equipment Before connecting cords, be sure to disconnect the AC power cord (mains lead). To the VIDEO IN jack of the TV. To the VIDEO IN jack of the TV. Video signals Satellite tuner, Cable TV tuner A Audio cord (not supplied) * If you want to record, you must make this connection (page 22). -
Page 17: 4: Connecting The Antennas (Aerials)
Notes • The default setting for the BD/DVD and VIDEO input buttons on the remote control is as follows: BD/DVD: Blu-ray Disc player VIDEO: VCR Be sure to change the default setting of the BD/DVD (and VIDEO) input button so that you can use the button to control your DVD player (and DVD recorder). -
Page 18: 5: Connecting The Ac Power Cord (Mains Lead)
5: Connecting the AC power cord (mains lead) Connect the AC power cord (mains lead) to a wall outlet. AC power cord (mains lead) Preparing the Receiver Initializing the receiver Before using the receiver for the first time, initialize the receiver by performing the following procedure. -
Page 19: Selecting The Speaker System
Selecting the speaker system You can select the speakers you want to drive, if you have connected the speakers to SPEAKERS terminals. Be sure to use the buttons on the receiver to perform this operation. SPEAKERS (OFF/A/B/A+B) Press SPEAKERS (OFF/A/B/A+B) repeatedly to select the speaker system you want to drive. -
Page 20: Basic Operations
Basic Operations Playback V/v/B/b Turn on the connected equipment. Turn on the receiver. Press the input button which corresponds to the equipment you want. You can also use INPUT SELECTOR on the receiver. The selected input appears on the display panel. -
Page 21: Viewing Information On The Display Panel
If you made a mistake Press B/b until the character you want to change flashes, then press V/v to select the correct character. Press The name you entered is registered. Viewing information on the display panel DISPLAY Press the corresponding input button which you want to check the information. -
Page 22: Recording Using The Receiver
Recording using the receiver You can record sound from an audio/video equipment using the receiver. Refer to the operating instructions supplied with your recording equipment. Press the input button which corresponds to the playback equipment. You can also use INPUT SELECTOR on the receiver. -
Page 23: Tuning To A Station
Tuning to a station automatically (Automatic Tuning) Press TUNER repeatedly to select the FM or AM band. Press TUNING + or TUNING –. TUNING + scans from lower to higher frequency stations and TUNING – for scanning higher to lower. The receiver stops scanning whenever a station is received. -
Page 24: Presetting Fm/Am Radio Stations (Preset Tuning)
Changing the AM tuning scale (USA and Canada models only) You can change the AM tuning scale to either 9 kHz or 10 kHz using the buttons on the receiver. TUNING MODE Press ?/1 to turn off the receiver. While holding down TUNING MODE, press ?/1. -
Page 25: Naming Preset Stations
Press The station is stored as the selected preset number. Repeat steps 1 to 5 to store another station. Tuning to preset stations Press TUNER repeatedly to select the FM or AM band. You can also use INPUT SELECTOR on the receiver. -
Page 26: Receiving Rds Broadcasts
Receiving RDS broadcasts (Europe model only) This receiver allows you to use Radio Data System (RDS), which enables radio stations to send additional information along with the regular programming signal. This receiver offers convenient RDS features, such as Program Service name display. RDS is available only for FM stations.* * Not all FM stations provide RDS service, nor do they provide the same type of services. -
Page 27: Using The Remote Control
Overview of the menus x BALANCE (Speaker balance) Lets you adjust the balance between left and right speakers. You can adjust from BAL. L+10 to BAL. R+10 in 1dB/step. The initial setting is BAL. 0. x NAME IN (Naming) Lets you set the name of inputs and preset stations. -
Page 28: Resetting The Input Buttons
Blu-ray Disc recorder (command mode BD3) MD deck Tape deck Sony VCRs are operated with a VTR 3 setting which corresponds to VHS. Sony DVD recorders are operated with a DVD1 or DVD3 setting. For details, refer to the operating instructions supplied with the DVD recorders. -
Page 29: Additional Information
Do not use any type of abrasive pad, scouring powder, or solvent, such as alcohol or benzine. If you have any questions or problems concerning your receiver, please consult your nearest Sony dealer. -
Page 30: Troubleshooting
Should any problem persist, consult your nearest Sony dealer. Note that if service personnel changes some parts during repair, these parts may be retained. Power The receiver is turned off automatically. - Page 31 Tuner Tuner function is not selectable. • Consult your nearest Sony dealer. The FM reception is poor. • Use a 75-ohm coaxial cable (not supplied) to connect the receiver to an outdoor FM antenna (aerial) as shown below.
-
Page 32: Specifications
If there is a malfunction, a message appears on the display panel. You can check the condition of the system by the message. If any problem persists, consult your nearest Sony dealer. PROTECT Irregular current is output to the speakers, or the receiver is covered and ventilation holes are blocked. - Page 33 Tone Gain levels ±10 dB, 1 dB step INPUT SHORT (with BASS = 0 dB, TREBLE = 0 dB) Weighted network, input level. FM tuner section Tuning range 87.5 MHz – 108.0 MHz Antenna (aerial) FM wire antenna (aerial) Antenna (aerial) terminals 75 ohms, unbalanced AM tuner section Tuning range...
-
Page 34: Index
Index AUTO.STBY 27 BALANCE 27 BASS 19 Blu-ray Disc player connecting 16 Cable TV tuner connecting 16 CD player connecting 14 Clear memory 18 remote control 28 DVD player connecting 16 DVD recorder connecting 16 Error messages 32 Initial setup 18 MD deck connecting 14 Muting 20... - Page 36 ©2012 Sony Corporation Printed in Malaysia...