TRANZSPORTER TP250 Assembly Manual
Carriage
Hide thumbs
Also See for TP250:
- Owner's manual (25 pages) ,
- Assembly instructions manual (8 pages) ,
- Assembly manual (4 pages)
Advertisement
Quick Links
Congratulations
You've purchased a roofing hoist manufactured by TIE DOWN ENGINEERING. All of hoist products
are easy to assembly and is solidly built in USA and tested to ensure years of service.
Before You Begin
We've included this easy to use instruction sheet to ensure quick, easy assembly of your carriage
platform. Be sure to read the instructions (a time saver in the long run). Identify all parts and hardware.
Questions?
We're here to help, just call 800-241-1806. For faster service, have your model and serial number
ready when calling.
Instruction Sheet
#08236
www.tranzsporter.com
Read this manual before using this product.
Failure to follow the instructions and safety precautions in this
manual can result in serious injury or death.
Keep this manual in a safe location for future reference.
TIE DOWN ENGINEERING • Atlanta, GA 30336
www.tiedown.com (404) 344-0000
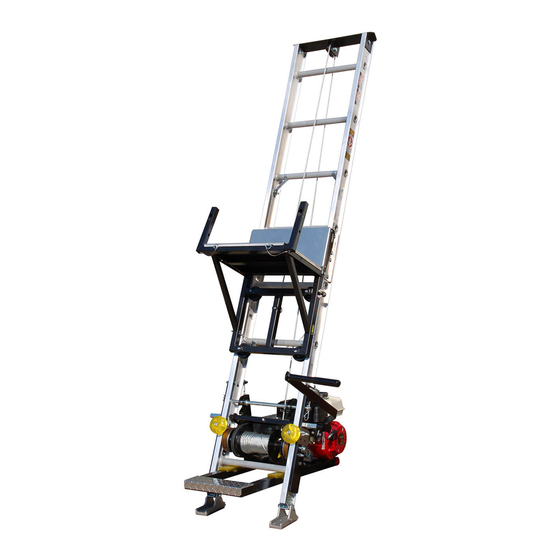
TP250
Carriage
Assembly
Manual
Page 1 of 4
Advertisement

Related Manuals for TRANZSPORTER TP250


Summary of Contents for TRANZSPORTER TP250
- Page 1 TP250 Carriage Assembly Manual Read this manual before using this product. Failure to follow the instructions and safety precautions in this manual can result in serious injury or death. Keep this manual in a safe location for future reference.
- Page 2 TP250 Carriage Parts Description List Plywood Brackets Platform Back/Flap Description Qty. Platform Back Flap Platform Base Carriage Base Support Struts w/Pins Plywood Brackets w/Pins 5/16”-18 x 2” Bolt Platform Base 5/16” Nyloc Nuts Support Struts Carriage Base TP250 Carriage Assembly Instructions...
- Page 3 Beveled End Step #3 Support Strut Round End Lift up one side of the carriage 90˚ and let it rest on its side. Platform Back/Flap Place the round end of the support strut in the platform (underside) base, align with Beveled End mounting holes.
- Page 4 Step #7 You have completely assembled the TP250 Carriage unit. Please proceed to the TP250 Operations Manual for further instructions. Located in the tubular holder on the rear side of the motor tray. TIE DOWN ENGINEERING www.tiedown.com •...
Need help?
Do you have a question about the TP250 and is the answer not in the manual?
Questions and answers