Advertisement
Quick Links
All rights reserved. This document may not be reproduced or distributed, in whole or in
part, for any commercial purpose without the express written consent of the author.
Permission is hereby granted to distribute this pdf document in its entirety for personal,
non‐commercial purposes only, provided that the contents are not modified in any way,
including the copyright notices contained herein. This document may be freely distributed
on WWW, FTP, or BBS sites in accordance with these restrictions.
Revision Description
1
2
B
H
‐
2
B
H
‐
E
E
Copyright © 2014, 2016 Carl Hunsinger
Initial release
Corrected error in circuit theory. Added vendor info, lamp house
repair procedure, and light preset control / switch information.
O
O
L
Y
M
P
U
S
L
Y
M
P
U
S
(
B
H
T
/
B
H
2
(
B
H
T
/
B
H
L
E
C
T
R
O
N
I
C
L
E
C
T
R
O
N
I
C
Revision History
T
U
)
T
U
)
S
S
June 17, 2014
March 17, 2016
Date
Advertisement

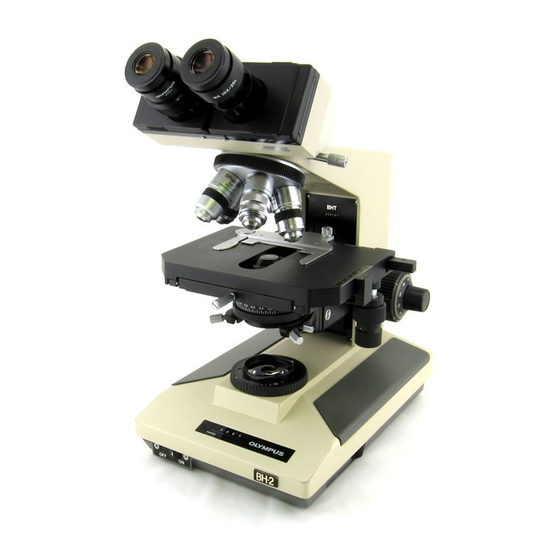
Related Manuals for Olympus BH-2 BHT


Summary of Contents for Olympus BH-2 BHT
- Page 1 ‐ ‐ Copyright © 2014, 2016 Carl Hunsinger All rights reserved. This document may not be reproduced or distributed, in whole or in part, for any commercial purpose without the express written consent of the author. ...
-
Page 2: Overview Of Electrical Circuitry
Overview of Electrical Circuitry The electrical circuitry of the Olympus BHT/BHTU microscopes resides completely within the base of the microscope stand. AC power is provided by an AC inlet jack on the back, where the line cord connects. There is a power switch on the front to turn the illumination on and off, as well as an intensity control on the right‐hand side to vary the lamp ... - Page 3 0.7V higher than the control signal from the potentiometer, at any setting of the potentiometer (excluding the minimum‐intensity setting, where there is no forward bias on the base‐emitter junction of transistor Q201). This means that the lamp voltage may be adjusted from zero at one extreme of the intensity control to nearly the full output voltage of DB101 at the other extreme of the intensity control. Figure 2 is the lamp dimmer circuitry shown in Figure 1 with the addition of transistor Q202, resistor R201, and capacitor C202. These three components provide a current‐limiting function for the dimmer, to prevent damage to the lamp in the event of power surges on the AC line and to minimize thermal stresses on the lamp at power‐up. Figure 2 – BHT/BHTU Lamp Dimmer Circuitry (with Current Limiting) Olympus BH‐2 (BHT/BHTU) Electronics Revision 2 Page 3 of 24 ...
- Page 4 The control signal is at maximum amplitude at the minimum intensity setting, and is at zero amplitude at the maximum intensity setting. The four comparators each have specific switching thresholds, which are configured to allow the comparators to illuminate the LEDs at four pre‐defined lamp voltages of 2V, 4V, 6V, and 7V, in response to the decreasing control signal from the intensity potentiometer. Figure 3 – BHT/BHTU LED Bar‐Graph Display Circuitry Olympus BH‐2 (BHT/BHTU) Electronics Revision 2 ...
- Page 5 IC1‐B. During the intervals where the control signal is below the threshold voltage, the comparator output pulls low, illuminating the 6V LED, and during the intervals where the control signal is clamped to approximately +0.7V (and is exceeding the threshold voltage), the comparator output pulls high, Olympus BH‐2 (BHT/BHTU) Electronics ...
- Page 6 6V LED will completely extinguish. The operation of the remaining three comparators is similar to this one, differing only in their threshold voltages. Power LED Resistor R203 and LED “A” function as the power‐on indicator for the microscope. Errors in the Olympus Documentation In the course of researching this document, two errors were identified in the schematic diagram published in the Olympus Research Microscope Series BH2 (BHS) Repair Manual. Both of these errors are in the LED bar‐graph display circuitry. ...
- Page 7 Figure 4 – Bottom View of BHT/BHTU Electrical Base (100/115V Version) Setting Up for Troubleshooting the Base Set the electrical base on a suitable work surface. If the unit includes a light preset control/switch, orient the printed circuit board containing the control and switch such that it will not make contact with the chassis or any other electrically conductive items during the troubleshooting process. Carefully plug the lamp house into J103 on the rear of the electrical base, as shown in Figure 5, making sure both contact pins of the lamp house engage the mating receptacles of J103. The lamp house will be fragile and unsupported when plugged into the electrical base without the stand, since the two alignment/support pins on the lamp house will not be engaged with the mating holes in the stand. Once again, do not touch the halogen lamp with your fingers. Olympus BH‐2 (BHT/BHTU) Electronics Revision 2 Page 7 of 24 ...
- Page 8 Figure 5 – Lamp House Plugged into J103 of BHT/BHTU Electrical Base (100/115V Version) With the AC line cord unplugged from the wall receptacle and with the AC power switch on the front of the unit in the OFF position, plug the line cord into the AC inlet jack on the rear of the base. Exercise extreme caution from this point forward, as potentially lethal line voltage will be present at various exposed points within the electrical base. Plug the AC line cord into a properly grounded AC receptacle. The electronics may now be operated as necessary for troubleshooting purposes. Never operate the microscope if the chassis bonding screw for the ground (center) pin of the AC inlet jack is loose or missing, or if the wire to this lug is cut or damaged (see Figure 6). These are critical safety components and are necessary to ensure that the chassis of the microscope is always at a safe potential in the event of any electrical faults within the equipment. Figure 6‐ Safety Ground Connection for AC Inlet Jack of BHT/BHTU Electrical Base (100/115V Version) Olympus BH‐2 (BHT/BHTU) Electronics Revision 2 Page 8 of 24 ...
- Page 9 Be sure to allow the contact cleaner sufficient time to evaporate out of the control before re‐applying power to the electrical base. Obtaining Replacement Components The BHT/BHTU microscopes are no longer supported by Olympus, and with few exceptions, factory replacement parts are not available. Some electrical parts (or suitable substitutes) are available from third party sources, and these parts are listed in Appendix 1 of this document, along with sources and pricing. The BHT/BHTU microscopes were very popular in their day, and used stands and their various bits and pieces frequently ...
- Page 10 The NTE5322 is available from Allied Electronics and from Amazon. Figure 8 ‐ Bridge Rectifier Mounted to BHT/BHTU Electrical Base (100/115V Version) Lamp Intensity Control The lamp intensity control is a 500Ω sliding potentiometer, with linear taper, and was manufactured by Noble (see Figure 9). It has 60mm of travel, and the mounting holes are spaced 65mm on center. Before replacing this part, try cleaning it with volume control/contact cleaner (with power removed from the equipment). Look for a substitute with a power rating of at least 1/2W. Figure 9 – Lamp Intensity Control Mounted to BHT/BHTU Electrical Base (100/115V Version) Olympus BH‐2 (BHT/BHTU) Electronics Revision 2 Page 10 of 24 ...
- Page 11 Strip the ends of the two orange wires that were connected to the four pin connector and solder them together, insulating with heat‐shrink tubing in order to prevent shorting to the chassis. Do the same thing for the two blue wires (one was connected to the two‐pin connector and the other was connected to the four‐pin connector) and the two red wires (one was connected to the two‐pin connector and the other was connected to the four‐pin connector). Be sure to route these spliced wires such that they will not be pinched and will not interfere with the optical path of the illumination system once the stand is reassembled. Figure 10 – Olympus DV2288‐01 Light Preset Board on Later BHT/BHTU Electrical Base (100/115V Version) Olympus BH‐2 (BHT/BHTU) Electronics Revision 2 ...
-
Page 12: Voltage Selector Switch
Figure 12 – Voltage Selector Switch Mounted to BHT/BHTU Electrical Base (100/115V Version) Olympus BH‐2 (BHT/BHTU) Electronics Revision 2 ... -
Page 13: Main Board
In the rare case that the main board is damaged beyond repair, an aftermarket replacement for the Olympus UYPC48 main board is available from J.C. Ritchey Company, LLC (see Figure 14). This board, which is a drop‐in replacement for the original Olympus board, comes complete with a replacement power transistor and the necessary transistor mounting insulator. No soldering is required for this option if only the circuit board needs to be replaced, but soldering is required if the power transistor is to be replaced at the same time. This looks to be a faithful reproduction of the ... - Page 14 Figure 15 ‐ Power Transistor Mounted to BHT/BHTU Electrical Base (100/115V Version) AC Inlet Jack For safety, always replace the AC inlet jack with an equivalent part, when available (see Figure 16). Make sure that the chassis‐bonding screw for the ground (middle) terminal of the jack is present and secure and that the grounding wire is undamaged before operating the equipment. This connection keeps the chassis at a safe potential in the event of any electrical faults within the equipment. If a suitable replacement jack cannot be located, a filler plate could be fabricated to take the place of the AC inlet jack, with a suitable hole drilled to allow an AC line cord to be installed with a strain‐relief grommet. If this approach is chosen, be sure to securely bond the ground conductor of the power cord to the unit chassis to maintain equipment safety. Olympus BH‐2 (BHT/BHTU) Electronics Revision 2 Page 14 of 24 ...
- Page 15 Figure 16 ‐ AC Inlet Jack Mounted to BHT/BHTU Electrical Base (100/115V Version) Lamp House There were two styles of lamp house used on the BHT/BHTU microscopes (see Figure 17). The original LS20‐H version supplied by Olympus (as part number 5‐LB402) did not have a metal reflector behind the bulb. Later in the life of the BHT/BHTU, Olympus upgraded the lamp house to the LS20H‐M2 (part number 5‐S119), which incorporated a reflector behind the lamp in order to provide more usable light. Since the LS20H‐M2 lamp house is directly interchangeable with the earlier LS20‐H part, it should be used whenever possible. Figure 17 – Original Lamp House (left) and Newer Lamp House with Reflector (right) Olympus BH‐2 (BHT/BHTU) Electronics Revision 2 Page 15 of 24 ...
- Page 16 Figure 18 – Lamp House Plugged into BHT/BHTU Electrical Base (100/115V Version) A repair kit for the Olympus lamp house is available from J.C. Ritchey Company, LLC (see Figure 19). This kit, which includes a replacement for the back cover and a new G4 lamp socket, may be used to overhaul either the LS20H or the LS20H‐M2 lamp houses. The replacement back is provided since the original can be damaged during disassembly. The installation of this repair kit requires soldering, but defective lamp houses may be sent to J.C. Ritchey Company for in‐ house repair/exchange. Figure 19 – BHT/BHTU Lamp House Repair Kit from J.C. Ritchey Company (photo courtesy James Ritchey) Olympus BH‐2 (BHT/BHTU) Electronics Revision 2 Page 16 of 24 ...
- Page 17 Table 1 may be used for replacements as well. Figure 20 –Philips #7388 FHE/ESB T3 Halogen Projection Lamp Manufacturer Part Number Philips 7388 (256784) Osram 54261 or 64250 HLX Ushio FHE/ESB (1000532) GE 778 (49718) or 788 (943117) Nikon 79099 Olympus 8‐C405 Reichert 11143 Swift MA‐780 Table 1 – Suitable Halogen Lamps for Olympus BHT/BHTU Microscopes Lamp house repair procedure courtesy Jerry Clement of J & H Microscope Service, Inc. Olympus BH‐2 (BHT/BHTU) Electronics Revision 2 ...
- Page 18 Lamp Dimmer Waveforms All of the waveforms in the following figures are shown relative to the negative output of the bridge rectifier, which is the zero reference point. These waveforms were produced using version 4.19e of the LTSpice IV circuit simulator. Figure 21 – Lamp Waveforms at Maximum Intensity (100% Setting of Intensity Control) Figure 22 – Lamp Waveforms at Medium Intensity (50% Setting of Intensity Control) Olympus BH‐2 (BHT/BHTU) Electronics Revision 2 Page 18 of 24 ...
- Page 19 Lamp Dimmer Waveforms (continued) Figure 23 – Lamp Waveforms at Low Intensity (20% Setting of Intensity Control) Figure 24 ‐ Lamp Waveforms during Current Limiting (80% Setting of Intensity Control, Lamp Resistance 0.2Ω) Olympus BH‐2 (BHT/BHTU) Electronics Revision 2 Page 19 of 24 ...
- Page 20 LED Bar‐Graph Display Waveforms Figure 25 – Filtered DC Power Supply Line at Maximum Lamp Intensity (100% Setting of Intensity Control) Figure 26 – Bar‐Graph Comparator Threshold Voltages Olympus BH‐2 (BHT/BHTU) Electronics Revision 2 Page 20 of 24 ...
- Page 21 LED Bar‐Graph Display Waveforms (continued) Figure 27 – Clamped Control Signal to Comparators at Medium Lamp Intensity (50% Setting of Intensity Control) Figure 28 ‐ Comparator IC1‐B Inputs with 6V LED Illuminated (70% Setting of Intensity Control) Olympus BH‐2 (BHT/BHTU) Electronics Revision 2 Page 21 of 24 ...
- Page 22 Item #: BW.ESB Price: $6.51 Caig Laboratories, Inc. URL: www.caig.com Telephone: 858‐436‐8388 DeoxIT D5 Spray Contact Cleaner Item #: D5S‐6 Price: $18.95 J.C. Ritchey Company, LLC URL: www.ritcheymicroscopeservice.com Telephone: 1‐740‐862‐9252 Email: ritcheymicroscopeservice@yahoo.com Replacement for UYPC48 board w/ power transistor Item #: JC100 Price: $120 In‐house repair/exchange of Olympus lamp house Item #: JC120 Price: $60 Repair kit for Olympus lamp house Item #: JC120‐1 Price: $30 J & H Microscope Service, Inc. 6 Merrick Ct. Madison, WI 53704 Telephone: 608‐279‐3191 Fax: 608‐244‐4625 Email: madisonwijerry@gmail.com Bender & Wirth 990 ceramic lamp socket Item #: Bender & Wirth 990 Price: $10 Mouser Electronics URL: www.mouser.com Toll Free: 800‐346‐6873 Email: sales@mouser.com ...
- Page 23 IC1-D 200 Ohm uPC324C 1/8W 2- THE UYPC48 PCB SCHEMATIC ON PAGE 98 OF THE OLYMPUS BH2(BHS) REPAIR MANUAL DIFFERS FROM THE SCHEMATIC R213 R210 1.5k PRESENTED HERE IN THE WIRING OF THE BAR-GRAPH LEDS AND THEIR CURRENT-LIMITING RESISTORS. SEE DETAIL 1.
- Page 24 IC1-D 200 Ohm uPC324C 1/8W 2- THE UYPC48 PCB SCHEMATIC ON PAGE 98 OF THE OLYMPUS BH2(BHS) REPAIR MANUAL DIFFERS FROM THE SCHEMATIC R213 R210 1.5k PRESENTED HERE IN THE WIRING OF THE BAR-GRAPH LEDS AND THEIR CURRENT-LIMITING RESISTORS. SEE DETAIL 1.
Need help?
Do you have a question about the BH-2 BHT and is the answer not in the manual?
Questions and answers