
Related Manuals for GRASS VALLEY HDA-3962


Summary of Contents for GRASS VALLEY HDA-3962
- Page 1 HDA-3962 Single/Dual 12G/3G/HD/SD SDI Distribution Amplifier (DA) with Optional Fiber Connectivity Guide to Installation and Operation 13-03070-011-AA-M00 2021-02-19...
- Page 2 Copyright and Trademark Notice Grass Valley®, GV® and the Grass Valley logo and/or any of the Grass Valley products listed in this document are trademarks or registered trademarks of GVBB Holdings SARL, Grass Valley USA, LLC, or one of its affiliates or subsidiaries.
- Page 3 Grass Valley believes this environmental information to be correct but cannot guarantee its completeness or accuracy since it is based on data received from sources outside our company. All specifications are subject to change without notice.
- Page 4 The laser wavelengths being used are totally invisible to the human eye and can cause permanent damage. Always use optical instrumentation, such as an optical power meter, to verify light output. 4 | HDA-3962...
- Page 5 Part 2. Immunity Federal Communications Commission Rules Part 15, Subpart B Caution to the user that changes or modifications not expressly approved by the party responsible for compliance could void the user's authority to operate the equipment. HDA-3962 | 5...
- Page 6 GUIDE TO INSTALLATION AND OPERATION Grass Valley products are designed to meet or exceed the requirements of the appropriate European EMC standards. In order to achieve this performance in real installations it is essential to use cables and connectors with good EMC characteristics.
-
Page 7: Table Of Contents
The Presets panel ..........................27 Specifications ........................... 28 Contact Us ..........................29 Grass Valley Technical Support ......................... 29 Corporate Head Office ..........................29 ANNEX 1 – HDA-3962 Local User Interface ................. 30 ANNEX 2 – Installing the Optical Interface .................. 31 HDA-3962 | 7... -
Page 8: Hda-3962 Single/Dual 12G/3G/Hd/Sd Sdi Distribution Amplifiers
The HDA-3962 from Grass Valley, a Belden Brand, provides single and dual channel distribution for 12G/3G/HD/SD- SDI signals with flexible routing of inputs to outputs. Flexible output selection enables the HDA-3962 to be used either as a single channel DA with up to 10 outputs, or in dual channel mode with up to five outputs per input. -
Page 9: Block Diagrams
DENSITÉ CONTROL HDA-3962 Functional Block Diagram OPTIONS: Optical option (1 SFP cage only) with HDA-396N-3SRP-HF. Refer to ordering info to see different SFP model supported. Figure 1 HDA-3962 Functional Block Diagram When using rear panel The HDA-3962 card HDA-396N- Operates in single mode with the following available outputs: A1, A2, A3, A4, A5, B1, and B2. -
Page 10: Front Card-Edge Interface
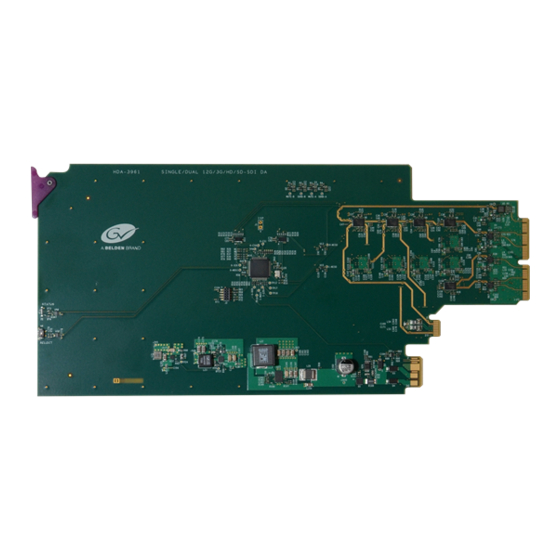
The actual connections available are supported by the chosen rear panel. See 2.3 - Rear Connector Panels. 1.4 Front Card-edge Interface The front card-edge of the HDA-3962 incorporates two elements: Status LED (see section 3.2) Select ... -
Page 11: Installation
2.1 Installation of Rear Connector Panels The HDA-3962 card is sized to fit into Grass Valley’s Densité 3 frame. Grass Valley Densité-series cards are each associated with a rear connector panel, which must be installed in the Densité 3 frame before the card can be inserted. -
Page 12: Rear Connector Panels
3. Close the front panel of the frame. 2.3 Rear Connector Panels The following diagrams illustrate the layout and connectors on the available HDA-3962 rear panels. Note that: The HDA-3962 card’s functionality is determined by the rear panel that is installed. - Page 13 SFP Modules can be installed into HDA-3962 rear panels that offer SFP connectivity, easily identifiable by a -F extension in the Grass Valley Rear part number. A single SFP optical module offers either 1 or 2 fiber connections, available as single Tx or Rx, or dual Rx or Tx.
-
Page 14: Bypass Relay
See ANNEX 2 on page 31 for a detailed description of the installation & removal procedure. 2.4 Bypass Relay The HDA-3962-3DRP-HR rear panel has an integrated bypass relay. The relay automatically activate if the card loses power, or is removed from the frame. -
Page 15: Operation
3.2 Card-Edge Status LED The status monitor LED is located on the front card-edge of the HDA-3962, and is visible through the front access door of the DENSITÉ 3 frame. This multi-color LED indicates the status of the HDA-3962 by color, and by flashing/steady illumination. -
Page 16: Local Control Using The Frame's Control Panel
GUIDE TO INSTALLATION AND OPERATION 4 Local Control Using the Frame’s Control Panel Push the SELECT button on the HDA-3962 card edge (see Section 1.4) to assign the local control panel to operate the HDA-3962. The STATUS LED on the HDA-3962 card edge flashes yellow. -
Page 17: Remote Control Using Icontrol
5.1 The iControl Graphic Interface Window The basic window structure for the HDA-3962 is shown in figure 3.2. The window identification line gives the card type (HDA-3962) and the slot number where the card is installed in its Densité frame. - Page 18 Each of these panels is described individually in the following sections. 3. The Load Factory button is always visible at the bottom of the panel. Click the Load Factory button to reset all parameters on this HDA-3962 card to factory default values. ...
-
Page 19: The Input Panel
Optical output A, can only carry channel A On an HDA-3962, optical output B can carry Channel A when the Operating Mode is set to Single Channel (see the Input tab), or it carries Channel B when the Operating Mode is set to Dual Channel Figure 7 Output panel –... -
Page 20: The Rear Panel
GUIDE TO INSTALLATION AND OPERATION 5.4 The Rear panel This panel identifies the type of rear panel installed with this HDA-3962. The name of the installed rear panel appears in the data box. If no rear is installed, “No Rear” appears in the data box. -
Page 21: The Sfp Info Panel
GUIDE TO INSTALLATION AND OPERATION 5.6 The SFP Info panel This panel shows information about the currently-installed SFP optical module. See Rear Connector Panels on page Figure 10 SFP Info panel HDA-3962 | 21... -
Page 22: The Alarms Panel
Card LED This column allows configuration of the contribution of each individual alarm to the status reported by the Status LED on the front edge of the HDA-3962 card, visible through the front door of the Densité frame. Overall Alarm This column allows configuration of the contribution of each individual alarm to the Overall Alarm associated with this card. - Page 23 Select one or more destination cards from the list in the window by setting in the checkboxes, or set all of them by setting in the All checkbox at the top of the column Figure 12 Copy to Other Cards HDA-3962 | 23...
- Page 24 OK accepts the settings and closes the window once the card confirms that there are no errors. Apply accepts the settings, but leaves the window open Cancel closes the window without applying any changes, and leaves the previous settings intact. 24 | HDA-3962...
-
Page 25: The Info Panel
This information is entered into data boxes in the Info control panel. Label: type the label that is shown for this HDA-3962 when it appears in iControl applications Short Label type the short-form label that iControl uses in some cases (8... - Page 26 GUIDE TO INSTALLATION AND OPERATION Remote System Administration: opens the Joining Locators data box, which lists remote lookup services to which this HDA-3962 is registered. Add: Force the iControl service for this HDA-3962 to register itself on a user-specified Jini lookup service, using the following syntax in the Input data box: jini://<ip_address>...
-
Page 27: The Presets Panel
GUIDE TO INSTALLATION AND OPERATION 5.9 The Presets panel User Presets The HDA-3962 has memory registers which can hold up to 5 user-defined parameter settings. Select any one of the five presets using the pull-down list. The name of the currently-selected User Preset is shown on the name bar. -
Page 28: Specifications
>15 dB up to 1.5 GHz >10 dB from 1.5 GHz to 3 GHz NOTE: When using a rear panel that is equipped with a bypass relay (model: HDA-3962-3DRP-HR), performance will be reduced for equipment connected to the output protected by the bypass relay (1). -
Page 29: Contact Us
GUIDE TO INSTALLATION AND OPERATION 7 Contact Us Grass Valley Technical Support For technical assistance, contact our international support center, at 1-800-547-8949 (US and Canada) or +1 530 478 4148. To obtain a local phone number for the support center nearest you, please consult the Contact Us section of Grass Valley’s website (www.grassvalley.com). -
Page 30: Annex 1 - Hda-3962 Local User Interface
GUIDE TO INSTALLATION AND OPERATION ANNEX 1 – HDA-3962 Local User Interface STATUS NO REAR / HDA-3962-3DRP-HR / HDA-396N-3SRP-HF / HDA-396N-3SRP-2IN / HDA-396N-3SRP IN A NO LOCK / NO SIGNAL / 270 Mbps / 1.5 Gbps / 3 Gbps/ 12 Gbps IN B NO LOCK / NO SIGNAL / 270 Mbps / 1.5 Gbps / 3 Gbps/ 12 Gbps... -
Page 31: Annex 2 - Installing The Optical Interface
ANNEX 2 – Installing the Optical Interface Installing and removing the Fiber I/O interface cartridge requires special care. This annex describes the process. Some rear panels used with the HDA-3962 incorporate a fiber optic interface. The interface consists of two parts: ... - Page 32 SFP. Never pull the fiber optic cable itself, as catastrophic damage may occur. 2. Insert a dust plug into the SFP module. Removing the SFP module 1. Move the latch to the open position. 32 | HDA-3962...
- Page 33 You may find that you need to wiggle the module, or perhaps push it into the slot a bit, before it will release and slide out. 3. Insert a dust plug into the SFP module. HDA-3962 | 33...
Need help?
Do you have a question about the HDA-3962 and is the answer not in the manual?
Questions and answers