Riello RS 70 Installation, Use And Maintenance Instructions
Forced draught gas burners
Hide thumbs
Also See for RS 70:
- Installation, use and maintenance instructions (81 pages) ,
- Installation, use and maintenance instructions (21 pages) ,
- Installation, use and maintenance instructions (25 pages)
Table of Contents
Advertisement
Advertisement
Table of Contents

Related Manuals for Riello RS 70


Summary of Contents for Riello RS 70
- Page 1 Installation, use and maintenance instructions Forced draught gas burners Progressive two-stage operation CODE MODEL TYPE 3785102 RS 70 821 T1 3785103 RS 70 821 T1 3785302 RS 100 822 T1 3785303 RS 100 822 T1 3785502 RS 130 823 T1...
- Page 2 Translation of the original instructions...
-
Page 3: Table Of Contents
Contents Declarations....................................3 Information and general warnings............................4 Information about the instruction manual ........................4 2.1.1 Introduction.................................. 4 2.1.2 General dangers................................4 2.1.3 Other symbols ................................4 2.1.4 Delivery of the system and the instruction manual...................... 5 Guarantee and responsibility............................5 Safety and prevention................................ - Page 4 Contents Burner adjustment..............................25 6.5.1 Ignition output ................................25 6.5.2 Output in 2nd stage..............................25 6.5.3 Output in 1st stage ..............................26 6.5.4 Intermediate outputs ..............................26 Pressure switch adjustment ............................27 6.6.1 Air pressure switch..............................27 6.6.2 Minimum gas pressure switch............................27 6.6.3 Flame presence check ...............................27 Servomotor adjustment ..............................28 Burner operation ................................29 6.8.1...
-
Page 5: Declarations
ISO 9001:2015 certified. Quality is ensured by means of a quality and management system that is Legnago, 21.04.2018 General Manager Research and Development Director RIELLO S.p.A. - Burners Department RIELLO S.p.A. - Burners Department Eng. U. Ferretti Eng. F. Comencini 20144609... -
Page 6: Information And General Warnings
Information and general warnings Information and general warnings Information about the instruction manual 2.1.1 Introduction WARNING: MOVING PARTS The instruction manual supplied with the burner: This symbol indicates that you must keep limbs is an integral and essential part of the product and must not away from moving mechanical parts;... -
Page 7: Delivery Of The System And The Instruction Manual
Information and general warnings 2.1.4 Delivery of the system and the instruction The system supplier must carefully inform the user about: – the use of the system; manual – any further tests that may be required before activating the When the system is delivered, it is important that: system;... -
Page 8: Safety And Prevention
Safety and prevention Safety and prevention Background The burners have been designed and built in compliance with which the burner has been regulated, the pressurisation of the current regulations and directives, applying the known technical combustion chamber, the dimensions of the combustion cham- rules of safety and envisaging all the potential danger situations. -
Page 9: Technical Description Of The Burner
Voltage of auxiliaries: 230/50/60 230V / 50-60Hz 110/50/60 110V / 50-60Hz 3/230/50 230/50/60 BASIC DESIGNATION EXTENDED DESIGNATION Models available Designation Voltage Start-up Code RS 70 3/230-400/50 Direct 3785102 RS 70 3/230-400/50 Direct 3785103 RS 100 3/230-400/50 Direct 3785302 RS 100 3/230-400/50... -
Page 10: Burner Categories - Countries Of Destination
SE - FI - AT - GR - DK - ES - GB - IT - IE - PT - IS - CH - NO 2ELL (43.46 - 45.3 MJ/m (0°C)) 2L - 2E - 2E(R)B LU - PL Technical data MODEL RS 70 RS 100 RS 130 TYPE 821 T1 822 T1 823 T1 POWER (1) 2nd stage 465 - 814... -
Page 11: Maximum Dimensions
Note that to inspect the combustion head the burner must be moved backward and turned upward. The maximum dimension of the open burner, without cover, is given by measurement I. D731 Fig. 1 RS 70 250 - 385 1161-1296 2” RS 100... -
Page 12: Firing Rates
Technical description of the burner Firing rates The RS 70 - 100 - 130 burners can operate in two modes: one- The firing rate value (Fig. 2) has been obtained stage or two-stage. considering an ambient temperature of 20 °C, an The MAXIMUM OUTPUT is selected from within area A (and B atmospheric pressure of 1,013 mbar (approx. -
Page 13: Test Boiler
Technical description of the burner Test boiler The burner/boiler combination does not pose any problems if the Example: boiler is EC approved and its combustion chamber dimensions Output 756 kW: diameter = 60 cm; length = 2 m. are similar to those indicated in the diagram (Fig. 3). If the burner must be combined with a boiler that has not been EC 4.9.1 Commercial boilers... -
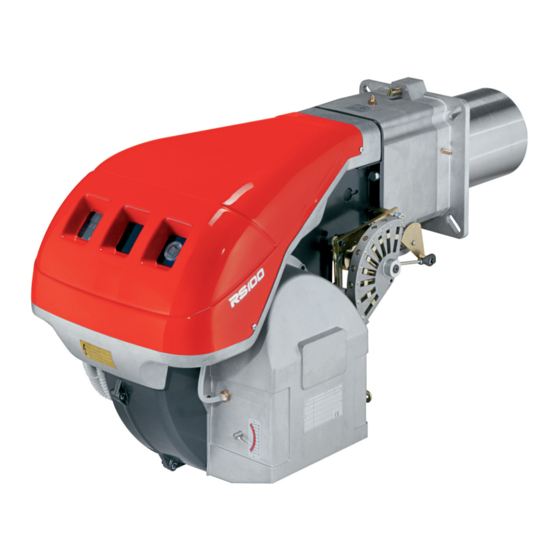
Page 14: Burner Description
Technical description of the burner 4.10 Burner description D3030 Fig. 4 Combustion head 20 Fan air inlet Ignition electrode 21 Screw securing fan to pipe coupling Screw for combustion head adjustment 22 Gas input pipe Pipe coupling 23 Gas butterfly valve Servomotor controlling the gas butterfly valve and the air 24 Boiler fixing flange damper valve (by means of an variable profile cam mechanism). -
Page 15: 4.11 Control Box Rmg88
The control box RMG88... is a safety device! WARNING Avoid opening or modifying it, or forcing its opera- tion. Riello S.p.A. cannot assume any responsibil- ity for damage resulting from unauthorised interventions! All interventions (assembly and installation operations, assistance, etc.) must be carried out by qualified personnel. -
Page 16: Servomotor (Lks 210
Technical description of the burner 4.12 Servomotor (LKS 210 ...) Important notes S9697 To avoid accidents, material or environmental damage, observe the following instructions! Avoid opening, modifying or forcing the actua- WARNING tors. All interventions (assembly and installation operations, assistance, etc.) must be carried out by qualified personnel. -
Page 17: Installation
Installation Installation Notes on safety for the installation After carefully cleaning all around the area where the burner is to The installation of the burner must be carried out be installed, and arranging for the environment to be illuminated by qualified personnel, as indicated in this manual correctly, proceed with the installation operations. -
Page 18: Operating Position
The position of the threaded holes can be marked using the ther- Provide an adequate lifting system. mal insulation screen supplied with the burner. Separate the combustion head from the rest of the burner RS 70 275-325 M 12 (Fig. 10):... -
Page 19: Access To Head Internal Part
Installation Access to head internal part In order to reach inside the combustion head (Fig. 11) proceed as D718 follows: remove the screw 1) and take out the internal part 2). 5.6.1 Combustion head pre-calibration For the RS 130 model, check, at this point, whether the maximum output of the burner in the 2nd stage is within area A or in area B of the firing rate. -
Page 20: Combustion Head Adjustment
3). Block the 3 screws 4). Example: RS 70 burner output = 581 kW (500 Mcal/h). The diagram (Fig. 15) shows that the gas and air adjustments for this output should be carried out on notch 3. -
Page 21: Gas Feeding
Installation Gas feeding Explosion danger due to fuel leaks in the pres- MBC “threaded” ence of a flammable source. Precautions: avoid knocking, attrition, sparks and heat. Make sure that the fuel interception tap is closed before performing any operation on the burner. The fuel supply line must be installed by qualified personnel, in compliance with current standards and laws. -
Page 22: Gas Train
Installation 5.9.2 Gas train 5.9.4 Gas pressure Approved according to standard EN 676 and provided separately Tab. G indicates the pressure drops of the combustion head and from the burner. gas butterfly valve, on the basis of the burner operating output. To select the correct gas train model, refer to the supplied “Burn- 1 p (mbar) er-gas train combination”... - Page 23 Installation Column 1 Combustion head pressure drop. Gas pressure measured at the test point 1)(Fig. 21), with: • combustion chamber at 0 mbar; S9690 • burner working at maximum output Column 2 Pressure loss at gas butterfly valve 2)(Fig. 21) with maximum opening: 90°.
-
Page 24: Electrical Wiring
Installation 5.10 Electrical wiring Notes on safety for the electrical wiring The electrical wiring must be carried out with the electrical supply disconnected. Electrical wiring must be made in accordance with the regulations currently in force in the country of destination and by qualified personnel. -
Page 25: Calibration Of The Thermal Relay
Installation 5.11 Calibration of the thermal relay The thermal relay serves to avoid damage to the motor due to an excessive absorption increase or if a phase is missing. For the calibration, refer to the wiring diagram. To reset 2)(Fig. 23), if a thermal relay has tripped, press the but- ton 1)(Fig. -
Page 26: Start-Up, Calibration And Operation Of The Burner
Start-up, calibration and operation of the burner Start-up, calibration and operation of the burner Notes on safety for the first start-up The first start-up of the burner must be carried out Before igniting the burner, see the paragraph by qualified personnel, as indicated in this manual “Safety test - with gas feeding closed”... -
Page 27: Burner Ignition
Start-up, calibration and operation of the burner Burner ignition The burner should light after having performed the above steps. In the event that the burner locks-out again, refer to chapter “Faults - Possible causes - Solutions” on page 34. If the motor starts but the flame does not appear and the control box goes into lockout, reset and wait for a new ignition attempt. -
Page 28: Output In 1St Stage
Start-up, calibration and operation of the burner Air adjustment 6.5.4 Intermediate outputs Progressively adjust the end profile of cam 3)(Fig. 26) by turning Adjustment of gas delivery the screws 5). No adjustment is required Turn the screws clockwise to increase air delivery. Turn the screws anticlockwise to reduce air delivery. -
Page 29: Pressure Switch Adjustment
Start-up, calibration and operation of the burner Pressure switch adjustment 6.6.1 Air pressure switch 6.6.2 Minimum gas pressure switch Adjust the air pressure switch after performing all other burner Adjust the minimum gas pressure switch after performing all the adjustments with the air pressure switch set to the start of the other burner adjustments with the pressure switch set to the start scale (Fig. -
Page 30: Servomotor Adjustment
Start-up, calibration and operation of the burner Servomotor adjustment The servomotor (Fig. 30) adjusts the air damper. To sum up, the intervention of the levers should occur in the fol- lowing order: Do not alter, for now, the factory setting for the 4 levers; A grad- uated label with 4 coloured sectors shows the intervention point 1st Blue lever of the levers. -
Page 31: Burner Operation
Start-up, calibration and operation of the burner Burner operation 6.8.1 Burner start-up STANDARD IGNITION (no. = seconds from instant 0) Control remote control TL closes. D3051 Servomotor starts: turn to the right, as far as the angle set on the cam with the orange lever. After about 3s: The control box starting cycle begins. -
Page 32: Burner Start-Up Cycle Diagnostics
Start-up, calibration and operation of the burner Burner start-up cycle diagnostics 6.9.1 Resetting of control box and diagnostics use During start-up, indication is according to the colour code table (Tab. H). The control box features a diagnostics function through which any causes of malfunctioning are easily identified (indicator: RED Sequences Colour code... -
Page 33: Maintenance
Maintenance Maintenance Notes on safety for the maintenance The periodic maintenance is essential for the good operation, Before carrying out any maintenance, cleaning or checking oper- safety, yield and duration of the burner. ations: It allows you to reduce consumption and polluting emissions and to keep the product in a reliable state over time. -
Page 34: Combustion Control (Gas)
Maintenance Boiler Clean the boiler as indicated in its accompanying instructions in order to maintain all the original combustion characteristics in- tact, especially: the flue gas temperature and combustion cham- ber pressure. Gas leaks D484 Make sure that there are no gas leaks on the pipe between the gas meter and the burner. -
Page 35: Opening The Burner
Maintenance Opening the burner Disconnect the electrical supply from the burner by means of the main system switch. DANGER D3034 Close the fuel interception tap. DANGER Wait for the components in contact with heat sources to cool down completely. Loosen the screws 1) and remove the hood 2); ... -
Page 36: Faults - Possible Causes - Solutions
Faults - Possible causes - Solutions Faults - Possible causes - Solutions In the event the burner stops, in order to prevent In the event there are further lockouts or faults any damage to the installation, do not unblock the with the burner, the maintenance interventions burner more than twice in a row. - Page 37 Faults - Possible causes - Solutions Signal Problem Possible cause Recommended remedy 10 blinks The burner does not Incorrect electrical wiring Check switch on, and the lock- out appears The burner goes into Defective control box Replace lockout Presence of electromagnetic disturbances in the Filter or eliminate thermostat lines Presence of electromagnetic disturbance...
- Page 38 RS 100 RS 130 Code 3010117 3010118 3010119 Kit for LPG operation The kit allows the RS 70 - 100 - 130 burners to use LPG. Burner RS 70 RS 100 RS 130 Output kW 242 - 814 349 - 1163...
- Page 39 Appendix - Accessories Vibration reduction kit (*) Burner RS 70 RS 100 RS 130 Code 3010286 3010287 3010288 (*) Without CE certification Differential circuit breaker kit Burner RS 70-100-130 Code 3010329 Maximum gas pressure switch kit Burner RS 70-100-130 Code...
- Page 40 Appendix - Electrical panel layout Appendix - Electrical panel layout Index of layouts Indication of references Functional diagram Functional diagram Electrical wiring that the installer is responsible for Indication of references / 1 . A 1 Sheet no. Co-ordinates 20144609...
- Page 41 Appendix - Electrical panel layout 20144609...
- Page 42 Appendix - Electrical panel layout 20144609...
- Page 43 Appendix - Electrical panel layout 20144609...
- Page 44 Appendix - Electrical panel layout 20144609...
- Page 45 Appendix - Electrical panel layout 20144609...
- Page 46 Appendix - Electrical panel layout 20144609...
- Page 47 Appendix - Electrical panel layout 20144609...
- Page 48 Appendix - Electrical panel layout Wiring layout key Control box Filter to protect against radio disturbance Ionisation probe connector Fuse Thermal relay Lockout signal lamp Relay Motor contactor Burner manual stop switch Ionisation probe Fan motor Air pressure switch PGmin Minimum gas pressure switch Three-phase line switch/disconnecting switch Single-phase line disconnecting switch...
- Page 52 RIELLO S.p.A. I-37045 Legnago (VR) Tel.: +39.0442.630111 http:// www.riello.it http:// www.riello.com Subject to modifications...
Need help?
Do you have a question about the RS 70 and is the answer not in the manual?
Questions and answers