
Related Manuals for Beko GN163220S/1 TRB


Summary of Contents for Beko GN163220S/1 TRB
- Page 1 GN163220S/1_TRB Réfrigérateur GN163220S/2 Refrigerator GN162420P/1_TRB GN162420P/2 GN162420X/1_TRB GN162420X/2 GN163120W/1_TRB GN163120W/2 GN163120W GN163220S GN162420X...
- Page 2 Chère cliente, cher client, Nous aimerions que vous soyez entièrement satisfait de notre appareil, fabriqué dans des infrastructures modernes et ayant fait l'objet d'un contrôle de qualité minutieux. À cet effet, veuillez lire en intégralité le manuel d'utilisation avant d'utiliser cet appareil, et conservez-le pour références ultérieures.
-
Page 3: Table Of Contents
Table des matières 1 Instructions en matière de sécurité et 4 Préparation d’environnement 4.1. Moyens d'économiser l'énergie ..15 1.1. Sécurité générale ....3 4.2. -
Page 4: Instructions En Matière De Sécurité Et D'environnement
Instructions en matière de sécurité et d’environnement Cette section fournit les Nettoyez la fiche du câble • instructions de sécurité d’alimentation à l’aide d’un nécessaires à la prévention chiffon sec, avant de le des risques de blessures ou brancher. de dommage matériel. Le non- Évitez de brancher le •... - Page 5 Instructions en matière de sécurité et d’environnement compartiment de congélation. Elles risquent d’exploser ! Placez les boissons • verticalement, dans des récipients convenablement fermés. Ne pulvérisez pas de • substances contenant des gaz inflammables près du réfrigérateur pour éviter tout risque d’incendie et d’explosion.
-
Page 6: Avertissement Hc
Instructions en matière de sécurité et d’environnement Évitez de monter ou de vous 1.1.2 Pour les modèles • appuyer contre la porte, les avec distributeur d'eau tiroirs ou toute autre partie Pour une utilisation optimale • du réfrigérateur. Cela peut du circuit hydraulique du faire tomber l’appareil et réfrigérateur, la pression... -
Page 7: Sécurité Enfants
Instructions en matière de sécurité et d’environnement Les produits qui nécessitent • Le présent produit a été fabriqué un contrôle de température avec des pièces et du matériel de qualité supérieure susceptibles d’être précis (vaccins, médicaments réutilisés et adaptés au recyclage. Ne sensibles à... -
Page 8: Réfrigérateur
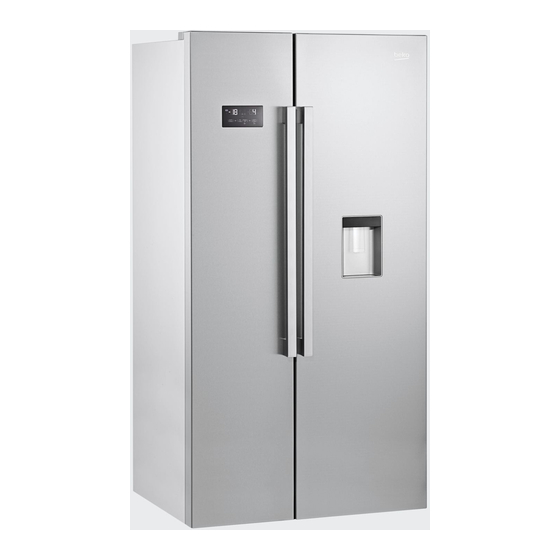
Réfrigérateur 1- Compartiment congélateur 10- Filtre à odeurs 2- Compartiment réfrigérateur 11- Compartiment zéro degré 3- Ventilateur 12- Bac à légumes 4- Compartiment amuse-gueule 13- Pieds réglables 5- Clayettes en verre 14- Compartiments de conservation des aliments 6- Balconnets de la porte du compartiment congelés réfrigérateur 15- Balconnets de la porte du compartiment... -
Page 9: Installation
Installation 3.1. Lieu idéal d'installation 3.2. Fixation des cales en plastique Utilisez les cales en plastiques fournies avec Contactez le service agréé pour l'installation de le réfrigérateur pour créer une circulation d’air votre réfrigérateur. Pour préparer l'installation du suffisante entre le réfrigérateur et le mur. réfrigérateur, lisez attentivement les instructions 1. -
Page 10: Réglage Des Pieds
Installation 3.3. Réglage des pieds 3.5. Raccordement à l'approvisionnement d'eau Si le réfrigérateur n’est pas équilibré, réglez les pieds avant en les tournant vers la gauche ou la (En option) droite. AVERTISSEMENT: Débranchez le réfrigérateur et la pompe à eau (si disponible) pendant le raccordement. -
Page 11: Raccordement Du Tuyau D'eau À L'appareil
Installation 3.6. Raccordement du 3.7. Raccordement au réseau tuyau d'eau à l'appareil d'approvisionnement d'eau Pour raccorder le tuyau d’eau au (En option) réfrigérateur, suivez les instructions Pour utiliser le réfrigérateur en le raccordant à suivantes : un réseau d’approvisionnement d’eau froide, il 1. -
Page 12: Pour Les Réfrigérateurs Utilisant Une Bonbonne
Installation 4. Fixez le joint à l’adaptateur du robinet et 2. Raccordez l’autre extrémité du tuyau d’eau serrez à la main ou à l’aide d’un outil. à la pompe à eau en poussant le tuyau à l’intérieur de l’orifice d’entrée de la pompe. 5. -
Page 13: Fixation Du Filtre Externe Au Mur (En Option)
Installation 3.9.1.Fixation du filtre 3. Fixez le filtre en position verticale sur les externe au mur accessoires de raccordement, tel qu’illustré (en option) sur l’étiquette. (6) AVERTISSEMENT: Ne fixez pas le filtre sur le réfrigérateur. Vérifiez que les pièces suivantes sont fournies avec votre modèle de réfrigérateur : 4. -
Page 14: Filtre Interne
Installation 3.9.2.Filtre interne 1. Le voyant « Ice Off » (Désactivation de la Le filtre interne livré avec l'appareil n'est pas installé préparation de glace) doit être actif au moment de l’installation du filtre. Passez du à la livraison. Pour l'installation du filtre, bien vouloir mode marche et au mode arrêt en appuyant lire attentivement les instructions ci-après. - Page 15 Installation 3. Retirez le couvercle de dérivation du filtre en le tirant. Quelques gouttes d’eau pourraient s’écoulées après le retrait du couvercle, c’est tout à fait normal. 4. Placez le couvercle du filtre dans le mécanisme et poussez-le pour verrouiller. 5.
-
Page 16: Préparation
Préparation 4.1. Moyens d'économiser l'énergie • Veuillez-vous assurer que les aliments ne mehmet sont pas en contact direct avec le capteur de Il est dangereux de connecter l’appareil température du compartiment réfrigérateur aux systèmes électroniques d’économie décrit ci-après. d’énergie, ils pourraient l’endommager. • Ne laissez pas la porte du réfrigérateur ouverte longtemps. -
Page 17: Utilisation De L'appareil
Utilisation de l’appareil 5.1. Panneau indicateur Les panneaux indicateurs varient en fonction du modèle de votre appareil. Les fonctions sonores et visuelles dudit panneau vous aident à utiliser votre réfrigérateur. 1. Indicateur du compartiment réfrigérateur 2. Indicateur de dysfonctionnements 3. Indicateur de température 4. - Page 18 Utilisation de l’appareil 1. Indicateur du compartiment réfrigérateur Appuyez à nouveau sur le bouton Vacances ( La lampe du compartiment réfrigérateur s'allume pour annuler cette fonction. au moment du réglage de la température dans ce 5. Bouton de réglage de température compartiment.
- Page 19 Utilisation de l’appareil 1- Utilisation économique 2- Température élevée/alerte de défaillance 3- Congélation rapide 4- Fonction Vacances 5- Réglage de la température du compartiment réfrigérateur 6- Économie d'énergie (voyant éteint) 7- Verrouillage du clavier 8- Eco-fuzzy 9- Réglage de la température du compartiment réfrigérateur 10- Congélation rapide *En option:...
- Page 20 Utilisation de l’appareil 1. Utilisation économique 5. Réglage de la température du comparti- ment réfrigérateur Ce voyant s'allume lorsque le compartiment Après avoir appuyé sur la touche (5), la congélateur est réglé à -18 °C, paramètre le plus température du compartiment réfrigérateur peut économique.
- Page 21 Utilisation de l’appareil 9. Réglage de la température du comparti- ment réfrigérateur La température du compartiment congélateur est réglable. La pression de la touche (9) permet de régler la température du compartiment congélateur à -18,-19, -20, -21, -22, -23 et -24. 10.
- Page 22 Utilisation de l’appareil 1. Réglage de la température du compartiment congélateur 2. Mode économie 3. Dysfonctionnements 4. Réglage de la température du compartiment réfrigérateur 5. Congélation rapide 6. Fonction Vacances 7. Verrouillage du clavier/alerte d’annulation du remplacement du filtre 8. Sélection d’eau, de glace pilée et de glaçons 9.
- Page 23 Utilisation de l’appareil 1. Réglages de la température du 6. Fonction Vacances compartiment congélateur Lorsque la fonction Vacances ( ) est activée, Une pression sur le bouton ( ) numéro (1), l'indicateur de la température du compartiment permet de définir la température du compartiment réfrigérateur affiche l'inscription «...
-
Page 24: Activation De L'avertisseur Pour Le Remplacement Du Filtre À Eau
Utilisation de l’appareil 10. Marche/Arrêt de l’écran Appuyez sur le bouton numéro (10) pour annuler ( Ensuite, entrez le mot de passe 1-4-5-3. ) ou activer ( ) la mise en Sélection des marche/arrêt de l'écran. Confirmation du nombres 11. Autoeco du mot de pas Appuyez sur le bouton auto eco ( ), numéro (11) -
Page 25: Utilisation Du Distributeur D'eau
Utilisation de l’appareil 5.4. Remplissage du réservoir 5.3. Utilisation du distributeur d’eau du distributeur d'eau (pour certains modèles) Soulevez le couvercle du réservoir d’eau comme l’indique la figure. Remplissez-le d’eau pure et Les premiers verres d'eau obtenue du potable. Remettez le couvercle. distributeur d'eau doivent normalement être chauds. -
Page 26: Nettoyage Du Réservoir D'eau
Utilisation de l’appareil 5.5. Nettoyage du réservoir d'eau Retirez le réservoir d'eau à l'intérieur du balconnet. Dégagez-le en tenant les deux côtés du balconnet. Tenez les deux côtés du réservoir et tirez-le dans un angle de 45 °. Retirez le couvercle du réservoir et nettoyez-le. Ne remplissez pas le réservoir d’eau de jus de fruits, de boissons gazeuses, de boissons alcoolisées ou tout autre liquide... -
Page 27: Récupération De Glace Ou De L'eau
Utilisation de l’appareil 5.6. Récupération de • L’appareil pourrait ne pas libérer de l’eau glace ou de l'eau durant la première utilisation. Ceci est dû à l’air qui se trouve dans le système. Il doit (en option) être évacué. Pour cela, poussez le bouton Pour récupérer de l'eau ( ) / des glaçons ( du distributeur d’eau pendant 1 à... -
Page 28: Compartiment Zéro Degré
Utilisation de l’appareil 5.8. Compartiment zéro degré 5.11. Ioniseur (En option) (En option) Utilisez ce compartiment pour conserver de Le système d'ioniseur dans le conduit d'air du l'épicerie fine à des températures faibles, ou des compartiment réfrigérateur sert à ioniser l'air. produits carnés destinés à... -
Page 29: Machine À Glaçons Icematic Et Bac À Glaçons
Utilisation de l’appareil 5.14. Machine à glaçons 5.15. Machine à glaçons Icematic et bac à glaçons (En option) (En option) La machine à glaçons est située dans la partie Remplissez la machine à glaçons d’eau et supérieure du couvercle du congélateur. mettez-la en place. - Page 30 Utilisation de l’appareil Poussez fermement vers le bas, jusqu'à ce qu'il n'y ait plus d'espace entre le réservoir et le plastique de la porte. (Figure 2) Si vous avez des difficultés à remonter le réservoir, tournez l’engrenage rotatif à 90 ° et réinstallez-le comme indiqué...
-
Page 31: Congélation Des Aliments Frais
Utilisation de l’appareil 5.16. Congélation des aliments frais 5.17. Recommandations relatives à la conservation des aliments congelés • Pour conserver la qualité des aliments, les denrées placées dans le compartiment Le compartiment doit être réglé à -18 °C congélateur doivent être congelées le plus minimum. -
Page 32: Position Des Aliments
Utilisation de l’appareil 5.20. Alerte ouverture de porte Faites bouillir les légumes et filtrer l'eau pour prolonger la durée de conservation à l'état (en option) congelé. Placez les aliments dans des emballages Un signal sonore est émis si la porte de l'appareil sous vide après les avoir filtrés et placez-les reste ouverte pendant 1 minute. -
Page 33: Entretien Et Nettoyage
Entretien et nettoyage • Conservez les aliments dans des récipients Le nettoyage régulier du produit prolonge sa durée fermés. Des micro-organismes peuvent de vie. proliférer des récipients non fermés et émettre AVERTISSEMENT: Débranchez de mauvaises odeurs. l’alimentation avant de nettoyer le • Ne conservez pas d’aliments périmés ou réfrigérateur. -
Page 34: Dépannage
Dépannage Parcourez la liste ci-après avant de contacter le service de maintenance. Cela devrait vous éviter de perdre du temps et de l'argent. Cette liste répertorie les plaintes fréquentes ne provenant pas de vices de fabrication ou des défauts de pièces. Certaines fonctionnalités mentionnées dans ce manuel peuvent ne pas exister sur votre modèle. - Page 35 Dépannage • Il se peut que le nouvel appareil soit plus grand que l’ancien. Les appareils plus grands fonctionnent plus longtemps. • La température de la pièce est probablement élevée. >>> Il est normal que l’appareil fonctionne plus longtemps quand la température de la pièce est élevée. • L’appareil vient peut-être d’être branché...
- Page 36 Dépannage En cas de vibrations ou de bruits. • Le sol n’est pas plat ou solide. >>> Si l’appareil balance lorsqu’il est déplacé doucement, ajustez les supports afin de le remettre en équilibre. Vérifiez également que le sol est assez solide pour supporter l’appareil.
- Page 37 Please read this manual before using the product! Dear Customer, We'd like you to make the best use of our product, which has been manufactured in modern facilities with care and meticulous quality controls. Thus, we advice you to read the entire user manual before you use the product. In case the product changes hands, do not forget to hand the guide to its new owner along with the product.
- Page 38 Table of Contents 1 Safety and environment instructions 3 5 Using the product 1.1. General safety..... . . 3 5.1. Indicator panel ..... 15 1.1.1 HC warning .
-
Page 39: Safety And Environment Instructions
Safety and environment instructions This section provides the safety If the product will not be used • instructions necessary to prevent for a while, unplug the product the risk of injury and material and remove any food inside. damage. Failure to observe these Do not use the product when the •... -
Page 40: Hc Warning
Safety and environment instructions Plug the product into an Take care to avoid trapping any • • earthed socket. Earthing part of your hands or body in must be done by a qualified any of the moving parts inside electrician. the product. -
Page 41: For Models With Water Fountain
Safety and environment instructions 1.1.2 For models with necessary for the product to water fountain function will be available for In order for the water system this period. • inside the refrigerator to 1.3. Child safety operate properly, pressure Keep packaging materials out •... -
Page 42: Refrigerator
Refrigerator 1- Freezer compartment 10- Odour filter 2- Cooler compartment 11- Zero degree compartment 3- Fan 12- Vegetable bins 4- Butter-cheese compartment 13- Adjustable stands 5- Glass shelves 14- Frozen food storing compartments 6- Cooler compartment door shelves 15- Freezer compartment door shelves 7- Minibar accessory 16- Icematics 8- Water tank... -
Page 43: Installation
Installation 3.1. Right place for installation 3.2. Attaching the plastic wedges Use the plastic wedges in the provided with Contact the Authorized Service for the product's the product to provide sufficient space for air installation. To ready the product for installation, circulation between the product and the wall. -
Page 44: Adjusting The Stands
Installation 3.3. Adjusting the stands 3.5. Water connection If the product is not in balanced position, adjust the (Optional) front adjustable stands by rotating right or left. WARNING: Unplug the product and the water pump (if available) during connection. The product’s water mains, filter and carboy connections must be rendered by authorizer service. -
Page 45: Connecting Water Hose To The Product
Installation 3.6. Connecting water 3.7. Connecting to water mains hose to the product (Optional) To connect the water hose to the product, To use the product by connecting to the cold water follow the instructions below. mains, a standard 1/2” valve connector must be 1. -
Page 46: For Products Using Water Carboy
Installation 4. Attach the connector into the faucet adaptor 2. Connect the other end of the water hose to and tighten by hand / tool. the water pump by pushing the hose into the pump’s hose inlet. 5. To avoid damaging, shifting or accidentally 3. -
Page 47: Fixing External Filter On The Wall (Optional)
Installation 3.9.1.Fixing external filter on the wall (Optional) WARNING: Do not fix the filter on the product. Check to see the following parts are supplied with your product’s model: 4. Attach the water hose extending from the top of the filter to the product’s water connection adaptor, (see 3.6.) 1. -
Page 48: Internal Filter
Installation 3.9.2.Internal filter 1. “Ice Off” indicator must be active while installing the filter. Switch the ON-OFF The internal filter provided with the product is not indicator using the “Ice” button on the screen. installed upon delivery; please follow the instructions below to install the filter. - Page 49 Installation 3. Remove the water filter by-pass cover by pulling. A few drops of water may flow out after removing the cover; this is normal. 4. Place the water filter cover into the mechanism and push to lock in place. 5.
-
Page 50: Preparation
Preparation • Make sure the foods are not in contact with 4.1. What to do for energy saving the cooler compartment temperature sensor mehmet described below. Connecting the product to electronic energy-saving systems is harmful, as it may damage the product. • Do not keep the refrigerator doors open for long periods. -
Page 51: Using The Product
Using the product 5.1. Indicator panel Indicator panels may vary depending on the model of your product. Audial and visual functions of the indicator panel will assist in using the refrigerator. 1. Cooler compartment indicator 2. Error status indicator 3. Temperature indicator 4. - Page 52 Using the product 1. Cooler compartment indicator Push the Vacation button ( ) again to cancel The cooler compartment light will turn on when this function. adjusting the cooler compartment temperature. 5. Temperature adjustment button 2. Error status indicator Respective compartment's temperature varies in This sensor will activate if the refrigerator is not -24°C..
- Page 53 Using the product 1- Economic use 2- High temperature / fault alert 3- Rapid cooling 4- Vacation function 5- Cooler compartment temperature setting 6- Energy saving (display off) 7- Keypad lock 8- Eco-fuzzy 9- Freezer compartment temperature setting 10- Rapid freezing *Optional: The figures in this user guide are intended as drafts and may not perfectly match your product.
- Page 54 Using the product 1. Economic use 5. Cooler compartment temperature setting This sign will light up when the freezer After pressing the button number (5), the compartment is set to -18°C', the most cooler compartment temperature can be set to economical setting.
- Page 55 Using the product 9. Freezer compartment temperature setting The temperature in the freezer compartment is adjustable. Pressing the button number (9) will enable the freezer compartment temperature to be set at -18,-19, -20, -21, -22, -23 and -24. 10. Rapid freezing For rapid freezing, press the button number (10);...
- Page 56 Using the product 1. Freezer compartment temperature setting 2. Economy mode 3. Error status 4. Cooler compartment temperature setting 5. Rapid cooling 6. Vacation function 7. Keypad lock / filter replacing alert cancellation 8. Water, fragmented ice, ice cubes selection 9.
- Page 57 Using the product 1. Freezer compartment temperature setting 6. Vacation function Pressing the button ( ) number (1) will enable When the Vacation function ( ) is active, the the freezer compartment temperature to be set at cooler compartment temperature indicator displays -18,-19,-20,-21 ,-22,-23,-24,-18...
-
Page 58: Activating Water Filter Change Warning
Using the product The indicator will light up after 6 hours when the 2. Then enter 1-4-5-3 as password. auto eco function is active. ( ) Confirming the entered Selecting the password password numbers 12. Rapid freezing Press the button ( ) number (12) for rapid freezing. -
Page 59: Using The Water Fountain
Using the product 5.4. Filling the fountain water tank 5.3. Using the water fountain Open the water tank’s lid, as shown in the figure. (for certain models) Fill in pure and clean drinking water. Close the lid. The first few glasses of water taken from the fountain will normally be warm. -
Page 60: Cleaning The Water Tank
Using the product 5.5. Cleaning the water tank Remove the water filling reservoir inside the door shelf. Detach by holding both sides of the door shelf. Hold both sides of the water tank and remove at 45° angle. Remove and clean the water tank lid. Do not fill the water tank with fruit juice, fizzy beverages, alcoholic beverages or any other liquids incompatible for use in... -
Page 61: Taking Ice / Water
Using the product 5.6. Taking ice / water • The water may be cloudy during first use of the filter; do not consume the first 10 glasses (Optional) of water. To take water ( ) / ice cube ( ) / fragmented • You must wait approximately 12 hours to get ice ( ), use the display to select the respective... -
Page 62: Zero Degree Compartment
Using the product 5.8. Zero degree compartment 5.11. Ionizer (Optional) (Optional) Use this compartment to keep delicatessen The ionizer system in the cooler compartment's at lower temperatures or meat products for air duct serves to ionize the air. The negative immediate consumption. -
Page 63: Icematic And Ice Storage Box
Using the product 5.15. Ice-maker 5.14. Icematic and ice storage box (Optional) (Optional) Ice maker is located on the upper section of the Fill the icematic with water and put in place. freezer cover. The ice will be ready after approximately two hours. - Page 64 Using the product Push downwards firmly, until there is no space left When ice does not come out, check for any ice stuck between the reservoir and the door plastic. (Figure 2) in the canal and remove it. Regularly check the ice If you have difficulty in refitting the reservoir, turn the canal to clear the obstacles as shown in the figure 5.
-
Page 65: Freezing Fresh Food
Using the product 5.16. Freezing fresh food 5.17. Recommendations for storing frozen foods • To preserve food quality, the food items placed in the freezer compartment must be frozen as The compartment must be set to at least -18°C. quickly as possible, use the rapid freezing for 1. -
Page 66: Placing The Food
Using the product 5.19. Placing the food Freezer Various frozen goods including compartment meat, fish, ice cream, shelves vegetables etc. Cooler Food items inside pots, capped compartment plate and capped cases, eggs shelves (in capped case) Cooler Small and packed food or compartment beverages door shelves... -
Page 67: Maintenance And Cleaning
Maintenance and cleaning Cleaning the product regularly will prolong its 6.2. Protecting plastic surfaces service life. Oil spilled on plastic surfaces may damage the surface and must be cleaned immediately with WARNING: Disconnect the power before warm water. cleaning the refrigerator. • Do not use sharp and abrasive tools, soap, house cleaning materials, detergents, gas, gasoline, varnish and similar substances for... -
Page 68: Troubleshooting
Troubleshooting Check this list before contacting the service. Doing so will save you time and money. This list includes frequent complaints that are not related to faulty workmanship or materials. Certain features mentioned herein may not apply to your product. The refrigerator is not working. - Page 69 Troubleshooting The freezer temperature is very low, but the cooler temperature is adequate. • The freezer compartment temperature is set to a very low degree. >>> Set the freezer compartment temperature to a higher degree and check again. The cooler temperature is very low, but the freezer temperature is adequate. • The cooler compartment temperature is set to a very low degree.
- Page 70 Troubleshooting The interior smells bad. • The product is not cleaned regularly. >>> Clean the interior regularly using sponge, warm water and carbonated water. • Certain holders and packaging materials may cause odour. >>> Use holders and packaging materials without free of odour. • The foods were placed in unsealed holders.
- Page 71 الثالجة/ دليل المستخدم !يرجى قراءة هذا الدليل قبل استخدام المنتج ،عميلنا العزيز .إننا نود بلوغ أعلى فعالية لمنتجنا، الذي تم تصنيعه في مرافق حديثة مع ضبط دقيق للجودة لذا، ننصحك بقراءة دليل المستخدم بشكل كامل قبل استخدام المنتج. في حال تغير مالك الجهاز، ال تنس منحه الدليل مع .الجهاز...
- Page 72 جدول المحتويات 5 استخدام المنتج 2 .........جدول المحتويات 1 تعليمات السالمة والبيئة 15 ........1.5. لوحة المؤشرات 21 ......2.5. تنشيط تغيير فلتر الماء 3 ........1.1. السالمة العامة 22 ......3.5. استخدام موزع الماء 4 ......HCتحذير 1.1.1 22 ......4.5. تعبئة خزان موزع الماء 4 ...
- Page 73 تعليمات السالمة والبيئة ال تستعمل مواد التنظيف بالبخار يوضح هذا الجزء تعليمات السالمة .لتنظيف الثالجة وإذابة الجليد داخلها الالزمة لمنع خطر اإلصابة والضرر قد يتالمس البخار مع المناطق المادي. يؤدي اإلخفاق في التقيد بهذه المكهربة ويتسبب بقصر الدائرة التعليمات إلى بطالن جميع ضمانات !الكهربائية...
- Page 74 تعليمات هامة عن السالمة والبيئة .الجهاز إذا كان الجهاز يحتوي على مصابيح ال تطأ أو تتكئ على الباب ، اتصل بخدمة الصيانةLEDمن نوع .والجوارير وأجزاء مماثلة من الثالجة المعتمدة الستبدالها أو اتصل بها في سيؤدي ذلك إلى سقوط الجهاز .حال...
- Page 75 تعليمات هامة عن السالمة والبيئة 2.1. االستخدام المخصص :5.1 االمتثال لتوجيهات حظر المواد الخطرة هذا المنتج مصمم لالستخدام EU WEEE هذا المنتج متوافق مع توجيهات المنزلي. وهو غير مالئم لالستخدام /56/1102)). وهو ال يحتوي على مواد ضارة أوEU .محظورة محددة في التوجيهات .التجاري...
- Page 76 الثالجة حجرة المجمد حجرة درجة الصفر حجرة المبرد سالل الخضار مروحة القواعد القابلة للتعديل حجرة الزبدة والجبن حجرات تخزين األطعمة المجمدة الرفوف الزجاجية رفوف باب حجرة المجمد رفوف باب حجرة المبرد آلة الثلج وحدة الثالجة الصغيرة صندوق تخزين الثلج خزان الماء غطاء...
- Page 77 التركيب 2.3. تثبيت األوتاد البالستيكية 1.3. المكان المناسب للتركيب استخدم األوتاد البالستيكية المزودة مع الجهاز لتوفير .اتصل بخدمة الصيانة المعتمدة من أجل تركيب الجهاز .مساحة كافية لتوزيع الهواء بين الجهاز والجدار إلعداد الجهاز للتركيب، انظر المعلومات في دليل لتثبيت األوتاد، فك البراغي الموجودة على المنتج .المستخدم...
- Page 78 التركيب 5.3. توصيل الماء 3.3. ضبط القواعد ) (اختياري إن لم يكن الجهاز في وضع متوازن، اضبط القواعد األمامية القابلة للتعديل بإدارتها إلى اليمين أو اليسار تحذير: افصل الجهاز ومضخة الماء (إن وجدت) عن .الكهرباء أثناء التوصيل يجب إجراء توصيالت الماء الرئيسية والفلتر وقارورة الماء...
- Page 79 التركيب 7.3. التوصيل مع مصدر الماء الرئيسي 6.3. توصيل خرطوم الماء بالمنتج (( اختياري .لتوصيل خرطوم الماء بالجهاز، اتبع التعليمات أدناه الستخدام الجهاز للتوصيل إلى مصدر الماء البارد، يجب فك الموصل الموجود على وصلة فوهة الخرطوم تركيب موصل صمام قياسي 1/2 بوصة على مصدر .على...
- Page 80 التركيب أوصل الطرف اآلخر لخرطوم الماء بمضخة الماء ركب الموصل على وصلة الصنبور وشده بواسطة .بدفع الخرطوم في مدخل خرطوم المضخة .اليد أو أداة ،لتجنب إتالف الخرطوم أو ليه أو فصله عرضيا .استخدم المشابك المزودة لتثبيت خرطوم الماء كما يجب .ركب...
- Page 81 التركيب 1.9.3. تركيب الفلتر الخارجي على الجدار )(اختياري .تحذير: ال تثبت الفلتر على المنتج :تحقق للتأكد من وجود القطع التالية مع جهازك ثبت خرطوم الماء الممتد من أعلى الفلتر إلى وصلة .)3.6 الماء (انظر موصل (1 قطعة): يستخدم لتوصيل خرطوم الماء .بظهر...
- Page 82 التركيب الفلتر. قم بتشغيل-إيقاف المؤشر بواسطة زر “الثلج” على 2.9.3. الفلتر الداخلي .الشاشة يتم تركيب الفلتر الداخلي المزود مع الجهاز عند التوصيل؛ .يرجى اتباع التعليمات أدناه لتركيب الفلتر يجب أن يكون مؤشر “إيقاف الثلج” نشطا أثناء تركيب :خط الماء .انزع سلة الخضار للوصول إلى فلتر الماء :خط...
- Page 83 التركيب ضع غطاء فلتر الماء على اآللة واضغط لقفله في مكانه قد تفيض بعض قطرات الماء بعد فك الغطاء؛ هذا أمر .طبيعي ضع غطاء فلتر الماء على اآللة واضغط لقفله في .مكانه اضغط على زر “الثلج” على الشاشة مرة أخرى .”إللغاء...
- Page 84 اإلعداد 2.4. االستخدام ألول مرة 1.4. إجراءات توفير الطاقة قبل استخدام ثالجتك، تأكد من إجراء اإلعدادات mehmet الضرورية انسجاما مع التعليمات المذكورة في أقسام يسبب توصيل الجهاز بنظام توفير الطاقة اإللكتروني .”“تعليمات السالمة والبيئة” و”التركيب .أضرارا، فقد يتلف المنتج دع الجهاز يعمل بدون طعام في الداخل لمدة 6 ساعات .ال...
- Page 85 استخدام المنتج 1.5. لوحة المؤشرات .قد تتباين ألواح المؤشرات بناء على موديل جهازك .ستساعدك الوظائف الصوتية والبصرية للوحة المؤشرات على استخدام الثالجة مؤشر حجرة المبرد مؤشر حالة الخطأ مؤشر درجة الحرارة زر وظيفة اإلجازة زر تعديل درجة الحرارة زر اختيار الحجرة مؤشر...
- Page 86 استخدام المنتج 7. مؤشر حجرة المبرد 1. مؤشر حجرة المبرد يعمل ضوء حجرة المجمد عند تعديل درجة حرارة حجرة يعمل ضوء حجرة المبرد عند تعديل درجة حرارة حجرة .المبرد .المبرد 8. مؤشر الوضع االقتصادي 2. مؤشر حالة الخطأ يشير إلى أن الثالجة تعمل في وضع توفير الطاقة. يكون ينشط...
- Page 87 استخدام المنتج االستخدام االقتصادي منبه ارتفاع درجة الحرارة/ الخلل التبريد السريع وظيفة اإلجازة إعداد درجة حرارة حجرة المبرد )توفير الطاقة (إيقاف الشاشة قفل لوحة المفاتيح الوضع االقتصادي إعداد درجة حرارة حجرة المبرد التجميد السريع اختياري: إن األشكال الموجودة في هذا الدليل مخصصة كمسودات وقد ال تتطابق مع جهازك تماما. إذا .كان...
- Page 88 استخدام المنتج قفل لوحة المفاتيح االستخدام االقتصادي -18 تضيء هذه العالمة عند ضبط حجرة المجمد على .) لمدة 3 ثواني ( اضغط على زر قفل لوحة المفاتيح مئوية وهو اإلعداد األكثر اقتصادا. ينطفئ مؤشر تضيء إشارة قفل لوحة المفاتيح ( ) ويتم تنشيط قفل ) عند...
- Page 89 استخدام المنتج إعداد درجة حرارة حجرة المجمد الوضع االقتصادي حالة الخطأ إعداد درجة حرارة حجرة المبرد التبريد السريع وظيفة اإلجازة قفل لوحة المفاتيح/ إلغاء منبه استبدال الفلتر اختيار الماء، الثلج المفتت، أو مكعبات الثلج تشغيل/إيقاف صنع الثلج تشغيل/إيقاف الشاشة الوضع االقتصادي التلقائي التجميد...
- Page 90 استخدام المنتج تشغيل/إيقاف صنع الثلج إعداد درجة حرارة حجرة المجمد ( ) إللغاء ( )9( اضغط على الزر رقم ) رقم (1) إلى تمكين ضبط ( يؤدي الضغط على الزر .) صنع الثلج ( أو تنشيط -21,-20,-19,-18 درجة حرارة حجرة المجمد على تشغيل/إيقاف...
- Page 91 استخدام المنتج إذا تم إدخال كلمة المرور بشكل صحيح، يصدر صوت 2.5. تنشيط تغيير فلتر الماء .الطنان لفترة وجيزة ويعمل مؤشر تحذير تغيير الفلتر )(للمنتجات الموصولة بخط الماء الرئيسي والمزودة بفلتر احتساب زمن استخدام الفلتر تلقائيا غير مفعل من :يتم تنشيط تحذير تغيير فلتر الماء كما يلي .المصنع...
- Page 92 استخدام المنتج 4.5. تعبئة خزان موزع الماء 3.5. استخدام موزع الماء افتح غطاء خزان الماء كما هو موضح في الشكل. ضع )(لبعض الموديالت .ماء الشرب النقي والنظيف. أغلق الغطاء .عادة ما تكون األكواب األولى من موزع الماء دافئة إذا لم يتم استخدام موزع الماء لفترة طويلة، تخلص من .أكواب...
- Page 93 استخدام المنتج .5.5 تنظيف خزان الماء .بابلا فر لخاد ءاملا ةئبعت ضوح كف فر يبناج كسمب هلصفب مق .بابلا .ةجرد 54 ةيوازب كفو ءاملا نازخ يبناج كسما .هفظنو ءاملا نازخ ءاطغ كف ال تمأل خزان الماء بعصير الفواكه، أو المشروبات الفوارة...
- Page 94 استخدام المنتج )6.5. إخراج الثلج/ الماء (اختياري يوصى بفصل مصدر إمداد الماء إذا كنت تنوي عدم .استخدام الجهاز لفترات طويلة أثناء اإلجازة مثال )/ الثلج المفتت ( )/ مكعبات الثلج ( إلخراج الماء إذا لم يتم استخدام موزع الماء لفترة زمنية طويلة، ربما )،...
- Page 95 استخدام المنتج 11.5. مولد األيونات 8.5. حجرة درجة الصفر )(اختياري )(اختيارية يعمل نظام توليد األيونات في مجرى هواء حجرة المبرد استخدم هذه الحجرة للحفاظ على األطعمة المعلبة عند على تأيين الهواء. تقوم انبعاثات األيونات السالبة بإزالة درجات حرارة منخفضة أو منتجات اللحوم لالستهالك .البكتيريا...
- Page 96 استخدام المنتج )51.5. صانع الثلج (اختياري 41.5. آلة الثلج وصندوق تخزين الثلج .يقع صانع الثلج على الجزء العلوي من غطاء المجمد )(اختياري امسك المقبضين على جانبي حوض تخزين الثلج وحركه جلثلا نوكيس .اهناكم يف اهعضو ءاملاب جلثلا ةلآ ألما .لألعلى إلخراجه جارخإل...
- Page 97 استخدام المنتج ﻁطﻭوﻳﯾﻠﺔ ﺯزﻣﻧﻳﯾﺔ ﻟﻔﺗﺭرﺓة ﺍاﺳﺗﺧﺩدﺍاﻣﻪﮫ ﻋﺩدﻡم ﺣﺎﻝل ﻓﻲ ﺃأﻭو ﻣﺭرﺓة ﻷﻭوﻝل ﺍاﻟﺛﻼﺟﺔ ﺍاﺳﺗﻌﻣﺎﻝل ﻋﻧﺩد ﺃأﺛﻧ ﺍاﻟﻬﮭﻭوﺍاء ﺗﻧﻔﻳﯾﺱس ﻭوﺳﻳﯾﺗﻡم ،٬ﺍاﻟﺗﻭوﺻﻳﯾﻝل ﺑﻌﺩد ﺍاﻷﻧﺑﻭوﺏب ﻓﻲ ﺍاﻟﻣﻭوﺟﻭوﺩد ﺍاﻟﻬﮭﻭوﺍاء ﺑﺳﺑﺏب ﺍاﻟﺛﻠﺞ ﻣﻛﻌﺑﺎﺕت ﻣﻥن ﺭرﺍاﺋﺣﺔ ﺗﻧﺑﻌﺙث ﻗﺩد ﺍاﻟﻌﺎﺩدﻱي ﻣﻠﻭوﺛﺎﺕت ﻋﻠﻰ ﻳﯾﺣﺗﻭوﻱي ﻗﺩد ﺍاﻟﻣﺎء...
- Page 98 استخدام المنتج 61.5. تجميد األطعمة الطازجة 81.5. شروط المجمد العميق للمحافظة على جودة الطعام، يجب تجميد األطعمة بحسب تعليماتIEC 62552، يجب أن يشتمل المجمد المخزنة في حجرة المجمد بأسرع وقت ممكن بواسطة -18 على سعة تجميد 5.4 كغم من األطعمة عند درجة .التجميد...
- Page 99 استخدام المنتج 91.5. وضع الطعام ،األصناف المجمدة المختلفة بما يشمل اللحم رفوف حجرة .السمك، اآليس كريم، الخضار، الخ المجمد أصناف الطعام داخل القدور، األطباق المغطاة رفوف حجرة )والعلب المغطاة، البيض (في علبة مغطاة المبرد رفوف باب حجرة المأكوالت والمشروبات الصغيرة والمغلفة المبرد...
- Page 100 66 والصيانة 1.6. منع الروائح الكريهة .يعمل تنظيف الجهاز بانتظام على إطالة عمره تم تصنيع المنتج من مواد خالية من الروائح. إال أن االحتفاظ بالطعام في أقسام غير مالئمة وتنظيف األسطح .الداخلية بطريقة خاطئة قد يتسبب بالروائح الكريهة تحذير: افصل التيار الكهربائي قبل تنظيف 15 لتجنب...
- Page 101 العثور على الخلل ريغ ىواكشلا ةمئاقلا هذه نمضتت .لاملاو تقولا ريفوت كلذ نأش نم .ةنايصلا زكرمب لاصتالا لبق ةمئاقلا هذه نم ققحت .كزاهج ىلع انه ةروكذم ةنيعم تامس قبطنت ال دقو .داوملا وأ ةعانصلا بويعب ةطبترملا .الثالجة ال تعمل .قابس الطاقة غير مستقر كليا. >>> ادفعه بحيث يستقر في المقبس كليا .الصمام...
- Page 102 العثور على الخلل .درجة حرارة المجمد منخفضة جدا، لكن درجة حرارة المبرد مالئمة تم ضبط درجة حرارة حجرة المجمد على درجة متدنية جدا. >>> اضبط درجة حرارة حجرة المجمد على درجة .أعلى وافحص مرة أخرى .درجة حرارة المبرد منخفضة جدا، لكن درجة حرارة المجمد مالئمة تم...
- Page 103 العثور على الخلل .ال يتم تنظيف الجهاز بانتظام. >>> نظف الجزء الداخلي بانتظام مستخدما إسفنجة وماء دافئ وماء مكربن قد تتسبب بعض المستوعبات ومواد التغليف بالروائح. >>> استخدم المستوعبات ومواد التغليف الخالية من .الروائح تم وضع الطعام في مستوعبات غير محكمة اإلغالق. >>> احتفظ باألطعمة في مستوعبات محكمة اإلغالق. قد .تنتشر...
- Page 104 57 4270 0000/AJ FR-EN-AR www.beko.com...
Need help?
Do you have a question about the GN163220S/1 TRB and is the answer not in the manual?
Questions and answers