Table of Contents
Advertisement
Quick Links
Advertisement
Table of Contents

Related Manuals for Epson EF-12


Summary of Contents for Epson EF-12
- Page 1 User's Guide...
-
Page 2: Table Of Contents
Contents Notations Used in This Guide Turning Off the Projector ..............30 Projection Modes ................31 Changing the Projection Mode Using the Menus ............31 Introduction to Your Projector Adjusting the Image Height............32 Projector Parts and Functions ............9 Image Shape .................. - Page 3 Contents HDMI CEC Features ................52 Solving Projector Shutdown Problems................. 75 Operating Connected Devices Using the HDMI CEC Features ........52 Solving Image Problems ..............76 Installing a Security Cable............... 54 Solving Missing Image Problems .................... 76 Adjusting an Image that is not Rectangular ............... 76 Updating Projector Firmware ............
- Page 4 Contents Laser Warning Labels........................94 Glossary..................... 96 Notices....................97 FCC Compliance Statement ...................... 97 Indication of the manufacturer and the importer in accordance with requirements of EU directive ....................98 Restriction of Use........................... 98 Trademarks ............................98 Copyright Notice ........................... 99 Copyright Attribution ........................
-
Page 5: Notations Used In This Guide
Notations Used in This Guide Safety Symbols The projector and its manuals use graphical symbols and labels to indicate content that tells you how to use the projector safely. Read and carefully follow the instructions that are marked with these symbols and labels to avoid injury to persons or damage to property. This symbol indicates information that, if ignored, could possibly result in personal injury or even death. - Page 6 Searching by keyword Click Edit > Advanced Search. Enter the keyword (text) for information you want to find in the search window, and then click Search. Hits are displayed as a list. Click one of the displayed hits to jump to that page. Jumping directly from bookmarks Click a title to jump to that page.
- Page 7 • To specify pages that are not in series, divide the pages with commas. Example: 5, 10, 15...
-
Page 8: Introduction To Your Projector
Introduction to Your Projector See these sections to learn more about your projector. g g Related Links • "Projector Parts and Functions"... -
Page 9: Projector Parts And Functions
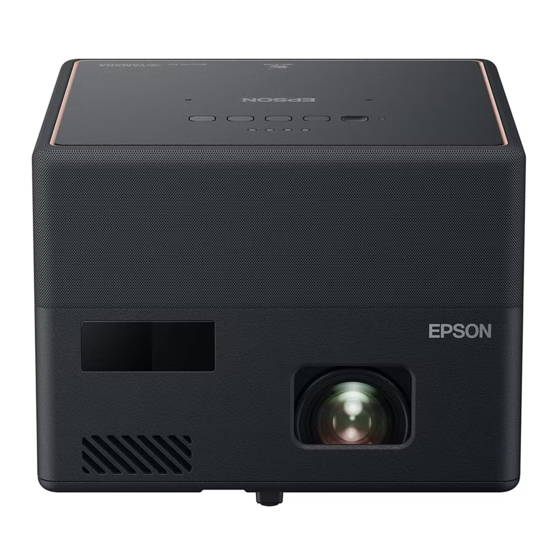
Projector Parts and Functions The following sections explain the projector parts and their functions. Name Function Camera Automatically adjusts the shape and focus of the g g Related Links projected image. • "Projector Parts - Front/Top" • "Projector Parts - Rear" p.10 Air intake vent Takes in air to cool the projector internally. -
Page 10: Projector Parts - Rear
Projector Parts and Functions • "Projector Indicator Status" p.74 Name Function • "Connecting to Video Sources" p.21 Air exhaust vents Exhaust vents for air used to cool the projector • "Connecting to an ARC Compatible AV System" p.22 internally. • "Connecting Headphones" p.21 Caution •... -
Page 11: Projector Parts - Control Panel
Projector Parts and Functions Name Function Name Function Foot release lever Press the foot release lever to extend and retract the Bluetooth Speaker Switches to the Bluetooth Speaker Mode. front adjustable foot. Mode button Air intake vent Takes in air to cool the projector internally. Volume up/down Adjusts the volume for the speaker and headphones. -
Page 12: Projector Parts - Projector Remote Control
Projector Parts and Functions Projector Parts - Projector Remote Control Name Function Indicator/Microphon Turns on when outputting signals from the remote control. Detects audio when you press the Mic button. YouTube button Starts the YouTube application. Bluetooth Speaker Switches to the Bluetooth Speaker Mode. Mode button Arrow buttons Selects menu items while displaying the projector's... - Page 13 Projector Parts and Functions Name Function Home button Displays the Android TV ™ home screen. Google Search button Searches with your voice. When you press this button, the remote control's microphone starts listening for voice commands. [Enter] button Enters the current selection and moves to the next level while displaying the projector's menu.
-
Page 14: Setting Up The Projector
Setting Up the Projector Follow the instructions in these sections to set up your projector. g g Related Links • "Projector Placement" p.15 • "Projector Connections" p.21 • "Installing Batteries in the Remote Control" p.23 • "Setting Up the Android TV™" p.25... -
Page 15: Projector Placement
Projector Placement You can place the projector on almost any flat surface to project an image. • Place the projector so it squarely faces the screen, not at an angle. You can also install the projector on a mount if you want to use it in a fixed location. -
Page 16: Projector Setup And Installation Options
Projector Placement Warning Warning • You must install a ceiling mount when suspending the projector from a ceiling. • Do not cover the projector's air intake or air exhaust vents. If the vents are If you do not install the projector correctly, it could fall and cause damage or covered, the internal temperature could rise and cause a fire. -
Page 17: Precautions On Installation
Projector Placement Standard Caution Do not cover the projector's lens. If the lens is covered, the internal temperature could rise and it could result in a malfunction. Attention • We recommend installing the projector on a protective mat to prevent the projector or the cloth covering the speaker from being damaged, or the color from staining unprotected surfaces. -
Page 18: Projection Distance
Projector Placement Installation space See the Appendix for details about how far to place the projector from the screen based on the size of the projected image. Attention When correcting keystone distortion, your image is slightly smaller. Be sure to leave the following amount of space around the projector so as not to block the air exhaust and intake vents. - Page 19 Projector Placement Turn the projector upside down. When installing the projector in a high place, thread the optional security wire set (ELPWR01) through the mount plate. Loosen the rear feet by turning them counterclockwise, and then remove them.
- Page 20 Projector Placement Attach the mount plate to the projector and secure it in place with the When installing the projector in a high place such as a ceiling, screws that come with the mount plate. make sure you hook the carabiner of the optional security wire set (ELPWR01) to a point that is strong enough to hold the weight of the projector and the mounting hardware.
-
Page 21: Projector Connections
Projector Connections See these sections to connect the projector to a variety of projection sources. Connect the other end to the projector's HDMI port. Attention Check the shape and orientation of the connectors on any cable you plan to connect. Do not force a connector into a port if it does not fit. The device or your projector could be damaged or could malfunction. -
Page 22: Connecting To An Arc Compatible Av System
Projector Connections Caution Do not start a playback at a high volume setting. Sudden loud noises may cause hearing loss. Always lower the volume before powering off, so that you can power on and then gradually increase the volume. Connecting to an ARC Compatible AV System If your AV system has an HDMI port, you can connect it to the projector using an HDMI cable (ARC compatible) to output audio to the AV system. -
Page 23: Installing Batteries In The Remote Control
Installing Batteries in the Remote Control The remote control uses the two AAA batteries that came with the projector. Insert the batteries with the + and – ends facing as shown. Attention Make sure you read the Safety Instructions before handling the batteries. Remove the battery cover as shown. -
Page 24: Remote Control Operation
Installing Batteries in the Remote Control Replace the battery cover and press it down until it clicks into place. Avoid using the remote control in conditions with bright fluorescent lights or in direct sunlight, or the projector may not respond to commands. -
Page 25: Setting Up The Android Tv
Setting Up the Android TV™ When you turn on the projector for the first time, you need to setup the built- When the language selection screen is displayed, select the language in Android TV you want to use. ™ You can change each of the settings even after completing the initial setup. -
Page 26: Android Tv ™ Home Screen
Setting Up the Android TV™ Android TV ™ Home Screen When you turn on the projector or press the button on the remote control, the Android TV home screen is displayed. ™ You can easily access online content, applications, and projector settings from the home screen. -
Page 27: Using Basic Projector Features
Using Basic Projector Features Follow the instructions in these sections to use your projector's basic features. g g Related Links • "Turning On the Projector" p.28 • "Turning Off the Projector" p.30 • "Projection Modes" p.31 • "Adjusting the Image Height" p.32 •... -
Page 28: Turning On The Projector
Turning On the Projector When you connect the video equipment to the projector, turn on the video The first time you turn on the projector, the remote control pairing equipment you want to use after you turn on the projector. screen and initial setup screen are displayed. - Page 29 Turning On the Projector Warning • Incorrect use of the AC adapter may cause malfunction, fire, or electric shock. Take the following precautions when using the AC adapter. • Do not use any AC adapter other than the one supplied with the projector. •...
-
Page 30: Turning Off The Projector
Turning Off the Projector Turn off the projector after use. • Turn off this product when it is not in use to prolong the life of the projector. Light source life varies depending on the environmental conditions and usage. Brightness decreases over time. Press the power button on the control panel or remote control. -
Page 31: Projection Modes
Projection Modes Depending on how you positioned the projector, you may need to change the Select the Display menu and press the [Enter] button. projection mode so your images project correctly. • Standard lets you project from a table in front of the screen. •... -
Page 32: Adjusting The Image Height
Adjusting the Image Height If you are projecting from a table or other flat surface and the image is too high or low, you can adjust the image height using the projector's adjustable foot. The larger the angle of tilt, the harder it becomes to focus. Locate the projector so that it only needs to be tilted at a small angle. -
Page 33: Image Shape
Image Shape You can project an even, rectangular image by placing the projector directly g g Related Links in front of the center of the screen and keeping it level. If you place the • "Projector Feature Settings - Display Menu" p.63 projector at an angle to the screen, or tilt it up or down, or off to the side, you may need to correct the image shape. -
Page 34: Correcting The Image Shape With Corner Adjustment
Image Shape Select the Display menu and press the [Enter] button. • H-Keystone When you are finished, press After correction, your image is slightly smaller. g g Related Links • "Projector Feature Settings - Display Menu" p.63 Correcting the Image Shape with Corner Adjustment Select H/V-Keystone and press [Enter]. - Page 35 Image Shape Select the Display menu and press the [Enter] button. To return to the area selection screen, press If the direction key on the screen turns gray, you cannot make further adjustments in that direction. Repeat steps 5 and 6 as needed to adjust any remaining points. When you are finished, press g g Related Links •...
-
Page 36: Focusing The Image Using The Projector Menus
Focusing the Image Using the Projector Menus You can correct the focus using the projector menus. g g Related Links • "Projector Feature Settings - Display Menu" p.63 When you press the button on the remote control, Auto Keystone automatically corrects focus and any keystone distortion of the projected image. -
Page 37: Selecting An Image Source
Selecting an Image Source When multiple image sources are connected to the projector, such as a computer and DVD player, you can switch from one image source to the other. Make sure the connected image source you want to use is turned on. For video image sources, insert a DVD or other video media and press play. -
Page 38: Image Aspect Ratio
Image Aspect Ratio The projector can display images in different width-to-height ratios called Select the Picture and press the [Enter] button. aspect ratios. Normally, the input signal from your video source determines the image's aspect ratio. However, you can change the aspect ratio for certain images to fit your screen. -
Page 39: Available Image Aspect Ratios
Image Aspect Ratio Available Image Aspect Ratios You can select the following image aspect ratios, depending on the input signal from your image source. • Note that using the aspect ratio function of the projector to reduce, enlarge, or split the projected image for commercial purposes or for public viewing may infringe upon the rights of the copyright holder of that image based on copyright law. -
Page 40: Adjusting Image Quality (Color Mode)
Adjusting Image Quality (Color Mode) The projector offers different color modes to provide optimum brightness, Select the Picture menu and press the [Enter] button. contrast, and color for a variety of viewing environments and image types. You can select the mode designed to match your image and environment, or experiment with the available modes. -
Page 41: Available Color Modes
Adjusting Image Quality (Color Mode) Available Color Modes You can set the projector to use these color modes, depending on your environment and image types. Color mode Description Dynamic This is the brightest mode. Best for prioritizing brightness. Vivid Best for enjoying various content in a bright environment. -
Page 42: Turning On Automatic Luminance Adjustment
Turning On Automatic Luminance Adjustment You can turn on Dynamic Contrast to automatically optimize the image Select one of the following options and press [Enter]: luminance. This improves the image contrast based on the brightness of the • High Speed to adjust brightness as soon as the scene changes. content you project. -
Page 43: Adjusting Image Quality In Detail
Adjusting Image Quality in Detail You can fine-tune various aspects of how quality and colors are displayed in Select Custom Settings and press [Enter]. your projected images. Select one of the following options: To optimize the color tone according to the scene, and to obtain a •... -
Page 44: Adjusting The Light Source Brightness
Adjusting the Light Source Brightness You can adjust the brightness of your projector's light source. Press to exit the menus. Turn on the projector and display an image. g g Related Links • "Image Quality Settings - Picture Menu" p.59 Press the button on the remote control. -
Page 45: Controlling The Volume With The Volume Buttons
Controlling the Volume with the Volume Buttons The volume buttons control the projector's internal speaker system. Turn on the projector and start a video. To lower or raise the volume, press the button on the control panel or remote control. A volume gauge appears on the screen. -
Page 46: Adjusting The Sound Settings (Sound Mode)
Adjusting the Sound Settings (Sound Mode) The projector offers various sound settings to fine-tune the sound quality for Select the Sound menu and press the [Enter] button. a variety of listening environments. You can select the mode designed to match your image, or experiment with the available modes. -
Page 47: Available Sound Modes
Adjusting the Sound Settings (Sound Mode) g g Related Links Setting Description • "Available Sound Modes" p.47 Virtual Surround Adjusts the strength of the surround effect. This setting • "Detailed Sound Settings" p.47 is saved for each Sound Mode. • "Sound Quality Settings - Sound Menu" p.61 Clear Voice Adjusts the voice so that it can be heard clearly. -
Page 48: Adjusting Projector Features
Adjusting Projector Features Follow the instructions in these sections to use your projector's adjustment features. g g Related Links • "Using the Projector as a Bluetooth Speaker" p.49 • "Shutting Off the Image Temporarily" p.51 • "HDMI CEC Features" p.52 •... -
Page 49: Using The Projector As A Bluetooth Speaker
Using the Projector as a Bluetooth Speaker You can use the projector's speaker to output audio from a video/audio device To exit Bluetooth Speaker Mode, press again. connected by Bluetooth. After exiting Bluetooth Speaker Mode, the following message is displayed. •... - Page 50 Using the Projector as a Bluetooth Speaker Warning Do not use the device near any medical equipment or equipment that is automatically controlled, such as automatic doors or fire alarms. Electromagnetic interference from the device may cause such equipment to malfunction and cause an accident.
-
Page 51: Shutting Off The Image Temporarily
Shutting Off the Image Temporarily When you want to enjoy the sound only from the projector, you can temporarily turn off the projected image. Press the button on the control panel or remote control. The light source turns off and the projected image is interrupted. To turn the image back on, press again. -
Page 52: Hdmi Cec Features
HDMI CEC Features When an audio/video source that meets the HDMI CEC standard is Select the Settings menu and press the [Enter] button. connected to the projector's HDMI port, you can use the projector's remote control to control certain features of the linked device. g g Related Links •... - Page 53 HDMI CEC Features g g Related Links • "Projector Feature Settings - Settings Menu" p.64...
-
Page 54: Installing A Security Cable
Installing a Security Cable You can use the security slot on the projector to attach a Kensington Microsaver Security system as a theft deterrent. For more details on the Microsaver Security System, see http://www.kensington.com/. g g Related Links • "Projector Parts - Front/Top"... -
Page 55: Updating Projector Firmware
Updating Projector Firmware You can get the latest version of the projector firmware over a network. When the latest projector firmware is available, a notification is automatically displayed on the screen. Follow the on-screen instructions to update the firmware. Press the button on the remote control. -
Page 56: Initializing The Projector
Initializing the Projector You can reset all of the projector settings to their default values. If you initialize the projector, all the information such as installed applications, Google account login information, and Projector Settings are deleted. Write down the settings you do not want to lose before performing initialization. -
Page 57: Adjusting The Menu Settings
Adjusting the Menu Settings Follow the instructions in these sections to access the projector menu system and change projector settings. g g Related Links • "Using the Projector Settings" p.58 • "Image Quality Settings - Picture Menu" p.59 • "Sound Quality Settings - Sound Menu" p.61 •... -
Page 58: Using The Projector Settings
Using the Projector Settings You can use the projector's menus to adjust the settings that control how your projector works. The projector displays the menus on the screen. Press the button on the remote control. You see the Projector Settings on the screen. Press the up or down arrow buttons to move through the menus listed on the screen. -
Page 59: Image Quality Settings - Picture Menu
Image Quality Settings - Picture Menu Settings on the Picture menu let you adjust the quality of your image for the Setting Options Description input source you are currently using. Scene Adaptive Varying levels Adjusts the coloring according to the Gamma available scene, and obtains a more vivid image. - Page 60 Image Quality Settings - Picture Menu g g Related Links • "Adjusting Image Quality (Color Mode)" p.40 • "Available Color Modes" p.41 • "Adjusting Image Quality in Detail" p.43 • "Turning On Automatic Luminance Adjustment" p.42 • "Adjusting the Light Source Brightness" p.44...
-
Page 61: Sound Quality Settings - Sound Menu
Sound Quality Settings - Sound Menu Settings on the Sound menu provide optimum sound for a variety of image Setting Options Description types. You can select the mode designed to match your image, or experiment Virtual Surround High Adjusts the strength of the surround with the available modes. -
Page 62: Sound Quality Settings - Sound Menu
Sound Quality Settings - Sound Menu Setting Options Description Audio Output Varying levels Adjusts the audio latency. If the audio is Latency available fast, select a higher value. This item is only available for the following types of audio. • audio output from the projector's speaker •... -
Page 63: Projector Feature Settings - Display Menu
Projector Feature Settings - Display Menu Settings on the Display menu provide correction methods to properly project g g Related Links your image. • "Image Shape" p.33 • "Projection Modes" p.31 Setting Options Description Auto Keystone Select On to automatically correct focus and any horizontal/vertical distortion of the projected image. -
Page 64: Projector Feature Settings - Settings Menu
Projector Feature Settings - Settings Menu Options on the Settings menu let you customize various projector features. Setting Options Description Device Auto Power Off: Select On to automatically turn off the connected audio/video device when you turn off the projector. Auto Language Change: Select On to automatically switch the language settings of the connected audio/video... -
Page 65: Maintaining The Projector
Maintaining the Projector Follow the instructions in these sections to maintain your projector. g g Related Links • "Projector Maintenance" p.66 • "Cleaning the Lens" p.67 • "Cleaning the Projector Case" p.68 • "Air Filter and Vent Maintenance" p.69... -
Page 66: Projector Maintenance
The only parts you should replace are the air filter and remote control batteries. If any other part needs replacing, contact Epson or an authorized Epson servicer. Warning Before cleaning any part of the projector, turn it off and unplug the power cord. -
Page 67: Cleaning The Lens
Cleaning the Lens Clean the projector's lens periodically, or whenever you notice dust or smudges on the surface. • To remove dust or smudges, gently wipe the lens with lens-cleaning paper. • To remove stubborn smudges, moisten a soft, lint-free cloth with lens cleaner and gently wipe the lens. -
Page 68: Cleaning The Projector Case
Cleaning the Projector Case Before cleaning the projector case, turn off the projector and unplug the power cord. • To remove dust or dirt, use a soft, dry, lint-free cloth. • To remove stubborn dirt, use a soft cloth moistened with water and mild soap. -
Page 69: Air Filter And Vent Maintenance
0.04 to 0.2 mg/m3.) Attention If regular maintenance is not performed, your Epson projector will notify you when the temperature inside the projector has reached a high level. Do not wait until this warning appears to maintain your projector filter as prolonged exposure to high temperatures may reduce the life of your projector. - Page 70 Air Filter and Vent Maintenance You can replace the air filter while the projector is mounted to the ceiling or Pull the air filter out of the projector. placed on a table. Turn off the projector and unplug the power cord. Turn the projector upside down.
- Page 71 Air Filter and Vent Maintenance Place the new air filter in the projector as shown and push gently until it clicks into place. Close the air filter cover. g g Related Links • "Replacement Parts" p.86...
-
Page 72: Solving Problems
Solving Problems Check the solutions in these sections if you have any problems using the projector. g g Related Links • "Projection Problems" p.73 • "Projector Indicator Status" p.74 • "Solving Projector Power-On or Power-Off Problems" p.75 • "Solving Image Problems" p.76 •... -
Page 73: Projection Problems
• The solutions in this manual can help you solve many problems. If none of these solutions help, contact Epson for technical support. After repairing the projector, Epson may return the projector to you in its initial status. Make sure you make a note of the account information of each online service before you contact your local dealer or the nearest Epson repair center. -
Page 74: Projector Indicator Status
• Clean or replace the air filter. • If the problem persists, unplug the projector and contact Epson for help. Laser warning. Turn the projector off, unplug it, and contact Epson for help. Flashing orange Laser has a problem. Turn the projector off, unplug it, and contact Epson for help. -
Page 75: Solving Projector Power-On Or Power-Off Problems
If you are using the remote control, check the batteries of the remote control. The power cord may be defective. Disconnect the cord and contact Epson for help. g g Related Links • "Turning On the Projector" p.28 •... -
Page 76: Solving Image Problems
Solving Image Problems Check the solutions in these sections if you have any problems with projected Check the status of your video source: images. • Make sure the connected device meets the HDMI CEC standard. See the documentation supplied with the device for more information. g g Related Links •... -
Page 77: Adjusting A Fuzzy Or Blurry Image
Solving Image Problems g g Related Links Fixing Partial Image Problems • "Correcting the Image Shape and Focus Automatically" p.33 • "Correcting the Image Shape Manually" p.33 If only a partial computer image is displayed, try the following steps until the •... -
Page 78: Adjusting An Image With Incorrect Brightness Or Colors
Solving Image Problems If you connected an extension power cable, try projecting without it to Adjusting an Upside-down Image see if it caused interference in the signal. If the projected image is upside-down, select the correct projection mode. Select a computer video resolution and refresh rate that are compatible Display >... -
Page 79: Solving Sound Problems
Solving Sound Problems Check the solutions in these sections if you have any problems with projected • Set HDMI2 ARC to On in the Settings menu. sound. • Set Sound Output Device to ARC in the Sound menu. g g Related Links •... - Page 80 Solving Sound Problems • Make sure the connected Bluetooth audio device is within the specified communication distance. • Avoid using the projector near wireless networks, microwave ovens, 2.4 GHz cordless phones, or other devices that use the 2.4 GHz frequency band. These devices can interfere with the signal between the projector and the Bluetooth audio device.
-
Page 81: Solving Remote Control Operation Problems
If the projector does not respond to remote control commands, try the following steps until the problem is solved. If you lose the remote control, you can order another one from Epson. Check that the remote control batteries are installed correctly and have power. -
Page 82: Solving Hdmi Cec Problems
Solving HDMI CEC Problems If you cannot operate the connected devices from the projector, try the following steps until the problem is solved. Make sure the cable meets the HDMI CEC standard. Make sure the connected device meets the HDMI CEC standard. See the documentation supplied with the device for more information. -
Page 83: Solving Wi-Fi Network Problems
Solving Wi-Fi Network Problems If you cannot connect to a Wi-Fi network, try the following solutions. Make sure your Wi-Fi router and modem are working properly. Rebooting these devices may solve the network connection problem. Check for obstacles between the Wi-Fi router and the projector, and change their positions to improve communication. -
Page 84: Solving Android Tv Problems
Solving Android TV™ Problems See the following page if you have any problems when watching the Android ™ https://support.google.com/androidtv/... -
Page 85: Appendix
Appendix Check these sections for the technical specifications and important notices about your projector. g g Related Links • "Optional Accessories and Replacement Parts" p.86 • "Screen Size and Projection Distance" p.87 • "Supported Monitor Display Resolutions" p.89 • "Projector Specifications" p.90 •... -
Page 86: Optional Accessories And Replacement Parts
Use when connecting the projector to the installation mount to prevent the projector from falling down. Special expertise is required to suspend the projector from a ceiling. Contact Epson for help. g g Related Links • "Installing the Projector on VESA Compliant Mounting Hardware or a Tripod"... -
Page 87: Screen Size And Projection Distance
Screen Size and Projection Distance Check the table here to determine how far to place the projector from the 16:9 screen size screen based on the size of the projected image. 80" 177 × 100 90" 199 × 112 100" 221 ×... - Page 88 Screen Size and Projection Distance 4:3 screen size 100" 203 × 152 120" 244 × 183...
-
Page 89: Supported Monitor Display Resolutions
Supported Monitor Display Resolutions The table here lists the compatible refresh rate and resolution for each compatible video display format. HDMI Port Input Signals Signal Refresh rate (Hz) Resolution Color space (dots) 640 × 480 RGB* SDTV 59.94 720 × 480 4:2:2/4:4:4/RGB (480i/480p) SDTV... -
Page 90: Projector Specifications
Projector Specifications This product is also designed for IT power distribution system with phase-to- Product name EF-12 phase voltage 230V. Dimensions 175 (W) × 128 (H) × 175 (D) mm (not including raised section) g g Related Links • "AC Adapter Specifications"... -
Page 91: External Dimensions
External Dimensions Distance from center of lens to suspension bracket fixing point Center of lens The unit in these illustrations is mm. -
Page 92: List Of Safety Symbols And Instructions
List of Safety Symbols and Instructions The following table lists the meaning of the safety symbols labeled on the No. Symbol mark Approved Description equipment. standards — The same as No. 8. No. Symbol mark Approved Description standards IEC60417 Battery, general IEC60417 "ON"... - Page 93 List of Safety Symbols and Instructions No. Symbol mark Approved Description No. Symbol mark Approved Description standards standards IEC60417 Class II equipment IEC60417 Caution (Sharp Corners) No. 5172 To identify equipment meeting the No. 6043 To indicate sharp corners that should safety requirements specified for Class not be touched.
-
Page 94: Laser Safety Information
Laser Safety Information This projector is a Class 1 laser product that complies with the IEC/EN60825- Inside 1:2014 international standard for lasers. Follow these safety instructions when using the projector. Warning • Do not open the projector's case. The projector contains a high-powered laser. •... - Page 95 Laser Safety Information Side As with any bright source, do not stare into the beam, RG2 IEC/EN 62471- 5:2015. For North/South America This projector is a Class 1 laser product that complies with the IEC/EN60825- 1:2014 international standard for lasers. Follow these safety instructions when using the projector.
-
Page 96: Glossary
Glossary This section briefly explains the difficult terms that are not explained in the Refresh Rate The light-emitting element of a display maintains the same text of this guide. For details, refer to other commercially available luminosity and color for an extremely short time. publications. -
Page 97: Notices
According to 47CFR, Part 2 and 15 • "Copyright Attribution" p.99 Class B external switching power supplies FCC Compliance Statement We: Epson America, Inc. Located at: 3131 Katella Avenue, Los Alamitos, CA Tel: 562-981-3840 Supplier's DECLARATION of CONFORMITY According to 47CFR, Part 2 and 15 Declare under sole responsibility that the product identified herein, complies Class B Personal Computers and Peripherals;... -
Page 98: Indication Of The Manufacturer And The Importer In Accordance With Requirements Of Eu Directive
Changes or modifications not expressly approved by the manufacturer could void the user's authority to operate the equipment. Trademarks EPSON is a registered trademark, EXCEED YOUR VISION and its logos are Indication of the manufacturer and the importer in registered trademarks or trademarks of Seiko Epson Corporation. -
Page 99: Copyright Notice
® word mark and logos are registered trademarks owned by 2020.12 414042801EN Bluetooth SIG, Inc. and any use of such marks by Seiko Epson Corporation is under license. Other trademarks and trade names are those of their respective owners. Adobe and Adobe Reader are either registered trademarks or trademarks of Adobe Systems Incorporated in the United States and/or other countries.
Need help?
Do you have a question about the EF-12 and is the answer not in the manual?
Questions and answers