
Related Manuals for Horus VERSUS


Summary of Contents for Horus VERSUS
- Page 1 STUFA A PELLET VERSUS COCOON MANUALE DI INSTALLAZIONE USO E MANUTENZIONE MOD. VERSUS-COCOON (IT)
-
Page 2: Table Of Contents
Manuale di installazione uso e manutenzione INFORMAZIONI GENERALI ................... 5 SIMBOLOGIA UTILIZZATA ..................... 5 SCOPO E CONTENUTO DEL MANUALE ................5 DESTINAZIONE D’USO ....................5 GENERALITA’ ....................... 5 NORMATIVE DI RIFERIMENTO ..................5 GARANZIA ........................6 RESPONSABILITA’ DEL COSTRUTTORE ................6 CONSEGNA E CONTROLLO DELLA STUFA .............. - Page 3 Manuale di installazione uso e manutenzione MENU 02 – SET OROLOGIO ..................17 MENU 03 – SET CRONO ....................18 SOTTOMENU 04-01 ABILITA CRONO ................18 SOTTOMENU 04-02 PROGRAMMAZIONE GIORNALIERA ..........18 SOTTOMENU 04-03 PROGRAMMAZIONE SETTIMANALE ..........19 SOTTOMENU 04-04 PROGRAMMAZIONE WEEK-END ..........21 MENU 04 SCEGLI LINGUA ...................
- Page 4 Manuale di installazione uso e manutenzione MANUTENZIONI A CURA DEL CAT (Centro Assistenza Autorizzato)……………...……………24 OPERAZIONI DA ESEGUIRE AD OGNI STAGIONE PRIMA DELL’ACCENSIONE A CURA DEL CAT…………………………………………………………………………………………………………………………………………..24 PER L’INSTALLATORE ....................24 CONDIZIONI DI GARANZIA E RICHIESTA INTERVENTO..........26 CERTIFICATO DI GARANZIA………………………………………………………………………………………..26...
-
Page 5: Informazioni Generali
Manuale di installazione uso e manutenzione 1. INFORMAZIONI GENERALI Il presente manuale è indirizzato ai proprietari, installatori, utilizzatori e manutentori delle stufe serie Versus ed è parte integrante del prodotto. Si specifica che le apparecchiature sono costruite e collaudate seguendo le prescrizioni di sicurezza indicate nelle direttive europee di riferimento. -
Page 6: Garanzia
Manuale di installazione uso e manutenzione 7. GARANZIA La stufa ed i particolari meccanici ed elettronici che dovessero risultare difettosi all’origine sono coperti da garanzia per la durata di 2 (due) anni. Durante il periodo di garanzia ogni operazione di smontaggio o sostituzione di particolari deve essere effettuata dal Centro Assistenza Autorizzato (CAT), pena la decadenza della garanzia. -
Page 7: Descrizione Della Stufa
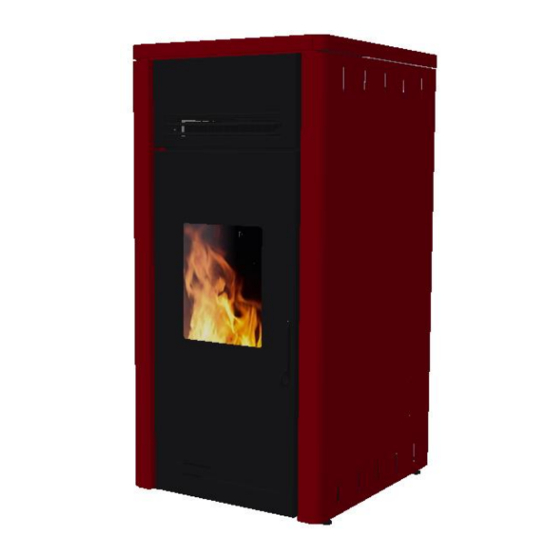
Manuale di installazione uso e manutenzione 13. DESCRIZIONE DELLA STUFA La stufa a pellet è stata costruita con materiali studiati e dimensionati per lo specifico utilizzo. Le parti principali ed i comandi della stufa sono evidenziati nella figura 1a e nella tabella 1a. TAB. -
Page 8: Caratteristiche Tecniche
Manuale di installazione uso e manutenzione 14. CARATTERISTICHE TECNICHE MODELLO Versus - Cocoon Potenza nominale min/Max 3.4 -11.5 Consumi min/max Kg/h 0.8/2.7 Capienza serbatoio Diametro uscita fumi Tensione/Frequenza V/Hz 230 / 50 Potenza media assorbita in fase di funzionamento Temperatura fumi min/Max C°... -
Page 9: Che Cosa E' Richiesto Per L'installazione Della Stufa
Posizionare la canna fumaria tenendo conto della posizione del foro di uscita fumi della stufa, disponibile sia posteriormente che sul laterale destro. Attenzione chiudere l’uscita post. con l’apposito tappo se utilizza questa uscita MISURE PER COLLEGAMENTO TUBI SCARICO FUMI E TUBI ARIA CANALIZZATA. FIG.4 FIG 4 Mod. VERSUS... -
Page 10: Avvertenze Di Sicurezza Per L'allacciamento/Attivazione Della Stufa
Manuale di installazione uso e manutenzione MOD. COCOON AVVERTENZE DI SICUREZZA PER L’ALLACCIAMENTO/ATTIVAZIONE DELLA STUFA Il collegamento elettrico della stufa alla rete elettrica viene effettuato tramite un cavo a norma in dotazione; l’installatore è responsabile del corretto collegamento elettrico, il quale deve avvenire conformemente alle norme di sicurezza. Si raccomanda di: verificare che la presa sia in grado di sopportare il carico massimo di potenza della stufa indicato nella targhetta Figura 1), presente nell’apparecchio;... -
Page 11: Collegamento Ad Un Condotto Con Tubo Isolato O Doppia Parete
Manuale di installazione uso e manutenzione In alternativa si consiglia l’impiego di tubo industriale coibentato che può essere usato anche all’esterno per evitare la condensa. ATTENZIONE È necessario utilizzare sempre tubi e raccordi con adeguate guarnizioni che garantiscano l’ermeticità. Tutti i tratti del condotto fumario devono essere ispezionabili e removibili per rendere possibile la periodica pulizia interna. -
Page 12: Collegamento A Canna Fumaria
Manuale di installazione uso e manutenzione 24. COLLEGAMENTO A CANNA FUMARIA (Figura 9) La canna fumaria deve avere dimensioni interne non superiori a cm 20 x 20 o diametro non superiore a 20 cm; nel caso di dimensioni superiori o cattive condizioni della canna fumaria (es. crepe, scarso isolamento, ecc.) è consigliato inserire nella canna fumaria un tubo in acciaio inox del diametro adeguato per tutta la lunghezza, fino alla cima. -
Page 13: Accensione
Manuale di installazione uso e manutenzione 29. ACCENSIONE Prima di accendere la macchina, è necessario verificare le seguenti parti: Controllare che il serbatoio pellet sia pieno. Estrarre, ripulire e controllare il batti fiamma in vermiculite, il braciere, il cassetto cenere (Fig. 17), riposizionando le parti avendo cura di inserirle nelle dovute posizioni. -
Page 14: Manutenzione Ordinaria
Manuale di installazione uso e manutenzione FIG18 30. MANUTENZIONE ORDINARIA Importante: è necessario pulire il braciere ad ogni riaccensione (Pos. F), pulire il cassetto cenere ogni 2-3 giorni (Pos. I), il batti fiamma in vermiculite (Pos. L) ed il sup. braciere (Pos. H). Si consiglia una volta al mese di smontare il parafiamma (Pos. M) e il tappo ispezione fumi (Pos.M1) ripulendo con aspirapolvere adeguato. -
Page 15: Console
Manuale di installazione uso e manutenzione 31. CONSOLLE La console visualizza le informazioni sullo stato di funzionamento della stufa. Accedendo al menù è possibile ottenere vari tipi di visualizzazione ed effettuare le impostazioni disponibili a seconda del livello di accesso. Dipendendo dalla modalità operativa, le visualizzazioni possono assumere differenti significati a seconda della posizione sul display. -
Page 16: Il Menu
Manuale di installazione uso e manutenzione 33. IL MENU Premendo sul tasto P3 (MENU) si accede al menù che è suddiviso in varie voci e livelli che permettono di accedere alle impostazioni e alla programmazione della scheda. Le voci di menù che consentono di accedere alla programmazione tecnica sono protette da chiave. -
Page 17: Menu 01 - Regola Ventole
Manuale di installazione uso e manutenzione 25- giovedì prog 3 On/off 26- venerdì prog 3 On/off 27- sabato prog 3 On/off 28- domenica prog 3 On/off 29- start prog 2 30- stop prog 2 31- lunedì prog 2 On/off 32- martedì prog 2 On/off 33- mercoledì... -
Page 18: Menu 03 - Set Crono
Manuale di installazione uso e manutenzione Fig. A Premere P3 Premere P3 Premere P3 Premere P3 1 volta per entrare 01 giorno set. 02 ore 03 minuti nel menu orologio P1 + P2 - P1 + P2 - P1 + P2 - Premere P3 Premere P3 Premere P3... -
Page 19: Sottomenu 04-03 Programmazione Settimanale
Manuale di installazione uso e manutenzione Selezione Significato Valori possibili START 1 Ora di attivazione Ora-ON STOP 1 Ora di disattivazione Ora-OFF START 2 Ora di attivazione Ora-ON STOP 2 Ora di disattivazione Ora-OFF 40. SOTTOMENU 04-03 PROGRAMMAZIONE SETTIMANALE Permette di abilitare, disabilitare e impostare le funzioni di cronotermostato settimanale. Il programmatore settimanale dispone di 4 programmi indipendenti il cui effetto finale è... - Page 20 Manuale di installazione uso e manutenzione Programma 2 Livello menu Selezione Significato Valori possibili 03-03-11 Start Prog 2 Ora di attivazione Ora-OFF 03-03-12 Stop prog 2 Ora di disattivazione Ora-OFF 03-03-13 Lunedì prog 2 On/off 03-03-14 Martedì prog 2 On/off 03-03-15 Mercoledì...
-
Page 21: Sottomenu 04-04 Programmazione Week-End
Manuale di installazione uso e manutenzione 41. SOTTOMENU 04-04 PROGRAMMAZIONE WEEK-END Permette di abilitare, disabilitare e impostare le funzioni di cronotermostato nel week-end (giorni 6 e 7, ovvero sabato e domenica). Il programmatore week end può essere attivato e disattivato come rappresentato nel grafico Fig. E. Fig. -
Page 22: Stufa In Lavoro
Manuale di installazione uso e manutenzione 51. STUFA IN LAVORO Conclusa in modo positivo la fase di avvio, la stufa passa alla modalità lavoro che rappresenta il normale modo di funzionamento. Se la temperatura fumi è maggiore di Pr15 sono abilitati gli scambiatori. 52. -
Page 23: Allarmi
Manuale di installazione uso e manutenzione ALLARMI Nell’eventualità che si verifichi un’anomalia di funzionamento, la scheda interviene e segnala l’avvenuta irregolarità operando in diverse modalità a seconda della tipologia di allarme. Sono previsti i seguenti allarmi: Origine dell’allarme Visualizzazione display Sonda temperatura fumi 01 ALARM SONDA FUMI Sovratemperatura fumi... - Page 24 Manuale di installazione uso e manutenzione ATTENZIONE Disattivare l’interruttore posteriore spostandolo su “0” (Figura 3°-3b, Posizione P) Togliere la spina dalla presa di corrente. ATTENZIONE Non scollegare l’apparecchio dalla presa di corrente o disattivare l’interruttore posteriore spostandolo su “0” durante il funzionamento della stufa. Questa manovra manda in blocco tutti i motori dell’apparecchio ed ostacola l’evacuazione dei fumi presenti all’interno della stufa.
- Page 25 Manuale di installazione uso e manutenzione La garanzia ha validità se: l’acquirente è in possesso dello scontrino fiscale d’acquisto o altro documento fiscale che comprovi l’avvenuto acquisto. Tale documento è condizione inderogabile per ottenere l’intervento in garanzia e va esibito al tecnico autorizzato (CAT) prima dell’intervento, pena il decadimento della suddetta.
- Page 26 Manuale di installazione uso e manutenzione 76. CERTIFICATO DI GARANZIA FONTANA FORNI SRL. MODELLO MATRICOLA DATI DEL RIVENDITORE: …………………………………………………………………………………………………. Timbro DATI D’ ACQUISTO ………………………………………………………………………………………………… ACQUIRENTE Nome ..........................Via:........................... E mail Città …................Cap.......... ………………………………… Nazione..........E mail............... Tel: ............Cell............. Firma ………………………………….
- Page 27 Manuale di installazione uso e manutenzione INFORMAZIONI AGLI UTENTI Ai sensi del decreto legislativo 49/2014” Attuazione delle Direttive 2002/95/CE,2002/96/CE e 2003/108/CE, relative alla riduzione dell’uso di sostanze pericolose nelle apparecchiature elettriche ed elettroniche, nonché allo smaltimento dei rifiuti”. Il simbolo del cassonetto barrato riportato sull’apparecchiatura o sulla confezione indica che il prodotto alla fine della propria vita utile deve essere smaltito in modo idoneo.
- Page 28 Manuale di installazione uso e manutenzione NOTE ____________________________________________________________________ ____________________________________________________________________ ____________________________________________________________________ ____________________________________________________________________ ____________________________________________________________________ ____________________________________________________________________ ____________________________________________________________________ ____________________________________________________________________ ____________________________________________________________________ ____________________________________________________________________ ____________________________________________________________________ ____________________________________________________________________ ____________________________________________________________________ ____________________________________________________________________ ____________________________________________________________________ ____________________________________________________________________ ____________________________________________________________________ ____________________________________________________________________ ____________________________________________________________________ ____________________________________________________________________ ____________________________________________________________________ ____________________________________________________________________ ____________________________________________________________________ ____________________________________________________________________ ____________________________________________________________________ ____________________________________________________________________ ____________________________________________________________________ ____________________________________________________________________ ____________________________________________________________________ ____________________________________________________________________ ____________________________________________________________________ ____________________________________________________________________ ____________________________________________________________________ ____________________________________________________________________ ____________________________________________________________________ ____________________________________________________________________...
- Page 29 Manuale di installazione uso e manutenzione FONTANA FORNI SRL Via G. Di Vittorio, 6 61047 San Lorenzo in Campo (PU) Italy Tel. +39.0721.776697 - Fax +39.0721.735370...
- Page 30 Manuale di installazione uso e manutenzione PELLET STOVE VERSUS COCOON OPERATING, INSTALLATION AND MAINTENANCE MANUAL MOD. VERSUS - COCOON (EN)
- Page 31 Manuale di installazione uso e manutenzione GENERAL NOTICE ....................... 33 SYMBOLS ........................33 PURPOSE AND CONTENTS OF THIS MANUAL .............. 33 INTENDED USE ......................33 GENERAL INFORMATION ................... 33 SAFETY STANDARDS ....................33 WARRANTY ....................... 33 MANUFACTURER'S LIABILITY ..................34 DELIVERY AND CHECK OF THE STOVE .................
- Page 32 Manuale di installazione uso e manutenzione SUB MENU 04-02 DAILY PROGRAMMING ..............45 SUB MENU 04-03 WEEKLY PROGRAMMING ............... 46 SUB MENU 04-04 WEEK-END PROGRAMMING ............47 MENU 04 CHOOSE LANGUAGE ................... 48 MENU 05 STAND-BY MODE ..................48 MENU 06 BUZZER MODE....................
-
Page 33: General Notice
GENERAL NOTICE This manual is intended for owners, installers, users and maintenance personnel of the VERSUS series stoves and is an integral part of the product. FONTANA FORNI SRL heating appliances are built and tested in accordance with the safety requirements specified by the European directives. -
Page 34: Manufacturer's Liability
Manuale di installazione uso e manutenzione MANUFACTURER'S LIABILITY By providing this manual, FONTANA FORNI SRL, declined all liability, both civil and criminal, direct or indirect, deriving from: 1. Non compliant installation 2. Partial or total failure to follow the instructions provided in this manual 3. -
Page 35: Technical Information
Manuale di installazione uso e manutenzione FIG.1a TECHNICAL INFORMATION MODELS Versus-Cocoon Rated power min/Max 3.4 -11.5 Consumption min/max Kg/h 0.8/2.7 Pellet tank capacity Fume exhaustion outlet diameter Voltage/Frequency V/Hz 230 / 50 Average power cosumption when in use Fume temperature min/Max C°... -
Page 36: Visual Match Of The Stove
Manuale di installazione uso e manutenzione We strongly recommend to use for our stoves certified fuel (Enplus, DINplus, O-NORM M7135). The use of improper pellet may compromise the functioning of the stove and bring to the invalidity of the guarantee. VISUAL MATCH OF THE STOVE The technician must visually and manually match the stove parts portrayed in figure 2 and in table 2 with the product description. -
Page 37: Measures For Rear Fume Exhaustion Pipe Connection
- Connect the flue checking that the fume exhaustion outlet, on the back or on the right side of the stove, is positioned correctly. MEASURES FOR REAR FUME EXHAUSTION PIPE CONNECTION Mod. Versus Mod. Cocoon CONNECT/OPERATE THE STOVE The stove is connected to the power supply system through a cable provided by the manufacturer. The technician is responsible for its correct and safe connection to the power system. -
Page 38: External Air Intake And Connection To The Flue
Manuale di installazione uso e manutenzione FONTANA FORNI SRL declines any responsibility for damages caused by the failure to meet the above mentioned EXTERNAL AIR INTAKE AND CONNECTION TO THE FLUE Any connection between the stove and the flue must be protected for your children's safety. For your own safety and comfort, please make sure that the room has a suitable air scoop (UNI10683). -
Page 39: Connection To The Flue
Manuale di installazione uso e manutenzione CONNECTION TO THE FLUE For the best possible stove functioning, the connection to the flue exhaustion pipe or system must have a positive gradient of no less than 3% in horizontal pipes. The overall length shall not be more than 2 m whereas, in vertical pipes, between a “T” fitting and other fittings (change of directions) there must be a distance of minimum 1.5 m and maximum 3 m By using adequate tools, check that there is a flue draught of at least 12 PA. -
Page 40: Fuel Charge
Manuale di installazione uso e manutenzione FUEL CHARGE When loading the fuel, make sure the bag containing the pellets doesn't touch the stove. The fuel has to be loaded in the tank, in the stove upper area. To load the fuel open up the fuel tank lid, wearing adequate protection gloves to avoid burning your skin when touching the hot parts in the device. -
Page 41: Routine Maintenance
Manuale di installazione uso e manutenzione Check that the back switch is on "I". ROUTINE MAINTENANCE clean the brazier every time you switch the stove on (Position F), once every 2-3 days have the ash pan (Position I), the vermiculite flame retardant plate (Position L) and the brazier support cleaned (Position H). -
Page 42: Control Panel
Manuale di installazione uso e manutenzione CONTROL PANEL The control panel displays information on the stove functioning. Through the menu the user can choose the desired display mode and obtain available information depending on the different working stages of the stove. On the basis of the operating mode, messages can take a different meaning according to the position they have on the display.The figure describes the different status indicators on the left side of the display. - Page 43 Manuale di installazione uso e manutenzione...
-
Page 44: Menu 01 - Set Fans
Manuale di installazione uso e manutenzione MENU 01 - SET FANS It allows you to independently set the two additional fans. Two options are available for each fan. Use P1 and P2 to select the desired option. MENU 02 – SET TIME AND DATE Set the current time and date. -
Page 45: Menu 03 - Set Chrono Sub Menu 04-01 Enable Chrono
Manuale di installazione uso e manutenzione MENU 03 - SET CHRONO SUB MENU 04-01 ENABLE CHRONO It allows you to globally enable and disable all chrono-thermostat functions. To set the chrono follow the instructions in the graphic (Figure B), the operation doesn't delete previous settings (Daily - weekly - week-end programming) SUB MENU 04-02 DAILY PROGRAMMING Allows you to enable, disable and set daily chrono-thermostat functions. - Page 46 Manuale di installazione uso e manutenzione SUB MENU 04-03 WEEKLY PROGRAMMING Allows you to enable, disable and set weekly chrono-thermostat functions.The weekly programming has 4 independent programs, whose final result is the combination of the 4 single programming options. The weekly programming can be enabled and disabled as shown in the graphic.
- Page 47 Manuale di installazione uso e manutenzione SUB MENU 04-04 WEEK-END PROGRAMMING Allows you to enable, disable and set chrono-thermostat functions during the week-end (days 6 and 7, i.e. Saturday and Sunday). The week-end programming can be enabled and disabled as shown in the graphic. NOTE: In order to avoid unwanted start-ups or shut-downs of the stove, enable one programming option at a time.
- Page 48 Manuale di installazione uso e manutenzione MENU 04 CHOOSE LANGUAGE Allows you to choose the language you prefer among the available ones. MENU 05 STAND-BY MODE Activate the STAND-BY mode which shuts down the stove when the room temperature is above the temperature SET for a period of time longer than the one defined by Pr44.
- Page 49 Manuale di installazione uso e manutenzione SWITCHING THE STOVE OFF Simply press P4 key for 2 seconds to shut the stove down. The auger is immediately blocked and the fume exhaustion system is brought to a high speed working mode. A FINAL CLEANING phase is thus carried out. The fume exhaustion stops after a time set by Pr39, after the fume temperature drops below the value determined by Pr13.
- Page 50 Manuale di installazione uso e manutenzione TROUBLESHOOTING Problem Cause Solution The stove does not Power disconnected\switch off Connect the power cable and/or turn on the ignite switch Protective fuse tripped Check the fuse located in the switch It is inside the control board The stove loads Igniter not working Replace the igniter...
- Page 51 Manuale di installazione uso e manutenzione Contact technical assistance The stove shows No pellets in the tank Refill the fuel tank "Ignition fail" Too much ash residue in the brazier Empty and clean the brazier, clean any clogged air holes, check the condition of the brazier Igniter malfunctioning Check the terminals, electrical operation, and replace if not working...
- Page 52 Manuale di installazione uso e manutenzione WARNING Before any type of maintenance, replacing, repairing, cleaning, etc. make sure your stove has no connection whatsoever to energy power supplies (disconnect the power supply cable from its socket) Wear appropriate safety devices (e.g. anti-perforation gloves) when carrying out maintenance operations. Carry out maintenance when the stove is shut down and completely cooled off.
- Page 53 Manuale di installazione uso e manutenzione WARRANTY CERTIFICATE FONTANA FORNI SRL IMPORTANT: In order for your warranty to be valid you must fill in the present form and send it by mail to FONTANA FORNI SRL, within 8 days from the purchase date. N.B The form is either registered or sent back to the purchaser.
- Page 54 Manuale di installazione uso e manutenzione NOTE ____________________________________________________________________ ____________________________________________________________________ ____________________________________________________________________ ____________________________________________________________________ ____________________________________________________________________ ____________________________________________________________________ ____________________________________________________________________ ____________________________________________________________________ ____________________________________________________________________ ____________________________________________________________________ ____________________________________________________________________ ____________________________________________________________________ ____________________________________________________________________ ____________________________________________________________________ ____________________________________________________________________ ____________________________________________________________________ ____________________________________________________________________ ____________________________________________________________________ ____________________________________________________________________ ____________________________________________________________________ ____________________________________________________________________ ____________________________________________________________________ ____________________________________________________________________ ____________________________________________________________________ ____________________________________________________________________ ____________________________________________________________________ ____________________________________________________________________ ____________________________________________________________________ ____________________________________________________________________ ____________________________________________________________________ ____________________________________________________________________ ____________________________________________________________________ ____________________________________________________________________ ____________________________________________________________________ ____________________________________________________________________ ____________________________________________________________________...
- Page 55 Manuale di installazione uso e manutenzione FONTANA FORNI SRL Via G. Di Vittorio, 6 61047 San Lorenzo in Campo (PU) Italy Tel. +39.0721.776697 - Fax +39.0721.735370...
- Page 56 Manuale di installazione uso e manutenzione POÊLE À GRANULÉS VERSUS COCOON GUIDE D'INSTALLATION, D'UTILISATION ET D'ENTRETIEN MOD. VERSUS-COCOON (FR)
- Page 57 Manuale di installazione uso e manutenzione INFORMATIONS GÉNÉRALES ........................59 SYMBOLES UTILISÉS ..........................59 BUT ET CONTENU DU MANUEL ........................ 59 UTILISATIONS ............................59 DONNÉES GÉNÉRALES ..........................59 NORMES DE RÉFÉRENCE ........................... 59 GARANTIE ..............................60 RESPONSABILITÉ DU CONSTRUCTEUR ...................... 60 SÉCURITÉ...
- Page 58 Manuale di installazione uso e manutenzione 39. MENU 05 MODE STAND-BY ........................73 40. MENU 06 MODE AVERTISSEUR SONORE ....................73 41. MENU 07 CHARGEMENT INITIAL ......................73 42. MENU 08 ÉTAT POÊLE ..........................73 43. MODALITÉ OPÉRATIONNELLE ........................73 44.
-
Page 59: Informations Générales
Les dommages éventuels subis par le poêle suite à une utilisation différente de celle prévue sont exclus de la garantie. Ce manuel ne contient que le informations relatives aux modèles: POÊLE À GRANULÉ VERSUS- COCOON SYMBOLES UTILISÉS... -
Page 60: Garantie
Manuale di installazione uso e manutenzione 7. GARANTIE La garantie s'applique au poêle et à ses pièces mécaniques et électroniques qui ont été reconnus défectueux à l'origine. La durée de la garantie est de deux (2) ans. Pendant la période de garantie toute opération de démontage ou de substitution de pièces doit être effectuée par le Service Après Vente agréé... -
Page 61: Descrtiption Du Poêle
Manuale di installazione uso e manutenzione DESCRTIPTION DU POÊLE Le poêle à granulés à été construite avec des matériaux étudiés et adaptés à cette utilisation spécifique. Le parties principales et les commandes du poêle sont mis en évidence dans la figure 1 et dans le tableau 1. TAB. -
Page 62: Caractéristiques Techniques
Manuale di installazione uso e manutenzione CARACTÉRISTIQUES TECHNIQUES MODÈLE POÊLE VERSUS-COCOON Puissance nominale min/Max 3.4 -11.5 Consommation min/max Kg/h 0.8/2.7 Capacité réservoir Diamètre évacuation des fumées Tension/Fréquence V/Hz 230 / 50 Puissance moyenne absorbée en phase de fonctionnement Température des fumées min/max C°... -
Page 63: Installation
Manuale di installazione uso e manutenzione INSTALLATION Seul le personnel qualifié et agrée doit, dans le respect total des réglementations en vigueur et des instruction d'assemblage, effectuer la mise en service, le branchement et la vérification du correct fonctionnement du poêle. FONTANA FORNI S.R.L., en cas d'une mise en service non conforme celle qui a été... -
Page 64: Consignes De Sécurité Pour Le Branchement/Mise En Service Du Poêle
Manuale di installazione uso e manutenzione MESURES POUR BRANCHEMENT TUYAU ÉVACUATION FUMÉES POSTÉRIEURE SUPERIEURE FIG.4 FIG 4 Mod.Versus Mod. Cocoon CONSIGNES DE SÉCURITÉ POUR LE BRANCHEMENT/MISE EN SERVICE DU POÊLE Le branchement électrique du poêle au réseau électrique est effectué par un câble à norme en dotation ; l'installateur est responsable du branchement électrique qui doit être effectué... -
Page 65: Prise D'air Extérieure Et Branchement Au Conduit De Fumée
Manuale di installazione uso e manutenzione PRISE D'AIR EXTÉRIEURE ET BRANCHEMENT AU CONDUIT DE FUMÉE Toutes les typologies d'installation et configuration des branchements entre le poêle et le conduit de fumée doivent prévoir des mesures de sécurité pour la protection des enfants. Pour assurer la sûreté et des bonne conditions de vie dans les pièces où le poêle est installé... -
Page 66: Raccordement Au Conduit De Fumée (Figure 8)
Manuale di installazione uso e manutenzione 20. RACCORDEMENT AU CONDUIT DE FUMÉE (Figure 8) Pour avoir un bon fonctionnement, le raccordement entre le poêle et le tuyau de cheminée ne doit pas être inférieur à 3% d'inclination dans les tronçons horizontaux. La longueur totale ne doit pas dépasser 2 m et le tronçon vertical d'un raccordement en "T"... -
Page 67: Allumage
Manuale di installazione uso e manutenzione R = 1000mm ALLUMAGE Avant d'allumer l'appareil, il est nécessaire de vérifier les parties suivantes: Contrôler que le réservoir à granulés ait été rempli.. Extraire, nettoyer et contrôler le déflecteur feu en vermiculite, le creuset, le tiroir cendres, en faisant attention à replacer les parties dans les positions correctes. -
Page 68: Entretien Ordinaire
Manuale di installazione uso e manutenzione ENTRETIEN ORDINAIRE IMPORTANT : avant chaque allumage il est nécessaire de nettoyer le creuset (Pos. F), tous les 2-3 jours nettoyez le tiroir cendres (Pos.I) et le porte-creuset (Pos. L). Il est conseillé de démonter le pare flamme aussi une fois par mois (Pos. M) et le bouchon d'inspection des fumées (Pos. -
Page 69: Tableau De Commande
Manuale di installazione uso e manutenzione TABLEAU DE COMMANDE Le tableau de commande affiche les informations sur l'état de fonctionnement du poêle. En accédant au menu il est possible d'obtenir des types différant d'affichages et d'effectuer les sélections disponibles selon le niveau d'accès. Selon la modalité opérationnelle, les affichages peuvent avoir des significations différentes dépendant de leur position sur l'écran.La figure décrit la signification des voyants d'état sur la partie gauche de l'écran. -
Page 70: Menu 03 - Set Chrono Sous
Manuale di installazione uso e manutenzione Fig. A Appuyer sur P3 Appuyer sur P3 Appuyer sur P3 Appuyer sur P3 1 fois pour entrer 01 jour sem. 02 heures 03 minutes dans le menu de P1+ P2- P1+ P2- P1+ P2- l'horloge Appuyer P4 Appuyer sur P3... -
Page 71: Sous-Menu 04-03 Programmation Hebdomadaire
Manuale di installazione uso e manutenzione SOUS-MENU 04-03 PROGRAMMATION HEBDOMADAIRE Cela permet d'activer, désactiver et introduire les fonctions de chrono thermostat hebdomadaire. Le programmateur hebdomadaire dispose de 4 programmes indépendants dont l'effet final est composé par la combinaison des 4 différentes programmations. - Page 72 Manuale di installazione uso e manutenzione...
-
Page 73: Sous-Menu 04-04 Programmation Weekend
Manuale di installazione uso e manutenzione SOUS-MENU 04-04 PROGRAMMATION WEEKEND Cela permet d'activer, désactiver et introduire les fonctions de chrono thermostat au week end (jours 6 et 7 c'est-à-dire samedi et dimanche). Le programmateur Week end peut être activé ou désactivé comme indiqué dans le graphique Fig. E. Fig. -
Page 74: Phase De Démarrage
Manuale di installazione uso e manutenzione PHASE DE DÉMARRAGE Le poêle exécute les phases de démarrage en séquence selon les modalités définies par les paramètres qui en gèrent les niveau du timing. DÉFAUT D'ALLUMAGE Une fois le temps Pr01 passé l'état d'alerte est activé, si la température des fumées n'atteint pas la température de 50°C. POÊLE EN FONCTION Une fois conclue la phase de démarrage, le poêle passe à... -
Page 75: Alarmes
Manuale di installazione uso e manutenzione ALARMES TOUTE SITUATION D'ALERTE CAUSE L'IMMÉDIATE EXTINCTION DU POÊLE. L'état d'alerte est atteint après le temps Pr11 et il peut être annulé en appuyant sur la touche P4. ALERTE SONDE TEMPÉRATURE FUMÉES Cela se produit en cas de panne de la sonde pour la détection des fumées lorsque cette-ci est en panne ou déconnectée. Pendant l'état d'alerte le poêle effectue la procédure d'extinction. - Page 76 Manuale di installazione uso e manutenzione Le poêle charge le Bougie d'allumage défectueuse Remplacer la bougie pellet mais il n'y a pas de flamme Brasier bouché par des résidus Vider le brasier et nettoyer le support du Combustion brasier et la chambre de combustion Remettre le brasier en place Brasier inséré...
-
Page 77: Instructions Fondamentales
Manuale di installazione uso e manutenzione Le poêle signale « Absence pellet à l'intérieur du Remplir le réservoir de combustible Surtempérature réservoir fumées » Trop de résidus de cendre Vider et nettoyer le brasier, nettoyer les dans le brasier éventuels trous de passage de l'air bouchés, contrôler les bonnes conditions du brasier Bougie d’allumage défectueuse Contrôler le serrage des bornes, contrôler le... -
Page 78: Entretien Par Le Sav (Service Après-Vente Autorisé)
Manuale di installazione uso e manutenzione 68. ENTRETIEN PAR LE SAV (SERVICE APRÈS-VENTE AUTORISÉ) ATTENTION L'entretien extraordinaire doit être effectuée en se servant du service d'un technicien spécialisé et agré (SAV) ATTENTION Avant tout type d'intervention d'entretien, substitution, réparation, nettoyage, etc. il est impératif d'isoler le poêle des sources d'électricité... -
Page 79: Certificat De Garantie Fontana Forni Srl
Manuale di installazione uso e manutenzione 72. CERTIFICAT DE GARANTIE FONTANA FORNI SRL MODÈLE MATRICULE DONNÉES DU REVENDEUR : ........................... Cachet de la Firme DONNÉES D'ACHAT ............................ ACHETEUR Ville ………………………………………………….. CP ........e-mail Nation…………......E-mail Signature TEL........... Mobile ............ IMPORTANT: Pour que cette garantie soit valable il faut remplir cette fiche et l'envoyer à... - Page 80 Manuale di installazione uso e manutenzione NOTE ___________________________________________________________ ___________________________________________________________ ___________________________________________________________ ___________________________________________________________ ___________________________________________________________ ___________________________________________________________ ___________________________________________________________ ___________________________________________________________ ___________________________________________________________ ___________________________________________________________ ___________________________________________________________ ___________________________________________________________ ___________________________________________________________ ___________________________________________________________ ___________________________________________________________ ___________________________________________________________ ___________________________________________________________ ___________________________________________________________ ___________________________________________________________ ___________________________________________________________ ___________________________________________________________ ___________________________________________________________ ___________________________________________________________ ___________________________________________________________ ___________________________________________________________ ___________________________________________________________ ___________________________________________________________ ___________________________________________________________ ___________________________________________________________ ___________________________________________________________ ___________________________________________________________ ___________________________________________________________...
- Page 81 Manuale di installazione uso e manutenzione...
- Page 82 Manuale di installazione uso e manutenzione ..00000 PELLETKACHEL VERSUS-COCOON INSTALLATIE-, GEBRUIKS- EN ONDERHOUDSHANDLEIDING (NL) MOD. VERSUS-COCOON (NE)
- Page 83 Manuale di installazione uso e manutenzione Sommario ALGEMENE INFORMATIE .................................85 GEBRUIKTE SYMBOLEN ................................85 DOEL EN INHOUD VAN DEZE HANDLEIDING ...........................85 BEDOELD GEBRUIK ..................................85 ALGEMEEN ....................................85 REFERENTIEVOORSCHRIFTEN ..............................85 GARANTIE ....................................86 VERANTWOORDELIJKHEID VAN DE FABRIKANT ........................86 LEVERING EN CONTROLE VAN DE KACHEL ..........................86 VOORSCHRIFTEN VOOR DE INSTALLATEUR ......................86...
- Page 84 Manuale di installazione uso e manutenzione MENU 05 STAND-BY MODUS ............................100 MENU 06 ZOEMER MODUS ..............................100 MENU 07 INITIËLE LADING ...............................100 MENU 08 STATUS KACHEL..............................100 MENU 09 TECHNISCHE AANPASSING ..........................100 BEDRIJFSMODUS ................................100 INSCHAKELEN VAN DE KACHEL ............................100 FASE VAN OPSTARTEN ..............................101 GEMISTE INSCHAKELING ..............................101...
-
Page 85: Algemene Informatie
Manuale di installazione uso e manutenzione 1. ALGEMENE INFORMATIE Deze handleiding is gericht aan eigenaars, installateurs, gebruikers en onderhouders van de kachels, serie VERSUS-COCOON en is een integraal onderdeel van het product. Men geeft aan dat de apparatuur vervaardigd is en getest werd in overeenstemming met de veiligheidseisen weergegeven in de Europese richtlijnen. -
Page 86: Garantie
Manuale di installazione uso e manutenzione 7. GARANTIE De kachel en de mechanische en elektronische onderdelen die bij het begin defect zouden zijn, zijn gedekt door een garantie voor een periode van 2 (twee) jaren. Gedurende de garantieperiode, moet iedere demontage of vervanging van onderdelen worden uitgevoerd door de Erkende Bijstandsdienst, op straffe van verval van de garantie. -
Page 87: Beschrijving Van De Kachel
Manuale di installazione uso e manutenzione 12. BESCHRIJVING VAN DE KACHEL De pelletkachel werd vervaardigd uit materialen die werden ontworpen voor het specifieke gebruik en met speciale afmetingen. De belangrijkste onderdelen en bedieningen van de kachel worden aangeduid in figuur 1 en tabel 1. TAB. -
Page 88: Technische Gegevens
Manuale di installazione uso e manutenzione 13. TECHNISCHE GEGEVENS KACHEL MODEL VERSUS-COCOON Nominaal vermogen min / max 3.4-11.5 Verbruik min / max Kg/h 0.8 – 2.7 Reservoirinhoud Diameter rookafvoer Spanning / Frequentie V/Hz 230/50 Gemiddeld opgenomen vermogen tijdens de werking Rookgastemperatuur min / max C°... -
Page 89: Installatie
- De kachel op de vloer plaatsen in een voordelige locatie voor het aansluiten van de luchttoevoer, van de rookgasafvoer en van de verwarmingsinstallatie. - Plaats de rookgasafvoer rekening houdend met de positie van het gat van het rookkanaal van de kachel, zowel achteraan als zijdelings rechts. Mod. Versus... -
Page 90: Waarschuwingen Betreffende Veiligheid Voor Aansluiting / Inschakeling Van De Kachel
Manuale di installazione uso e manutenzione Mod. Cocoon 19. WAARSCHUWINGEN BETREFFENDE VEILIGHEID VOOR AANSLUITING / INSCHAKELING VAN DE KACHEL De elektrische aansluiting van de kachel op het stroomnet gebeurt via een meegeleverde standaard kabel, de installateur is verantwoordelijk voor de juiste elektrische aansluiting, die in overeenstemming moet zijn met de veiligheidsnormen. Het volgende wordt aanbevolen: ... -
Page 91: Aansluiting Op Een Leiding Met Geisoleerde Buis Of Dubbele Wand
Manuale di installazione uso e manutenzione Als alternatief raden wij het gebruik van geïsoleerde industriële buizen aan, die ook aan de buitenkant kunnen worden gebruikt om condensvorming tegen te gaan LET OP Men dient steeds gebruik te maken van buizen en hulpstukken met geschikte pakkingen die een hermetische afsluiting garanderen. Alle onderdelen van het rookkanaal moeten controleerbaar en afneembaar zijn om periodieke interne reiniging mogelijk te maken. -
Page 92: Aansluiting Aan Rookgasafvoer
Manuale di installazione uso e manutenzione 22. AANSLUITING AAN ROOKGASAFVOER Voor een goede werking ervoor zorgen dat de verbinding tussen de kachel en de rookgasafvoer of afvoerpijp niet lager is dan 3% helling in de horizontale delen. De totale lengte mag niet meer dan 2 m bedragen en het verticale deel van een T-koppeling naar een andere (verandering van richting) mag niet minder zijn dan 1,5 m en niet meer dan 3 meter. -
Page 93: Minimale Afstand Van Brandbare Materiaal
Manuale di installazione uso e manutenzione 27. MINIMALE AFSTAND VAN BRANDBARE MATERIAAL Minimale afstand van brandbare wand achterin de lucht P = 250mm Minimale afstand van brandbare muur kant lucht L = 300mm Minimale afstand van de lucht ontvlambaar vloer ... -
Page 94: Routine Onderhoud
Manuale di installazione uso e manutenzione LET OP Aandacht besteden aan de mogelijke aanwezigheid van resten die nog warm zijn. De vlammenafdekking en aslade herplaatsen; Vervang de vuurpot en zorg dat de opening van grotere omvang aan de rechterzijde samenvalt met de buis van de ontstekingsweerstand ... -
Page 95: Console
Manuale di installazione uso e manutenzione 30. CONSOLLE De console geeft informatie weer betreffende de werking van de kachel. Vanaf het menu, kunt u verschillende soorten weergaven krijgen en kunnen de beschikbare instellingen worden gemaakt afhankelijk van het toegangsniveau. Afhankelijk van de operationele modi kunnen de weergaven verschillende betekenissen aannemen, afhankelijk van de positie op het display. -
Page 96: Menu 01 - Regeling Ventilatoren
Manuale di installazione uso e manutenzione 01-schakel chrono in 01-schakel chrono in ON / OFF 02-progr.dag 01 - chrono dag ON / OFF 02 - start 1 dag 03 - stop 1 dag 04 - start 2 dag 05- stop 2 dag 03-progr.wekelijks ON / OFF 01- chrono week... -
Page 97: Menu 03 - Instellen Chrono Sub-Menu 03-01 Chrono Inschakelen
Manuale di installazione uso e manutenzione MENU 03 - INSTELLEN CHRONO SUB-MENU 03-01 CHRONO INSCHAKELEN Laat toe om globaal al de functies van de chronothermostaat in- en uit te schakelen, de voortgang van de programmering is deze weergegeven in het diagram, de handeling wist de opgeslagen programmeringen niet uit (dagelijkse programmering - wekelijkse - weekend). - Page 98 Manuale di installazione uso e manutenzione...
- Page 99 Manuale di installazione uso e manutenzione...
-
Page 100: Submenu 04-04 Weekendprogrammering
Manuale di installazione uso e manutenzione 38. SUBMENU 04-04 WEEKENDPROGRAMMERING Maakt het mogelijk de functies van de chronothermostaat in het weekend in te schakelen, uit te schakelen en in te stellen (dagen 6 en 7 of zaterdag en zondag). De weekend programmeur kan in- of uitgeschakeld worden zoals aangegeven in de grafiek. SUGGESTIE: teneinde verrichtingen van ongewild in- en uitschakelen te voorkomen, één enkel programma per keer activeren. -
Page 101: Fase Van Opstarten
Manuale di installazione uso e manutenzione 47. FASE VAN OPSTARTEN De kachel voert opeenvolgend de fasen van opstarten uit, in overeenstemming met de procedures die gedefinieerd zijn door de parameters die de niveaus van timing ervan controleren. 48. GEMISTE INSCHAKELING Eens de tijd Pr01 doorlopen, wordt de status van het alarm geactiveerd, als de rookgastemperatuur de 50°... -
Page 102: Alarm Sensor Rookgastemperatuur
Manuale di installazione uso e manutenzione 59. ELKE ALARMVOORWAARDE VEROORZAAKT HET ONMIDDELLIJK UITZETTEN VAN DE KACHEL De alarmstatus wordt bereikt na de tijd PR11 en kan worden gereset met de druk op de knop P4. 60. ALARM SENSOR ROOKGASTEMPERATUUR Treedt op in geval van defect van de sensor voor het opmeten van de rookgassen als dit mislukt is of losgekoppeld. Tijdens de alarmtoestand voert de kachel de uitschakelingprocedure uit. -
Page 103: Vooraleer In Te Schakelen
Manuale di installazione uso e manutenzione LET OP Het buitengewoon onderhoud moet worden uitgevoerd met behulp van een gespecialiseerd en erkend technicus (Technische bijstandsdienst). LET OP Vóór elke vorm van onderhoud, vervanging, herstel, schoonmaak, etc.. is het essentieel om de kachel te isoleren van de energiebronnen (trek de stekker uit het stopcontact). - Page 104 Manuale di installazione uso e manutenzione FONTANA FORNI SRL wijst alle verantwoordelijkheid af voor eventuele schade die direct of indirect kan voortvloeien uit personen, voorwerpen of dieren als gevolg van het gebrekkig naleven van alle instructies in dit boekje, onjuiste installatie, sabotage van het toestel, oneigenlijk gebruik, slecht onderhoud, gebruik door ondeskundige personen, niet- FONTANA FORNI SRL naleving van wetten, richtlijnen en geldige verordeningen.
-
Page 105: Garantiecertificaat Fontana Forni Srl
Manuale di installazione uso e manutenzione 70. GARANTIECERTIFICAAT FONTANA FORNI SRL MODEL SERIENUMMER GEGEVENS DETAILHANDELAAR: …………………………………………………………………………………………………. Stempel GEGEVENS VAN AANKOOP ………………………………………………………………………………………………… KOPER Naam………………………………………………………………………………………….. Straat........................E mail Stad............Postnummer............………………………………… Land..........................E-mail................. Handtekening Tel.: ............…………………………………. GSM............ BELANGRIJK: FONTANA FORNI SRL Voor de geldigheid van de garantie, deze kaart invullen en versturen naar binnen 8 dagen vanaf de datum van aankoop. - Page 106 Manuale di installazione uso e manutenzione NOTE ____________________________________________________________ ____________________________________________________________ ____________________________________________________________ ____________________________________________________________ ____________________________________________________________ ____________________________________________________________ ____________________________________________________________ ____________________________________________________________ ____________________________________________________________ ____________________________________________________________ ____________________________________________________________ ____________________________________________________________ ____________________________________________________________ ____________________________________________________________ ____________________________________________________________ ____________________________________________________________ ____________________________________________________________ ____________________________________________________________ ____________________________________________________________ ____________________________________________________________ ____________________________________________________________ ____________________________________________________________ ____________________________________________________________ ____________________________________________________________ ____________________________________________________________ ____________________________________________________________ ____________________________________________________________ ____________________________________________________________ ____________________________________________________________ ____________________________________________________________ ____________________________________________________________ ____________________________________________________________ ____________________________________________________________ ____________________________________________________________...
- Page 107 Manuale di installazione uso e manutenzione...
Need help?
Do you have a question about the VERSUS and is the answer not in the manual?
Questions and answers