Advertisement
Quick Links
Thanks for choosing our Newport Series ceiling fan.
We strongly recommend that you read this manual carefully before installation.
Models Parameters (Fan Only):-
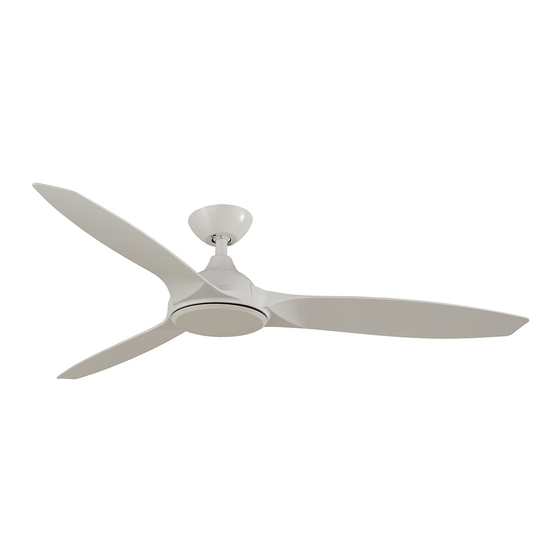
MNF143WWR
1420mm 3 Blade Ceiling Fan White with Remote Control
MNF143MMR
1420mm 3 Blade Ceiling Fan Matt Black with Remote Control
MNF143OWR
1420mm 3 Blade Ceiling Fan Walnut with remote control
Models Parameters (Fan and Light):-
MMF1433WWR
1420mm 3 Blade Ceiling Fan White, 18W Tricolour LED Light with Remote Control
MMF1433MMR
1420mm 3 Blade Ceiling Fan Matt Black, 18W Tricolour LED Light with Remote Control
MMF1433OWR
1420mm 3 Blade Ceiling Fan Walnut, 18W Tricolour LED Light with Remote Control
Part List:
Qty 1x motor assembly
Qty 1x balancing kit
Qty 3x blades
Application
Flat Surface / Ceiling
How to Assemble
Fg.1
Secure the hanger bracket
to ceiling beam or a suitable
piece of timber inserted
between the ceiling beams
using the two long screws
supplied with the package.
(See Fg.1)
E: sales@martecltd.com.au | P: 02 8778 7500
www.martecaustralia.com.au
N E W P O R T S e r i e s I n s t a l l a t i o n G u i d e
Qty 1x instruction manual
Qty 1x hanging bracket
Slope Ceiling up to 15°
Fg.2
Place circular shockproof
gasket above the hanger
bracket. Align the bracket
and screw the hanger
bracket to the ceiling tightly.
(See Fg.2)
Qty 1x screw kit
Qty 1x remote control kit
Corrugated Ceiling
Fg.3
Place fan into hanger
bracket and align Ball Joint
Slot with hanger bracket as
illustrated.(See Fg.3)
Apex Ceiling
Fg.4
After wiring is completed,
attach the canopy to the
hanger bracket by pushing
upwards and twisting anti-
clockwise. Tighten screws
and ensure canopy is not
touching the ball joint.
(See Fg.4)
Advertisement

Related Manuals for Martec Newport Series


Summary of Contents for Martec Newport Series
- Page 1 N E W P O R T S e r i e s I n s t a l l a t i o n G u i d e Thanks for choosing our Newport Series ceiling fan. We strongly recommend that you read this manual carefully before installation.
- Page 2 WARNING Installation MUST carry out by a qualified and licensed electrician. How to Install Blades Fg.5 Fg.6 To install align the blades with the orifice as shown. (See Attach the blade to the top of the motor using the 4 blade Fg.
- Page 3 WARNING Installation MUST carry out by a qualified and licensed electrician. Instructions and Functions of Transmitter 1. LED indicator light 1. LED indicator light 2. Speed of the fan 2. Light ON/OFF (1 high speed - 5 low speed) (Use to dim light within 1s) 3.
- Page 4 WARNING Installation MUST carry out by a qualified and licensed electrician. Wire Connections NB: Remote Control fan and light NB: Remote Control fan only To AC To AC Power Power To the To the Fan Motor To the Fan Motor Fan Light 6* Year Warranty Visit our website for details...