Table of Contents
Advertisement
Available languages
Available languages
Quick Links
Advertisement
Chapters
Table of Contents

Subscribe to Our Youtube Channel
Related Manuals for Burg BCA78-ZKB


Summary of Contents for Burg BCA78-ZKB
- Page 1 Bedienungs- und Installationsanleitung Glaskeramik-Einbaukochfeld...
-
Page 2: Table Of Contents
INHALT 1. Übersicht über das Gerät 2. Sicherheitshinweise 3. Installation 4. Elektrischer Anschluss 5. Betrieb 6. Touch Control-Sicherheitsfunktionen 7. Reinigung und Pflege... - Page 3 Lieber Kunde! Vielen Dank für den Kauf unseres Burg-Kochfeldes. Die Sicherheitshinweise und Empfehlungen in dieser Anleitung dienen Ihrer eigenen Sicherheit und der Sicherheit anderer Personen. Hier erfahren Sie auch, wie Sie die Funktionen Ihres neuen Gerätes optimal nutzen können. Bitte bewahren Sie diese Anleitung an einem sicheren Ort auf. Eventuell möchten Sie zukünftig darin nachschlagen - zum Beispiel, wenn Fragen...
-
Page 4: Übersicht Über Das Gerät
Übersicht über das Gerät Vor der ersten Inbetriebnahme Lesen Sie die Anleitung aufmerksam durch, bevor Sie das Gerät installieren und benutzen. Vergewissern Sie sich nach dem Auspacken, dass nichts beschädigt ist. Im Zweifelsfall wenden Sie sich bitte an Ihren Händler oder an einen qualifizierten Techniker. Entfernen Sie sämtliches Verpackungsmaterial, lassen Sie das Verpackungsmaterial (Kunststoffbeutel, Bänder und ähnliche Dinge) nicht in Kinderhände geraten;... -
Page 5: Sicherheitshinweise
Sicherheitshinweise LESEN SIE DIESE ANLEITUNG VOLLSTÄNDIG UND SORGFÄLTIG DURCH, BEVOR SIE IHR GERÄT IN BETRIEB NEHMEN, UND HALTEN SIE ES STETS ZUR VERFÜGUNG WENN NÖTIG. DIESES HANDBUCH WURDE FÜR VERSCHIEDENE MODELLE EINER REIHE VERFASST. ES KANN SEIN, DASS IHR GERÄT ÜBER EINIGE EIGENSCHAFTEN, DIE IN DIESEM HANDBUCH ERLÄUTERT WURDEN NICHT VERFÜGT. - Page 6 decken Sie die Flamme z.B. mit einem Deckel oder einer Löschdecke ab. - WARNUNG: Brandgefahr: lagern Sie keine Gegenstände auf den Kochflächen. - WARNUNG: Wenn die Oberfläche rissig ist, schalten Sie das Gerät aus, um die Gefahr eines elektrischen Schlages zu vermeiden. - Für Kochfelder mit Abdeckung: Entfernen Sie vor dem Öffnen der Abdeckung alle Verunreinigungen darauf.
- Page 7 -Stellen Sie vor der Installation sicher, dass die lokalen Netzbedingungen (Gastyp und Gasdruck oder Strom-Spannung-und Frequenz) und die Anpassung des Gerätes kompatibel sind. Die Anpassungsbedingungen dieses Gerätes sind auf dem Typenschild angegeben - VORSICHT: Dieses Gerät ist nur ist nur zum Kochen von Speisen und für den Gebrauch im Haushalt bestimmt und sollte nicht für andere Zwecke oder auf einer anderen Anwendung, z.
-
Page 8: Installation
Installation Der elektrische Anschluss dieses Kochfeldes sollte von einer autorisierten Fachkraft oder einem qualifizierten Elektriker ausgeführt werden; dabei sind die Anweisungen in dieser Anleitung sowie zutreffende Richtlinien zu beachten. · Überzeugen Sie sich vor der Installation, dass örtliche Stromversorgung und Einstellung des Gerätes aufeinander abgestimmt sind. - Page 9 · Verlegen Sie das einseitig klebende Dichtungsband um die gesamte äußere Unterseitenkante des Kochfeldes. Dehnen Sie das Band nicht. · Schrauben Sie die 4 Arbeitsplattenklemmen an die Seitenflächen des Produktes. Arbeitsplattenklemme...
-
Page 10: Elektrischer Anschluss
Elektrischer Anschluss Elektrischer Anschluss · Bevor Sie mit dem elektrischen Anschluss beginnen, überzeugen Sie sich zunächst davon, dass Stromversorgung und Steckdose für den maximalen Leistungsbedarf des Kochfeldes ausgelegt sind. · Die elektrische Installation im Haus sowie der Netzstecker müssen geerdet sein und den Vorschriften zur elektrischen Sicherheit entsprechen. -
Page 11: Betrieb
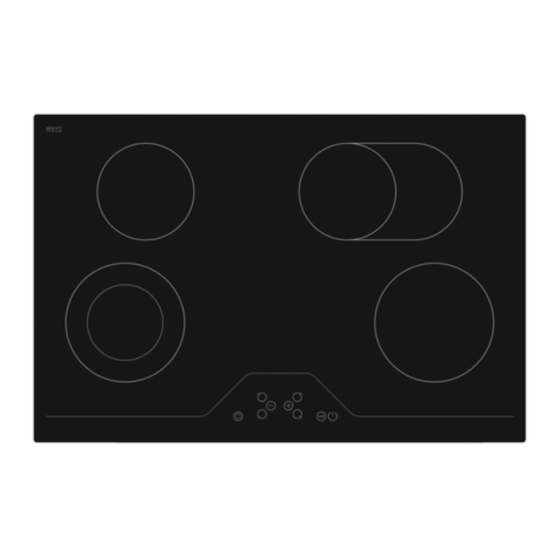
Betrieb Das Gerät wird über Sensortasten ("Touch Control") bedient, sämtliche Funktionen werden durch optische und akustische Signale bestätigt. HINWEIS: Falls in den Anzeigen ein blinkendes "H" angezeigt werden sollte, lesen Sie bitte im Abschnitt "Kochfeld zurücksetzen" nach. Dual/Oval Kochstelle Zonenauswahl* Dezimalpunkt einschalten/ausschalten Kochstufenanzeige... - Page 12 Gerät ein- und ausschalten. Wenn sich das Gerät im Bereitschaftsmodus befindet, können Sie es in den Betriebsmodus versetzen, indem Sie die Ein-/Austaste mindestens 1 Sekunde lang gedrückt halten. Der Vorgang wird durch ein akustisches Signal bestätigt. Bei sämtlichen Kochstellen wird die Kochstufe 0 angezeigt, die Dezimalpunkte in sämtlichen Kochstufenanzeigen blinken.
- Page 13 Kochstufe mit und ohne Zusatzhitze einstellen Sämtliche Kochstellen sind mit einer Zusatzhitze-Funktion ausgestattet. Wenn die Zusatzhitze aktiv ist, heizt sich die Kochstelle über einen bestimmten Zeitraum, der von der gewählten Kochstufeneinstellung abhängt, mit Maximalleistung auf. Dies wird durch ein blinkendes A, das abwechselnd mit der Kochstufeneinstellung angezeigt wird (z.
- Page 14 Sie können eine Kochstelle auch abschalten, indem Sie die Kochstufe auf 0 reduzieren. Wenn "0" in der Kochstufenanzeige angezeigt wird, erlischt auch der Dezimalpunkt in der Anzeige der ausgewählten Kochstelle. Falls bei dieser Kochstelle noch Restwärme vorhanden ist, wird dies durch ein blinkendes "H"...
-
Page 15: Touch Control-Sicherheitsfunktionen
Touch Control-Sicherheitsfunktionen Die folgenden Sicherheitsfunktionen wirken, um unbeabsichtigte Betätigung der Kochfeld-Bedienelemente zu unterbinden. Sensor-Sicherheitsabschaltung Um unerwünschte, zufällige Betätigung von Sensortasten zu vermeiden, werden die Sensortasten auf bestimmte Weise überwacht. Falls eine oder mehrere Tasten länger als 12 Sekunden lang betätigt werden, wird dieser Zustand (zum Beispiel ausgelöst durch Kochgeschirr, das auf der Sensortaste abgestellt wurde oder Fehlfunktionen des Sensors) durch ein akustische Signal angezeigt und das Gerät abgeschaltet. - Page 16 Nachdem das Kochfeld abgekühlt ist, verschwindet das "t" aus der Anzeige, das Gerät wechselt in den Bereitschaftsmodus. Dies bedeutet, dass Sie das Gerät durch Berühren von wieder einschalten können. Restwärmeanzeige Wenn das Kochfeld nach dem Einsatz abgeschaltet wird, bleibt die Glaskeramik noch einige Zeit heiß...
-
Page 17: Reinigung Und Pflege
Reinigung und Pflege Kochgeschirr mit unebenem Boden (oder mit Rückständen am Boden) sollte nicht benutzt werden, da dies die Glaskeramik verkratzen kann. Der Boden des Kochgeschirrs sollte so dick und flach wie nur möglich sein. Bevor Sie Kochgeschirr benutzen, überzeugen Sie sich davon, dass der Boden sauber und trocken ist. Stellen Sie das Kochgeschirr grundsätzlich zuerst auf die Kochstelle auf, bevor Sie sie einschalten. - Page 18 Dies gilt insbesondere für Zucker, Sirup und ähnliche stark zuckerhaltige Lebensmittel, die irreparable Beschädigungen der Oberfläche verursachen können, wenn sie sich einbrennen. Falls solche Produkte auf der Glaskeramik schmelzen, sollten diese sofort (solange die Glaskeramik noch heiß ist) mit einem Schaber entfernt werden, damit es nicht zu irreparablen Beschädigungen der Oberfläche kommt.
- Page 20 Dieses Symbol auf dem Produkt oder der Verpackung weist darauf hin, dass dieses Produkt nicht als Haushaltsmüll entsorgt werden darf. Statt dessen muss es an einem entsprechenden Sammelpunkt für das Recycling von elektrischen und elektronischen Geräten abgegeben werden. Um sicherzustellen dass dieses Produkt korrekt entsorgt wird, tragen Sie dazu bei, negative Folgen für die Umwelt und die menschliche Gesundheit, die durch unsachgemäße Entsorgung dieses Produkts verursacht werden könnten, zu ver hindern.
- Page 21 OPERATING AND INSTALLATION INSTRUCTIONS BUILT-IN VITROCERAMIC HOB...
- Page 22 CONTENTS 1. DESCRIPTION OF THE HOB 2. SAFETY INSTRUCTIONS 3. INSTALLATION 4. ELECTRICAL CONNECTION 5. USAGE 6. TOUCH CONTROL SAFETY FUNCTIONS 7. CLEANING AND CARE...
- Page 23 Dear Customer, Thank you for purchasing this Burg Cooking Hob.The safety precautions and recommendations in these instructions are for your own safety and that of others. They will also provide a means by which to make full use of the features offered by your appliance.
-
Page 24: Description Of The Hob
DESCRIPTION OF THE HOB BEFORE USING FOR THE FIRST TIME Read the instructions carefully before installing and using the appliance. After unpacking the appliance, make sure it is not damaged. In case of doubt, do not use the appliance and contact your supplier or a qualified engineer. -
Page 25: Safety Instructions
SAFETY INSTRUCTIONS READ THESE INSTRUCTIONS CAREFULLY AND COMPLETELY BEFORE USING YOUR APPLIANCE, AND KEEP IT IN A CONVENIENT PLACE FOR REFERENCE WHEN NECESSARY. THIS MANUAL IS PREPARED FOR MORE THAN ONE MODEL IN COMMON. YOUR APPLIANCE MAY NOT HAVE SOME OF THE FEATURES THAT ARE EXPLAINED IN THIS MANUAL. PAY ATTENTION TO THE EXPRESSIONS THAT HAVE FIGURES, WHILE YOU ARE READING THE OPERATING MANUAL. - Page 26 - WARNING: If the surface is cracked, switch off the appliance to avoid the possibility of electric shock. - For hobs incorporating a lid, any spillage should be removed from the lid before opening. And also the hob surface should be allowed to cool before closing the lid.
- Page 27 Installation Warnings - Do not operate the appliance before it is fully installed. - The appliance must be installed by an authorized technician and put into use. The producer is not responsible for any damage that might be caused by defective placement and installation by unauthorized people.
-
Page 28: Installation
INSTALLATION The electrical connection of this hob should be carried out by an authorised service personal or a qualified electrician, according to the instructions in this guide and in compliance with the current regulations. · Prior to installation, ensure that the local distribution conditions and the adjustment of the appliance are compatible. - Page 29 · Apply the one-sided self-adhesive sealing tape supplied all the way round the lower edge of the cooking surface along the outer edge of the glass ceramic panel. Do not stretch it. · Screw the 4 worktop mounting brackets on the side walls of product. worktop mounting bracket...
-
Page 30: Electrical Connection
ELECTRICAL CONNECTION Electrical connection of your hob · Before proceeding with the electrical connection, verify that the current carrying capacity of the system and the socket is adequate for the maximum power rating of the hob. · Electrical installation of the residence and the electrical current plug in use must be earthed and conform with safety regulations. -
Page 31: Usage
USAGE The appliance is operated by touching buttons and the functions are confirmed by displays and acoustic signals. NOTE: See the section on HOB RESET if you see a flashing H in any of the displays. The mains are applied to the hob control Stand-By-Mode S-Mode and all heater displays are off or a residual... - Page 32 Turning the appliance on / off . If the appliance is in Stand-By-Mode, it is put in Operating-Mode by pressing the On/Off button at least 1 second. A beep indicates a successful operation. On all heaters a ´0` appears and all Decimal Point of the heater flashes. If there is no operation within 10 sec, the display of all heaters will turn off.
- Page 33 Set Cooking Level With and Without Heat Boost A l l h e a t e r s a r e e q u i p p e d w i t h h e a t b o o s t f u n c t i o n a l i t y If the heat boost is active, then the heater will be operated with maximum power for the period of the heat boost time, which is dependent on the selected heat setting.
- Page 34 The heater can also be turned off by reducing the heat setting to ´0`. When Heater Display indicates ´0`, the Decimal Point of the selected heater will also turn off. If there is a residual heat for this heater remaining, this will be indicated by a static display ´H` in the heat setting display.
-
Page 35: Touch Control Safety Functions
TOUCH CONTROL SAFETY FUNCTIONS The following safety functions are available to avoid unintended operations of the hob control. Sensor Safety Cut Off To prevent the appliance from unwanted, random sensor operation, sensor monitoring is included. In case of one or more buttons are pressed longer than 12 sec, the sensor monitoring routine indicates with a beep, that wrong operation (pot or other object placed on the button, sensor failure, etc.) and switches off the appliance. - Page 36 After the hob cools the ´t` displays will be erased and the hob control enters standby mode. This means that the user can reactivate the appliance by touching Residual Heat Functions After the hob is turned of f when cooking is finished, there is some heat stored in the vitroceramic glass called residual heat.
-
Page 37: Cleaning And Care
CLEANING AND CARE Cookware with rough bottoms should not be used since these can scratch the ceramic surface. The bottom of the cookware should be as thick and flat as possible. Before use, make sure that cookware bottoms are clean and dry. - Page 38 This is especially true in the case of sugar/syrup mixtures which could permanently pit the surface of the hob if left to burn on it. If any of these products has melted on the ceramic surface, you should remove it immediately (when the surface is still hot) by using a scraper to avoid any permanent damage to the surface of the hob (available from the s t o r e w h e r e y o u p u r c h a s e d t h i s a p p l i a n c e ) .
- Page 39 Brand Model BCA78-ZKB Type of Hob Electric Number of Cooking Zones Heating Technology-1 Radiant Size-1 Ø14,5 Energy Consumption-1 192,0 Wh/kg Heating Technology-2 Radiant Size-2 Ø18,0 Energy Consumption-2 192,0 Wh/kg Heating Technology-3 Radiant Size-3 Ø18,0 Energy Consumption-3 191,0 Wh/kg Heating Technology-4...
- Page 40 The symbol on the product or on its packaging indicates that this product may not be treated as household waste. Instead it shall be handed over to the applicable collection point for the recycling of electrical and electronic equipment. By ensuring this product is disposed of correctly , you will help prevent potential negative consequences for the environment and human health, which could otherwise be caused by inappropriate waste handling of this...
- Page 41 INSTRUCTIONS RELATIVES A L'UTILISATION ET A L'INSTALLATION TABLE DE CUISSON VITROCÉRAMIQUE ENCASTRABLE...
- Page 42 TABLE DES MATIÈRES 1. DESCRIPTION DE L'APPAREIL 2. CONSIGNES DE SÉCURITÉ 3. INSTALLATION 4. BRANCHEMENT ELECTRIQUE 5. UTILISATION 6. FONCTIONS SECURITAIRE DU BOUTON DE COMMANDE 7. NETTOYAGE ET ENTRETIEN...
- Page 43 Chère cliente, cher client, Merci d'avoir acheté la présente table de cuisson de marque Burg. Les précautions de sécurité et les recommandations contenues dans les présentes instructions sont destinées à votre propre sécurité et à celle de vos proches. Elles vous donneront par ailleurs un moyen avec lequel utiliser entièrement toutes les fonctions offertes par votre appareil.
-
Page 44: Description De L'appareil
DESCRIPTION DE L'APPAREIL AVANT D'UTILISER VOTRE APPAREIL POUR LA PREMIERE FOIS Lisez attentivement les instructions avant d'installer cet appareil et de l'utiliser. Après l'avoir enlevé de son emballage, assurez-vous qu'il n'est pas endommagé. En cas de doute, n'utilisez pas l'appareil mais contactez plutôt votre fournisseur ou un technicien qualifié. -
Page 45: Consignes De Sécurité
CONSIGNES DE SÉCURITÉ LISEZ INTEGRALEMENT ET ATTENTIVEMENT CES INSTRUCTIONS AVANT DE COMMENCER A UTILISER VOTRE APPAREIL. GARDEZ BIEN CE MANUEL CAR VOUS POUVEZ LE CONSULTER EN CAS DE BESOIN. CE MANUEL EST CONÇU POUR ETRE UTILISE PAR PLUSIEURS MODELES. CERTAINS FONCTIONNALITES DECRITES DANS CE MANUEL PEUVENT ETRE INACTIVES AVEC VOTRE VERSION. - Page 46 - Pour les plaques à couvercle, tout déversement doit être enlevé du couvercle avant l'ouverture de la plaque. Avant de poser le couvercle, il faut s'assurer que la surface de la plaque s'est refroidie. - Cet appareil ne doit pas être actionné par une minuterie externe ou par une télécommande séparée du système.
- Page 47 - Assurez-vous que le câble d'alimentation n'est pas coincé. Si le câble d'alimentation est endommagé, il doit être remplacé par le fabricant, son représentant ou par tout technicien qualifié afin de prévenir tout danger. Avertissements d'installation - N'utilisez l'appareil que lorsque l'installation est terminée. - L'appareil doit être installé...
-
Page 48: Installation
INSTALLATION Le branchement électrique de cette table de cuisson doit être effectué par un personnel du service agrée ou par un électricien qualifié, selon les instructions contenues dans ce guide et conformément aux réglementations en vigueur. · Avant toute installation, assurez-vous que les conditions de distribution et le réglage de l'appareil sont compatibles. - Page 49 · Appliquez le ruban d'étanchéité autocollant unilatéral fourni tout autour du côté inférieur de la surface de cuisson, le long du côté extérieur du panneau vitrocéramique. Ne l'étirez pas. · Vissez les 4 crochets de montage du plan de travail sur les parois latérales du produit.
-
Page 50: Branchement Electrique
BRANCHEMENT ELECTRIQUE Branchement électrique de votre table de cuisson · Avant de procéder au branchement électrique, vérifiez que la capacité de transport actuelle du système et la prise sont appropriées pour la puissance nominale maximale de la table de cuisson. ·... -
Page 51: Utilisation
UTILISATION Pour faire fonctionner votre appareil, appuyez sur les touches et les fonctions sélectionnées seront confirmées par des affichages et des signaux acoustiques. REMARQUE: Reportez-vous à la section relative au REGLAGE DE LA TABLE DE CUISSON dans le cas où vous voyez un H clignotant dans l'un des affichages. - Page 52 Allumer/Eteindre l'appareil. Si l'appareil est en mode de veille, vous pouvez le mettre en mode de fonctionnement si vous appuyez sur la touche On/Of f (Marche/Arrêt) pendant au moins 1 seconde. Un bip sera émis pour indiquer que l'opération a été effectuée avec succès. Sur tous les éléments chauffants, un ´0` apparaît et tout point décimal de l'élément chauffant clignote.
- Page 53 Réglez le niveau de cuisson avec ou sans pompe à chaleur Tous les éléments chauffants comportent la fonctionnalité de la pompe à chaleur. Si la pompe à chaleur est active, le fonctionnement de l'élément chauffant se fera alors avec une puissance maximale pendant la période de la durée de la pompe à...
- Page 54 Vous pouvez également éteindre l'élément chauffant en réduisant le réglage de chaleur à ´0`. Lorsque l'écran d'affichage indique 0`, le point décimal de l'élément chauffant sélectionné s'éteindra aussi. S'il y a un reste de chaleur résiduelle pour cet élément chauffant, celui-ci sera indiqué...
-
Page 55: Fonctions Securitaire Du Bouton De Commande
FONCTIONS SECURITAIRE DU BOUTON DE COMMANDE Les fonctions sécuritaires suivantes sont disponibles pour éviter les fonctionnements non voulus de la commande de la table de cuisson. Coupure du capteur de sécurité Pour éviter au capteur de l'appareil de rencontrer un fonctionnement involontaire et hasardeux, un détecteur de contrôle est inclus. - Page 56 Après refroidissement de la table de cuisson, ´t` est effacé et la commande de ladite table passe en mode de veille. Ceci signifie que l'utilisateur peut réactiver l'appareil en appuyant sur la touche Fonctions de la chaleur résiduelle Après que la table de cuisson soit éteinte à la fin de l'opération, il y a une quantité...
-
Page 57: Nettoyage Et Entretien
NETTOYAGE ET ENTRETIEN Les ustensiles de cuisson aux fonds durs ne doivent pas être utilisés dans la mesure où ils peuvent rayer la surface en céramique. Le fond de l'ustensile de cuisson doit être aussi épais et plat que possible. Avant toute utilisation, assurez-vous que les fonds de l'ustensile en question sont propres et secs. - Page 58 Il s'agit notamment des produits comme le sucre/les mélanges de sirop qui pourraient ronger en permanence la surface de la table de cuisson si un nettoyage préalable n'est pas effectué avant la prochaine utilisation. Si l'un de ces produits a fondu sur la surface en céramique, vous devez l'enlever immédiatement (lorsque la surface est encore chaude) en utilisant un grattoir afin d'éviter tout dommage permanent à...
- Page 59 Marque BCA78-ZKB Modèle Type de plaque de cuisson Électrique Nombre de zones de cuisson Technologie de chauffage - zone de cuisson 1 Radiant Taille - zone de cuisson 1 Ø 14,5 Consommation énergétique - zone de cuisson 1 192,0 Wh/kg...
- Page 60 Le symbole figurant sur le produit ou sur son emballage indique qu'il ne doit pas être traité comme les autres ordures ménagères. Il doit être déposé dans un centre de collecte approprié pour le recyclage des équipements électriques et électroniques. En veillant à ce que l'élimination du présent produit se fasse dans de bonnes conditions, vous participez ainsi à...
- Page 61 GEBRUIKS- EN INSTALLA TIEHANDLEIDING VITROKERAMISCHE INBOUWKOOKPLAA T...
- Page 62 INHOUD 1. BESCHRIJVING VAN DE KOOKPLAAT 2. VEILIGHEIDSINSTRUCTIES 3. INSTALLATIE 4. ELEKTRISCHE AANSLUITING 5. GEBRUIK 6. TOUCH CONTROL VEILIGHEIDSFUNCTIES 7. REINIGING EN ONDERHOUD...
- Page 63 Geachte klant, Wij danken u voor de aankoop van deze Burg Kookplaat. De veiligheidsmaatregelen en aanbevelingen in deze handleiding zijn bedoeld voor uw eigen veiligheid en die van anderen. De handleiding biedt u tevens een middel om de functies van het apparaat ten volle te kunnen gebruiken.
- Page 64 BESCHRIJVING VAN DE KOOKPLAAT VÓÓR HET EERSTE GEBRUIK Gelieve de instructies vóór gebruik of installatie van het apparaat zorgvuldig te lezen. Controleer na het uitpakken van het apparaat of het niet beschadigd is. In geval van twijfel: het apparaat niet in gebruik nemen en contact opnemen met uw leverancier of een gekwalificeerd technicus.
- Page 65 VEILIGHEIDSINSTRUCTIES LEES DEZE INSTRUCTIES ZORGVULDIG EN VOLLEDIG VOOR U UW FORNUIS IN GEBRUIK NEEMT EN BEWAAR ZE VOOR EEN EVENTUELE RAADPLEGING IN DE TOEKOMST. DEZE HANDLEIDING IS GEMAAKT VOOR MEER DAN ÉÉN MODEL. HET IS MOGELIJK DAT SOMMIGE FUNCTIES DIE IN DEZE HANDLEIDING WORDEN BESPROKEN NIET AANWEZIG ZIJN OP UW APPARAAT.
- Page 66 Bij kookplaten met een deksel moet alle gemorste etensresten worden verwijderd van het deksel voor u het open maakt. U moet de oppervlakte van de kookplaat ook laten afkoelen voor u het deksel sluit Bij kookplaten is het toestel niet bedoeld voor werking met een externe timer of een afzonderlijk systeem met afstandsbediening Gebruik geen harde schurende...
- Page 67 2. VEILIGHEIDSWAARSCHUWINGEN U moet erop toezien dat netsnoeren niet geklemd raken tijdens de installatie. Als het netsnoer beschadigd is, moet het worden vervangen door de fabrikant, zijn onderhoudsdienst of dergelijk gekwalificeerde personen om ieder risico uit te sluiten. Waarschuwingen bij de installatie U mag het apparaat niet in gebruik nemen voor de installatie volledig is afgewerkt.Het toestel moet gemonteerd en in werking gesteld worden door een geautoriseerde technicus.
- Page 68 INSTALLATIE De elektrische aansluiting van deze kookplaat mag uitsluitend worden uitgevoerd door erkend onderhoudspersoneel of een gekwalificeerd elektricien en overeenkomstig de instructies van deze handleiding en conform de geldende voorschriften. · Vóór installatie controleren of de plaatselijke distributie-omstandigheden en de afstelling van het apparaat compatibel zijn. ·...
- Page 69 · Breng de bijgeleverde eenzijdige zelfklevende tape aan rond de onderkant van het kookoppervlak, langs de buitenrand van de keramische plaat. Rek het niet uit. · Schroef de 4 bevestigingshaakjes voor het werkblad aan de zijwanden van het product. bevestigingshaakje werkblad...
- Page 70 ELEKTRISCHE AANSLUITING Elektrische aansluiting van de kookplaat · Voordat u verder gaat met de elektrische aansluiting, eerst controleren of het actuele draagvermogen van het systeem en de stekker geschikt zijn voor de maximum spanning van de kookplaat. · De elektrische huisinstallatie en de elektrische stekker die wordt gebruikt moeten geaard zijn en conform de veiligheidsvoorschriften zijn aangesloten.
- Page 71 GEBRUIK Het apparaat wordt bediend via tiptoetsen en de functies worden via het display en geluidssignalen bevestigd. OPMERKING: Zie het hoofdstuk RESETTEN VAN DE KOOKPLAAT als u in het scherm een knipperende H ziet. Dubbele/ovalen zone* Kookzone Actieve/inactie Indicator Komma display ve kookzone Indicator...
- Page 72 Zet het apparaat aan / uit. Als het apparaat in standby staat, wordt deze bedieningsstand gezet door ten minste 1 seconde op de Aan/Uit knop te drukken. Een piepje geeft aan dat dit is gelukt. Op alle kookzones verschijnt een '0' en alle komma's van de kookzones knipperen.
- Page 73 Instellen Kookniveau Met en Zonder Aankookbooster Alle kookzones zijn uitgerust met de functie aankookbooster. Als de aankookbooster actief is, wordt de betreffende kookzone bepaalde tijd op het hoogste niveau ingeschakeld, afhankelijk van de geselecteerde warmtestand. Dit wordt in het kookzonedisplay aangegeven door een knipperende 'A' die wordt afgewisseld met de waarde van de warmtestand (bijv.
- Page 74 De kookzone kan ook worden uitgeschakeld door de warmtestand naar '0' te brengen. Als het Kookzonedisplay ´0` aangeeft, wordt ook de Komma van de geselecteerde kookzone uitgeschakeld. Als deze kookzone nog heet is, wordt restwarmte aangegeven door een stilstaande 'H' in het overeenkomstige kookzonedisplay. Toetsvergrendeling De functie toetsvergrendeling wordt gebruikt om het apparaat te blokkeren en tijdens bediening in een veiligheidsstand te zetten.
- Page 75 TOUCH CONTROL VEILIGHEIDSFUNCTIES Het apparaat is voorzien van de volgende beveiligingen om onbedoelde bediening van de kookplaat te voorkomen. Sensorbeveiliging Om te voorkomen dat het apparaat door ongewenste, willekeurig sensorbediening, is het voorzien van sensorbewaking. Als één of meer toetsen langer dan 12 seconden worden ingedrukt, geeft de sensorbewaking een piepsignaal.
- Page 76 Nadat de kookplaat is afgekoeld verdwijnt 't' en gaat de bediening van de kookplaat over in de standby-stand. Dit betekent dat de gebruiker het apparaat opnieuw kan activeren door aan te raken. Restwarmte-functies Als de kookplaat na het koken wordt is uitgeschakeld, wordt er warmte opgeslagen in het keramische glas.
- Page 77 REINIGING EN ONDERHOUD Gebruik nooit kookgerei met ruwe bodem aangezien dit krassen kan veroorzaken op het keramisch oppervlak. De onderkant van het kookgerei moet zo dik en plat mogelijk zijn. Controleer voor het gebruik of de onderkant van het kookgerei schoon en droog is. Plaats het kookgerei altijd op de kookzone voordat u deze ingeschakeld.
- Page 78 Dit is het in het bijzonder van toepassing op suiker/siroopmengsels die het oppervlak van de kookplaat permanent kunnen beschadigen wanneer ze inbranden. Als één van deze producten op het keramisch oppervlak gesmolten is, moet u dit onmiddellijk met een schraper verwijderen (zolang de plaat nog heet is) om permanente beschadiging van de kookplaat te voorkomen.
- Page 79 Merk Model BCA78-ZKB Type kookplaat Elektrisch Aantal kookzones Verwarmtechnologie-1 Stralingsbron Formaat-1 Ø 14,5 Energieverbruik-1 192,0 Wh/kg Verwarmtechnologie-2 Stralingsbron Formaat-2 Ø 18,0 Energieverbruik-2 192,0 Wh/kg Verwarmtechnologie-3 Stralingsbron Formaat-3 Ø 18,0 Energieverbruik-3 191,0 Wh/kg Verwarmtechnologie-4 Stralingsbron Formaat-4 15,5 x 26,0 Energieverbruik-4 190,0...
- Page 80 Voor meer gedeta illeerde informatie over de recyclage van dit produkt, gelieve uw stadhuis, uw afvalverwerkingsbedrijf of de winkel waar u dit produkt kocht te contacteren. Burger Küchenmöbel GmbH Martin-Luther-Str. 31 39288 Burg / Germany 52200882...
Need help?
Do you have a question about the BCA78-ZKB and is the answer not in the manual?
Questions and answers