Table of Contents
Advertisement
Available languages
Available languages
Quick Links
No: 24054 – 09/20 rev. 2
Catalog Numbers • Les Numéros de Catalogue • Números de Catálogo: CI-305, CI-305-1
Country of Origin: Made in China • Pays d'origine: Fabriqué en Chine • País de origen: Hecho en China
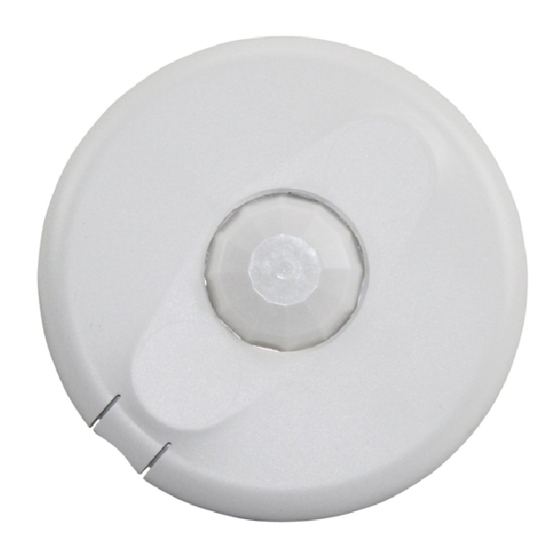
The Wattstopper CI-305 360° passive infrared (PIR) occupancy sensors turn lighting systems on and off based on occupancy.
The sensors can be configured to turn lighting on, and hold it on as long as the sensor detects occupancy. After no movement is
detected for a user specified time (30 seconds to 30 minutes) the lights are switched off. A "walk-through" mode can turn lights off after
only 3 minutes, if no activity is detected after 30 seconds of an occupancy detection.
The CI-305 operates on 24V supplied by Wattstopper Power Packs, 24VAC or half wave rectified AC.
Depending upon obstacles such as furniture or partitions, the area of coverage may be less or more
than the sensing distances shown in the coverage pattern. This must be considered when planning
the number of sensors and their placement. It is also recommended to place the sensor 4 to 6 feet
away from air supply ducts as rapid air currents or the differences in temperatures may cause false
activations.
Mount the sensor to the ceiling. The CI-305 sensors are designed for a ceiling height of about 8-10
feet. Mounting above or below this range will significantly affect the coverage patterns. Be aware
that as you decrease the mounting height, you decrease the range and increase the sensitivity to
smaller motions. Conversely, when you increase the height, you increase the range and decrease
the sensitivity to smaller motions. At heights of more than 12-14 feet, you may start to significantly
reduce sensitivity. As a general rule, each occupant should be able to clearly view the sensor.
Often the best location to install a CI- 305 in a closed office is off-center. Avoid placing a sensor directly in
line with an open door through which it has a clear view out, as the sensor may detect people walking by.
Open Office Area Coverage
To get complete coverage in an open office area, install multiple sensors so that there is an overlap
with each adjacent sensor's coverage area.
For open office areas with partitions it is best to place sensors over intersection of four workstations.
For large areas of coverage use multiple sensors.
Masking the PIR Lens
Opaque adhesive tape is supplied so that sections of the PIR lens can be masked. This restricts the
sensor's view and allows you to eliminate PIR coverage in unwanted areas such as hallways outside
of the desired coverage area. Since masking removes bands of coverage, remember to take this into
account when troubleshooting coverage problems.
Wattstopper
360° Passive Infrared Low Voltage Occupancy Sensor (version 5)
with Manual On feature
Détecteur de mouvement basse tension à infra-rouge passif 360° (v5)
avec marche en mode manuel
Sensor de ocupación con tecnología infrarroja pasiva de baja tensión 360°
con función de encendido manual (v5)
Installation Instructions • Instructions d'Installation • Instrucciones de Instalación
Voltage .......................... .........18-28VDC/VAC, half wave rectified AC
Current Consumption .................................................................10 mA
Power Supply ..............................................Wattstopper Power Packs
Operating Temperature ................................ 32° to 131°F (0° to 55°C)
Time Delay Adjustment ............................... 30 seconds to 30 minutes
PIR Coverage
Sensitivity Adjustment ...................................High or Low (DIP switch)
UL & CUL Listed for use with Wattstopper Power Packs
DESCRIPTION AND OPERATION
PLACEMENT GUIDELINES
®
SPECIFICATIONS
Walk-Through Mode .............3 minutes if no activity after 30 sec.
Test Mode ........................................5 sec. upon DIP switch reset
Model CI-305 ........................................................... up to 1200ft2
Model CI-305-1 ......................................................... up to 500ft2
Advertisement
Table of Contents

Related Manuals for LEGRAND Wattstopper CI-305


Summary of Contents for LEGRAND Wattstopper CI-305
- Page 1 DESCRIPTION AND OPERATION The Wattstopper CI-305 360° passive infrared (PIR) occupancy sensors turn lighting systems on and off based on occupancy. The sensors can be configured to turn lighting on, and hold it on as long as the sensor detects occupancy. After no movement is detected for a user specified time (30 seconds to 30 minutes) the lights are switched off.
-
Page 2: Wiring Directions
E101196 Care should be taken to separate high voltage power from low voltage (Class 2) +24V Common control wiring. www.legrand.us/wattstopper All connections to sensor are low voltage, Class 2. Wiring terminals Standard wiring with local off switch Manual-On wiring with low voltage momentary switch... -
Page 3: Coverage Pattern
Using an Octagonal J-Box J-Box Mount 4" Octagonal J-Box 1. Pull the low voltage wires from the power pack into the J-Box through the (at least 1.5" deep) conduit knockout. Ceiling 2. Connect the low voltage wires to the appropriate terminals on the sensor. 3. -
Page 4: Dip Switch Setting
DIP SWITCH SETTING The CI-305 has 7 DIP switches under the cover. DIP Switch Setting Chart Time Delay: Switches 1, 2, 3 Switch# The sensor will hold the lights ON as long as occupancy is detected. The time delay countdown starts when Time Delay 1 2 3 no motion is detected. -
Page 5: Ordering Information
LED flashes: 1. Check all sensor and power pack wire connection. 2. Check for 24VDC at the power pack’s blue wire connection to sensor while sensor is activated. If there is no voltage, replace the sensor. If there is voltage, replace the power pack 3. - Page 6 CARACTÉRISTIQUES TECHNIQUES Les détecteurs de mouvement à infra-rouges passifs (IRP) Tension ... 18-28 V CC/V CA, courant alternatif redressé mono alternance Wattstopper CI-305 360° allument et éteignent les systèmes Consommation actuelle ..............15 mA d’éclairage selon les niveaux de présence.
-
Page 7: Instructions De Câblage
• le fil de l’autre côté de l’interrupteur à la borne Interrupteur man. du détecteur. +24V Common Vous devez faire attention à séparer les fils haute tension du secteur des fils de www.legrand.us/wattstopper régulation basse tension (classe 2). Tous les raccordements au capteur sont basse tension, classe 2. Bornes de raccordement Câblage standard avec interrupteur d'arrêt local... -
Page 8: Réglage Du Détecteur
MONTAGE DU DÉTECTEUR Montage au plafond Directement sur le plafond 1. Fixez les clips à ressort en plastique sur les bords du détecteur dans les fentes prévues à cet effet. 2. Découpez un orifice rond de 8,9 à 10,2 cm (3,5 à 4 po.) dans la dalle du plafond acoustique au niveau de l’emplacement de montage. -
Page 9: Protection Contre La Surcharge
* Le Mode Test est un état temporaire qui démarre lorsque vous mettez les interrupteurs DIP du détecteur sur le « Mode test/20 minutes » pour la première fois (interrupteurs 1, 2 et 3 sur ARRÊT). Si vous avez besoin de lancer le Mode test et que les interrupteurs DIP sont déjà... -
Page 10: Dépannage
DÉPANNAGE Les lumières ne S’ALLUMENT pas en cas de présence, et la condition suivante est présente : La DEL rouge ne clignote pas : 1. Vérifiez que le disjoncteur de circuit a bien été réenclenché. 2. Vérifiez tous les raccordements des fils du détecteur et du bloc d’alimentation. 3. -
Page 11: Especificaciones
INSTRUCCIONES EN ESPAÑOL DESCRIPCIÓN Y FUNCIONAMIENTO ESPECIFICACIONES Los sensores de ocupación con tecnología infrarroja pasiva (PIR) Voltaje ....de 18-28 V CC/V CA o CA rectificada de media onda de 360° CI-305 de Wattstopper encienden y apagan los sistemas Consumo de corriente ..............15 mA de iluminación según la ocupación. -
Page 12: Instrucciones De Cableado
RS2-3 a las aplicaciones anteriores, conecte: Common www.legrand.us/wattstopper • El cable de un lado del interruptor a la terminal de +24 del sensor. • El cable del otro lado del interruptor a la terminal de interruptor man. del sensor. -
Page 13: Ajuste Del Sensor
Uso de una caja de conexiones octágonal Montaje en caja de conexiones 1. Pase los cables de bajo voltaje desde la fuente de alimentación hacia dentro de la Caja de conexiones caja de conexiones por el troquel del conducto. octágonal de 4" (al menos 1,5"... -
Page 14: Configuración Del Interruptor Dip
Para probar los sensores de ocupación 1. Asegúrese de que la demora de tiempo se configure para el modo de prueba* mediante la configuración “Modo de prueba/20 minutos”. (los interruptores DIP 1, 2 y 3 están apagados). 2. No se mueva. El LED rojo no debería destellar. Las luces deberían apagarse luego de 5 segundos. (En caso contrario, consulte “Solución de problemas”). -
Page 15: Protección Contra Sobrecarga
PROTECCIÓN CONTRA SOBRECARGA El sensor de presencia tiene una función de protección contra sobrecarga integrada que apaga la salida del control automáticamente cuando la corriente de la carga supere 200 mA. La luz LED del sensor parpadeará rápidamente (~ 10 Hz) a fin de emitir una señal visual de una condición de sobrecarga. -
Page 16: Información Para Hacer Pedidos
No. 24054 – 09/20 rev. 2 © Copyright 2020 Legrand All Rights Reserved. 800.879.8585 © Copyright 2020 Tous droits réservés Legrand. www.legrand.us/wattstopper © Copyright 2020 Legrand Todos los derechos reservados.
Need help?
Do you have a question about the Wattstopper CI-305 and is the answer not in the manual?
Questions and answers