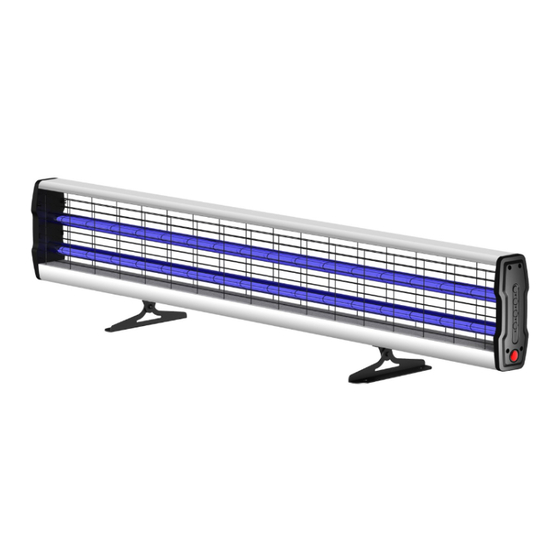
GOLDENSEA UV UVT72 User Manual
Hide thumbs
Also See for UVT72:
- Quick start manual (4 pages) ,
- User manual (17 pages) ,
- User manual (16 pages)
Table of Contents
Advertisement
Quick Links
Advertisement
Table of Contents

Summary of Contents for GOLDENSEA UV UVT72
- Page 1 UVT72 USER MANUAL KEEP THIS MANUAL FOR FUTURE NEEDS...
-
Page 2: Table Of Contents
Thank you for purchasing a GOLDENSEA UV product. You have acquired a powerful and versatile device. We are confident that you will be satisfied with our excellent products and service. For your own safety, please read this user manual carefully before installing and operating the device. - Page 3 www.goldenseauv.com Voltage Input: AC 100-240V~, 50/60Hz; Power: 80W; Product Size: 1273x75x240mm This UV lamp is only for commercial use in non-residential locations, such as in the hotels, schools, factories, theaters, gymnasiums, restaurants, offices, etc., it shall only be used by professional person. The warning sign as below shall be shown on the way to the fixture during operation.
-
Page 4: Operation
www.goldenseauv.com 1. Operation (Remote Control only) 1) Close all the doors and windows. 2) Plug-in and power on: press the power switch <I/O> to <I>, the power indicator turns on green. 3) Select time setting <30 mins>, <60 mins> or <120 mins> by the Time Setting button on the remote control. -
Page 5: Notes
www.goldenseauv.com 3. Notes 1. Put the UV lamp on a height of 0cm-400cm to get the best disinfection effect. Please do not put the lamp higher than 400cm, as the Motion Sensor cannot detect perfectly. 2. The surface of the lamp should be kept clean. 3. -
Page 6: Product Overview
www.goldenseauv.com Avertissement – RISQUE DE BLESSURES WARNING – RISK OF PERSONAL INJURY CORPORELLES THIS EQUIPMENT IS DESIGNED FOR CET ÉQUIPEMENT EST CONÇU POUR ÊTRE USE WITH GERMICIDAL LAMPS OR UV UTILISÉ AVEC DES LAMPES GERMICIDALES OU SOURCES AND MUST BE INSTALLED DES SOURCES UV ET DOIT ÊTRE INSTALLÉ... -
Page 7: Dimensional Drawings
www.goldenseauv.com 4) Protective Grid 1) Handle 5) UV Tube 2) Power Switch 6) Indicator Lights 3) Power Cable 4) Hanging Hook 5) 7. Dimensional Drawings 8. Installation Instructions 8.1 Wall Mounting wall Steps: 1. Mount 2 screws (M4) on the wall with a distance of 1261.7mm. 2. -
Page 8: Replacing The Uv Tube
www.goldenseauv.com 8.2 Rigging Installation Diameter: 6mm Steps: 1. Fix your hanging rods into the holes (diameter: 6mm) of the rigging brackets on the device as shown. (Note: the hanging rods are not included) 2. Attach a safety cable (not included) between the handle of device and a fixing point on the ceiling or wall. -
Page 9: Troubleshooting Tips
www.goldenseauv.com 4. Holding the UV tube and turn it 90°anti clockwise (or clockwise) ③ as shown and take it out from its holder. Note: please follow your local toxic and hazardous waste regulations for lamp disposal. 5. Insert the new UV tube into the holder and turn the UV tube 90°anti clockwise (or clockwise) until it fits into place correctly and tightly. -
Page 10: Features
www.goldenseauv.com Emitting Single beep every 10 seconds Red indicator on (working) Motion Dual beeps every 10 seconds Red & Green indicators flashing Detected End of Triple beeps every 10 seconds Green indicator on Cycle (in 30 seconds) 11. Features Light Source •... -
Page 11: Cleaning And Maintenance
www.goldenseauv.com Remote Control Included (battery type: CR2025) UV Glasses Included (protective eyewear) Reflector Included Warning Sign Included Safety Cable Optional UV Irradiance Meter Optional 12. Cleaning and Maintenance 1. To ensure the device remains in good condition and does not fail prematurely, regular maintenance, cleaning and checks are required.


Need help?
Do you have a question about the UVT72 and is the answer not in the manual?
Questions and answers