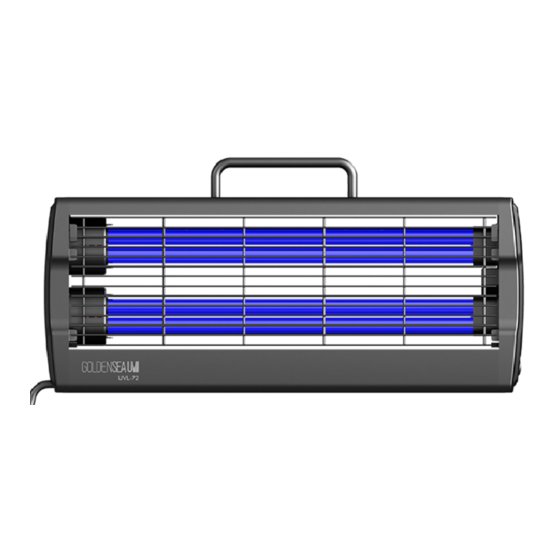
GOLDENSEA UV UVL72 Manual
Hide thumbs
Also See for UVL72:
- Quick start manual (4 pages) ,
- User manual (17 pages) ,
- User manual (16 pages)
Table of Contents
Advertisement
Quick Links
Advertisement
Table of Contents

Summary of Contents for GOLDENSEA UV UVL72
- Page 1 UVL72 USER MANUAL KEEP THIS MANUAL FOR FUTURE NEEDS...
-
Page 2: Table Of Contents
Thank you for purchasing a GOLDENSEA UV product. You have acquired a powerful and versatile device. We are confident that you will be satisfied with our excellent products and service. For your own safety, please read this user manual carefully before installing and operating the device. - Page 3 www.goldenseauv.com Voltage Input: AC 100-240V~, 50/60Hz; Power: 80W; Product Size: 491x76x240mm This UV lamp is only for commercial use in non-residential locations, such as in the hotels, schools, factories, theaters, gymnasiums, restaurants, offices, etc., it shall only be used by professional person. The warning sign as below shall be shown on the way to the fixture during operation.
-
Page 4: Manual Operation
www.goldenseauv.com 1. Manual Operation (control panel) 1) Close all the doors and windows. 2) Plug-in and power on: press the power switch <I/O> to <I>, the power indicator turns on green. 3) Select time setting <30 mins>, <60 mins> or <120 mins> by the Time Setting touch key, the touch key indicator light turns on. -
Page 5: Motion Sensor Operation(If The Lamp With Motion Sensor)
www.goldenseauv.com Start 3. Motion Sensor Operation (if the lamp with Motion Sensor) 1. Turn on the UV lamp, select the disinfection time and start, leave the room, after 2 minutes alarming (Di….Di…Di….), the UV lamps will switch on automatically, the motion sensor will be activated. -
Page 6: Suggestion For Disinfection Time
www.goldenseauv.com According to the guideline, indoor spaces should be disinfected with UV light with an intensity of over 1.5 watts per square meter. An UV lamp can disinfect objects within one meter for at least half an hour. Longer exposure to radiation is needed when the temperature indoors is below 20°... -
Page 7: Product Overview
www.goldenseauv.com ATTENTION – RISQUE D’INCENDIE CAUTION: TO REDUCE THE RISK OF FIRE UTILISER UNIQUEMENT LES LAMPES USE ONLY _TUV PL-L, 36W,0.44A_ LAMPS _TUV PL-L, 36W,0.44A Suitable for damp locations CONVIENT AUX EMPLACEMENTS HUMIDES UV-C RISK GROUP 3 GROUPE DE RISQUE UV-C 3 WARNING: UV-C emitted from this AVERTISSEMENT UV-C émis par ce product. -
Page 8: Dimensional Drawings
www.goldenseauv.com 8. Dimensional Drawings 9. Installation Instructions 9.1 Installation of Floor Bracket Steps: 1. Take the device and the floor brackets out of the package. 2. Align the screw holes of the floor brackets with the screw holes at the bottom of the device. - Page 9 www.goldenseauv.com 9.2 Wall Mounting wall Steps: 1. Mount 2 screws (M4) on the wall with a distance of 422mm. 2. Mount the device onto the 2 screws using the 2 hooks of the device (as shown). 3. Attach a safety cable (not included) between the handle of device and a fixing point on the wall.
- Page 10 www.goldenseauv.com 9.4 Installation of Rigging Bracket (optional) Diameter: 6mm Steps: 1. Fix the rigging brackets to the screw holes of both top and bottom of the device as shown with 8 screws (M4x10mm) provided. 2. Fix the rigging brackets to the hanging rods on the ceiling as shown. (The hanging rods are not included) 3.
-
Page 11: Replacing The Uv Tube
www.goldenseauv.com 9.6 Installation of Rotating Bracket (optional) Steps: 1. Align the screw holes of the rotating bracket with the screw holes of both top and bottom of the device as shown. 2. Fix the rotating bracket to the device with 4 screws (M4x10mm). 10. -
Page 12: Troubleshooting Tips
www.goldenseauv.com Steps: 1. Wait for UV tube to cool down (to avoid scalding) after switching off the device. 2. Pull up the locking tabs ① on both sides of the device, and open the protective grid as shown. 3. Remove the safety catch ② of the UV tube, move the UV tube out of its holder from left to right ③... -
Page 13: Features
www.goldenseauv.com Status Audio Alarm Power Indicator Standby Green indicator on Beeping for 2 minutes regularly Red indicator flashing for 2 minutes Delayed (frequency increase in the regularly (frequency increase in the Start countdown 10 seconds) countdown 10 seconds) Lamp UV Lamp on after 15 seconds Red indicator on after beeping stops Strike when the beeping stops... - Page 14 www.goldenseauv.com Weight Net weight: 2.2 kg Accessories List: UV Tube Included Remote Control Included (battery type: CR2025) UV Glasses Included (protective eyewear) Reflector Included Floor Bracket Included Warning Sign Included Tripod Bracket Included Safety Cable Optional Rigging Bracket Optional Rotating Bracket Optional UV Irradiance Meter Optional...
-
Page 15: Cleaning And Maintenance
www.goldenseauv.com 13. Cleaning and Maintenance 1. To ensure the device remains in good condition and does not fail prematurely, regular maintenance, cleaning and checks are required. 2. For cleaning of the device, please use a lint-free cloth. 3. To avoid damage to the device, never use detergent or solvents. 4.


Need help?
Do you have a question about the UVL72 and is the answer not in the manual?
Questions and answers