
Related Manuals for Miele WCA 030 Active


Summary of Contents for Miele WCA 030 Active
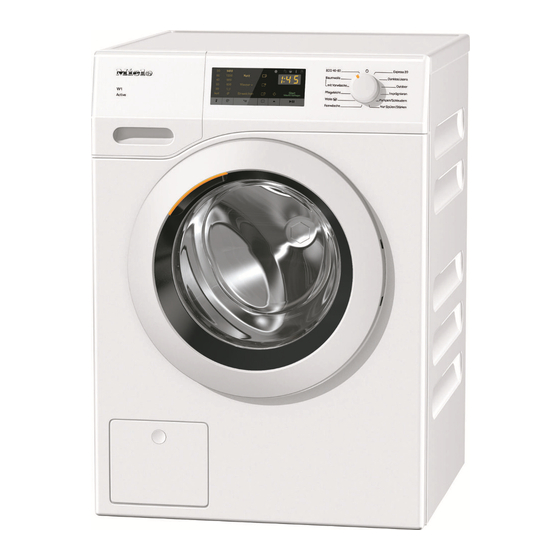
- Page 1 Operating instructions for washing machines To avoid the risk of accidents or damage to the machine, it is essen- tial to read these instructions before it is installed and used for the first time. en-GB M.-Nr. 11 592 740...
-
Page 2: Table Of Contents
Contents Warning and Safety instructions ..............Operating the washing machine ..............12 Control panel ....................... 12 How the sensor controls work ................13 Caring for the environment ................14 Before using for the first time ................15 Removing the open spanner ................15 Washing environmentally and economically .......... - Page 3 Water softeners ....................39 Dispensing aids ....................39 Fabric conditioner and liquid starch ..............39 Recommended Miele detergents ................ 41 Recommended detergents in accordance with Directive (EU) Nr. 1015/2010..42 Cleaning and care ..................... 43 Cleaning the external casing and the control panel ..........43 Cleaning the detergent dispenser drawer ............
- Page 4 Contents The water protection system................64 Connection to the water supply ................65 Water drainage ....................66 Electrical connection ..................67 Consumption data ..................... 68 Note for test institutes ..................69 Selecting test programmes ................69 Consumption data ..................... 70 Technical data....................
-
Page 5: Warning And Safety Instructions
It must be used only as a domestic appliance to wash items which are specified by the manufacturer as being washable on the wash care label. Miele cannot be held liable for damage resulting from in- correct or improper use or operation. - Page 6 Warning and Safety instructions The washing machine can only be used by people with reduced physical, sensory or mental capabilities, or lack of experience or knowledge, if they are supervised whilst using it or have been shown how to use it safely and recognise and understand the con- sequences of incorrect operation.
- Page 7 Faulty components must only be replaced by genuine Miele ori- ginal spare parts. Only when these parts are fitted can Miele guaran- tee the safety standards of the machine. The electrical socket must be easily accessible after installation so that the machine can be disconnected from the electricity supply if necessary.
- Page 8 Warning and Safety instructions If the electrical connection cable is faulty it must only be replaced by a Miele authorised service technician to protect the user from danger. The machine must be isolated from the electricity supply when cleaning and maintaining the machine and in the event of a fault.
- Page 9 Warning and Safety instructions Correct use Do not install the washing machine in a room where there is a risk of frost. Frozen hoses may burst or split. The reliability of the elec- tronic control unit may be impaired at temperatures below freezing point.
- Page 10 If, however, you do wish to descale it, only use a proprietary natural citric acid based descaling agent. Miele recommends using Miele descaling agent which is available to order online at www.miele.co.uk or from Miele. Strictly observe the instructions on the packaging.
- Page 11 A Miele tumble dryer can be stacked on top of a Miele washing machine using the appropriate stacking kit (available as an optional accessory). Please make sure you order the correct one for the Miele washing machine and Miele tumble dryer.
-
Page 12: Operating The Washing Machine
Operating the washing machine Control panel a Sensor control (temperature) f Sensor control (start/add laun- for selecting the temperature dry) b Sensor control ... -
Page 13: How The Sensor Controls Work
Operating the washing machine i Indicator lights How the sensor controls work lights up if there are faults af- The sensor controls control the values located above them. fecting the water inlet and drainage The , , , , and sensor con- trols react to fingertip contact. ... -
Page 14: Caring For The Environment
/ recycling centre for electrical and electronic ap- pliances, or contact your dealer or Miele for advice. You are also respons- ible for deleting any personal data that may be stored on the appliance being disposed of. Please ensure that your old appliance poses no risk to children while being stored prior to disposal. -
Page 15: Before Using For The First Time
Before using for the first time Remove the drain hose elbow Damage resulting from incorrect from the drum installation and connection. Installing and connecting the wash- An elbow piece for the drain hose is ing machine incorrectly will cause stored in the drum. - Page 16 Before using for the first time Protective foil and stickers re- Opening the door at the end of moval the programme Remove: The door remains locked during the anti-crease phase. The indicators light - The protective foil from the door up for the first 15 minutes.
-
Page 17: Washing Environmentally And Economically
This will keep the energy and water and odours to build up in the washing consumption to a minimum in relation machine. Miele therefore recommends to the size of the load. cleaning the washing machine once every month. -
Page 18: Prepare The Laundry
1. Prepare the laundry Tip: Stains (e.g. blood, egg, coffee, tea) can be pre-treated using some handy tricks which can be found in the Miele guide to laundry care. Damage due to solvent-based cleaning agents Cleaning agents containing benzine, stain remover, etc., can damage... -
Page 19: Load The Washing Machine
2. Load the washing machine Open the door Close the door Reach under the door grip and pull Make sure that no items are caught the door open. between the door and the seal. Check the drum for pets or foreign objects before loading it with laun- dry. -
Page 20: Select A Programme
3. Select a programme Selecting a temperature and spin Programme selection speed The washing machine is switched on by turning the programme selector to a The wash programme’s pre-set tem- wash programme. perature and spin speed light up brightly. The temperatures reached inside the washing machine might not be the same as the temperatures selected. - Page 21 3. Select a programme Selecting extra options In some programmes, you can combine 2 extra options. In other programmes, you can only se- lect 1 extra option or there are no avail- able extra options. Touch the sensor control: - Once: the Short extra option is selec- ted and lights up.
-
Page 22: Add Detergent
4. Add detergent Adding fabric conditioner Detergent dispenser drawer Any detergent suitable for automatic front loading washing machines can be used. Please observe the instructions for use and dosage on the detergent packaging. Adding detergent Add fabric conditioner or liquid starch to the ... - Page 23 4. Add detergent Tips on dosing Using liquid detergent with a pre- wash Adjust the detergent dosage to the level of soiling of the laundry and the size of Liquid detergent cannot be used for the the load. Reduce the amount of deter- main wash if the pre-wash has been se- gent with smaller loads (e.g.
-
Page 24: Capdosing
Each capsule contains the correct amount for one wash cycle. Caps are available to order from Miele Open the lid of the / compart- or from the Miele online shop (see the ment. end of this booklet for contact details). ... - Page 25 4. Add detergent The wash programme will dispense the contents of the capsule at the correct time. Water intake to the compartment is solely via the capsule. Do not add any additional fabric con- ditioner to the compartment. Remove the empty capsule at the end of the programme.
-
Page 26: Start The Programme
5. Start the programme Starting a programme Adding laundry during a pro- gramme sequence Touch the sensor control. Laundry can be added or removed at The door will lock and the programme any time, provided that the symbol will start. is not illuminated in the display. -
Page 27: End Of Programme
6. End of programme Opening the door and remov- Items left in the drum could discolour ing the laundry other items in the next wash or be- come discoloured themselves. The door remains locked during the Remove all items from the drum. anti-crease phase. -
Page 28: Spinning
Spinning Final spin speed in wash pro- Selecting Rinse hold (final spin) grammes Touch the sensor control re- peatedly until the indicator (Rinse When a programme is selected, the hold) lights up. sensor control for the optimum spin speed for that programme will be The laundry is not spun after the final brightly lit up in the control field. -
Page 29: Delay Start
Delay start With Delay start you can choose when Starting Delay start you want the programme to start. You Touch the sensor control. can delay the start of the programme by The Delay start process starts and 30 minutes up to a maximum of 24 counts down on the time display. -
Page 30: Programme Chart
Programme chart ECO 40-60 Max. load 7.0 kg Items For normally soiled cotton garments A laundry load consisting of mixed cottons that are intended for washing at 40 °C or 60 °C can be washed in the same wash cycle. This programme is the most efficient in terms of energy and water consumption for washing cottons. - Page 31 Programme chart Minimum iron Cold to 60 °C Max. load 3.5 kg Items Synthetic and mixed fibre textiles as well as easy care cotton Reduce the spin speed for fabric that creases easily. Woollens Cold to 40 °C Max. load 2.0 kg Items Wool or wool blend fabric Reduce the spin speed for fabric that creases easily.
- Page 32 Programme chart Outerwear Cold to 40 °C Max. load 2.5 kg Items Performance outerwear (e.g. jackets and trousers) made from mem- brane fabric such as Gore-Tex®, SYMPATEX®, WINDSTOPPER®, etc. - Zip up or close any jackets with Velcro before washing. - Do not use fabric conditioner. - If required, these items can also be re-proofed using the Proof- ing programme.
-
Page 33: Extra Options
Extra options You can use the extra options buttons Short to augment the wash programmes. For textiles with light soiling with no vis- Use the sensor control to select or ible staining. deselect extra options. The wash duration is reduced. Water + The water level in the main wash and the rinses will be increased. -
Page 34: The Following Extras Can Be Selected In Addition To The Programmes
Extra options The following extras can be selected in addition to the pro- grammes ECO 40-60 – – – – Cottons Minimum iron – Woollens – – – – Delicates –... -
Page 35: Garment Care Label Symbols
Garment care label symbols Drying Washing The number of dots indicates the dry- The figure quoted in the bucket is the ing temperature maximum temperature the garment can be washed at. The number of Normal temperature bars under the symbol indicates the ... -
Page 36: Programme Sequence
Programme sequence Main wash Rinses Spinning Water Wash Water Rinses level rhythm level ECO 40-60 2–3 1,2,3 Cottons Minimum iron Woollens Delicates ... - Page 37 Programme sequence Special features in the pro- = low water level gramme sequence = medium water level Anti-crease: = high water level At the end of the programme, the drum = intensive rhythm continues to turn at intervals for up to 30 minutes to help prevent creasing.
-
Page 38: Changing The Programme Sequence
Changing the programme sequence Changing a programme (safety Cancelling a programme lock) You can cancel a wash programme at any time after it has started. A programme, temperature, spin speed or selected options cannot be changed Turn the programme selector to the once the machine has been success- position. -
Page 39: Detergent
Detergent The correct detergent Dispensing aids All detergents produced for automatic Use dispensing aids, (e.g. balls) if these washing machines are suitable. Follow are supplied with the detergent, particu- the manufacturer's instructions and larly when using liquid detergent. dosage recommendations on the pack- Refill packs of detergent aging. - Page 40 Detergent Using fabric conditioner or Colour run and dye removers/ starch separately dyes Prepare the starch in accordance with Damage due to colour run/dye the manufacturer's instructions on the removers. packaging. Colour run and dye removers can Tip: When adding fabric conditioner, cause corrosion in the washing ma- activate the Water + extra option.
-
Page 41: Recommended Miele Detergents
Detergent Recommended Miele detergents Miele detergents have been specially designed for day-to-day use in Miele wash- ing machines. See “Detergents and care products” for more information about these detergents. Miele detergents Miele capsules UltraWhite UltraColor ... -
Page 42: Recommended Detergents In Accordance With Directive (Eu) Nr. 1015/2010
Detergent Recommended detergents in accordance with Directive (EU) Nr. 1015/2010 The recommendations apply to the temperature ranges given in the Programme chart. Universal Coloureds Delicates and Specialist woollens detergent ECO 40-60 – – Cottons – – ... -
Page 43: Cleaning And Care
Cleaning and care Cleaning the external casing Cleaning the detergent dis- and the control panel penser drawer Removing the dispenser drawer Risk of electric shock! Mains voltage is present when the washing machine is switched off Disconnect the machine from the electricity supply before cleaning or maintenance. - Page 44 Cleaning and care Cleaning the siphon and the / compartment channel Liquid starch results in clogging. If clogged, the siphon in the / compartment will not work and the compartment can overflow. Clean the siphon particularly thor- oughly after using liquid starch a few times.
-
Page 45: Hygiene Info(Cleaning The Drum)
Cleaning and care Cleaning the filter in the inlet valve Hygiene info (Cleaning the drum) Using pliers, carefully loosen the ribbed plastic nut on the inlet valve Washing at low temperatures and/or us- and unscrew it. ing liquid detergent can cause bacteria and unpleasant odours to build up in the washing machine. -
Page 46: Problem Solving Guide
Problem solving guide Many malfunctions and faults that can occur in daily operation can be easily remedied. Time and money will be saved because a service call will not be needed. The following guide may help you to find the reason for a malfunction or a fault, and to correct it. -
Page 47: The Programme Is Cancelled And A Fault Indicator Light Lights Up In The Control Panel
Wait at least 2 minutes before reconnecting the washing machine to the electricity supply. Switch the washing machine on again. Restart the programme. If the fault message appears again, contact the Miele Customer Service Department. -
Page 48: During The Programme, A Symbol Appears In The Time Display
When washing, a wash programme using a temperat- lights up. ure above 60 °C has not been run for a long time. Run the Cottons 90 °C programme using Miele machine cleaner or a universal powder detergent. This will clean the washing machine and prevent a... -
Page 49: General Problems With The Washing Machine
In order to prevent bacteria and unpleasant odours building up in the washing machine, run the Cot- tons 90 °C programme using Miele machine cleaner or a universal powder detergent. The door and the detergent drawer were closed after washing. - Page 50 Problem solving guide General problems with the washing machine Problem Cause and remedy Fabric conditioner is not The siphon tube is not correctly positioned or is completely dispensed clogged. or too much water re- Clean the siphon, see “Cleaning and care - Clean- mains in the ...
-
Page 51: An Unsatisfactory Wash Result
Problem solving guide An unsatisfactory wash result Problem Cause and remedy Liquid detergent does Liquid detergents usually contain no bleaching not give the required agents. They do not remove fruit, coffee and tea result. stains. Use a general purpose powder detergent contain- ing a bleaching agent. -
Page 52: The Door Will Not Open
Problem solving guide The door will not open Problem Cause and remedy The door cannot be The drum is locked during a programme. pulled open during a Follow the description in “5. Starting a programme programme. – Adding or removing laundry”. After the programme is For safety reasons the drum door cannot be opened cancelled, flashing bars... -
Page 53: Opening The Door In The Event Of A Blocked Drain Outlet And/Or Power Cut
Problem solving guide Draining the washing machine Opening the door in the event of a blocked drain outlet and/ Remove the drain filter, though not or power cut completely. Switch off the washing machine. Place a suitable container under the access panel, e.g. - Page 54 Problem solving guide Open the door Danger of injury due to rotating drum! Reaching into a moving drum is ex- tremely dangerous. Always make sure that the drum is stationary before reaching in to re- move laundry. Clean the drain filter thoroughly. ...
-
Page 55: Service
In the event of any faults which you Optional spare parts and accessories cannot remedy yourself, please contact for this washing machine are available your Miele dealer or the Miele Customer from your Miele Dealer, the Miele Spare Service Department. Parts Department or via the internet at www.miele.co.uk. -
Page 56: Installation
*INSTALLATION* Installation Front view a Water inlet hose (pressure tested to e Detergent dispenser drawer 7000 kPa) f Door b Mains connection cable g Access to drain filters, drain pumps c Flexible drain hose (with detachable and emergency release swivel elbow) h Four height-adjustable feet d Control panel... -
Page 57: Rear View
*INSTALLATION* Installation Rear view a Drain hose e Water inlet hose (pressure tested to 7000 kPa) b Transport clips for inlet and drain f Safety caps for transit bars hoses and mains connection cable c Mains connection cable g Transport clips for inlet and drain hoses and for storing transit bars d Protruding lid for holding when mov- when not in use... -
Page 58: Installation Surface
(concrete or brick), in order to ensure it cannot fall or slip. Secure the washing machine using a clamp/fastening bracket (MTS floor mounting kit – available from your Miele dealer or Miele spare parts de- partment). -
Page 59: Removing The Transit Bars
*INSTALLATION* Installation Removing the right-hand transit bar Removing the transit bars Removing the left-hand transit bar Push the cover out and turn the left- hand transit bar 90° using the span- Push the cover out and turn the left- ner supplied. - Page 60 *INSTALLATION* Installation Covering holes Securing the transit bars Risk of injury from sharp edges. There is a risk of injury from reaching into holes that are not covered. Cover the holes for the transit bars after they have been removed. ...
-
Page 61: Fitting The Transit Bars
*INSTALLATION* Installation Fitting the transit bars Opening the covers Press against the retainer with a sharp object (a narrow screwdriver, for example). The cover opens. Fitting the transit bars To fit the bars, follow the instructions for removing them in reverse order. Tip: The bars will slide in more easily if you lift the drum slightly. -
Page 62: Levelling The Machine
*INSTALLATION* Installation Levelling the machine The washing machine must stand per- fectly level on all four feet to ensure safe and proper operation. Incorrect installation may increase elec- tricity and water consumption and may cause the machine to move about. Screwing out and adjusting the feet The four adjustable screw feet are used for levelling the washing machine. -
Page 63: Installing Under A Continuous Worktop
*INSTALLATION* Installation Installing under a continuous work- Washer-dryer stack The washing machine can be combined with a Miele tumble dryer in a washer- Risk of electric shock due to ex- dryer stack. The appropriate “WTV” posed cables stacking kit* to match your dryer is re- There is a risk of coming into contact quired. -
Page 64: The Water Protection System
*INSTALLATION* Installation Electronic unit and washing machine The water protection system housing The Miele water protection system pro- - Sump tects all parts of the washing machine Any leaking water is collected in a from water damage. sump in the base of the machine. A... -
Page 65: Connection To The Water Supply
*INSTALLATION* Installation Maintenance Connection to the water supply Only use a genuine Miele hose that has Health risk and risk of damage been pressure tested to withstand at due to contaminated incoming water. least 7,000 kPa should you ever need a The quality of the incoming water replacement. -
Page 66: Water Drainage
If required, the hose can be extended to a length of up to 5 m. Accessories are available from Miele or from your Miele dealer. For a delivery head of more than 1 m (up to a max. of 1.8 m) a replacement drain pump will need to be fitted. -
Page 67: Electrical Connection
If the connection cable is damaged, it must only be replaced with a specific connection cable of the same type (available from the Miele Customer Ser- vice Department). For safety reasons, such replacement may only be carried out by a qualified technician or the Miele Customer Service Department. -
Page 68: Consumption Data
Consumption data Load Energy Water Duration Residual moisture °C kWh Litres h:min Cottons * 0.90 2:59 0.88 2:59 0.50 2:59 Cottons 2.00 2:29 1.20 2:29 1.00 2:19 0.95 2:39 0.35 2:39 Minimum iron 0.45 1:59 Delicates 0.25 1:09 – Woollens 0.23 0:38 –... -
Page 69: Note For Test Institutes
Consumption data Note for test institutes Test programme in accordance with EN 60456 and energy label with Directive 1061/2010 Selecting test programmes Test programmes that conform to EN 60456 and the energy label to Direct- ive 1061/2010 can be selected via the ECO 40-60 programme. ... -
Page 70: Consumption Data
Consumption data... -
Page 71: Technical Data
Technical data Height 850 mm Width 596 mm Depth 636 mm Depth with door open 1054 mm Height for building under 850 mm Width for building under 600 mm Weight Approx. 80 kg Capacity 7.0 kg dry laundry Supply voltage See data plate Rated load See data plate Fuse rating See data plate Consumption data... -
Page 72: Programmable Functions
Programmable functions Choosing and selecting a pro- The programmable functions are used grammable function to alter the machine's electronics to suit changing requirements. Program- The number of the programmable mable functions can be altered at any function will appear in the time display time. -
Page 73: Editing And Saving A Programmable Function
Programmable functions Editing and saving a program- Exit programming level mable function Turn the programme selector to . You can either switch a programmable The option you have selected is now function on/off or select different op- stored in memory. You can change it tions. -
Page 74: Lock Code
Programmable functions Lock code Indicator switch-off behaviour The lock code prevents the washing machine being used without your The indicators will switch off after knowledge. 15 minutes to save energy. When the code has been activated, you Options have to enter a code after switching the ... -
Page 75: Memory
Programmable functions Memory Soak duration The washing machine will save the You can set a duration for the soak last settings (temperature, spin speed duration of between 30 minutes and and some of the extras) selected for a 2 hours. programme after the programme has The duration can be selected in started. -
Page 76: Reduce Temperature
The boiling point for water is lower at There are three different water levels high altitudes. In order to avoid water which can be selected by activating boiling, Miele recommend activating the Water + extra. the reduce temperature setting at alti- Options tudes of more than 2000 m above sea... -
Page 77: Suds Cooling
Programmable functions Suds cooling Anti-crease When this is activated, additional wa- The anti-crease function helps prevent ter flows into the drum at the end of creasing if laundry is not going to be the main wash to cool the suds down. removed immediately after the end of Hot suds can damage plastic drainage the programme. -
Page 78: Detergents And Care Products
All the products - For wool, silks and delicates have been designed for Miele washing - Special care complex based on machines. wheat protein and with colour-pro- These and many other useful products... -
Page 79: Specialist Detergents
- For down-filled items - Visibly renews fabric with just one wash - Retains the elasticity and breathabil- ity of down - Special Miele formula with No- vozymes technology - Lanolin for effective cleaning and gentle care - Removes pilling and renews colour... -
Page 80: Fabric Care
Detergents and care products Fabric care Machine care These fabric care products are available Descaling agent as convenient single-use capsules. - Removes heavy limescale deposits Fabric conditioner cap - Mild and gentle with natural citric - Fabric conditioner for freshly scented acid laundry - Gentle on heater elements, drum and... - Page 83 United Kingdom Miele Co. Ltd., Fairacres, Marcham Road, Abingdon, Oxon, OX14 1TW Tel: 0330 160 6600, Internet: www.miele.co.uk/service, E-mail: info@miele.co.uk Australia Ireland South Africa Miele Australia Pty. Ltd. Miele Ireland Ltd. Miele (Pty) Ltd. ACN 005 635 398 2024 Bianconi Avenue...
- Page 84 WCA 030 Active en-GB M.-Nr. 11 592 740 / 03...
Need help?
Do you have a question about the WCA 030 Active and is the answer not in the manual?
Questions and answers