Table of Contents
Advertisement
Quick Links
Advertisement
Table of Contents

Related Manuals for Xylem Flygt 5530


Summary of Contents for Xylem Flygt 5530
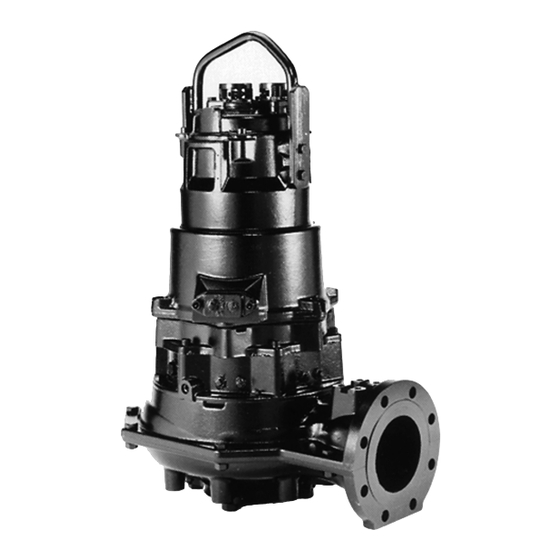
- Page 1 Installation, Operation, and Maintenance Manual Flygt 5530...
-
Page 3: Table Of Contents
Earthing (Grounding)........................19 Connect the motor cable to the pump..................19 Connect the motor cable to the starter and monitoring equipment........20 Cable charts............................21 Check the impeller rotation......................29 Operation..............................31 Precautions............................31 Distance to wet areas........................31 Noise level............................31 Flygt 5530 Installation, Operation, and Maintenance Manual... - Page 4 The pump does not stop when a level sensor is used..............46 The pump starts-stops-starts in rapid sequence................46 The pump runs but the motor protection trips................47 The pump delivers too little or no water..................47 Technical Reference..........................49 Motor data............................49 Application limits..........................49 Flygt 5530 Installation, Operation, and Maintenance Manual...
-
Page 5: Introduction And Safety
This includes any modification to the equipment or use of parts not provided by Xylem. If there is a question regarding the intended use of the equipment, please contact an Xylem representative before proceeding. -
Page 6: Environmental Safety
• Handle and dispose of the processed liquid in compliance with applicable environmental regulations. • Clean up all spills in accordance with safety and environmental procedures. • Report all environmental emissions to the appropriate authorities. Flygt 5530 Installation, Operation, and Maintenance Manual... -
Page 7: User Safety
1. Follow local laws and regulations regarding recycling if the unit or parts are accepted by an authorized recycling company. 2. If the first guideline is not applicable, then return the unit or parts to your Xylem representative. User safety... -
Page 8: Product Warranty
However, should the need arise for a warranty claim, then contact your Xylem representative. Spare parts Xylem guarantees that spare parts will be available for 15 years after the manufacture of this product has been discontinued. Flygt 5530 Installation, Operation, and Maintenance Manual... -
Page 9: Transportation And Storage
• Always lift the unit by its lifting handle. Never lift the unit by the motor cable or by the hose. • Do not attach sling ropes to shaft ends. Flygt 5530 Installation, Operation, and Maintenance Manual... -
Page 10: Temperature Ranges For Transportation, Handling And Storage
Lifting equipment is always required when handling the unit. It must fulfill the following requirements: • The minimum height (contact Xylem for information) between the lifting hook and the floor must be sufficient to lift the unit. • The lifting equipment must be able to hoist the unit straight up and down, preferably without the need for resetting the lifting hook. -
Page 11: Storage Guidelines
• Before operating the unit after storage, it must be inspected with special attention to the seals and the cable entry. • The impeller/propeller must be rotated every other month to prevent the seals from sticking together. Flygt 5530 Installation, Operation, and Maintenance Manual... -
Page 12: Product Description
• Modifications to the unit or installation should only be carried out after consulting with Xylem. • Original spare parts and accessories that are authorized by Xylem are essential for compliance. The use of other parts can invalidate any claims for warranty or compensation. -
Page 13: Parts
Motor For information about the motor, Motor data (page 49). Monitoring equipment For more information about the monitoring equipment, see Monitoring equipment (page 13). Impeller The impeller is a shrouded three- channel H-impeller. Flygt 5530 Installation, Operation, and Maintenance Manual... - Page 14 Support bearing The bearing consists of a single-row ball bearing. Agitator The agitator stirs the slurry in order to prevent deposition of material on the sump bottom. Use of the agitator is optional. Flygt 5530 Installation, Operation, and Maintenance Manual...
-
Page 15: Monitoring Equipment
Specially approved products also have an approval plate. Curve code/Propeller code Serial number, see Product denomination (page 14) Product number Country of origin Additional information Phase; type of current; frequency Rated voltage Flygt 5530 Installation, Operation, and Maintenance Manual... -
Page 16: Product Denomination
The serial number is used for identification of an individual product, and is divided into four parts. This is an example of a serial number, and an explanation of its parts. NP 3085.183 - 951 0163 Product code Production year Production cycle Running number Flygt 5530 Installation, Operation, and Maintenance Manual... -
Page 17: Installation
Fasteners WARNING: • Only use fasteners of the proper size and material. • Replace all corroded fasteners. • Make sure that all fasteners are properly tightened and that there are no missing fasteners. Flygt 5530 Installation, Operation, and Maintenance Manual... -
Page 18: Install With P-Installation
Check that the guide bars are placed vertically. Use a level or a plumb line. 5. Connect the discharge pipe to the discharge connection. Make sure the rubber gasket in the discharge connection is correctly positioned. 6. Lower the pump along the guide bars. Flygt 5530 Installation, Operation, and Maintenance Manual... -
Page 19: Install With S-Installation
5. Connect the motor cable and the starter and monitoring equipment according to the separate instructions. Make sure that the impeller rotation is correct. For more information, see Check the impeller rotation (page 29). Flygt 5530 Installation, Operation, and Maintenance Manual... -
Page 20: Make The Electrical Connections
• The sheathing must not be damaged and must not have indentations or be embossed (with markings, etc.) at the cable entry. • The cable entry seal sleeve and washers must conform to the outside diameter of the cable. Flygt 5530 Installation, Operation, and Maintenance Manual... -
Page 21: Earthing (Grounding)
• The screened cable must be used according to the European CE requirements if a Variable Frequency Drive (VFD) is used. For more information, contact your Xylem representative (VFD-supplier). -
Page 22: Connect The Motor Cable To The Starter And Monitoring Equipment
9. Fasten the screws on the entrance flange so that the cable insertion assembly bottoms out. Connect the motor cable to the starter and monitoring equipment WARNING: Do not install the starter equipment in an explosive zone unless it is explosion-proof rated. Flygt 5530 Installation, Operation, and Maintenance Manual... -
Page 23: Cable Charts
This topic contains general connection information. It also provides cable charts that show connection alternatives for use with different cables and power supply. T1 T2 Figure 4: Phase sequence Connection locations The figures in this section illustrate how to interpret the connection strip symbols. Flygt 5530 Installation, Operation, and Maintenance Manual... - Page 24 L1 L2 L3 T1 T2 T3 T4 Thermal contact FLS 10 Thermistor 10. Level sensor 11. Capacitor FLS 10 Color code standard Code Description Brown Black White Orange Green GNYE Green-Yellow Grey Blue Yellow Flygt 5530 Installation, Operation, and Maintenance Manual...
- Page 25 For markings on sensor leads, see Sensors connection (page 28). Connections included • 3-phase connection (page 24) • 1-phase connection (page 26) • Sensors connection (page 28) • Screened cable connection (page 27) Flygt 5530 Installation, Operation, and Maintenance Manual...
- Page 26 U1 V1 W1 W2 U2 V2 L1 L2 L3 L3:1 L2:1 L1:1 U1 V1 W1 W2 U2 V2 L3:2 L2:2 L1:2 U1 V1 W1 W2 U2 V2 U1 V1 W1 W2 U2 V2 L1 L2 L3 L1 L2 Flygt 5530 Installation, Operation, and Maintenance Manual...
- Page 27 U1 V1 W1 W2 U2 V2 U1 V1 W1 W2 U2 V2 Y-SER U1 V1 W1 W2 U2 V2 W5 U5 V5 U6 W6 U1 V1 W1 W2 U2 V2 U1 V1 W1 W2 U2 V2 WS004128A Flygt 5530 Installation, Operation, and Maintenance Manual...
- Page 28 4 Leads with level regulator U1 Z1 Starter 12 Leads U1 V1 U6 U2 W2 V5 W1 W5 U5 V2 W6 U1 V1 W1 W2 U2 V2 V2 W2 U1 V1 W1 W2 U2 V2 Starter Flygt 5530 Installation, Operation, and Maintenance Manual...
- Page 29 FGB Screened Mini CAS Mini CAS+AUX Screen - SUBCAB and Screenflex T1 and T2 T1 and T2 White insulation hose twisted White insulation hose twisted together Screen together Screen T1 T2 L2 L3 Flygt 5530 Installation, Operation, and Maintenance Manual...
- Page 30 T1/*OG/4 WH/YE T2/*OG/5 *SUBCAB AWG + FLS Max 12 V Control leads WH/YE Mini T1/*OG/4 T2/*BU/5 *SUBCAB AWG + CLS Max 12 V T1 Control leads BN/RD WH/YE Mini T1/*OG/4 T2/*BU/5 *SUBCAB AWG Flygt 5530 Installation, Operation, and Maintenance Manual...
-
Page 31: Check The Impeller Rotation
Check the impeller rotation WARNING: The starting jerk can be powerful. 1. Start the motor. 2. Stop the motor after a few seconds. 3. Check that the impeller rotates according to this illustration. Flygt 5530 Installation, Operation, and Maintenance Manual... - Page 32 The correct direction of impeller rotation is clockwise when you look at the pump from above. 4. If the impeller rotates in the wrong direction, transpose two phase leads (3-phase) and do this procedure again. Flygt 5530 Installation, Operation, and Maintenance Manual...
-
Page 33: Operation
Make sure that the rotation of the impeller is correct. For more information, see Check the impeller rotation. 1. Check the oil level in the oil housing. 2. Remove the fuses or open the circuit breaker, and check that the impeller can be rotated freely. Flygt 5530 Installation, Operation, and Maintenance Manual... - Page 34 Operation 3. Conduct insulation test phase to ground. To pass, the value must exceed 5 megohms. 4. Check that the monitoring equipment works. 5. Start the pump. Flygt 5530 Installation, Operation, and Maintenance Manual...
-
Page 35: Maintenance
15 (11) 27 (20) 65 (48) 127 (93.7) 220 (162) 434 (320) 70, 80 2.7 (2) 5.4 (4) 9.0 (6.6) 22 (16) 44 (32) 76 (56) 187 (138) 364 (268) 629 (464) 1240 (915) Flygt 5530 Installation, Operation, and Maintenance Manual... -
Page 36: Change The Oil
WARNING: The oil housing may be pressurized. Hold a rag over the oil plug to prevent oil from spraying out. WS002420A 4. Drain the pump. Unscrew the other oil plug for easier drainage. Flygt 5530 Installation, Operation, and Maintenance Manual... -
Page 37: Service The Pump
(liquid) temperatures <40°C. NOTICE: Shorter intervals may be required when the operating conditions are extreme, for example with very abrasive or corrosive applications or when the liquid temperatures exceed 40°C (104°F). Inspection Flygt 5530 Installation, Operation, and Maintenance Manual... -
Page 38: Major Overhaul
For a major overhaul, take this action in addition to the tasks listed under Inspection. Service item Action Support and main bearing Replace the bearings with new bearings. Mechanical seal Replace with new seal units. Flygt 5530 Installation, Operation, and Maintenance Manual... -
Page 39: Service In Case Of Alarm
Replace the hydraulic parts Replace the impeller Required tools: • Impeller puller If applicable, contact your Xylem representative for correct type and size • Rod (wooden or plastic) for locking the impeller in place • Two crowbars, if applicable WARNING: •... - Page 40 Use the impeller puller or crowbars. Place a protector between the shaft end and the impeller puller. Do not pry off the impeller, since it can easily be damaged. 4. Remove the wearing cover. If applicable use a crowbar. 5. Remove the expeller. Flygt 5530 Installation, Operation, and Maintenance Manual...
- Page 41 Torque values (page 33). 6. Check that the impeller can rotate freely. Make sure that there is no friction between the impeller and the wear ring and that the clearance is 0.3 mm (0.01in.). Flygt 5530 Installation, Operation, and Maintenance Manual...
-
Page 42: Replace The Wear Parts
(page 38). 1. Remove the wearing cover and the expeller. Use a crowbar, if applicable. WS002412A 2. Remove the gasket from the pump housing outlet. 3. Remove the lining from the pump housing: Flygt 5530 Installation, Operation, and Maintenance Manual... - Page 43 2. Fit the expeller, wearing cover and the impeller. For more information, see Install the impeller (page 39). 3. Fit the inner lining: a) Fit the new greased O-rings to the lower part of the pump housing. Flygt 5530 Installation, Operation, and Maintenance Manual...
- Page 44 The correct distance is 0.3 mm (0.01 in.). b) Adjust the nuts along the studs to achieve the correct distance. c) Tighten the trimming flange nuts. For tightening torque, see Torque values (page 33). 8. Install the suction cover: Flygt 5530 Installation, Operation, and Maintenance Manual...
-
Page 45: Replace The Agitator
Fit the suction cover. b) Fit two washers on each suction cover screw and tighten. Tightening torque: 100 Nm (74 ft-lbs) Replace the agitator Impeller screw Barrel nut Propeller shaft Agitator propeller Washer Retaining ring Flygt 5530 Installation, Operation, and Maintenance Manual... - Page 46 5. Fit the propeller, the retaining ring, washer, the propeller screw into the propeller shaft and tighten. Tightening torque: 57 Nm (42 ft-lbs) 6. Fit the wear/protective plug into the propeller. 7. Check that the impeller can rotate freely. Flygt 5530 Installation, Operation, and Maintenance Manual...
-
Page 47: Troubleshooting
• All fuses have power and that they are securely fastened to the fuse holders. • The overload protection is not tripped. • The motor cable is not damaged. The impeller is stuck. Clean: Flygt 5530 Installation, Operation, and Maintenance Manual... -
Page 48: The Pump Does Not Stop When A Level Sensor Is Used
• The sump in order to prevent the impeller from clogging again. If the problem persists, refer to the Flygt Service Guide on the web or contact the local Xylem service shop. Always state the serial number of your pump when you contact Xylem, Product Description (page 10). -
Page 49: The Pump Runs But The Motor Protection Trips
Troubleshooting If the problem persists, refer to the Flygt Service Guide on the web or contact the local Xylem service shop. Always state the serial number of your pump when you contact Xylem, Product Description (page 10). The pump runs but the motor protection trips WARNING: Always disconnect and lock out power before servicing to prevent unexpected startup. - Page 50 If the problem persists, refer to the Flygt Service Guide on the web or contact the local Xylem service shop. Always state the serial number of your pump when you contact Xylem, Product Description (page 10).
-
Page 51: Technical Reference
5.5–14 (liquid) Depth of immersion 20 m (65 ft) maximum Other For the specific weight, current, voltage, power ratings, and speed of the pump, see the data plate of the pump. Flygt 5530 Installation, Operation, and Maintenance Manual... - Page 54 For more information on how Xylem can help you, go to xyleminc.com Xylem Water Solutions AB Visit our Web site for the latest version of this document and more information Gesällvägen 33...
Need help?
Do you have a question about the Flygt 5530 and is the answer not in the manual?
Questions and answers