Table of Contents
Advertisement
Quick Links
Advertisement
Table of Contents

Related Manuals for Zanussi ZOCND7K1


Summary of Contents for Zanussi ZOCND7K1
- Page 1 User Manual GETTING STARTED? EASY. ZOCND7K1 ZOCND7X1 EN User Manual Oven...
-
Page 2: Safety Information
VISIT OUR WEBSITE TO: Get usage advice, brochures, trouble shooter, service and repair information: www.zanussi.com/support SAFETY INFORMATION Before the installation and use of the appliance, carefully read the supplied instructions. The manufacturer is not responsible for any injuries or damage that are the result of incorrect installation or usage. -
Page 3: Safety Instructions
WARNING: The appliance and its accessible parts become hot • during use. Care should be taken to avoid touching heating elements. Always use oven gloves to remove or put in accessories or • ovenware. Before carrying out any maintenance, disconnect the appliance •... - Page 4 removed from the holder), earth leakage trips Height of the back of 571 mm and contactors. the appliance • The electrical installation must have an isolation device which lets you disconnect the appliance Width of the front of 595 mm from the mains at all poles.
-
Page 5: Internal Lighting
• Do not let the appliance stay unattended during CARE AND CLEANING operation. WARNING! Risk of injury, fire, or • Deactivate the appliance after each use. damage to the appliance. • Be careful when you open the appliance door while the appliance is in operation. Hot air can •... -
Page 6: Installation
INSTALLATION WARNING! Refer to Safety chapters. BUILDING IN min. 550 min. 560 ±1 min. 550 min. 560 ±1... -
Page 7: Product Description
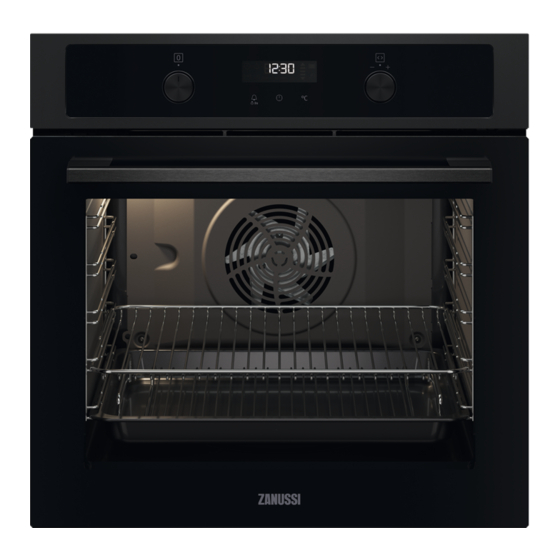
SECURING THE OVEN TO THE CABINET PRODUCT DESCRIPTION GENERAL OVERVIEW Control panel Knob for the heating functions Power lamp / symbol Display Control knob (for the temperature) Temperature indicator / symbol Heating element Lamp 10 Cavity embossment 11 Shelf support, removable 12 Shelf positions ACCESSORIES For roasting and grilling. -
Page 8: Before First Use
Sensor field / Button Description To set a clock function. To check the oven temperature or the temperature of the core tem- perature sensor (if applicable). Use only while a heating function operates. DISPLAY A. Timer / Temperature B. Heat-up and residual heat indicator C. -
Page 9: Heating Functions
HEATING FUNCTIONS Oven function Application Oven function Application To grill thin pieces of food The oven is off. and to toast bread. Grill Off position To roast large meat joints or To decrease the heat-up poultry with bones on one time. -
Page 10: Clock Functions
Released humidity can cause burns. After the 7. Remove water from the cavity embossment. function stops, carefully open the door. WARNING! Make sure that the 1. Fill the cavity embossment with tap water. oven is cold before you remove the remaining water from the cavity embossment. - Page 11 HOW TO SET: TIME OF DAY After the first connection to the mains, wait until the display shows: hr, 12:00. 12 - flashes. Step 1 Turn the knob for the temperature to set the hour. Step 2 - press to confirm. The display shows the set hour and: min.
-
Page 12: Using The Accessories
Step 3 Turn the knob for the temperature to set the minutes for the function: Duration. Press: Step 4 Turn the knob for the temperature to set the hour for the function: Duration. Press: The display shows: Step 5 Turn the knob for the temperature to set the hour for the function: End Time. Press: Step 6 Turn the knob for the temperature to set the minutes for the function: End Time. - Page 13 Wire shelf: Push the shelf between the guide bars of the shelf support and make sure that the feet point down. Deep pan: Push the deep pan between the guide bars of the shelf support. Wire shelf and deep pan together: Push the deep pan between the guide bars of the shelf support and the wire shelf on the guide bars above.
-
Page 14: Additional Functions
2. Put the deep pan into the oven on the necessary shelf position. ADDITIONAL FUNCTIONS USING CHILD LOCK oven is more than 40 °C.Turn the knob for the temperature left or right to check the oven When the Child lock is on the oven cannot be temperature. -
Page 15: Hints And Tips
HINTS AND TIPS WARNING! Refer to Safety chapters. CAKES / PAS- COOKING RECOMMENDATIONS TRIES / (°C) (min) The oven has five shelf positions. BREADS Count the shelf positions from the bottom of the oven floor. Your oven may bake or roast differently to the oven Cookies / 150 - 180 10 - 20... - Page 16 Use 200 ml of water. Use a glass baking dish. FOOD REGENERA- TION (min) ROASTING (°C) (min) Focaccia 15 - 25 Meat 15 - 25 Roast beef 50 - 60 Pasta 15 - 25 Chicken 60 - 80 Pizza 15 - 25 Roast pork 65 - 80 Rice...
- Page 17 Conventional Cooking True Fan Cooking CAKES (min) (°C) (°C) Muffins, three 140 - 1, 3 and 5 30 - 45 Baking tray levels Biscuits 140 - 30 - 35 Baking tray Biscuits, two 140 - 2 and 4 35 - 40 Baking tray levels Biscuits, three...
- Page 18 Conventional Cooking True Fan Cooking BREAD AND PIZZA (min) (°C) (°C) White bread, 1 - 2 60 - 70 pieces, 0.5 kg each Rye bread, pre- 30 - 45 Bread tin heating is not needed Bread rolls, 6 - 8 2 (2 and 25 - 40 Baking...
- Page 19 Conventional Cooking True Fan Cooking MEAT (min) (°C) (°C) Beef 50 - 70 Pork 90 - 120 Veal 90 - 120 English roast beef, rare 50 - 60 English roast beef, medium 60 - 70 English roast beef, well done 70 - 75 Conventional Cooking True Fan Cooking...
-
Page 20: Turbo Grilling
Conventional Cooking True Fan Cooking FISH (min) (°C) (°C) Trout / Sea bream, 3 - 4 fish 40 - 55 Tuna / Salmon, 4 - 6 fillets 35 - 60 GRILL Preheat the empty oven. Use the fourth shelf position. Grill with the maximum temperature setting. - Page 21 BEEF LAMB (°C) (min) (°C) (min) Roast beef or fillet, 180 - 6 - 8 Lamb saddle, 1 - 160 - 40 - 60 medium 1.5 kg Roast beef or fillet, 170 - 8 - 10 well done POULTRY (°C) (min) PORK (°C)
-
Page 22: Moist Fan Baking - Recommended Accessories
DEFROST Defrosting time Further defrosting (kg) (min) time (min) Chicken 100 - 140 20 - 30 Place chicken on an upturned saucer placed on a large plate. Turn halfway through. Meat 100 - 140 20 - 30 Turn halfway through. 90 - 120 Cream 2 x 0.2... -
Page 23: Moist Fan Baking
Ramekins Pizza pan Baking dish Flan base tin Ceramic Dark, non-reflective Dark, non-reflective Dark, non-reflective 8 cm diameter, 28 cm diameter 26 cm diameter 28 cm diameter 5 cm height MOIST FAN BAKING For the best results follow suggestions listed in the table below. -
Page 24: Information For Test Institutes
(°C) (min) Cookies, 16 baking tray or dripping 20 - 30 pieces Macaroons, 24 baking tray or dripping 25 - 35 pieces Muffins, 12 baking tray or dripping 30 - 40 pieces Savory pastry, 20 baking tray or dripping 25 - 30 pieces Short crust bis- baking tray or dripping... - Page 25 (°C) (min) Apple Convention- Wire 70 - 90 pie, 2 al Cooking shelf tins Ø20 Apple True Fan Wire 70 - 90 pie, 2 Cooking shelf tins Ø20 Sponge Convention- Wire 40 - 50 Preheat the oven cake, al Cooking shelf for 10 minutes.
-
Page 26: Care And Cleaning
CARE AND CLEANING WARNING! Refer to Safety chapters. NOTES ON CLEANING Clean the front of the oven with a soft cloth with warm water and a mild detergent. Clean and check the door gasket around the frame of the cavity. Use a cleaning solution to clean metal surfaces. -
Page 27: Removing And Installing Door
Step 1 Turn off the oven and wait until it is cold. Step 2 Pull the front of the shelf support away from the side wall. Step 3 Pull the rear end of the shelf support away from the side wall and remove it. - Page 28 When the cleaning is completed, install the glass panels and the oven door. Make sure that you put the glass panels (A and B) back in the correct sequence. Check for the symbol / printing on the side of the glass panel, each of the glass panels looks different to make the disassembly and assembly easier.
-
Page 29: Troubleshooting
Step 2 Clean the glass cover. Step 3 Replace the lamp with a suitable 300 °C heat-resistant lamp. Step 4 Install the glass cover. TROUBLESHOOTING WARNING! Refer to Safety chapters. Error codes WHAT TO DO IF... The display Check if... shows... -
Page 30: Energy Efficiency
Product number (PNC) ......... Serial number (S.N.) ......... ENERGY EFFICIENCY PRODUCT INFORMATION AND PRODUCT INFORMATION SHEET* Supplier's name Zanussi ZOCND7K1 949499412 Model identification ZOCND7X1 949499411 Energy Efficiency Index 81.2 Energy efficiency class Energy consumption with a standard load, conventional 0.93 kWh/cycle... -
Page 31: Environmental Concerns
ZOCND7K1 30.5 kg Mass ZOCND7X1 30.5 kg * For European Union according to EU Regulations 65/2014 and 66/2014. For Republic of Belarus according to STB 2478-2017, Appendix G; STB 2477-2017, Annexes A and For Ukraine according to 568/32020. Energy efficiency class is not applicable for Russia. - Page 32 WWW.ZANUSSI.COM/SHOP...
Need help?
Do you have a question about the ZOCND7K1 and is the answer not in the manual?
Questions and answers