Sign In
Upload
Download
Table of Contents
Contents
Add to my manuals
Delete from my manuals
Share
URL of this page:
HTML Link:
Bookmark this page
Add
Manual will be automatically added to "My Manuals"
Print this page
×
Bookmark added
×
Added to my manuals
Manuals
Brands
FERRI Manuals
Lawn Mower
T380D Series
Use and maintenance manual
FERRI T380D Series Use And Maintenance Manual
Hydraulic flail hedge mower arm
Hide thumbs
1
2
Table Of Contents
3
4
5
6
7
8
9
10
11
12
13
14
15
16
17
18
19
20
21
22
23
24
25
26
27
28
29
30
31
32
33
34
35
36
37
38
39
40
41
42
43
44
45
46
47
48
49
50
51
52
53
54
55
56
57
58
59
60
61
62
63
64
65
66
67
68
69
70
71
72
73
74
75
76
77
78
79
80
81
82
83
84
85
86
87
88
89
90
91
92
93
94
95
96
97
98
99
100
101
102
103
104
105
106
107
108
109
110
111
112
113
114
115
116
117
118
119
120
121
122
123
124
125
126
127
128
129
130
131
132
133
134
135
136
137
138
139
page
of
139
Go
/
139
Contents
Table of Contents
Troubleshooting
Bookmarks
Table of Contents
Table of Contents
1 General Information
Purpose and Contents of the Manual
Who Should Read this Manual
Updates to the Manual
Conservation
Copyrights
Spare Parts
Machine Versions
2 Safety Rules
General Safety Rules
Safety Rules Concerning Road Traffic
Safety Rules During Use
Responsibility of the Operator or the Owner
Safety Rules Concerning the Hydraulic System
Fire-Prevention Methods
Overhead Hazards
Protection and Equipment for the Operator
Maintenance: Safety Rules
Working Range of the Machine
Safety Decals
Replacing Safety Decals
3 Technical Characteristics
General Description of the Machine
Proper and Improper Use of the Machine
Machine Identification
Description of the Parts
Technical Specifications
Noise Level
Radius of Work
End Tools
Flail Heads
Cutter Bar
Optional Equipment
Flails
4 Installation and Handling
Lifting
Tractor Hitch
Position of the Centre of Gravity
Attaching Without a Quick Hitch
Attaching Without a Quick Hitch
DELTA Coupling
Fitting the PTO Shaft
Tractor Stability
Electrical Connections
Assembling the End Tool
Connecting The Flail Head
Disconnecting The Flail Head
Cutter Bar Connection
Detachment from the Tractor
Detachment with Head Resting on the Ground (TSA530-550-610)
5 Adjustments
Working Speed Adjustment
6 Use and Operating Rules
Controls
Cable Controls (CLASSIC)
Electronic Controls (ELECTRA Version)
Controls (FULL ELECTRA Version)
Starting up
Starting up the Machine
Starting The Flail Head
Starting the Cutter Bar
Starting Up The Flail Head (Full Electra Version)
Starting up the Cutter Bars (FULL ELECTRA Version)
Working Mode
Arm Safety
Work with Arm Close to a Vertical Position
Stopping
Stopping (FULL ELECTRA Version)
Transport Position
7 Routine Maintenance
General Information
Checklist
Every 8 Working Hours or Daily
Every 50 Working Hours or Every Month
Every 200 Working Hours
Every 500 Working Hours or Every Month
Oil Table
Greasing
Changing the Gearbox Oil
Replacing the Oil and the Filters
Replacing Oil Filter Cartridge
Cleaning the Heat Exchanger
Electrical System
Electric System Diagnostics
Procedure for Movement Operation in Case of Electrical Failure
Instructions for Preloading the Hydropneumatic Accumulators
Fastening the Hydraulic Hose Couplings
Bolt Tightening
Parking or Storage
8 Extraordinary Maintenance
Pipe Replacement
Replacing the Pipes in the Hydraulic Stopping Devices
Pin Replacement
9 Trouble Shooting Chart
General
10 Scrapping and Disposal
11 Warranty
Voiding of the Warranty
12 Optional Units
Air-Oil Heat Exchanger
Assembly Instructions
Boom Hydro-Pneumatic Suspension
Assembly Instructions
St Boom Dual Effect Kit
Assembly Instructions
Advertisement
Quick Links
1
Spare Parts
2
Replacing the Oil and the Filters
Download this manual
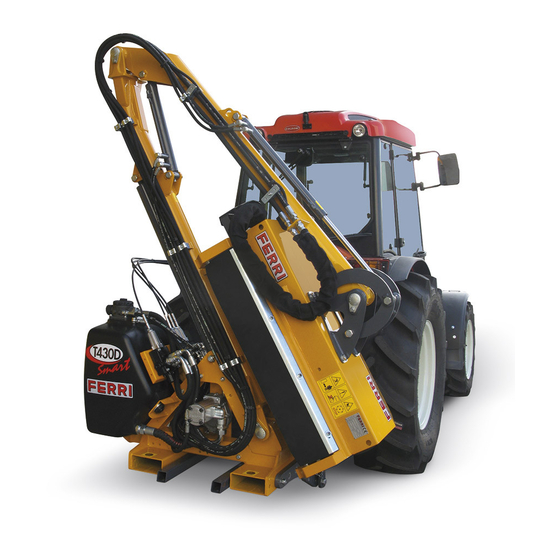
USE AND MAINTENANCE MANUAL
HYDRAULIC FLAIL HEDGE MOWER ARM
EN-GB
ENGLISH
Model
T380D right
T430D right
T380D left
T430D left
Translation of Original Instructions
Serial number
01
01
01
01
Rev. 1.0
Table of
Contents
Previous
Page
Next
Page
1
2
3
4
5
Advertisement
Table of Contents
Need help?
Do you have a question about the T380D Series and is the answer not in the manual?
Ask a question
Questions and answers
Related Manuals for FERRI T380D Series
Lawn Mower FERRI TKD Maintenance And Use Manual
Hydraulic flail hedge mowers (34 pages)
Lawn Mower FERRI T250A Series Use And Maintenance Manual
Hydraulic flail hedge mower arm (140 pages)
Lawn Mower FERRI T320A Series Use And Maintenance Manual
Hydraulic flail hedge mower arm (140 pages)
Lawn Mower FERRI T320A right Use And Maintenance Manual
Hydraulic flail hedge mower arm (140 pages)
Lawn Mower FERRI T320A left Use And Maintenance Manual
Hydraulic flail hedge mower arm (140 pages)
Lawn Mower FERRI T320A reversible LH driving position Use And Maintenance Manual
Hydraulic flail hedge mower arm (140 pages)
Lawn Mower FERRI T430D Series Use And Maintenance Manual
Hydraulic flail hedge mower arm (139 pages)
Lawn Mower FERRI T430D right Use And Maintenance Manual
Hydraulic flail hedge mower arm (139 pages)
Lawn Mower FERRI T430D left Use And Maintenance Manual
Hydraulic flail hedge mower arm (139 pages)
This manual is also suitable for:
T430d series
T380d right
T430d right
T380d left
T430d left
Table of Contents
Print
Rename the bookmark
Delete bookmark?
Delete from my manuals?
Login
Sign In
OR
Sign in with Facebook
Sign in with Google
Upload manual
Upload from disk
Upload from URL


Need help?
Do you have a question about the T380D Series and is the answer not in the manual?
Questions and answers