Table of Contents
Advertisement
Quick Links
Advertisement
Table of Contents

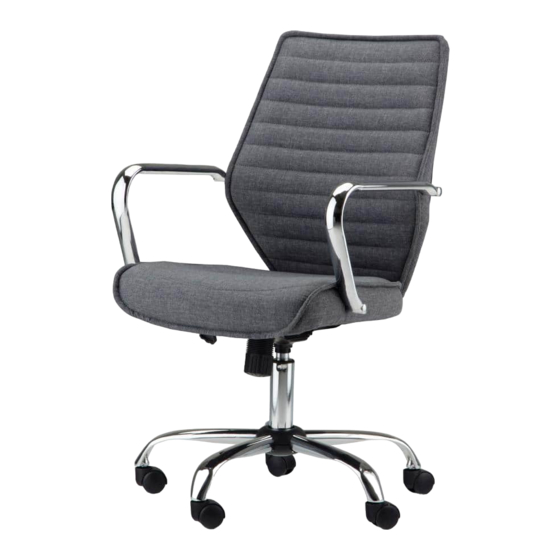
Summary of Contents for Simpli Home Wyndenhall Brooklyn + Max SWIVEL OFFICE CHAIR AXCOCHR-12
- Page 1 SAMUELS / LELAND / FITCH SWIVEL OFFICE CHAIR MODEL # AXCOCHR-12...
- Page 2 Questions, problems, assembly help, missing parts? No need to return the product, we will gladly help and ship your replacement parts free of charge Please call Customer Service at 1-866-518-0120 ext. 262 Monday to Friday between 9 am – 4 pm EST or go to www.simpli-home.com/parts request...
-
Page 3: Safety Information
IMPORTANT: Please read this manual carefully before beginning assembly of this product. Keep this manual for future reference. SAFETY INFORMATION Identify all the parts and hardware. Do not discard of the packaging until you have checked that you have all of the parts and hardware required. Hardware package may have spare parts. -
Page 4: Pre-Assembly Information
PRE-ASSEMBLY INFORMATION PARTS DESCRIPTION BACK SEAT ARMS QTY 1 QTY 1 QTY 2 MECHANISM GAS LIFT CASTER QTY 1 QTY 1 QTY 5 BASE QTY 1 NEED HELP? For help with assembly or if you are missing a part, Please call customer service at 1-866-518-0120 ext. 262 (9 am to 4 pm EST) -
Page 5: Hardware Description
PRE-ASSEMBLY INFORMATION HARDWARE DESCRIPTION SHORT BOLT LONG BOLT FLAT HEAD BOLT M6 X 20mm M6 X 30mm M8 X 40mm QTY 4 QTY 4 QTY 4 ALLEN KEY WASHER M6 X 18mm QTY 4 QTY 1 QTY 8 ALLEN KEY QTY 1 NEED HELP? For help with assembly or if you are missing a part, Please call customer service at 1-866-518-0120 ext. - Page 6 ASSEMBLY STEP 1 Place the Base (G) upside down on a flat smooth surface. Attach the Casters (F) to the Base (G). Attach Gas Lift (E) to the Base (G).
- Page 7 ASSEMBLY STEP 2 Place the Seat (B) on its back on a flat smooth surface. Attach the Mechanism (D) to the bottom of the Seat (B) with four Short Bolts (1) and four Washers (4). Use Allen Key (6) to tighten.
- Page 8 ASSEMBLY STEP 3 Attach the metal plate on Back (A) to the Mechanism (D) with four Long Bolts (2) and four Washers (4). Use Allen Key (6) to tighten approximately 20%.
- Page 9 ASSEMBLY STEP 4 Attach the Arms (C) to the Back (A) and Seat (B) using two Flat Head Bolts (2) on each Arm (C). Use Allen Key (7) to tighten.
- Page 10 ASSEMBLY STEP 5 Place the Seat (B) on its back on a flat smooth surface. Use Allen Key (6) to fully tighten.
- Page 11 ASSEMBLY STEP 6 Place the Seat (B) right side up the Gas Lift (E).
- Page 12 ASSEMBLY STEP 7 Place two Bolt Caps (5) on each Arm (C).
- Page 13 ASSEMBLY STEP 8 The tension knob is located under the seat cushion. Turn the knob clockwise to tighten the tilt mechanism. Turn the knob counter-clockwise to loosen the tilt mechanism.
- Page 14 ASSEMBLY STEP 9 To raise the seat, lift your weight off the seat and reach underneath the right side of the Chair to lift the handle up slowly with a clockwise twisting motion to allow the Chair to rise to desired height. To lower seat, lift the handle slowly with a clockwise twisting motion while seated.
- Page 15 ASSEMBLY STEP 10 To tilt the Chair while seated: Pull the handle outward to unlock. Push the handle inward to lock into position.
-
Page 16: Warranty
WARRANTY Thank you for purchasing a Simpli Home – Wyndenhall – Brooklyn + Max product. These products have been made to demanding, high-quality standards and are guaranteed for domestic use against manufacturing faults for a period of 12 months from the date of purchase. This warranty does not affect your statutory rights.


Need help?
Do you have a question about the Wyndenhall Brooklyn + Max SWIVEL OFFICE CHAIR AXCOCHR-12 and is the answer not in the manual?
Questions and answers