Advertisement
Quick Links
CONTACT US FIRST
CONTACT US FIRST
sauder.com
sauder.com
sauder.com
BEFORE MAKING ANY RETURNS TO THE STORE.
BEFORE MAKING ANY RETURNS TO THE STORE.
sauder.com/service
Visit
Prefer the phone? Give us a ring at
Customer Service is available Monday-Friday - 9 a.m. to 5:30 p.m. EST (except holidays)
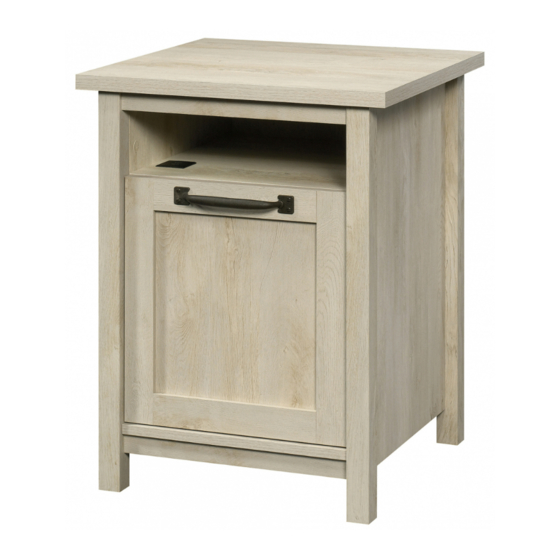
Night Stand
Model 423434
Share your journey!
to order replacement parts, view video assembly tips, or chat with a live rep.
1-800-523-3987
.
WARNING
CHOKING HAZARD - Small Parts
Not for children under 3 years.
Adult assembly required.
NOTE: THIS INSTRUCTION
BOOKLET CONTAINS IMPORTANT
SAFETY INFORMATION.
PLEASE READ AND KEEP FOR
FUTURE REFERENCE.
English pg 1-19
Français pg 20-22
Español pg 23-25
Lot # 529996
Purchased: __________________
05/24/19
Advertisement

Related Manuals for Sauder Night Stand 423434


Summary of Contents for Sauder Night Stand 423434
- Page 1 CONTACT US FIRST CONTACT US FIRST sauder.com sauder.com sauder.com BEFORE MAKING ANY RETURNS TO THE STORE. BEFORE MAKING ANY RETURNS TO THE STORE. sauder.com/service Visit to order replacement parts, view video assembly tips, or chat with a live rep. 1-800-523-3987 Prefer the phone? Give us a ring at Customer Service is available Monday-Friday - 9 a.m.
- Page 2 Assembly Tools Required Part Identifi cation No. 2 Phillips Screwdriver Tip Shown Actual Size Hardware Identifi cation Assembly Steps 5-19 Hammer Not actual size Français 20-22 Español 23-25 Skip the power trip. Safety This time. Warranty Page 2 423434 www.sauder.com/service...
- Page 3 Use this part identifi cation to help identify similar parts. RIGHT END (1) LEFT END (1) SHELF (1) BOTTOM (1) LEG (4) BACK (1) SKIRT (1) MOLDING (1) TOP (1) DOOR (1) www.sauder.com/service 423434 Page 3...
- Page 4 PULL - 1 CORD CLIP - 1 DOOR STOP - 1 APPLIQUE CARD - 4 BLACK 9/16" LARGE HEAD SCREW - 8 BLACK 1/2" FLAT HEAD SCREW - 4 15S SILVER 5/8" MACHINE SCREW - 2 Page 4 423434 www.sauder.com/service...
- Page 5 Look for this icon. It means a Step 1 video assembly tip is available at www.sauder.com/service/tips Assemble your unit on a carpeted fl oor or on the empty å carton to avoid scratching your unit or the fl oor. Push eighteen HIDDEN CAMS (1F) into the ENDS (A and B), å...
- Page 6 Push twelve HIDDEN CAMS (1F) into the remaining holes å of the ENDS (A and B). Some assembly (and snacks) required. Arrow (12 used) Arrow Arrow Hole The arrow in the HIDDEN CAM must point toward the hole in the edge of the board. Page 6 423434 www.sauder.com/service...
- Page 7 Step 3 Turn twelve CAM SCREWS (8F) into the LEGS (E). å (12 used) www.sauder.com/service 423434 Page 7...
- Page 8 Fasten the RIGHT END (A) to two LEGS (E). Tighten six å HIDDEN CAMS. Both LEGS will overhang this edge. These surfaces should be even. S u r f a c H I D Edge with D E N i t h CAM DOWELS Page 8 423434 www.sauder.com/service...
- Page 9 Fasten the LEFT END (B) to two LEGS (E). Tighten six å HIDDEN CAMS. Both LEGS will overhang this edge. These surfaces should be even. S u r f a c H I D Edge with D E N i t h CAM DOWELS www.sauder.com/service 423434 Page 9...
- Page 10 Tighten Risk of damage or Arrow injury. HIDDEN CAMS must be completely Arrow Maximum tightened. HIDDEN 210 degrees CAMS that are not completely tightened may loosen, and parts may separate. To Minimum completely tighten: 190 degrees Page 10 423434 www.sauder.com/service...
- Page 11 Fasten the BACK (F) to the SHELF (C) and BOTTOM (D). å Tighten four HIDDEN CAMS. Maximum Arrow 210 degrees Minimum 190 degrees Edge with CAM DOWELS h o l i t h f a c S u r www.sauder.com/service 423434 Page 11...
- Page 12 BRACKETS and into the SKIRT. NOTE: There are no pre-drilled holes in the SKIRT. The å SCREWS will tighten into the groove. The groove is closer to this edge. BLACK 9/16" LARGE HEAD SCREW (4 used in this step) Page 12 423434 www.sauder.com/service...
- Page 13 Turn the CORD CLIP (4P) into the SHELF (C) as shown. å Maximum Arrow Fasten the LEFT END (B) to the SHELF (C) and BOTTOM (D). å 210 degrees Tighten four HIDDEN CAMS. Minimum 190 degrees Edge with CAM DOWELS www.sauder.com/service 423434 Page 13...
- Page 14 These small holes faster… well ok. Not technically faster. must be here. But defi nitely makes for a sturdier Side Table that’ s easier to assemble and friendlier to the environment. Page 14 423434 www.sauder.com/service...
- Page 15 9/16" LARGE HEAD SCREWS (1S) through the ANGLE BRACKETS and into the TOP. Using your hammer, gently tap four TACK GLIDES (13E) å into the LEGS (E). BLACK 9/16" LARGE HEAD SCREW (4 used in this step) www.sauder.com/service 423434 Page 15...
- Page 16 Step 12 Fasten two HINGES (14H) to the DOOR (J). Use four å BLACK 1/2" FLAT HEAD SCREWS (11S). BLACK 1/2" FLAT HEAD SCREW (4 used in this step) Page 16 423434 www.sauder.com/service...
- Page 17 SCREW a few turns before completely tightening any of them. Fasten the PULL (149K) to the DOOR (J). Use two SILVER 5/8" å Hinge MACHINE SCREWS (15S). See the next step for DOOR adjustments. å SILVER 5/8" MACHINE SCREW (2 used for the PULL) 149K www.sauder.com/service 423434 Page 17...
- Page 18 To adjust the DOORS in or out (depth), loosen the mounting å screw one turn and move the DOORS in or out, as needed. Tighten the mounting screw after making adjustments. Mounting screw (depth) Adjusting screw (horizontal) (vertical adjustment) Page 18 423434 www.sauder.com/service...
- Page 19 "Changes or modifi cations not expressly approved by the party responsible for compliance could void the user's authority to operate this device". "Changes or modifi cations not expressly approved by Sauder Woodworking Co. could void the user's authority to operate this device".
- Page 20 QUANTITÉ d’ a chat de cet élément et conserver le livret pour future référence. EXTRÉMITÉ DROITE ..........1 CONCENTRATEUR USB .........1 Pour contacter Sauder EXTRÉMITÉ GAUCHE ..........1 13E PATIN ..................4 en ce qui concerne cet TABLETTE ................1 EXCENTRIQUE ESCAMOTABLE ....30 élément, faire référence au numéro de lot et...
- Page 21 Fixer l'EXTRÉMITÉ GAUCHE (B) à la TABLETTE (C) et au DESSOUS (D). Serrer quatre EXCENTRIQUES ESCAMOTABLES. ÉTAPE 10 Fixer le DESSUS (I) aux EXTRÉMITÉS (A et B) et à l'ARRIÈRE (F). Serrer six EXCENTRIQUES ESCAMOTABLES. www.sauder.com/service 423434 Page 21...
- Page 22 VIS avant de les serrer toutes à bloc. Nettoyer avec un tissu humide. Essuyer. Fixer la POIGNÉE (149K) à la PORTE (J). Utiliser deux VIS À MÉTAUX 16 mm ARGENTÉES (15S). Voir l'étape suivante pour réglages des PORTES. Page 22 423434 www.sauder.com/service...
- Page 23 Si EXTREMO IZQUIERDO ..........1 13E TACHUELA DESLIZANTE ........4 necesita ponerse en ESTANTE ................1 EXCÉNTRICO ESCONDIDO ......30 contacto con Sauder en FONDO .................1 PASADOR DE EXCÉNTRICO ......18 cuanto a esta unidad, refi érase al número PATA ..................4 BIELA DE EXCÉNTRICO ........12...
- Page 24 Fije el EXTREMO IZQUIERDO (B) al ESTANTE (C) y al FONDO (D). Apriete cuatro EXCÉNTRICOS ESCONDIDOS. PASO 10 Fije el PANEL SUPERIOR (I) a los EXTREMOS (A y B) y al DORSO (F). Apriete seis EXCÉNTRICOS ESCONDIDOS. Page 24 423434 www.sauder.com/service...
- Page 25 BISAGRAS. Debe apretar cada TORNILLO unas vueltas antes de Seque con un paño. apretar cualquier tornillo fi rmemente. Fije un TIRADOR (149K) a la PUERTA (J). Utilice dos TORNILLOS PLATEADOS PARA METAL de 16 mm (15S). Consulte el próximo paso para ajustar la PUERTA. www.sauder.com/service 423434 Page 25...
- Page 26 Además, el peso y la ubicación del tubo de imagen tienden a causar la inestabilidad de televisores y son propensos a inclinarse hacia adelante. Page 26 423434 www.sauder.com/service...
- Page 27 à compter de la date d'achat la première fois et qui sont signalés à Sauder dans les limites de couverture de la contre tout défaut de matériaux ou de fabrication des composantes de mobilier Sauder.
- Page 28 Walmart.com in the product detail page. General Conformity Certifi cate 1. This certifi cate applies to the Sauder Woodworking Product identifi ed by this Instruction Book. 2. This certifi cate applies to compliance of this product with the CPSC Ban on Lead-Containing Paint (16 CFR 1303).
Need help?
Do you have a question about the Night Stand 423434 and is the answer not in the manual?
Questions and answers