Table of Contents
Advertisement
Quick Links
FR GUIDE D'UTILISATION
DE BETRIEBSANLEITUNG
EN GUIDE TO INSTALLATION
ES MANUAL DE UTILICIÓN
IT MANUALE D'USO
NL GEBRUIKSAANWIJZING
PT GUIA DE UTILIZAÇÂO
CS PŘÍRUČKA K POUŽITÍ
PL INSTRUCJA OBSŁUGI
HU HASZNÁLATI UTASÍTÁS
EL ΕΓΧΕΙΡΙΔΙΟ ΧΡΗΣΗΣ
DA BRUGERMANUAL
SK PRÍRUČKA NA POUŽITIE
Hotte décor
Dekor-Dunstabzugshaube
Decorative Hood
Campana extractora decorativa
Cappa arredamento
Designafzuigkap
Exaustor decorativo
DHD585XE1
DHD783X
SV BRUKSANVISNING
Digestoř
Wyposażenie okapu
Szagelszívó berendezés
Διακοσμητικός Απορροφητήρας
Indretnings emhætte
Digestor
Spiskåpa för innebruk
Advertisement
Table of Contents

Related Manuals for DeDietrich DHD585XE1


Summary of Contents for DeDietrich DHD585XE1
- Page 1 DE BETRIEBSANLEITUNG EN GUIDE TO INSTALLATION ES MANUAL DE UTILICIÓN IT MANUALE D’USO NL GEBRUIKSAANWIJZING PT GUIA DE UTILIZAÇÂO CS PŘÍRUČKA K POUŽITÍ PL INSTRUCJA OBSŁUGI HU HASZNÁLATI UTASÍTÁS EL ΕΓΧΕΙΡΙΔΙΟ ΧΡΗΣΗΣ DA BRUGERMANUAL SK PRÍRUČKA NA POUŽITIE Hotte décor Digestoř Dekor-Dunstabzugshaube Wyposażenie okapu Decorative Hood Szagelszívó berendezés Campana extractora decorativa Διακοσμητικός Απορροφητήρας Cappa arredamento Indretnings emhætte Designafzuigkap Digestor Exaustor decorativo Spiskåpa för innebruk DHD585XE1 DHD783X...
- Page 3 96 Naturally, since our objective is the satisfaction of our clients towards our products, our customer service is at your total disposition to respond to any request and receive any useful suggestion (reference details at the end of the booklet). Visit our web site www.dedietrich-elecromanager.com where you will find our latest innovations as well as all useful information. DE DIETRICH The new objects of value Constantly seeking to improve our products, we reserve the right to modify their technical, functional, or aesthetic characteristics as they evolve.
-
Page 4: Table Of Contents
CONTENTS 1 / TO THE ATTENTION OF THE USER - Safety instructions - Description of the applianc 2 / INSTALLING THE HOOD - Mounting the hood - Installation - Removal of the filter cartridge - Mounting the carbon filter - Electrical hook-up of the hood 3 / HOW THE HOOD WORKS 4 / CLEANING THE HOOD 5 / OPERATIONAL ANOMALIES - Changing the light bulb 6 / AFTER SALES SERVICE... -
Page 5: To The Attention Of The User
1/ TO THE ATTENTION OF THE USER Important: keep these instructions for use with the appliance. If the appliance should be sold or passed on to others, make sure that the instructions are passed on with it. We thank you for taking note of these suggestions before installing and using the appliance. They have been written for your personal safety and the safety of others. The manufacturer cannot be held liable for any problems, damage of fires caused on or by the appliance and arising from failure to follow the instructions in this handbook. - SAFTEY INSTRUCTIONS These hoods have been designed for personal use in the home. The appliance must be used by adults.Take care that children do not touch the appliance and do not use it as a toy. Make sure... -
Page 6: Description Of The Applianc
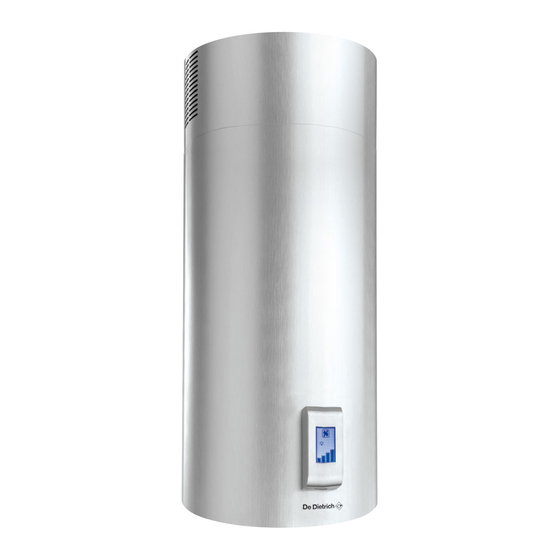
1/ TO THE ATTENTION OF THE USER - DESCRIPTION OF THE APPLIANCE DHD585XE1 DHD783 air output grill display (filter mode) ventilation pipe... -
Page 7: Installing The Hood
2/ INSTALLING THE HOOD - During installation, or in the case of repairs, the appliance must be unplugged. - Make sure that the electrical tension of the power source corresponds to the electrical tension indicated on the information plate on the inside of the hood. -If you need to modify the electrical layout of your house in order to be able to use the hood, call a qualified technician. - If you use the hood in the discharge mode, never hook up the appliance to a discharge conduit used for combustion fumes (boilers, chimneys, etc.) or a CMV unit (Controlled Mechanical Ventilation). - The discharge conduit, whatever it may be, must never exit into the attic. - Install the hood at a safe distance of at least 70 cm from the hob surface, whether they are electric, gas, or mixed. If you have a conduit exit to the outside: fig. 2 The hood can be hooked up to the opening by way of a discharge conduit (minimum diameter F125mm, unpainted, in aluminium, flexible, or in non-flammable material). If the conduit has a diameter of less than 125 mm, you must use the hood in the recirculation mode. If you do not have a conduit exit to the outside: fig. 1 All of our appliances can operate in the recirculation mode. In this case, you must add an active carbon filter that acts to control smells. ELECTRIAL HOOK UP This appliance conforms to the European Directives 2006/95/EC (Low Voltage Directive) and 2004/108/EC (Electromagnetic Compatibility). When you install the appliance and carry out maintenance, it must be unplugged from the power source or the fuses must be disengaged or removed. Electrical hook up must be carried out before the appliance is installed in the cabinet. -
Page 8: Removal Of The Filter Cartridge
Discharge mode DHD585XE1 attach the extensions (Fig.4 Det.A) to the upper plate (Fig.4) with the supplied screws. Position the upper plate (Fig.4.1) on the ceiling, drill four 8mm holes corresponding to the drill jig. Insert the expander sleeves into the holes (Fig, 4-1 – A) and attach the plate to the ceiling with the screws (Fig. 4-1-B). Then attach the lower structure (Fig, 6.2) to the hood lining up its holes with the bolts welded to the ventilator support (Fig. 6.1). Insert the supplied washers and nuts (Fig. 6.2-A) tightening them with an appropriate tool. Connect the air discharge conduit to the motor unit by way of the collar. Insert the upper structure (fig. 6.3) on the lower structure while adjusting the position to the desired height, respecting the minimum required height between the cooker and the hood. Tighten the screws... -
Page 9: Electrical Hook-Up Of The Hood
- ELECTRIAL HOOK UP OF THE HOOD This appliance is fitted with an H05 VVF 3 conductor, 0.75 mm2 (neutral, phase, and ground) power cable. This can be hooked up to a 220 – 240 V mono-phase electrical network by way of a CEI 60083 regulation power socket that must remain accessible after installation, in conformity to installation regulations. -
Page 10: How The Hood Works
3/ HOW THE HOOD WORKS (Fig.13) Version with remote control and display (Fig. 8-10) A: first speed active B: second speed active C: third speed active D: fourth speed active E: light on F: 10-minutes timer selected Instructions for the use of the remote control - To switch the cooker hood on or to switch it off press the button: - To increase the speed up to the fourth one press the button: - To reduce the speed up to the second one press the button: - To go from a high speed back to the first one press twice the button: - To light on or to light off the hood press the button: - To set the timer up press the button: The LED on the right side will start to flash (every 5 seconds), the hood will work for 10 minutes at the selected speed and then it lights automatically off. If the client increases or reduces the speed while the timer is on, this is automatically stopped. NB: At every selected function, the LED lights on accordingly. - Page 11 TECHNICAL DATA: Alkaline battery powered: 12v mod. 23A Operating frequency: 433.92 Mhz Combinations: 4096 Max. consumption: 25mA Operating temperature: -20° : +55°C Standard configuration. If two cooker hoods-radio control system are installed in the same room or in the immediate vicinity, each system may affect the operation of the other, due to the fact that they have the same code. Therefore it will be necessary to change the code of one of the radio controls. Generating a new transmission code. The radio control is supplied by the manufacturer with default codes stored. If you want to create a new set of codes, proceed as follows: press and hold the UP, STOP and DOWN buttons simultaneously for 2 seconds. After the LEDS light up, press the UP and DOWN buttons within 5 seconds. The LEDS will flash 3 times to indicate that the process is completed.
-
Page 12: Cleaning The Hood
4/ CLEANING THE HOOD Careful maintenance helps guarantee proper operation and good results from an appliance over time. The hood must be unplugged from the electrical power source, both by unplugging the appliance from the socket as well as de-activating the breaker, before removing the metal fil- ters. After cleaning, you must replace the metal filters as outlined in the instructions. MAINTENANCE ACCESSORY PRODUCTS TO USE HOW TO PROCEED? -
Page 13: Operational Anomalies
5/ OPERATIONAL ANOMALIES SYMPTOM SOLUTION The hood does not Check that: work... • there is not a power outage. • a specific speed has actually been selected. The hood has low ou- Check that: tput... • the motor speed selected is sufficient for the quantity of fumes steam present. • the kitchen is ventilated well enough to allow for air intake. • the carbon filter is not worn (hood n recirculation mode). The hood stops in the Check that: middle of operation • there is not a power outage. • the omnipolar device has not tripped. - CHANGING THE LIGHT BULB Before any maintenance, the hood must be disconnected from the power source, either by unplugging the power cord from the wall socket or by deactivating the switch.
Need help?
Do you have a question about the DHD585XE1 and is the answer not in the manual?
Questions and answers