Table of Contents
Advertisement
Quick Links
Advertisement
Table of Contents

Related Manuals for Cisco Nexus 9336C-FX2-E


Summary of Contents for Cisco Nexus 9336C-FX2-E
- Page 1 Cisco Nexus 9336C-FX2-E NX-OS Mode Switch Hardware Installation Guide First Published: 2021-02-16 Americas Headquarters Cisco Systems, Inc. 170 West Tasman Drive San Jose, CA 95134-1706 http://www.cisco.com Tel: 408 526-4000 800 553-NETS (6387) Fax: 408 527-0883...
- Page 2 Any products and features described herein as in development or available at a future date remain in varying stages of development and will be offered on a when-and if-available basis. Any such product or feature roadmaps are subject to change at the sole discretion of Cisco and Cisco will have no liability for delay in the delivery or failure to deliver any products or feature roadmap items that may be set forth in this document.
-
Page 3: Table Of Contents
Installing the Switch Using the NXK-ACC-KIT-1RU Rack-Mount Kit Grounding the Chassis Starting the Switch C H A P T E R 4 Connecting the Switch to the Network Overview of Network Connections Connecting a Console to the Switch Cisco Nexus 9336C-FX2-E NX-OS Mode Switch Hardware Installation Guide... - Page 4 Regulatory Standards Compliance Specifications A P P E N D I X C LEDs Switch Chassis LEDs Fan Module LEDs Power Supply LEDs A P P E N D I X D Additional Kits Cisco Nexus 9336C-FX2-E NX-OS Mode Switch Hardware Installation Guide...
-
Page 5: Overview
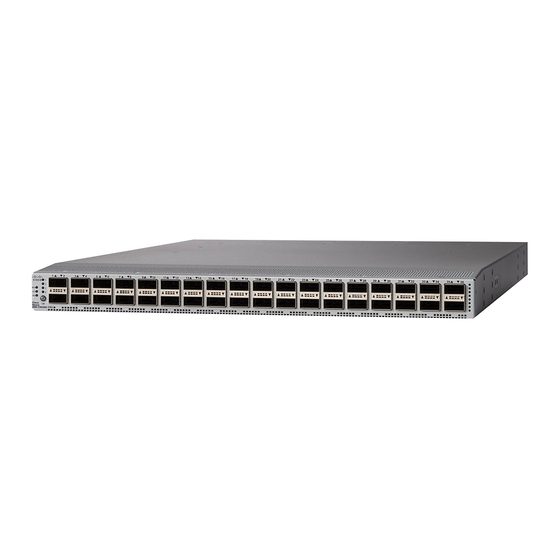
• Overview, on page 1 Overview The Cisco Nexus 9336C-FX2-E switch (N9K-C9336C-FX2-E) is a 1-rack unit (RU), fixed-port switch designed for deployment in data centers. This switch has the following ports: • 36 40/100-Gigabit QSFP28 ports • Two management ports (one 10/100/1000BASE-T port and one SFP port) •... - Page 6 1 (left) and 2 (right) Fan modules (6) with slots Management port (SFP) numbered from 1 (left) to 6 (right) Console port USB port The following figure shows the side of the chassis. Cisco Nexus 9336C-FX2-E NX-OS Mode Switch Hardware Installation Guide...
- Page 7 If the switch has port-side exhaust airflow (blue coloring for fan modules), you must locate the ports in the hot aisle. If you locate the air intake in a hot aisle, the switch can overheat and shut down. Cisco Nexus 9336C-FX2-E NX-OS Mode Switch Hardware Installation Guide...
- Page 8 Overview Overview Cisco Nexus 9336C-FX2-E NX-OS Mode Switch Hardware Installation Guide...
-
Page 9: Preparing The Site
Exhaust fans cool power supplies and system fans cool switches by drawing in air and exhausting air out through various openings in the chassis. However, fans also ingest dust and other particles, causing contaminant Cisco Nexus 9336C-FX2-E NX-OS Mode Switch Hardware Installation Guide... -
Page 10: Minimizing Electromagnetic And Radio Frequency Interference
You will want to consult experts in electrical surge suppression and shielding if you had similar problems in the past. Cisco Nexus 9336C-FX2-E NX-OS Mode Switch Hardware Installation Guide... -
Page 11: Shock And Vibration Requirements
• Use a standard 19-inch (48.3-cm), four-post Electronic Industries Alliance (EIA) cabinet or rack with mounting rails that conform to English universal hole spacing per section 1 of the ANSI/EIA-310-D-1992 standard. Cisco Nexus 9336C-FX2-E NX-OS Mode Switch Hardware Installation Guide... - Page 12 Statement 1048 Rack Stabilization The rack stabilizing mechanism must be in place, or the rack must be bolted to the floor before installation or servicing. Failure to stabilize the rack can cause bodily injury. Cisco Nexus 9336C-FX2-E NX-OS Mode Switch Hardware Installation Guide...
-
Page 13: Installing The Chassis
Starting the Switch, on page 17 Safety Before you install, operate, or service the switch, see the Regulatory, Compliance, and Safety Information for the Cisco Nexus 3000 and 9000 Series for important Safety Information. Warning Statement 1071 Warning Definition IMPORTANT SAFETY INSTRUCTIONS Before you work on any equipment, be aware of the hazards involved with electrical circuitry and be familiar with standard practices for preventing accidents. -
Page 14: Installation Options With Rack-Mount Kits
You can install the switch using the following rack-mount options: • Rack-mount kit (NXK-ACC-KIT-1RU) which you can order from Cisco. This option offers you easy installation, greater stability, increased weight capacity, added accessibility, and improved removability with front and rear removal. -
Page 15: Unpacking And Inspecting The Switch
Unpacking and Inspecting the Switch Before you install the switch, be sure to unpack and inspect the switch for damage or missing components. If anything is missing or damaged, contact your customer service representative immediately. Cisco Nexus 9336C-FX2-E NX-OS Mode Switch Hardware Installation Guide... -
Page 16: Installing The Switch Using The Nxk-Acc-Kit-1Ru Rack-Mount Kit
• You have inspected the switch shipment to ensure that you have everything ordered. • Make sure that the switch rack-mount kit includes the following parts: • Front rack-mount brackets (2) • Rear rack-mount brackets (2) • Slider rails (2) Cisco Nexus 9336C-FX2-E NX-OS Mode Switch Hardware Installation Guide... - Page 17 Note Depending on the chassis depth, the back rack-mount bracket may not fit. In that case the back rack-mount bracket is not needed. Cisco Nexus 9336C-FX2-E NX-OS Mode Switch Hardware Installation Guide...
- Page 18 Holding the switch with both hands, position the two rear rack-mount brackets on the switch between the rack or cabinet posts that do not have slider rails attached to them (see the following figure). Cisco Nexus 9336C-FX2-E NX-OS Mode Switch Hardware Installation Guide...
- Page 19 Tighten the 10-32 screws to 20 in-lb (2.26 N·m) or tighten the 12-24 screws to 30 in-lb (3.39 N·m). Step 5 If you attached a grounding wire to the chassis grounding pad, connect the other end of the wire to the facility ground. Cisco Nexus 9336C-FX2-E NX-OS Mode Switch Hardware Installation Guide...
-
Page 20: Grounding The Chassis
Verify that the ground wire is securely attached to the grounding lug by attempting to pull the wire out of the crimped lug. Cisco Nexus 9336C-FX2-E NX-OS Mode Switch Hardware Installation Guide... -
Page 21: Starting The Switch
• The rack must be close enough to the dedicated power source so that you can connect the switch to the power source by using a designated power cables. • You have the designated power cables for the power supplies that you are connecting to the dedicated power sources. Cisco Nexus 9336C-FX2-E NX-OS Mode Switch Hardware Installation Guide... - Page 22 If there is a safety cover for the terminals, place and secure it over the terminals to avoid an electrical shock hazard. e) Turn on the power at the circuit breaker for the DC power source. Step 4 Verify that the power supply LED is on and green. Cisco Nexus 9336C-FX2-E NX-OS Mode Switch Hardware Installation Guide...
- Page 23 A setup utility automatically launches the first time that you access the switch and guides you through the basic configuration. For instructions on how to configure the switch and check module connectivity, see the appropriate Cisco Nexus 9000 Series configuration guide.
- Page 24 Installing the Chassis Starting the Switch Cisco Nexus 9336C-FX2-E NX-OS Mode Switch Hardware Installation Guide...
-
Page 25: Connecting The Switch To The Network
When running cables in overhead or subfloor cable trays, we strongly recommend that you locate power cables and other potential noise sources as far away as practical from network cabling that terminates on Cisco equipment. In situations where long parallel cable runs cannot be separated by at least 3.3 feet (1 meter), we recommend that you shield any potential noise sources by housing them in a grounded metallic conduit. - Page 26 Connect the other end of the RJ-45 rollover cable to the console or to a modem. What to do next You are ready to create the initial switch configuration (see Creating the Initial Switch Configuration, on page 23). Cisco Nexus 9336C-FX2-E NX-OS Mode Switch Hardware Installation Guide...
-
Page 27: Creating The Initial Switch Configuration
To connect the switch to the network, you can use the default choices for each configuration except the IP address, which you must provide. You can perform the other configurations later as described in the Cisco Nexus 9000 Series NX-OS Fundamentals Configuration Guide. -
Page 28: Setting Up The Management Interface
RJ-45 connectors. For longer connections, you can use an optical cable with SFP transceivers (LH or SX type). Note Use only one of these management ports—the switch does not support the use of both management ports. Cisco Nexus 9336C-FX2-E NX-OS Mode Switch Hardware Installation Guide... -
Page 29: Connecting Interface Ports To Other Devices
When removing transceivers from the switch, it is best to remove the optical cable first and then remove the transceiver. To determine which transceivers, adapters, and cables are supported by this switch, see the Cisco Transceiver Modules Compatibility Information document. Cisco Nexus 9336C-FX2-E NX-OS Mode Switch Hardware Installation Guide... - Page 30 Connecting the Switch to the Network Connecting Interface Ports to Other Devices Cisco Nexus 9336C-FX2-E NX-OS Mode Switch Hardware Installation Guide...
-
Page 31: Replacing Components
Additionally, the airflow direction of the power supply must match or conform to the airflow direction of the installed fan modules. For the airflow direction used by the switch, see the coloring of the fan modules. Cisco Nexus 9336C-FX2-E NX-OS Mode Switch Hardware Installation Guide... - Page 32 Replacing Components Replacing a Power Supply Module Cisco Nexus 9336C-FX2-E NX-OS Mode Switch Hardware Installation Guide...
-
Page 33: Rack Specifications
• Standard 19-inch (48.3 cm) (two- or four-post EIA cabinet or rack, with mounting rails that conform to English universal hole spacing per section 1 of ANSI/EIA-310-D-1992). For more information, see Requirements Specific to Perforated Cabinets, on page Cisco Nexus 9336C-FX2-E NX-OS Mode Switch Hardware Installation Guide... -
Page 34: Requirements Specific To Standard Open Racks
To help with cable management, you might want to allow additional space in the rack above and below the chassis to make it easier to route all of the fiber optic or copper cables through the rack. Cisco Nexus 9336C-FX2-E NX-OS Mode Switch Hardware Installation Guide... -
Page 35: System Specifications
17.3 inches (43.9 cm) 24.7 inches (62.7 cm) 1.72 inches (4.4 cm) (1 RU) Switch and Module Weights and Quantities Component Weight per Unit Quantity Cisco Nexus 9336C-FX2-E Chassis 18.8 lb (8.5 kg) (N9K-C9336C-FX2-E) Cisco Nexus 9336C-FX2-E NX-OS Mode Switch Hardware Installation Guide... -
Page 36: Transceiver And Cable Specifications
The following table lists the typical amount of power that the switch consumes. It also lists the maximum amount of power that you must provision for the switch and power supply for peak conditions. Cisco Nexus 9336C-FX2-E NX-OS Mode Switch Hardware Installation Guide... -
Page 37: Power Specifications
• NXA-PAC-1100W-PI and PI2 Characteristic Specification AC input voltage Nominal range: 100 and 240 VAC (Range: 90-132 VAC, 180-264 VAC) AC input frequency Nominal range: 50 to 60 Hz (Range: 47-63 Hz) Cisco Nexus 9336C-FX2-E NX-OS Mode Switch Hardware Installation Guide... -
Page 38: 1100-W Dc Power Supply Specifications
Power supply standby voltage 3.3 V/ 3A Efficiency rating @ -48VDC 94% at 50% load Power Cable Specifications The following sections specify the power cables that you can order and use with this switch. Cisco Nexus 9336C-FX2-E NX-OS Mode Switch Hardware Installation Guide... -
Page 39: Ac Power Cables Supported By Nx-Os Mode Switches
(2.5 m) United Kingdom CAB-9K10A-UK 250 VAC, 10 A, BS1363 plug (13 A fuse), 8.2 (2.5 m) All except Argentina, Brazil, and NO-POWER-CORD No power cord included with Japan switch Cisco Nexus 9336C-FX2-E NX-OS Mode Switch Hardware Installation Guide... -
Page 40: Regulatory Standards Compliance Specifications
• CNS13438 Class A EMC: Immunity • EN55024 • CISPR24 • EN300386 • KN 61000-4 series RoHS The product is RoH-6 compliant with exceptions for leaded-ball grid-array (BGA) balls and lead press-fit connectors. Cisco Nexus 9336C-FX2-E NX-OS Mode Switch Hardware Installation Guide... -
Page 41: Leds
Temperature exceeds the major alarm threshold. The switch is not receiving power. Green Fans and power supply modules are operational. Amber At least one fan or power supply module is not operating. Cisco Nexus 9336C-FX2-E NX-OS Mode Switch Hardware Installation Guide... -
Page 42: Fan Module Leds
Power supply is not receiving power. Green Flashing amber Power supply warning—possibly one of the following conditions: • High voltage • High power • Low voltage • Slow power supply fan Cisco Nexus 9336C-FX2-E NX-OS Mode Switch Hardware Installation Guide... -
Page 43: Appendix D Additional Kits
A P P E N D I X Additional Kits Cisco Nexus 9336C-FX2-E NX-OS Mode Switch Hardware Installation Guide... - Page 44 Additional Kits Additional Kits Cisco Nexus 9336C-FX2-E NX-OS Mode Switch Hardware Installation Guide...
Need help?
Do you have a question about the Nexus 9336C-FX2-E and is the answer not in the manual?
Questions and answers