
Related Manuals for Technika TEG85U


Summary of Contents for Technika TEG85U
- Page 1 FREESTANDING COOKER OPERATING AND INSTALLATION INSTRUCTIONS Models: TEG85U - TEG96U 461308280_002 03/2017...
- Page 2 The appliance was designed and made in accordance with the International standards listed below: =>IEC 60 335-1 and IEC 60 335-2-6 (electrical) plus relative amendments The appliance complies with the prescriptions of the International Directives as below: Electrical safety (BT). Electromagnetic compatibility (EMC) Gas safety.
-
Page 3: Table Of Contents
ASSISTANCE AND SPARE PARTS Before this appliance left the factory it was tested and set by specialized, expert personnel in order to guarantee the best functioning results. Any subsequent repairs or adjustments that may be necessary must be done with the maximum of care and attention by authorised personnel.For this reason we recommend you always contact us (refer below), specifying the brand, model, serial number and type of problem you are having with it. -
Page 4: Important Notes And Precautions For Use
IMPORTANT NOTES AND PRECAUTIONS FOR USE removed from the outer surfaces and You have purchased one of our the various inner parts, thoroughly products for which we thank you. We check that the appliance is in perfect are confident that this new appliance, condition. - Page 5 IMPORTANT NOTES AND PRECAUTIONS FOR USE installation.. WARNING - Accessible parts may • Before cooking for the first time, become hot during use. To avoid ensure the oven is empty and its door burns young children should be kept closed, heat the oven at maximum away.
- Page 6 IMPORTANT NOTES AND PRECAUTIONS FOR USE • The appliance is not intended to be • In the case of a failure or malfunction, operated by means of an external turn the appliance off and switch off timer or separate remote-control the electrical supply and do not tamper system with it.
-
Page 7: Description Of The Appliance
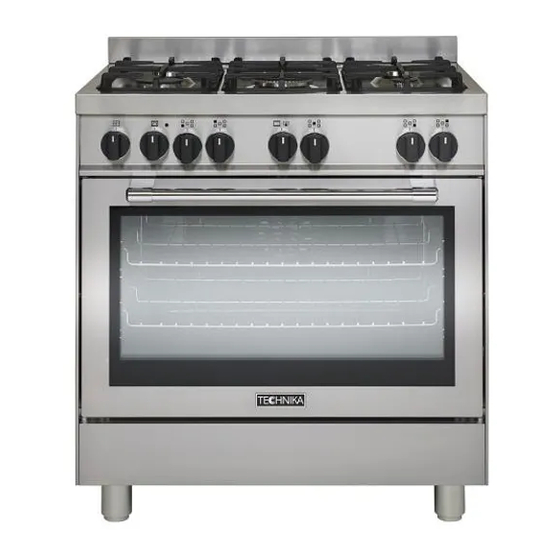
DESCRIPTION OF THE APPLIANCE PRESENTATION TIMER WITH COOKING TIME This accessory has a dual function: it signals how Our cooker is fitted with a fully gas hotplate. This innovative burner hotplate offers you more scope and much cooking time has elapsed and it also turns the versatility in hotplate cooking than ever before. - Page 8 DESCRIPTION OF THE APPLIANCE DESCRIPTION OF THE APPLIANCE DESCRIPTION OF THE CONTROLS HOB GAS BURNER KNOB (A) By rotating the knob the following symbols appear: = Closed position = “Full on” position = “Reduced rate or Low” position OVEN THERMOSTAT KNOB (B) By turning the oven knob we will find the different oven temperature values (from 50°C to Max).
-
Page 9: Instructions For The User
INSTRUCTIONS FOR THE USER HOB: GENERAL NOTES ON SAFETY ABNORMAL OPERATION Any of the following are considered to be abnormal • When using the burners, do not leave the appliance operation and may require servicing: unsupervised. Ensure that children and the infirm •... - Page 10 INSTRUCTIONS FOR THE USER OVEN: GENERAL SAFETY INSTRUCTIONS • Do not leave the oven unsupervised during use. Ensure that children and the infirm do not play with the appliance. • Do not spray aerosols in the vicinity of this appliance while it is operating.
- Page 11 INSTRUCTIONS FOR THE USER HOW TO USE THE MULTIFUNCTION OVEN CONVETIONAL GRILL COOKING Turn the selector knob to the symbol and adjust the DEFROSTING AT ROOM TEMPERATURE thermostat knob to the desired temperature. Turn the selector knob to the symbol and place the Selecting this function the top central heating element food you want to defrost inside the oven.
- Page 12 INSTRUCTIONS FOR THE USER COOKING / BAKING TIMETABLE COOKING BY COOKING BY Position Of The NATURAL CONVECTION FORCED CONVECTION Weight Foods Oven Shelf From Temperature Cooking Time Temperature Cooking Time The Bottom In °C In Min In °C In Min MEAT Roast veal 200-225...
- Page 13 INSTRUCTIONS FOR THE USER USING THE GRILL • The grill is located in the top of the oven and makes for an extremely versatile and controllable method of cooking. • Preheat the grill for a few minutes for quicker cooking and more succulent results. Preferably add seasonings after cooking is completed •...
- Page 14 INSTRUCTIONS FOR THE USER USEFUL COOKING TIPS Meat: • If, when cooking meat, the time needed is more than 40 minutes, turn the oven off 10 minutes Cakes and bread: before the end of cooking time to exploit the • Heat the oven for at least 15 minutes before you residual heat (energy saving).
- Page 15 INSTRUCTIONS FOR THE USER CLEANING AND MAINTENANCE STRUCTURE All the cooker parts (in enamelled or painted metal, • Prior to any maintenance work or cleaning, steel, or glass) should be cleaned frequently with warm disconnect the appliance from the electricity soapy water and then rinsed and dried with a soft cloth.
- Page 16 INSTRUCTIONS FOR THE USER REPLACING THE OVEN LAMP (fig. 13) OVEN SIDEWALL GRIDS (fig. 10) For an effective cleaning of the oven side-guide rails, Ensure the appliance is switched off before these can be extracted unscrewing knurled nuts (G). replacing the lamp to avoid the possibility of To fit the rails back in their place, first insert rear pins in electric shock..
-
Page 17: Troubleshooting
TROUBLESHOOTING Some problems can be caused either as the results of simple maintenance operations or by incorrect selection of settings. Prior to contacting a Service Centre please check the following chart. PROBLEM REMEDY The appliance is not working • Make sure the gas cock is open •... -
Page 18: Instructions For The Installer
INSTRUCTIONS FOR THE INSTALLER you have any doubts do not use the appliance and TECHNICAL INFORMATION call our Service Centre. • Do not move the appliance by the handles. The installations, conversions and maintenance • Some parts mounted on the appliance are protected operations listed in this part must only be carried by a plastic film. - Page 19 INSTRUCTIONS FOR THE INSTALLER LEVELLING THE COOKER • Adjustable feet, to be fitted to the appliance, which allow the height of the cooker to be aligned with other kitchen furniture This can be done by means of the terminal part of the leg themselves (fig. 15) •...
- Page 20 INSTRUCTIONS FOR THE INSTALLER INCORRECT INSTALLATION Accidental Tipping Tipping of an upright oven can happen when it has not been secured properly. Because of the uprights height it is top heavy meaning that if enough pressure or weight is applied to the oven door while open it may cause the oven to fall forward.
- Page 21 INSTRUCTIONS FOR THE INSTALLER Correct Chain Installation In order to prevent the oven from tipping forward as shown on the previous page, we need to make sure both chains provided with the oven are used. On the left side of the oven a 16mm drill bit was used to drill through the cabinetry into the adjacent cabinet, as you can see the hole has not been drilled hard up against the wall because there is a 16mm board...
- Page 22 INSTRUCTIONS FOR THE INSTALLER SECURING THE COOKER TO WALL (fig. 14) THE CUPBOARD WITH TWO SCREWS ON EACH SAFETY CHAIN. Note:- The installation of the chain provided PLEASE TEST THAT THE COOKER DOES NOT is for safety reasons, it must be installed as TILT FORWARD indicated below.
- Page 23 INSTRUCTIONS FOR THE INSTALLER GAS CONNECTION Installation using flexible connection As an option, the cooker may be installed with a This appliance shall be installed only by authorised flexible connection hose, which complies with AS/ personnel and in accordance with the manufacturer’s NZS 1869 (AGA Approved), 10 mm ID, class B or installation instructions, local gas fitting regulations, D, Minimum 1000 mm - Maximum 1200 mm, as an...
- Page 24 INSTRUCTIONS FOR THE INSTALLER ELECTRICAL CONNECTION TAPS (fig. 21) The electrical connection must be carried out in All gas taps are male cone type with only one way of accordance with the current standards and laws passage. Adjustment of the «Reduced rate» position in force and by an authorised electrician.
- Page 25 INSTRUCTIONS FOR THE INSTALLER GAS CONVERSIONS CHANGING THE FLEXIBLE GAS HOSE When converting from Natural Gas to LPG ensure that In order to guarantee that the gas hose is always in the NG regulator is removed and replaced with the excellent condition we strongly recommend changing Test Point Assembly.
- Page 26 INSTRUCTIONS FOR THE INSTALLER MAINTENANCE Prior to any maintenance work or changing parts, disconnect the appliance from the gas and electricity power sources. Servicing must only be carried out by authorised personnel. REPLACING THE TAPS Proceed in the following way when replacing a tap: •...
-
Page 27: Technical Features
14.6 Center Natural 1.00 15.0 ELECTRICAL COMPONENTS NOMINAL DATA DESCRIPTION TEG85U - TEG96U Lower heating element of the oven 2100 W Top heating element of the oven-grill 2000 + 2200 W Rear heating element 3000 W Oven lamp 15 W - E 14 - T 300 Fan of the rear heating element 25..29 W... - Page 28 TECHNICAL FEATURES Electric wiring diagram mod. TEG85U-TEG96U...
- Page 29 Whilst every effort is made to produce up to date literature, this document should not be regarded as an infallible guide. Actual product only should be used to derive cut out sizes. All Technika Appliances must be installed by a qualified person/s with adherence to the relevant electrical, plumbing and GAS codes, with compliance being issued as required by state or national legislation.
- Page 30 SPACE FOR DATA LABEL 461308280_002 03/2017...
Need help?
Do you have a question about the TEG85U and is the answer not in the manual?
Questions and answers