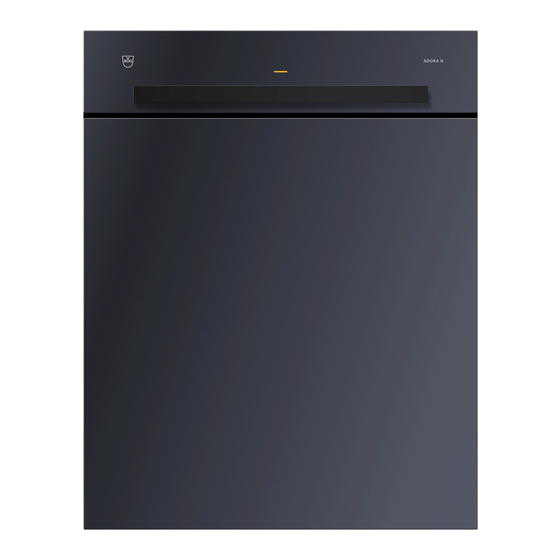
V-ZUG Adora 55 N Operating Instructions Manual

V-ZUG Adora 55 N Operating Instructions Manual

Integrated adora n
Hide thumbs Also See for Adora 55 N:

Advertisement

V-ZUG Ltd
Dishwasher
Integrated Adora N
Operating instructions

Advertisement

Table of Contents
loading
Need help?

Need help?

Do you have a question about the Adora 55 N and is the answer not in the manual?

Questions and answers

Summary of Contents for V-ZUG Adora 55 N

  • Page 1 V-ZUG Ltd Dishwasher Integrated Adora N Operating instructions...
  • Page 2 GS 55Ni SMS 55 Adora 55 N GS 55N-Gi SMS 55 Adora 60 N GS 60Ni EURO 60 Adora 60 N GS 60N-Gi EURO 60 Variations depending on the model are noted in the text. © V-ZUG Ltd, CH-6301 Zug, 2013...
  • Page 3: Table Of Contents

    Contents 1 Safety precautions 1.1 Before using for the first time ........5 1.2 Correct use .
  • Page 4 7 Trouble-shooting 7.1 What to do if … ..........48 7.2 Power failure .
  • Page 5: Safety Precautions

    Safety precautions The appliance corresponds to recognised technology standards and the relevant safety regulations. Proper use of the appliance is however essential to avoid damage and accidents. Please therefore follow the precautions given in these operating instructions. In accordance with the requirements of IEC 60335-1: •...
  • Page 6: Correct Use

    1 Safety precautions Correct use • The appliance is only suitable for washing household dishes and cutlery with water and standard dishwasher detergent. The appliance is for use in the home and for the intended purpose only. No liability is assumed for any damage caused by improper or incorrect use.
  • Page 7: Children In The Home

    1 Safety precautions Children in the home • Packaging material (e.g. plastic, polystyrene) can be dangerous for children. Danger of suffocation! Keep packaging material away from children. • The appliance is designed for use by adults who are familiar with these operating instructions.
  • Page 8 1 Safety precautions • Do not sit or lean on the appliance door. After loading or unloading the appliance, do not leave the appliance door open as it can pose a risk – danger of tripping and bruising! • Due to risk of injury, place knives and cutlery with sharp edges or points into the cutlery basket in such a way that they do not stick out (points facing downwards).
  • Page 9 1 Safety precautions • Before closing the appliance door and starting a programme ensure that there are no foreign objects or pets in the appliance. Foreign objects, such as nails and paper clips, can damage parts of the appliance as well as the dishes.
  • Page 10: Your Appliance

    Your appliance Appliance description • Capacity 12 international place settings (SMS 55) 13 international place settings (EURO 60) • 5 programmes «Daily» «Quick/Glass» «Intensive» «Pre-rinsing» «Economy programme» • Additional functions «Energy saving» «Delayed start» • «All in 1» detergent • Hot water connection...
  • Page 11: Appliance Construction

    2 Your appliance Appliance construction Appliance door Door handle Operating and display elements Baskets Filter system Salt reservoir Detergent dispenser Rinse agent reservoir Quick operating instructions 10 Cutlery basket 11 Spray arms...
  • Page 12: Operating And Display Elements

    2 Your appliance Operating and display elements Programme buttons Programme selection Economy programme End of programme Additional functions (buttons) Saving energy Delayed start Programme symbols Daily Intensive Quick/Glass Pre-rinsing Additional functions/indicators (symbols) Energy saving Rinse agent refill indicator «All in 1» detergent Salt refill indicator...
  • Page 13 2 Your appliance Display (digital display) Various information appears in the display during the programme selection and the programme sequence: • Delayed start • Error messages...
  • Page 14: Programme Overview

    Programme overview Programme Symbol Daily For normal soiling. Not suitable for burned-on or dried-on soiling. For light soiling, aperitif dishware and coffee cups and saucers. Not Quick/Glass suitable for slowly dissolving tabs. Gentle programme for glasses. For heavy soiling as well as pots, pans and gratin dishes with dried- Intensive or burned-on soiling.
  • Page 15 3 Programme overview Programme sequence/consumption data Pre- Inter- Rinsing with Cleaning Water Energy rinsing mediate rinse agent Drying Duration* [°C] [kWh] [°C] rinsing [°C] 1h15 1.20 0h45 0.85 If required 1h40 1.40 0h07 0.05 1.03 2h30 – 1.04 * Duration without final drying...
  • Page 16: Additional Functions

    3 Programme overview Additional functions Function Symbol Reduces the wash temperature during cleaning by 5 °C, providing Energy saving energy savings of approximately 10 % and gentle washing for glassware. The delayed start allows you to wash during off-peak hours (e.g. at off-peak electricity rates).
  • Page 17: User Settings

    User settings User settings can only be changed when no programme is running. The procedure is generally the same for all settings. Changing user settings Hold the button depressed for 5 seconds. ➤ – Display: Press the button repeatedly until the required setting (symbol) ➤...
  • Page 18 4 User settings The following diagram gives an overview of the possible user settings. Hold the button depressed for 5 seconds Off * All in 1 Rinse agent dosage Level 1 Level 4 * Level 9 Water hardness Level 1 Level 5 * Level 9 Off *...
  • Page 19: All In 1" Detergent

    4 User settings «All in 1» detergent The «All in 1» setting adapts the programme for use with detergent with integrated salt and rinse agent function in an optimal way. • products can only be used up to a certain water hardness. If the refill indicators illuminate, still refill with regeneration salt or rinse agent.
  • Page 20: Rinse Agent Dosage

    4 User settings Rinse agent dosage If the drying result is unsatisfactory, then the dosage can be switched off («Off» setting) or set to one of 9 levels. • If the dishes are still wet or there are water spots, set the dosage to level 6 or higher.
  • Page 21: Water Hardness

    4 User settings Water hardness The built-in water softener removes limescale from the water, enabling problem-free cleaning. Automatic regeneration occurs at regular intervals, thus guaranteeing its effectiveness. After regeneration, the next programme starts by rinsing out the water softener by pumping water through it and draining simultaneously.
  • Page 22 4 User settings Levels of water hardness Possible settings for French (°fH) and German (°dH) measures of water hardness Level °fH – – – – – – – – – – °dH – – – – – – – – –...
  • Page 23: Hot Water Connection

    4 User settings Hot water connection The available hot water is used optimally. If the water intake is still too cold, a short pre-rinse is carried out. The cleaning phase with hot water follows. If the additional energy saving function is selected, the water is heated up further electrically to only a minimum temperature, reducing energy consumption further.
  • Page 24: Operation

    Operation Preparing the appliance Open the appliance door Pull the door handle forwards. ➤ – Any programme that is running will be automatically interrupted. Before using for the first time Switch the power on. ➤ Turn the water tap on. ➤...
  • Page 25: Loading The Baskets

    5 Operation Loading the baskets Not all table- and kitchenware are dishwasher safe. Please follow the advice in D ISHWASHING TIPS Remove any coarse or hard pieces of food or foreign objects left on the ➤ dishes. Make sure no toothpicks get into the appliance. Toothpicks can cause the ➤...
  • Page 26: Loading Tips For The Upper Basket

    5 Operation Loading tips for the upper basket Pull the upper basket out as far as it will go and load. Arrange smaller items ➤ such as saucers, glasses, cups and dishes. If using foldable racks 1, stagger the items so that the water can reach ➤...
  • Page 27 5 Operation Glass holders The glass holders 1 are particularly suitable for tall glasses. They can be folded down or up. Push the glass holders gently down or, ➤ alternatively, pull them up until they engage. Racks The racks 1 can be used as glass holders. Remove the racks to accommodate tall glasses.
  • Page 28 5 Operation Easy prongs The easy prongs 1 can be placed over the prongs anywhere in the basket. By using the easy prongs, drinking glasses, baby bottles, sports bottles, vases and carafes can be placed anywhere in the basket. Use 2 easy prongs for wider vessels.
  • Page 29 5 Operation Adjustable upper basket The height of the upper basket can be adjusted to 3 levels by a total of approximately 4 cm. It can be inclined in various ways. Raising the upper basket Hold the upper basket at the sides by ➤...
  • Page 30: Loading Tips For The Lower Basket

    5 Operation Loading tips for the lower basket Pull the lower basket out as far as it will go and load. ➤ Load larger items such as plates, bowls, platters, pots and pans. ➤ Load wide dishes (soup plates, lids, etc.) at the back on the right. ➤...
  • Page 31 5 Operation Easy prongs The easy prongs 1 can be placed over the prongs anywhere in the basket. By using the easy prongs, drinking glasses, baby bottles, sports bottles, vases and carafes can be placed anywhere in the basket. Use 2 easy prongs for wider vessels. Cleaning baking trays The upper basket has to be removed for larger baking trays.
  • Page 32 5 Operation Cutlery basket To avoid injury, place knives and cutlery with sharp edges or points into the cutlery basket in such a way that they do not stick out (points facing downwards). Knives and cutlery with sharp edges or points may also be placed horizontally in the upper basket.
  • Page 33: Adding The Detergent

    5 Operation Adding the detergent Powder Open the detergent dispenser by ➤ pushing the release catch in the direction of the arrow. Add the detergent to the detergent ➤ compartment. • For dosage, follow the detergent manufacturer’s instructions. • Observe the «20 and 30 ml» level marks 1.
  • Page 34 5 Operation Choice of detergent Do not use washing-up liquid. It can cause excessive foaming, causing your appliance to malfunction. Follow the dosage instructions printed on the detergent package carefully. Using too high a dosage can cause damage to the appliance.
  • Page 35: Selecting A Programme

    5 Operation Selecting a programme Close the appliance door. ➤ Press the button repeatedly until the required programme symbol ➤ flashes. – The programme starts in 15 seconds. – The symbol for the programme selected illuminates and other symbols go out.
  • Page 36: Selecting The Economy Programme

    5 Operation Selecting the economy programme Close the appliance door. ➤ Press the button. ➤ – flashes. – The programme starts in 15 seconds. – illuminates.
  • Page 37: Selecting Additional Functions

    5 Operation Selecting additional functions After selecting a programme, it is possible – within 15 seconds and while the programme symbol is flashing – to select additional functions. Press the additional function button. ➤ – illuminates (example). – The programme starts in 15 seconds. It is not possible to select the additional function with the programme.
  • Page 38: Saving Additional Functions

    5 Operation Saving additional functions When an additional function is saved, it is automatically active during programme selection. Hold the additional function button depressed for 5 seconds. ➤ – The selection is saved. To clear the saved additional function, depress the button again for ➤...
  • Page 39: Delayed Start

    5 Operation 5.10 Delayed start The delayed start allows you to wash during off-peak hours (e.g. at off-peak electricity rates). A delayed start of between 1 and 9 hours can be set. The delayed start duration last entered is shown as a suggestion. Setting a delayed start Close the appliance door.
  • Page 40: Interrupting A Programme

    5 Operation 5.11 Interrupting a programme The dishes and water may be hot – scalding hazard! Press the button. ➤ – The programme is interrupted for 5 seconds. Open the appliance door carefully. ➤ – The programme symbol flashes. When the appliance door is closed – in the case of higher water temperatures –...
  • Page 41: End Of Programme

    5 Operation 5.13 End of programme At the end of the programme: – The symbols remain illuminated for about 60 minutes (drying). – Display: – After drying, the symbols and the display go out. For a better drying result, the appliance door should not be opened until the symbols and display go out.
  • Page 42: Care And Maintenance

    Care and maintenance Cleaning the interior Using the correct dosage of detergent will automatically clean the interior of the appliance. We recommend cleaning the appliance twice a year with dishwasher cleaner. Follow the directions for use for dishwasher cleaner carefully. Most dishwasher cleaners work more effectively at higher temperatures.
  • Page 43: Cleaning The Filter System

    6 Care and maintenance Cleaning the filter system Only use soft materials for cleaning beneath the filter system. Never use metal objects for cleaning. An incorrectly assembled filter system can cause the appliance to malfunction. A dirty filter system can cause unsatisfactory cleaning results and affect the water outlet.
  • Page 44: Cleaning The Spray Arms

    6 Care and maintenance Cleaning the spray arms If the cleaning performance is unsatisfactory or if dishwasher detergent is being left behind, then the nozzles in the spray arms may be clogged. Upper spray arm Remove the upper basket. ➤ Release bayonet fastener 1 in an anti- ➤...
  • Page 45: Filling With Regeneration Salt

    6 Care and maintenance Filling with regeneration salt Never fill the salt reservoir with detergent! When the supply of regeneration salt is exhausted, the refill indicator illumi- nates during programme selection and at the end of the programme. Open the appliance door and pull out or remove the ➤...
  • Page 46: Filling With Rinse Agent

    6 Care and maintenance Filling with rinse agent Never fill the rinse agent reservoir with detergent. Wipe away any spilt rinse agent (risk of foaming and error messages in which alternate). Follow the manufacturer’s safety instructions and warnings. Rinse agent prevents water spotting after final rinsing (rinsing with rinse agent).
  • Page 47: Cleaning The Water Inlet Filter

    6 Care and maintenance Cleaning the water inlet filter Have the water inlet filter cleaned by experts only. If carried out incorrectly, there is a risk of flooding! The built-in water inlet filter can become blocked by limescale deposits, rust or foreign objects.
  • Page 48 Trouble-shooting This section lists faults that can be solved simply by following the instructions given. If another fault is displayed or the fault cannot be remedied, please call Customer Services. Please note down the error message and the serial number (FN) before calling Customer Services.
  • Page 49 7 Trouble-shooting … alternate Possible cause Solution • Filter system blocked. Fix the problem. ➤ • Drain hose bent or Cancel the error message by pressing the ➤ kinked. button. • Drain pump or siphon is Restart the programme. ➤ blocked.
  • Page 50 7 Trouble-shooting … alternate Possible cause Solution • Various situations can Cancel the error message by pressing the ➤ lead to an «E» message. button. If the error message persists: Switch the power supply off for about ➤ 1 minute. Switch the power supply back on again.
  • Page 51 7 Trouble-shooting … alternate Possible cause Solution • Faulty electrical Cancel the error message by pressing the ➤ connection. button. • Overvoltage. If the error message persists: Switch the power supply off for about ➤ 1 minute. Switch the power supply back on again. ➤...
  • Page 52 7 Trouble-shooting … the appliance will not start Close the appliance door. ➤ Plug in at the mains socket. ➤ Check the fuses. ➤ … the dishes are not clean Select a more powerful programme. ➤ Load the baskets differently, avoiding blind spots. ➤...
  • Page 53 7 Trouble-shooting … the dishes are wet and dull or have water marks on them Refill the rinse agent. ➤ Increase the rinse agent dosage setting. ➤ Do not open the appliance door until the end of the programme when the ➤...
  • Page 54 7 Trouble-shooting Power failure A power failure causes: • the programme that is currently running to stop. After the cause of the power supply failure has been resolved, the programme is resumed. • the fault indication system to be interrupted.
  • Page 55 Dishwashing tips Dishes Not all table- and kitchenware are dishwasher safe. • Handcrafted objects and wooden or plastic parts that are sensitive to heat or detergent suds should be cleaned by hand. • Printed glass and porcelain are hardwearing only to a point and eventually can wear off over time.
  • Page 56 Accessories and spare parts Please give model number of the appliance and exact description of the accessory or spare part when ordering parts. Accessories «Small» cutlery basket Cup insert Vario cutlery basket insert Racks Set of 4 easy prongs...
  • Page 57 9 Accessories and spare parts Spare parts Seal/water inlet filter for Aqua-Stop Filter system...
  • Page 58 Technical data External dimensions SMS 55 EURO 60 SMS 55 EURO 60 Extra height Extra height Height (with slide plate) [cm] 75.9 82.4 75.9 82.4 Height (with plinth) [cm]: – 84.5–89.0 78.0–89.8 84.5–96.3 Width [cm]: 54.6 54.6 59.6 59.6 Depth [cm]: 57.2 57.2 57.2...
  • Page 59 10 Technical data 10.1 Note for testing institutes (SMS 55) Capacity: 12 place settings (SMS 55) Loading: See following images Detergent dosage: 5 g reference detergent on the inner door panel and 25 g in the detergent dispenser Rinse agent dosage: Level 9 Declaration programme: Economy programme After the programme has finished, the appliance automatically...
  • Page 60 10 Technical data Lower basket (soiling) plates (egg) plates (minced meat) soup plates (porridge) dessert plates (spinach) dessert plate (egg) large serving dish (minced meat) oval platter (margarine) Cutlery basket BK (soiling) back (3 compartments) teaspoons (clean) dessert spoons (clean) soup spoons (porridge) knives (clean) forks (egg)
  • Page 61 10 Technical data 10.2 Note for testing institutes (EURO 60) Capacity: 13 place settings (EURO 60) Loading: See following images Detergent dosage: 5 g reference detergent on the inner door panel and 27.5 g in the detergent dispenser. Rinse agent dosage: Level 9 Declaration programme: Economy programme After the programme has finished, the appliance automatically...
  • Page 62 10 Technical data Lower basket (soiling) plates (egg) plates (minced meat) plate (top half with egg/bottom half with minced meat) soup plates (porridge) dessert plates (spinach) dessert plate (egg) dessert plate (bottom half with egg/top half with spinach) large serving dish (minced meat) oval platter (margarine) Cutlery basket BK (soiling) back (3 compartments)
  • Page 63 10 Technical data 10.3 Noise measurement The measurement is to be carried out in accordance with the European Norm on airborne acoustical noise IEC 60704. Please note the Installation Instructions accompanying the appliance. Install the appliance (see Installation Instructions). ➤ For relevant appliances, screw the slide plate to the floor at the front and ➤...
  • Page 64 Disposal Packaging • All packaging materials (cardboard, plastic film (PE) and polystyrene (EPS)) are marked and should, if possible, be collected for recycling and disposed of in an environmentally friendly way. Disconnection • Disconnect the appliance from the mains. With a fixed appliance, this is to be carried out by a qualified electrician! Safety •...
  • Page 65 Index Accessories ....56 Display elements ....12 Ordering ....67 Disposal .
  • Page 66 12 Index Noise measurement ... 63 Safety ..... . . 64 Note for testing institutes Safety concept .
  • Page 67 – The identification plate is located on the left-hand side on edge of the tub. If the appliance is not working properly, contact your nearest V-ZUG Ltd Serv- ice Centre using freephone 0800 850 850 and stand in close proximity to the appliance.
  • Page 68 The programme starts in 15 seconds ➤ When the display goes out, open the appliance door and unload the dishes ➤ V-ZUG Ltd Industriestrasse 66, 6301 Zug Tel. +41 (0)41 767 67 67, Fax +41 (0)41 767 61 61 vzug@vzug.ch, www.vzug.ch Service Centre: Tel.

This manual is also suitable for:

Adora 60 nGs 55niGs 55n-giGs 60niGs 60n-gi

Table of Contents