Advertisement
Available languages
Available languages
Quick Links
Advertisement

Related Manuals for Motion CM-03


Summary of Contents for Motion CM-03
- Page 1 M A N U A L C M - 0 3 / 0 5 Li-ion battery powered tube motors with pull and remote operation...
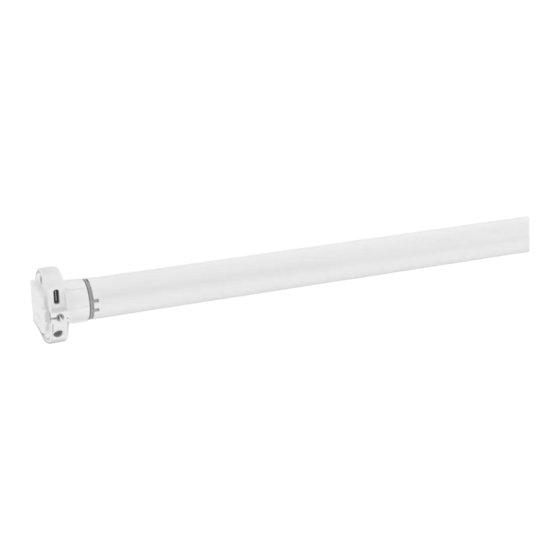
- Page 2 M OT I ON C M- 03/0 5 LI - IO N T U B U LA R M O T O R CM-03/05 Li-ion battery powered tube motors with pull and remote operation Motor features Li-ion Battery USB Rechargeable...
- Page 3 M OT I ON C M- 03/0 5 LI - IO N T U B U LA R M O T O R WARNING Read the instructions carefully before assembling and using the product. Assembly can be completed by non- professionals.
- Page 4 M OT I ON C M- 03/0 5 LI - IO N T U B U LA R M O T O R Important Safety instructions Important Installation instructions WARNING: To reduce the risk of severe injury or WARNING: Important safety instructions. Follow all death, it is important to follow these instructions for instructions, since incorrect installation can lead to personal safety.
- Page 5 M OT I ON C M- 03/0 5 LI - IO N T U B U LA R M O T O R FCC Manual their own expense. This device complies with Part 15 of the FCC Rules. If this equipment does cause harmful interference Operation is subject to the following two conditions: to radio or television reception, which can be (1) this device may not cause harmful interference,...
- Page 6 Single Channel Max. mount blinds select select blinds CM-11 unlimited Hand-held remote CM-12 unlimited Hand-held remote CM-13 unlimited Hand-held remote CM-15 unlimited Wall remote CM-16 unlimited Wall remote CM-17 unlimited Table remote CM-18 unlimited Pull remote CM-20 Motion Wi-Fi bridge...
- Page 7 M OT I ON C M- 03/0 5 LI - IO N T U B U LA R M O T O R Max. Frequency Range Power supply Length Width Height Certificates scenes 30 m with 433 MHz CR2430 3.0V 120 mm 45 mm 14 mm...
- Page 8 M OT I ON C M- 03/0 5 LI - IO N T U B U LA R M O T O R CM-11 CM-12 1 Channel Remote 5 Channel Remote Channel Channel indicator indicator Centre Centre (stop/favourite) (stop/favourite) Right Left Down Down...
- Page 9 M OT I ON C M- 03/0 5 LI - IO N T U B U LA R M O T O R CM-13 CM-17 15 Channel Remote 4 Channel Table Remote Channel indicator Centre Channel 1 (stop/favourite) Channel 3 Right Left Centre...
- Page 10 M OT I ON C M- 0 3 / 0 5 LI - IO N TU B U L AR M O TO R CM-15 CM-16 1 Channel Wall Remote 4 Channel Wall Remote Down Centre Centre (stop/favourite) (stop/favourite) Left Right Down Pair...
- Page 11 M OT I ON C M- 03/0 5 LI - IO N T U B U LA R M O T O R CM-18 CM-20 1 Channel Tassel Remote Motion Bridge Pair button See manual CM-20...
- Page 12 M OT I ON C M- 03/0 5 LI - IO N T U B U LA R M O T O R Install the blind Click! Click! Click! Activate the motor Activate the motor by charging it with a micro USB cable.
- Page 13 M OT ION C M - 03/ 0 5 LI - I O N T U B U LA R MO TO R Pair a remote Pair a remote control that is able to program blinds. See pages 4 and 5 for remote control details.
- Page 14 M OT ION C M - 0 3 / 0 5 LI - IO N TU B U L AR M O TO R Set bottom position Press and hold the down button until the blind reaches the desired bottom position. WARNING: risk of damage.
- Page 15 M OT I ON C M - 03/0 5 LI - IO N T U B U LA R M O T O R Set top position Press and hold the up button until the blind 10.1 reaches the desired top position. WARNING: risk of damage.
- Page 16 M OT I ON C M- 03/0 5 LI - IO N T U B U LA R M O T O R Set favourite position (optional) Move the blind to a desired favourite position. 12.1 Centre Hold the centre button to save this Favourite 12.2 position.
- Page 17 M OT I ON C M- 03/0 5 LI - IO N T U B U LA R M O T O R Operate the blind Pull control: pull once to move the blind to the end positions. Pull again to stop the blind. Remote control: Choose the channel with which the Centre blind has been paired using the channel button.
- Page 18 M OT I ON C M- 03/0 5 LI - IO N T U B U LA R M O T O R Reset favourite position Move the blind to a desired favourite position. 16.1 Press the program button on the motor to activate 16.2 Centre program mode.
- Page 19 M OT I ON C M- 03/0 5 LI - IO N T U B U LA R M O T O R Reset the blind It is possible to only delete end limits or to do a factory reset. Factory reset will delete the end limits and remove the connection to any paired remote.
- Page 20 M OT I ON C M- 03/0 5 LI - IO N T U B U LA R M O T O R Advanced options Manual control In case there is no remote control or pull control, the blind can be operated with the program button on the motor.
- Page 21 M OT I ON C M- 03/0 5 LI - IO N T U B U LA R M O T O R Single select 15 channel remote Single select makes it possible to activate program mode on a single blind through a remote control, without having to physically press the program button on the blind.
- Page 22 M O TI ON C M - 0 3 / 05 LI - I O N T U BU L A R M O TO R Channel select 5 channel remote Channel select makes it possible to copy blinds in between channels/remotes without having to physically press the program button on the motors.
- Page 23 M OT I ON C M- 03/0 5 LI - IO N T U B U LA R M O T O R Activate / deactivate the motor To prevent the blind from getting damaged, the motor has a transport mode that makes sure the blind will not be activated before installation.
- Page 24 M OT I ON C M- 03/0 5 LI - IO N T U B U LA R M O T O R...
- Page 25 Although this manual has been composed with the utmost For the latest information and updated care, Coulisse B.V. does not accept any responsibility for damage manuals, visit rtube.nl/cm-03 due to mistakes and/or faults in this manual. Coulisse B.V. reserves the right to revise the manual and to revise and/or change its content at any time, without obligation to notify any person or entity of such revisions or changes.
- Page 26 M OT I ON C M- 0 3 /05 LI- IO N R O H R M O T O R CM-03/05 Li-ion batteriebetriebene Rohrmotoren mit Zieh- und ferngesteuertem Betrieb Motoreigenschaften Li-ion-Batterie USB wiederaufladbar Kabellos Geschwindigkeits- Bidirektional kontrolle Integrierte Wiederaufladbar mit...
- Page 27 M OT I ON C M- 0 3 /05 LI- IO N R O H R M O T O R ACHTUNG Lesen Sie die Gebrauchs- anweisung sorgfältig vor der Montage und Verwendung des um Strangulierung und Ver- Produkts. Montage kann durch wicklung zu vermeiden.
- Page 28 M OT I ON C M- 0 3 /05 LI- IO N R O H R M O T O R Wichtige Sicherheitshinweise Trennen Sie das Gerät von der Stromquelle WARNUNG: Zur Vermeidung von Verletzungs- oder schalten Sie die automatische Steuerung und Todesrisiken.
- Page 29 M OT I ON C M- 0 3 /05 LI- IO N R O H R M O T O R Die festen Steuerelemente sollten nach der Bei Betrieb müssen die folgenden zwei Installation deutlich sichtbar sein. Bedingungen erfüllt sein: Das Antriebsteil sollte kompatibel sein mit 1.
- Page 30 M OT I ON C M- 0 3 /05 LI- IO N R O H R M O T O R Wand Program- Max. Kanäle Einze- Kana- Montage mierung Rollos lauswahl lauswahl des Rollos CM-11 unbegrenzt Handfernbedienung CM-12 unbegrenzt Handfernbedienung CM-13 unbegrenzt Handfernbedienung CM-15 unbegrenzt Wand-Fernbedienung CM-16 unbegrenzt Wand-Fernbedienung CM-17 unbegrenzt Tisch-Fernbedienung CM-18 unbegrenzt Zieh-Fernbedienung CM-20 Motion Wi-Fi-Brücke...
- Page 31 M OT I ON C M- 0 3 /05 LI- IO N R O H R M O T O R Max. Frequenz Bereich Stromquelle Länge Breite Höhe Zertifikate Szenen 30 m mit 433 MHz 1 konkreten CR2430 3.0V 120 mm 45 mm 14 mm Mauer...
- Page 32 M OT I ON C M- 0 3 /05 LI- IO N R O H R M O T O R CM-11 CM-12 1 Kanal-Fernbedienung 5 Kanal-Fernbedienung Kanalanzeige Kanalanzeige Hoch Hoch Mitte Mitte (stop/bevorzugt) (stop/bevorzugt) Rechts Links Runter Runter Kanal Auswahl Kopplung Kopplung...
- Page 33 M OT I ON C M- 0 3 /05 LI- IO N R O H R M O T O R CM-13 CM-17 15 Kanal-Fernbedienung 4 Kanal Tisch-Fernbedienung Kanalanzeige Hoch Hoch Mitte Kanal 1 (stop/bevorzugt) Kanal 3 Rechts Links Mitte (stop/bevorzugt) Runter Kanal 2...
- Page 34 M OT IO N C M- 03/0 5 LI - IO N R O H R MO TO R CM-15 CM-16 1 Kanal Wand-Fernbedienung 4 Kanal Wand-Fernbedienung Hoch Runter Hoch Mitte (stop/ Mitte bevorzugt) (stop/bevorzugt) Links Rechts Runter Kopplung Knopf Kopplung Knopf...
- Page 35 M OT I ON C M- 0 3 /05 LI- IO N R O H R M O T O R CM-18 CM-20 1 Channel Qasten-Fernbedienung Motion hub Kopplung Knopf Siehe Anleitung CM-20...
- Page 36 M OT I ON C M- 0 3 /05 LI- IO N R O H R M O T O R Das Rollo installieren Click! Click! Click! Aktivieren Sie den Motor, indem Sie ihn mit Den Motor aktivieren einem Mikro-USB-Kabel aufladen. Eine grüne LED wird beginnen, zu blinken.
- Page 37 M OT I ON C M- 0 3 /05 LI- IO N R O H R M O T O R Mit einer Fernbedienung koppeln Mit einer Fernbedienung koppeln, mit der sich Rollos programmieren lassen. Siehe Seiten 4 und 5 für Fernbedienungsdetails. In diesem Handbuch ist ein CM-12 dargestellt.
- Page 38 M OT ION C M - 0 3 /05 LI- I O N R O H R M O T O R Untere Position einstellen Drücken und halten Sie den Runter-Knopf, bis das Rollo die gewünschte untere Position WARNUNG: erreicht. Beschädigungsgefahr.
- Page 39 M OT I ON C M- 0 3 /05 LI- IO N R O H R M O T O R Obere Position einstellen Hoch Drücken und halten Sie den Rauf-Knopf, bis das 10.1 Rollo die gewünschte obere Position erreicht. WARNUNG: Beschädigungsgefahr.
- Page 40 M OT I ON C M- 0 3 /05 LI- IO N R O H R M O T O R Lieblingsposition einstellen (optional) Bringen Sie das Rollo in Ihre gewünschte Lieblingsposition. 12.1 Mitte Halten Sie den mittleren Knopf gedrückt, um 12.2 diese Lieblingsposition zu speichern.
- Page 41 M OT I ON C M- 0 3 /05 LI- IO N R O H R M O T O R Das Rollo benutzen Zieh-Steuerung: Ziehen Sie einmal, um das Rollo in die Endpositionen zu versetzen. Ziehen Sie noch mal, um das Rollo zu stoppen.
- Page 42 M OT I ON C M- 0 3 /05 LI- IO N R O H R M O T O R Lieblingsposition neu einrichten Versetzen Sie das Rollo in Ihre gewünschte Lieblingsposition. 16.1 Drücken Sie den Programm-Knopf auf dem Motor, um den Programmier- 16.2 Mitte modus zu aktivieren.
- Page 43 M OT I ON C M- 0 3 /05 LI- IO N R O H R M O T O R Rollo auf Werkseinstellungen zurücksetzen Sie können entweder nur die Endpositionen neu einstellen oder das Gerät auf die Werkseinstellungen zurücksetzen. Wenn Sie das Gerät auf die Werkseinstellungen zurücksetzen, werden die Endpositionen sowie die Verbindung zu sämtlichen gekoppelten Fernbedienungen gelöscht.
- Page 44 M OT I ON C M- 0 3 /05 LI- IO N R O H R M O T O R Erweiterte Optionen Manuelle Steuerung Falls keine Fern- oder Zieh-Steuerung verfügbar ist, kann das Rollo mit dem Programmknopf auf dem Motor gesteuert werden. Halten Sie den Programm-Knopf gedrückt, um das 20.1 Rollo manuell zu bedienen.
- Page 45 M OT I ON C M- 0 3 /05 LI- IO N R O H R M O T O R Einzelauswahl 15 Kanal-Fernbedienung Die Einzelauswahl ermöglicht es, den Programmiermodus auf einem einzelnen Rollo durch eine Fernbedienung zu aktivieren, ohne dass Sie den Programmknopf auf dem Rollo physisch betätigen müssen.
- Page 46 M OT ION C M- 0 3/05 LI - IO N R O H R M O T O R Kanalauswahl 5 Kanal-Fernbedienung Kanalauswahl ermöglicht es, Rollos zwischen Kanälen/Fernbedienungen zu kopieren, ohne dass Sie den Programmknopf auf den Motoren physisch betätigen müssen. Wählen Sie den Um die 23.1...
- Page 47 M OT I ON C M- 0 3 /05 LI- IO N R O H R M O T O R Motor aktivieren / deaktivieren Um eine Beschädigung des Rollos zu vermeiden, verfügt der Motor über einen Transportmodus, der sicherstellt, dass das Rollo nicht vor der Installation in Betrieb genommen wird. Halten Sie den Programmknopf gedrückt und ziehen Sie zweimal, um den Motor zu 25.1 aktivieren oder zu deaktivieren.
- Page 48 M OT I ON C M- 0 3 /05 LI- IO N R O H R M O T O R...
- Page 49 Für die neuesten Informationen und Obwohl diese Bedienungsanleitung sorgfältig zusammengestellt wurde, können Fehler enthalten sein. aktualisierte Handbücher besuchen Sie bitte rtube.nl/cm-03 Coulisse B.V. ist nicht verantwortlich für Schäden, die aufgrund von fehlerhaften Informationen in dieser Bedienungsanleitung zustande gekommen sind und übernimmt keinerlei Haftung.
- Page 50 M OT I ON C M - 03 / 0 5 M O T E U R T U BU L AI R E L I - I O N CM-03/05 Moteurs tubulaires alimentés par batterie Li-ion avec traction et télécommande Caractéristiques du moteur...
- Page 51 M OT I ON C M - 03 / 0 5 M O T E U R T U BU L AI R E L I - I O N AVERTISSEMENT Lisez attentivement les instructions avant d'assembler et d' u tiliser le produit. Le montage peut être effectué...
- Page 52 M OT I ON C M - 03 / 0 5 M O T E U R T U BU L AI R E L I - I O N Instructions de sécurité importantes travaux de maintenance, tels que le nettoyage des AVERTISSEMENT : pour réduire le risque de blessure vitres, sont effectués à...
- Page 53 M OT I ON C M - 03 / 0 5 M O T E U R T U BU L AI R E L I - I O N 3 Déclaration d’interférence des Le variateur est destiné à être installé à une fréquences radio de la FCC hauteur d' a u moins 2,5 m au-dessus du sol ou d' u ne autre niveau d' a ccès.
- Page 54 M OT I ON C M - 03 / 0 5 M O T E U R T U BU L AI R E L I - I O N Chaînes Program- Sélection Sélection de Stores max. montage mer les unique chaîne stores...
- Page 55 M OT I ON C M - 03 / 0 5 M O T E U R T U BU L AI R E L I - I O N Scènes Fréquence Portée Alimentation Longueur Largeur Hauteur Certificats max. 30 m avec 433 MHz CR2430 3.0V 120 mm...
- Page 56 M OT I ON C M - 03 / 0 5 M O T E U R T U BU L AI R E L I - I O N CM-11 CM-12 Télécommande à 1 chaîne Télécommande à 5 chaînes Indicateur Indicateur de chaîne...
-
Page 57: Table Of Contents
M OT I ON C M - 03 / 0 5 M O T E U R T U BU L AI R E L I - I O N CM-13 CM-17 Télécommande à 15 chaînes Télécommande de table à 4 chaînes Indicateur de chaîne Croissant... -
Page 58: Centre (Arrêt / Favori)
M OT ION C M - 0 3 /05 MO TE U R T U B U LA I R E LI - I O N CM-15 CM-16 Télécommande murale à 1 chaîne Télécommande murale à 4 chaînes Croissant Croissant Centre Centre (arrêt / favori) - Page 59 M OT IO N C M - 03 / 0 5 MO TE U R TU B U L AI R E L I - IO N CM 18 CM-20 Télécommande à gaine à 1 chaîne Motion hub Coupler bouton Voir le manuel CM-20...
- Page 60 M OT I ON C M - 03 / 0 5 M O T E U R T U BU L AI R E L I - I O N Installez le store Click! Click! Click! Activez le moteur Activez le moteur en le chargeant avec un câble micro-USB.
-
Page 61: Indicateur De Chaîne
M OT ION C M - 03/ 0 5 M O T E U R TU B U L AI R E L I - IO N Associez une télécommande Associez une télécommande capable de programmer des stores. Voir les pages 4 et 5 pour plus de détails sur les télécommandes. Dans ce manuel CM-12 est affiché. - Page 62 M OT I ON C M- 0 3 /05 MO T E U R TU B U LA I R E LI - I O N Définir la position du bas Appuyez et maintenez la touche bas jusqu' à ce que le store atteigne la position inférieure désirée.
- Page 63 M OT ION C M - 0 3 / 05 M O T E U R T U BU LA IR E LI - I O N Définir la position du haut Croissant Appuyez et maintenez la touche croissant 10.1 jusqu' à...
- Page 64 M OT I ON C M - 03 / 0 5 M O T E U R T U BU L AI R E L I - I O N Définir la position favorite (facultatif) Déplacez le store vers une position favorite souhaitée. 12.1 Centre Maintenez le bouton central pour enregistrer...
-
Page 65: Chaîne
M OT I ON C M - 03 / 0 5 M O T E U R T U BU L AI R E L I - I O N Faire fonctionner le store Contrôle de traction : tirez une fois pour déplacer le store vers les positions finales. - Page 66 M OT I ON C M - 03 / 0 5 M O T E U R T U BU L AI R E L I - I O N Réinitialiser la position favorite Déplacez le store vers une position favorite 16.1 souhaitée.
- Page 67 M OT I ON C M - 03 / 0 5 M O T E U R T U BU L AI R E L I - I O N Réinitialiser le store Il est possible de supprimer uniquement les limites finales ou de réinitialiser les paramètres d' u sine.
- Page 68 M OT I ON C M - 03 / 0 5 M O T E U R T U BU L AI R E L I - I O N Options avancées Commande manuelle Dans le cas où il n' y a pas de commande à distance ou de contrôle de traction, le store peut être actionné...
- Page 69 M OT I ON C M - 03 / 0 5 M O T E U R T U BU L AI R E L I - I O N Sélection unique de télécommande à 15 chaînes La sélection simple permet d' a ctiver le mode programme sur un seul store grâce à une télécommande, sans avoir à...
- Page 70 M OT ION C M - 0 3 /0 5 M O T E U R TU B U LA I R E L I- I O N Sélection de chaîne de télécommande à 5 chaînes La sélection de chaîne permet de copier les stores entre les chaînes / télécommandes sans avoir à...
-
Page 71: Chaîne
M OT I ON C M - 03 / 0 5 M O T E U R T U BU L AI R E L I - I O N Activer / désactiver le moteur Pour éviter que le store ne soit endommagé, le moteur dispose d' u n mode de transport qui garantit que le store ne sera pas activé... - Page 72 M OT I ON C M - 03 / 0 5 M O T E U R T U BU L AI R E L I - I O N...
- Page 73 CoulisseB.V. décline toute responsabilité pour les dommages dus à des erreurs et / ou des défauts dans ce manuel. rtube.nl/cm-03 Coulisse B.V.se réserve le droit de réviser le manuel et de réviser et / ou modifier son contenu à tout moment, sans obligation d'informer toute personne ou entité...
- Page 74 M OT I ON C M - 0 3 / 05- B U IS M O TO R ( LI - I O N) CM-03/05 Buismotoren met trek- en afstandsbediening op basis van li-ionbatterij Kenmerken van de motor Li-ionbatterij Oplaadbaar via USB-...
- Page 75 M OT I ON C M - 0 3 / 05- B U IS M O TO R ( LI - I O N) WAARSCHUWING Lees deze handleiding aandachtig alvorens het product te monteren en te Houd alle koorden buiten het bereik van kleine kinderen om gebruiken.
- Page 76 M OT I ON C M - 0 3 / 05- B U IS M O TO R ( LI - I O N) Belangrijke veiligheidsinstructies Bedien het product niet wanneer er WAARSCHUWING: Om het risico op ernstige onderhoudswerkzaamheden in de buurt verwondingen of op de dood te verminderen is worden uitgevoerd, zoals het wassen van het belangrijk voor de veiligheid van personen...
- Page 77 M OT I ON C M - 0 3 / 05- B U IS M O TO R ( LI - I O N) De aandrijving is bedoeld om te worden storingen die een ongewenste werking kunnen geïnstalleerd op een hoogte van minimaal veroorzaken.
- Page 78 Kanalen Enkele Kanaal montage program- rolgordijnen selectie selecteren meren CM-11 onbeperkt Afstandsbediening CM-12 onbeperkt Afstandsbediening CM-13 onbeperkt Afstandsbediening CM-15 onbeperkt Afstandsbediening op muur CM-16 onbeperkt Afstandsbediening op muur CM-17 onbeperkt Afstandsbediening op tafel CM-18 onbeperkt Afstandsbediening (trekken) CM-20 n.v.t. Motion-wifi-bridge...
- Page 79 M OT I ON C M - 0 3 / 05- B U IS M O TO R ( LI - I O N) Max. Frequentie- bereik Voeding Lengte Breedte Hoogte Certificaten scènes 30 m bij 433 MHz 1 betonnen n.v.t.
- Page 80 M OT I ON C M - 0 3 / 05- B U IS M O TO R ( LI - I O N) CM-11 CM-12 Afstandsbediening met 1 kanaal Afstandsbediening met 5 kanalen Kanaal- Kanaal- aanduiding aanduiding Omhoog Omhoog Midden Midden (stop/favoriet)
- Page 81 M OT I ON C M - 0 3 / 05- B U IS M O TO R ( LI - I O N) CM-13 CM-17 Afstandsbediening met 15 kanalen Tafel-afstandsbediening met 4 kanalen Kanaal- aanduiding Omhoog Omhoog Midden Kanaal 1 (stop/favoriet) Kanaal 3 Rechts...
- Page 82 M OT IO N C M- 03 / 0 5 - B U I SM O TO R (L I - I O N) CM-15 CM-16 Afstandsbediening met 1 kanaal op muur Afstandsbediening met 4 kanalen op muur Omhoog Omlaag Omhoog Midden Midden...
- Page 83 M OT I ON C M - 0 3 / 05- B U IS M O TO R ( LI - I O N) CM-18 CM-20 Afstandsbediening met 1 kanaal Motion-bridge Koppelings- knop Zie handleiding CM-20...
- Page 84 M OT I ON C M - 0 3 / 05- B U IS M O TO R ( LI - I O N) Installeer het rolgordijn Click! Click! Click! Activeer de motor Activeer de motor door deze op te laden met een micro USB-kabel.
- Page 85 M OT I ON C M - 0 3 / 05- B U IS M O TO R ( LI - I O N) Koppel een afstandsbediening Koppel een afstandsbediening die rolgordijnen kan programmeren. Raadpleeg pagina 4 en 5 voor meer informatie over de afstandsbediening.
- Page 86 M OT IO N C M- 0 3/0 5 - B U I S M O T O R ( L I- I O N) Onderste positie instellen Houd de knop omlaag ingedrukt totdat het rolgordijn de gewenste onderste positie bereikt. WAARSCHUWING: Risico op beschadiging.
- Page 87 M OT I ON C M - 0 3 / 05- B U IS M O TO R ( LI - I O N) Bovenste positie instellen Omhoog Houd de knop omhoog ingedrukt totdat het 10.1 rolgordijn de gewenste bovenste positie bereikt. WAARSCHUWING: Risico op beschadiging.
- Page 88 M O TI ON C M- 03 / 0 5 - B U IS M O TO R (L I - IO N) Optioneel: Favoriete positie instellen Stel het rolgordijn in op een gewenste favoriete positie. 12.1 Midden Houd de knop ‘midden’ ingedrukt om deze 12.2 favoriete positie op te slaan.
- Page 89 M OT I ON C M - 0 3 / 05- B U IS M O TO R ( LI - I O N) Het rolgordijn bedienen Trekbediening: Trek een keer om het rolgordijn naar de eindposities te bewegen. Trek opnieuw om het rolgordijn te stoppen.
- Page 90 M OT I ON C M - 0 3 / 05- B U IS M O TO R ( LI - I O N) Favoriete positie opnieuw instellen Stel het rolgordijn in op een gewenste favoriete positie. 16.1 Druk op de knop programmeren op de motor om de programmeermodus 16.2 Midden te activeren.
- Page 91 M OT I ON C M - 0 3 / 05- B U IS M O TO R ( LI - I O N) Het rolgordijn opnieuw instellen Het is mogelijk om alleen eindposities te verwijderen of om terug te gaan naar de fabrieksinstellingen.
- Page 92 M OT I ON C M - 0 3 / 05- B U IS M O TO R ( LI - I O N) Uitgebreide opties Handmatige bediening Als er geen afstandsbediening of trekbediening is, kan het rolgordijn worden bediend via de programmeerknop op de motor. Houd de knop programmeren ingedrukt om het 20.1 rolgordijn handmatig te bedienen.
- Page 93 M OT I ON C M - 0 3 / 05- B U IS M O TO R ( LI - I O N) Afstandsbediening met 15 kanalen en enkele selectie Met ‘Enkele selectie’ kunt u een programmeermodus voor een rolgordijn activeren via een afstandsbediening, zonder dat u op de fysieke programmeerknop op het rolgordijn hoeft te drukken.
- Page 94 M OT ION C M- 0 3 / 0 5 - B U I SM O TO R (L I - I O N) Afstandsbediening met 5 kanalen en kanaal selecteren Met ‘Kanaal selecteren’ kunnen rolgordijnen tussen kanalen/afstandsbedieningen worden gekopieerd zonder dat er op de programmeerknop op de motoren hoeft te worden gedrukt. Selecteer het Houd de knop 23.1...
- Page 95 M OT I ON C M - 0 3 / 05- B U IS M O TO R ( LI - I O N) Activeer/deactiveer de motor Om schade aan het rolgordijn te voorkomen, heeft de motor een transportmodus. Deze zorgt dat het rolgordijn niet voortijdig wordt geactiveerd voordat deze is geïnstalleerd.
- Page 96 M OT I ON C M - 0 3 / 05- B U IS M O TO R ( LI - I O N)
- Page 97 Ga naar rtube.nl/cm-03 voor de nieuwste Hoewel deze handleiding met zeer veel zorg is samengesteld, aanvaardt Coulisse B.V. geen enkele aansprakelijkheid voor...
- Page 98 M OT I ON C M- 03/0 5 LI - IO N M O TO R TU B U LA R CM-03/05 Motores tubulares accionados por una batería de Li-ion, con mecanismo de tracción y operación remota Características del motor Batería de Li-ion...
- Page 99 M OT I ON C M- 03/0 5 LI - IO N M O TO R TU B U LA R ADVERTENCIA Lea detenidamente las instrucciones antes de instalar y usar el producto. El proceso de montaje puede ser completado por personas quedarse atrapados en ellos y no profesionales.Para uso en estrangularse.
- Page 100 M OT I ON C M- 03/0 5 LI - IO N M O TO R TU B U LA R Instrucciones de seguridad automáticos cuando se realicen tareas de importantes mantenimiento en las inmediaciones, tales ADVERTENCIA: Para reducir el riesgo de lesiones como la limpieza de cristales.
- Page 101 M OT I ON C M- 03/0 5 LI - IO N M O TO R TU B U LA R La parte accionada debe ser compatible con 2. Este dispositivo debe aceptar cualquier el par de giro nominal (1.1N.m/2.2N.m) y el interferencia que reciba, incluida aquella que tiempo de funcionamiento nominal (12min).
- Page 102 Control remoto de mano CM-12 ilimitado Control remoto de mano CM-13 ilimitado Control remoto de mano CM-15 ilimitado Control remoto de pared CM-16 ilimitado Control remoto de pared CM-17 ilimitado Control remoto de mesa CM-18 ilimitado Mecanismo tirador CM-20 Puente wifi MOTION...
- Page 103 M OT I ON C M- 03/0 5 LI - IO N M O TO R TU B U LA R Máx. de Frecuencia Alcance Alimentación Largo Ancho Alto Certificados escenas 30 m con 433 MHz 1 muro de CR2430 3.0V 120 mm 45 mm 14 mm...
- Page 104 M OT I ON C M- 03/0 5 LI - IO N M O TO R TU B U LA R CM-11 CM-12 Mando de 1 canal Mando de 5 canales Indicador Indicador de canal de canal Subir Subir Centro Centro (parar/favorito) (parar/favorito)
- Page 105 M OT I ON C M- 03/0 5 LI - IO N M O TO R TU B U LA R CM-13 CM-17 Mando de 15 canales Mando de mesa de 4 canales Indicador de canal Subir Subir Centro Canal 1 (parar/favorito) Canal 3 Derecha...
- Page 106 M O TI ON C M- 0 3 / 0 5 LI - IO N M O TO R TU BU L AR CM-15 CM-16 Mando de pared de 1 canal Mando de pared de 4 canales Subir Bajar Subir Centro Centro (parar/favorito)
- Page 107 M OT I ON C M- 03/0 5 LI - IO N M O TO R TU B U LA R CM-18 CM-20 Mecanismo tirador de 1 canal Puente Motion Botón emparejar Consultar manual CM-20...
- Page 108 M OT I ON C M- 03/0 5 LI - IO N M O TO R TU B U LA R Instalar la persiana Click! Click! Click! Activar el motor Cargue el motor con un cable micro-USB para activarlo. Una luz LED verde empezará a parpadear.
- Page 109 M OT I ON C M- 03/0 5 LI - IO N M O TO R TU B U LA R Emparejar un mando Empareje un mando a distancia para programar las persianas. Consulte las páginas 4 y 5 para obtener más detalles. En este manual se muestra el CM-12.
- Page 110 M OT ION C M - 0 3 / 05 LI- I O N M O T O R T U BU LA R Ajustar la posición inferior Pulse y sostenga el botón bajar hasta que la persiana alcance la posición inferior deseada. ADVERTENCIA: Riesgo de daños.
- Page 111 M OT I ON C M- 03/0 5 LI - IO N M O TO R TU B U LA R Ajustar la posición superior Subir Pulse y sostenga el botón subir hasta que la 10.1 persiana alcance la posición superior deseada. ADVERTENCIA: Riesgo de daños.
- Page 112 M OT I ON C M- 03/0 5 LI - IO N M O TO R TU B U LA R Ajustar la posición favorita (opcional). Ajuste la persiana en la posición favorita deseada. 12.1 Centro Mantenga pulsado el botón centro para 12.2 guardar esta posición favorita.
- Page 113 M OT I ON C M- 03/0 5 LI - IO N M O TO R TU B U LA R Activar la persiana Mecanismo de tracción: Tire una vez para que la persiana se mueva a las posiciones finales. Tire de nuevo para detener la persiana.
- Page 114 M OT I ON C M- 03/0 5 LI - IO N M O TO R TU B U LA R Restablecer la posición favorita Mueva la persiana a la posición favorita deseada. 16.1 Pulse el botón programar del motor para activar el modo de 16.2 Centro programación.
- Page 115 M OT I ON C M- 03/0 5 LI - IO N M O TO R TU B U LA R Restablecer la persiana Es posible borrar solamente las posiciones finales o restablecer los valores de fábrica. Al restablecer los valores de fábrica, se borrarán las posiciones finales y la conexión a cualquier mando emparejado.
- Page 116 M OT I ON C M- 03/0 5 LI - IO N M O TO R TU B U LA R Opciones avanzadas Control manual Si no dispone de un mando a distancia o mecanismo de tracción, la persiana se puede operar con el botón de programación en el motor. Mantenga el botón programar pulsado para operar 20.1 la persiana manualmente.
- Page 117 M OT I ON C M- 03/0 5 LI - IO N M O TO R TU B U LA R Mando de 15 canales con Selección individual La Selección individual permite activar el modo de programación de una sola persiana con el mando a distancia, sin tener que pulsar físicamente el botón de programación de la persiana.
- Page 118 M O TI ON C M - 0 3 / 05 LI - I O N M O T O R T U BU L A R Mando de 5 canales con Selección de canal La Selección de canal permite copiar persianas entre canales/mandos sin tener que pulsar físicamente el botón de programación de los motores.
- Page 119 M OT I ON C M- 03/0 5 LI - IO N M O TO R TU B U LA R Activar / desactivar el motor Para evitar que la persiana se dañe, el motor dispone de un modo de transporte que asegura que la persiana no se active antes de la instalación.
- Page 120 M OT I ON C M- 03/0 5 LI - IO N M O TO R TU B U LA R...
- Page 121 Coulisse B.V. se reserva el derecho de revisar el manual y revisar visite rtube.nl/cm-03 y/o cambiar el contenido en cualquier momento, sin la obligación de notificar a cualquier persona o entidad de tales revisiones o cambios.
- Page 122 M OT I ON C M- 03/0 5 LI - IO N T U B U LA R M O T O R...
- Page 123 M OT I ON C M- 03/0 5 LI - IO N T U B U LA R M O T O R...
- Page 124 Coulisse B.V. Vonderweg 48 7468 DC Enter The Netherlands +31 547 85 55 55 +31 547 85 55 50 info@coulisse.com coulisse.com...
Need help?
Do you have a question about the CM-03 and is the answer not in the manual?
Questions and answers