
Related Manuals for D-Link DP-301


Summary of Contents for D-Link DP-301
-
Page 1: Hardware Guide
Model DP-301 Ethernet / Fast Ethernet Multiprotocol Print Server Hardware Guide Rev. 02w (October 2004) 6DP301H...01 Printed In Taiwan RECYCLABLE... -
Page 2: Table Of Contents
Service Features ...2 External Features ...3 ...3 Rear Panel ...4 LED Indicators NPACKING AND NSTALLATION Unpacking and Inspecting ...6 Installing the DP-301 ...7 Power-up and Self-Test ...8 ...8 LED Test Series Component Test Series ...9 Operational Test Velcro-mounting the DP-301 ...10 RODUCT... -
Page 3: About This Guide
BOUT THIS UIDE This manual describes the D-Link DP-301 Ethernet/Fast Ethernet Multiprotocol Print Server, including full descriptions of its features, detailed installation procedures, and troubleshooting information. Your DP-301 package includes important software components, and additional user manuals. The software components, and procedures for installation and setup of the software, are covered in the PS Admin User’s... -
Page 4: Introduction
NTRODUCTION The DP-301 Print Server is a compact print server which connects to your Ethernet or Fast Ethernet network anywhere you wish to locate printer services. It manages the flow of print files from your workstations or file servers to its connected printers, delivering print jobs to high-performance printers much faster than a file server or a PC acting as a print server can. -
Page 5: Service Features
Service Features DP-301 print servers improve network printing services in three ways: The DP-301 picks up the workload of managing print file traffic to its connected printers. This provides workload relief to your file servers, and allows the file servers' full capacity to be used for file access or other direct services to network users. -
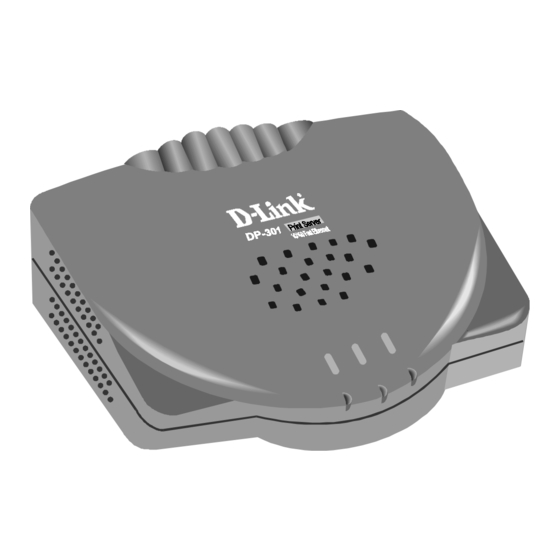
Page 6: External Features
DP-301 Rear Panel Printer Port The printer port, labeled LPT, is configurable by commands in the PS Admin program, or by commands issued to the DP-301 via Telnet. See the PS Admin User’s Guide for configuration procedures. Introduction... -
Page 7: Network Port
DC Power Input power input The power supply included in your DP-301 package is correct for the DP-301. Substitution of other equipment may void warranty. LED Indicators The front panel of the DP-301 comprises three LED indicators. - Page 8 DP-301 Print Server Hardware Guide This indicator shows steady green while the DP-301 is transferring print data through its printer port Introduction...
-
Page 9: Unpacking And Installation
This chapter explains how to install your DP-301 print server and connect it to the network. It also describes the automatic power-on self test, and provides instructions for convenient Velcro mounting. Unpacking and Inspecting Carefully remove all items from the package. In addition to this Hardware... -
Page 10: Installing The Dp-301
Installing the DP-301 Follow these steps for a trouble-free start of print-server operations with your DP-301. Please take particular notice of the warning in step 4: the network connection should be made before supplying power to the DP-301. 1. Confirm proper operation of the printer to be connected to the DP-301. -
Page 11: Power-Up And Self-Test
DP-301 Print Server Hardware Guide Power-up and Self-Test Whenever the DP-301 is powered up, two kinds of testing procedures follow automatically. The first procedure is just a programmed series of LED flashes, to confirm proper operation of the three LED indicators. The second procedure comprises programmed tests of each of the DP-301's major components. -
Page 12: Operational Test
"Testing your Print Server"). Velcro-mounting the DP-301 The DP-301 can stand on the printer's tabletop, or may be Velcro-mounted to a side panel of the printer or another suitable surface next to the printer. To prepare for Velcro-mounting, separate the two parts of the supplied... - Page 13 DP-301's rear panel. Peel the white backing off of the hook tape. Align the hook tape to match the alignment of the loop tape when the DP-301 is in the attitude you have chosen, and press the loop tape's adhesive back onto the mounting surface.
-
Page 14: Product Specifications
RODUCT PECIFICATIONS Printer Connection Printer Port: IEEE 1284 standard bidirectional parallel interface with 25- pin connector. Bidirectional Communication: Hewlett-Packard (Printer Language) standard for bidirectional communication. Network Connection Network Standards: IEEE 802.3 10Base-T Ethernet, IEEE 802.3u 100Base-TX Fast Ethernet Network Data Transfer Rate: 10Mbps and 100Mbps (megabits per second), according to network environment. -
Page 15: Management And Diagnostics
DP-301 Print Server Hardware Guide Management and Diagnostics Standard: SNMP MIBs: MIB-II (RFC 1213) Diagnostic LED Indicators: Pw/Tx, Link/Rx, LPT Environmental and Physical Power Supply: External power supply providing 12VDC/ 500mA Dimensions: 139.5mm 114.5mm 27.2mm Weight: approx. 165g Operating Temperature: 0 to 50 C... -
Page 16: Ort Inouts
The following table lists the pinouts of the DP-301's 25-pin parallel port connector (identical to the parallel port connector used on most personal computers), and the corresponding pin numbers for the 36-pin Centronics connector as used on most printers. Signal names beginning with n are active-low signals. -
Page 17: Index
Link at an Authorized D-Link Service Office. The replacement hardware need not be new or have an identical make, model or part. D-Link may, at its option, replace the defective Hardware or any part thereof with any reconditioned product that D-Link reasonably determines is substantially equivalent (or superior) in all material respects to the defective Hardware. - Page 18 If a material non-conformance is incapable of correction, or if D-Link determines in its sole discretion that it is not practical to replace the non-conforming Software, the price paid by the original licensee for the non-conforming Software will be refunded by D-Link;...
- Page 19 Any hardware, software, firmware or other products or services provided by anyone other than D-Link; and Products that have been purchased from inventory clearance or liquidation sales or other sales in which D-Link, the sellers, or the liquidators expressly disclaim their warranty obligation pertaining to the product.
- Page 20 Connect the equipment into an outlet on a circuit different from that to which the receiver is connected. • Consult the dealer or an experienced radio/TV technician for help. For detailed warranty information applicable to products purchased outside the United States, please contact the corresponding local D-Link office.
- Page 21 Registration Product registration is entirely voluntary and failure to complete or return this form will not diminish your warranty rights.
Need help?
Do you have a question about the DP-301 and is the answer not in the manual?
Questions and answers