Table of Contents
Advertisement
Quick Links
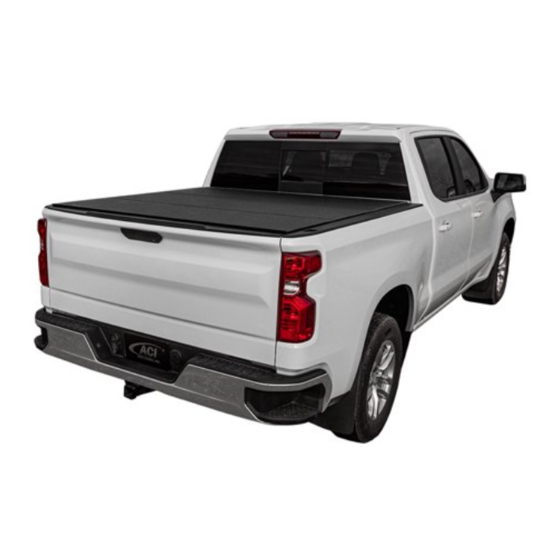
Thank you for purchasing ACCESS
manufactured this cover using superior quality materials and workmanship. With proper
care, your cover will provide years of service and enjoyment.
NOTICE TO INSTALLER: Even if familiar with hardware, read instructions prior to
installation as improvements may be made without notice. Always handle components
with care. If you have questions or problems call customer service. When done, these
instructions must be given to the consumer.
NOTICE TO CONSUMER: Before using this product, read maintenance and safety
sections. Save these instructions for future reference.
DATE PURCHASED:
WHERE PURCHASED:
SERIAL NUMBER:
INSTALLATION INSTRUCTIONS
®
FOR YOUR RECORDS
Questions? 866-630-8726
Original Roll-Up Cover. Agri-Cover, Inc. proudly
(Located on decal under rear bar by tailgate)
agricover.com
Advertisement
Table of Contents

Related Manuals for AGRI-COVER Access


Summary of Contents for AGRI-COVER Access
- Page 1 INSTALLATION INSTRUCTIONS Thank you for purchasing ACCESS Original Roll-Up Cover. Agri-Cover, Inc. proudly ® manufactured this cover using superior quality materials and workmanship. With proper care, your cover will provide years of service and enjoyment. NOTICE TO INSTALLER: Even if familiar with hardware, read instructions prior to installation as improvements may be made without notice.
-
Page 2: Parts Diagram
PREPARATION This document is typically used with trucks that have 78" or longer boxes. Unpack cover components and clean truck box. COMPONENTS TOOLS NEEDED • (8) Clamps • (2) 1/2” Wrenches • (2) Driver side rails • Marking pen • (2) Passenger side rails •... -
Page 3: Installing Side Rails
1: INSTALLING SIDE RAILS NOTE: Some installs require special instructions. If required, follow special instructions for side rail attachment along with these standard instructions. A. Locate two side rail sections with matching profiles displayed in image below. B. Unroll hook and loop and slide into front side rail channel. C. - Page 4 1: INSTALLING SIDE RAILS (Continued) E. Position side rail with weather strip Strike at Top of side rail against inside lip of box. Push side rail flush with top side rear forward until it touches front of box. of box at front IMPORTANT: Ensure strike is positioned at rear of box.
- Page 5 1: INSTALLING SIDE RAILS (Continued) I. Adjust side rail flush with top of box, install second clamp on side rail 1/3 from front of box. Repeat clamping procedure. J. Adjust side rail flush with top of box, install third clamp at side rail splice (where two side rail sections meet).
- Page 6 2: APPLYING SEAL GASKET NOTE: For best adhesion, ensure air and surface temperatures are above 60° F. NOTE: With a spray-in bed liner, better adhesion is possible by smoothing surface and applying an adhesion promoter. A. Ensure bulkhead is clean, wipe top surface with alcohol pad.
- Page 7 3. APPLYING REAR SEAL NOTE: For best adhesion, ensure air and surface temperatures are above 60° F. Side rail A. Clean underside of side rail with alcohol Edge of box pad saved in Step 2. Hold seal up to end of side rail, ensure end of seal contacts edge of box.
- Page 8 4: INSTALLING TENSION ADJUSTERS A. The cover comes pre-rolled in open position for ease of installation. Set pre- rolled cover on tailgate with front bar facing up. Align tension adjuster (marked “L”) on driver side of cover as shown. “L” left tension adjuster B.
- Page 9 5: MOUNTING COVER TO SIDE RAILS A. Set cover at front of box on side rail (behind cab) with front bar facing up. B. Roll front bar onto front side rails and fold/ tuck vinyl flap under front bar. Now, front bar will face down.
- Page 10 5: MOUNTING COVER TO SIDE RAILS (Continued) E. Center the front bar between the two side rails. Side rail Center front bar between side rails until space is equal at both ends NOTE: Before tightening, ensure the vinyl flap is tucked under front bar. Vinyl flap tucked under front bar Side rail...
- Page 11 6: INITIAL OPERATION AND ADJUSTMENTS A. Unroll cover and place rear bar into strikes on side rails. Press down on rear bar to close (20-30 lbs pressure). The cover fabric may be tight. Over time, under tension, it will Strike at rear conform to its hardware and loosen slightly.
-
Page 12: Troubleshooting
TROUBLESHOOTING PROBLEM SOLUTION Cover too loose Turn both tension adjusters counter clockwise to move front bar forward (see Step 6D). Cover too tight Turn both tension adjusters clockwise to move front bar back (see Step 6D). Gap between rear bar and tailgate Side rails set too high (see Step 6B). - Page 13 CLOSING ROLL UP COVER A. Release storage straps at front. Attach storage straps to retaining buckles located under rolled cover. B. Using both hands, unroll cover toward the tailgate. C. With tailgate down, position rear bar against strikes. Push down on bar until latching system secures under side rails.
- Page 14 OPENING ROLL UP COVER A. Open tailgate, pull down latching system's cord and rotate rear bar with other hand. B. Using both hands, roll cover toward the cab. C. Secure cover with storage straps. NOTE: See next page for storage strap adjustment.
- Page 15 STORAGE STRAP ADJUSTMENT A. To tighten storage strap, pull back on top layer of strap loop until strap is snug. B. To take out slack in loop, slide slip bracket down.
-
Page 16: Safety Information
SAFETY INFORMATION • Do not cover cargo higher than the cover. • Do not place object(s) on or against the cover or its framework at any time. • Always secure cargo to avoid shifting and damaging the cover or its parts. •... - Page 17 TIPS FOR A LONGER LASTING COVER • Keep cover closed when not in use. • Always seal cover edges the full length of box on both sides with hook and loop sealing system. • Keep the cover tight; cover should sound drum-like when tapped on. •...
-
Page 18: Inspection And Maintenance
INSPECTION AND MAINTENANCE The operator can perform most of inspection and maintenance. It may be necessary to review the installation and operating instructions. • Periodically check and/or retighten clamps as needed. • Periodically check latching system to ensure latches fully engage side rails. •... -
Page 20: Manufacturer's Limited Warranty
Agri-Cover, Inc. extends the following five (5) year Limited Warranty for the ACCESS Original Roll-Up Cover: ® Agri-Cover, Inc. warrants a period of five (5) years from the date of manufacture that its ACCESS Original Roll-Up Cover is free from defects in workmanship, under normal use ®...
Need help?
Do you have a question about the Access and is the answer not in the manual?
Questions and answers