
Related Manuals for Ocean Digital WR-233


Summary of Contents for Ocean Digital WR-233
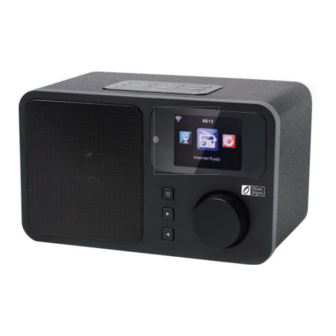
- Page 1 User Manual Internet Radio WR-233 Please read this user manual carefully before using the receiver.
-
Page 2: Table Of Contents
Welcome Table of contents Welcome ..........1 Location of Controls . -
Page 3: Location Of Controls
Location of Controls Front 1. Remote control sensor 2. LCD display 3. Speaker 4. Left / Back button 5. Right button 6. Standby button 7. Volume / Dial / Select rotary knob (Rotate to adjust the volume or browse the menu. Push down the button to confirm selection) 8. -
Page 4: Remote Control
Remote Control : Standby button : Mute 3. 0-9: Favorite station key / input letters and numbers for WiFi Encryption code :Dim the display : Favorite button, adding station to your favorite list 6.▲: Cursor up 7.▼: Cursor down 8.t : Cursor left / back to previous menu 9.u : Cursor right 10.OK: confirm button : Alarm button... - Page 5 Before you start Please ensure the following is ready: • You have a broadband internet connection. • A wireless (Wi-Fi) broadband router (2.4GHz) is connected to the internet successfully. The radio supports Wireless B, G and N connection (Wireless N router can also be used with the setting on B or G).
-
Page 6: Remote Control Character List
Remote control character list Key“0”―― 0,'DEL' Key“1”―― '1'->'@'->' '(space)->'!'-> “ (double quotes) ->'#'->'$'->'%'->'&'-> '(single quotes)->'(' ->')'->'*'->'+'->','->'-'->'.'->'/'->':'->';'->'<'->'='->'>'->'?'- >'['->'\'->']'->'^'->'_'->'`'->'{'->'|'->'}'->'~' Key “2”―― 2,A,B,C,a,b,c Key“3”―― 3,D,E,F,d,e,f Key“4”―― 4,G,H,I,g,h,i Key“5”―― 5,J,K,L,j,k,l Key“6”―― 6,M,N,O,m,n,o Key“7”―― 7,P,Q,R,S,p,q,r,s Key“8”―― 8,T,U,V,t,u,v Key“9”―― 9,W,X,Y,Z,w,x,y,z Remark: press '→' to move to next character and press 'OK' button to confirm. You can also press ↑... -
Page 7: Connecting To Your Wifi Network
Connecting to your WiFi Network The screen below will appear. You can choose Yes to proceed to search for the available WiFi network. If your router has the WPS function, you can select the “Yes[WPS]” to proceed. 01:01 Would you like to configure Network now? Yes(WPS) It will then start scanning the network. -
Page 8: Start Using Internet Radio
After the router is connected successfully, it will show “Network OK” and display the menu screen: 08:58 Internet Radio You can now start enjoying the internet radio. Internet Radio Choose 'Internet Radio' from the menu, you can see different functions as below: To start listen the worldwide radio stations, select “Radio Station/Music”, My Favorite This is to show the list of your Favorite stations which have been assigned to the presets. -
Page 9: Aux-In
To recall a preset station: Press the button briefly and choose your desire station. Remark: Please note Preset 1-5 is reserved for future use and cannot be preset for radio stations. Radio Station / Music Select this option, then you can select your desired radio station by Category, Genre or Location., etc. - Page 10 Please make sure your computer laptop is on the same Wi-Fi network as the Radio before you start using this function. 1. If your PC is running Microsoft Windows XP, then you can use Windows Media Player 11(WMP11) to act as your UPnP (Universal Plug and Play) media server. (For Windows 7 or above, please download the correspond version of Windows Media Player).
- Page 11 2.1.4 From the 'Media Sharing' windows, the radio will be listed as an unknown device. Click on the unknown device listed, then click the 'Allow' button and then click 'OK'. Allowing the Radio to Connect: 2.2 Windows 7 / Windows Media Player 12 2.2.1 If you are using WMP 12, simply go to <File>...
- Page 12 iii) Set the network location iv) Choose Home network...
- Page 13 v) Create a homegroup, then choose the kind of media file to be accessed, such as music..etc. vi) Launch the Windows Media Player, select <Stream> and choose <Automatically allow devices to play my media> from the drop down list. vii) You can now enjoy the music streaming from the windows media player. Music streaming via UPnP 1.
-
Page 14: Configuration
Remark: On standby mode, you also can press “Enter” button for the switching of “Currently Date & Time” and “Currently Weather”, and you can press “← →” buttons to display the previous/next day weather forecast. Remark: The weather is just for reference only. It may have deviation to the actual weather. -
Page 15: Alarm Setting
It allows maximum 5 users to register with the same radio and you can switch to listen the favorite list under one user at a time 01:44 My mediaU Internet Radio Media Center > Network Wireless Network Configuration Press “Enter” to scan for wireless network and list out. Wireless Network (WPS PBC)... -
Page 16: Sleep Timer Seting
Language There are 17 Languages available, such as English, German, French, Norwegian, Italiano, Svenska, Dansk and others. You can choose the one which suitable for you. Dimmer You can adjust the backlight of the LCD with below settings: 1. Power Saving You can set the backlight to dim down when there is no operation for a certain time of period. -
Page 17: Trouble Shooting
Equalizer Select your prefer music effect. Resume When Power On This is set to ON or OFF of “ Resume When Power On”. Software update 1)Upgrade information will pop up on the display when there is upgrade version on the server. 2)When there is upgrade version available on the server, you can do the manual upgrade from the update menu. - Page 18 2. If your radio can connect to the network successfully, but is unable to play particular stations, it may be due to one of the following reasons: - The station is not broadcasting at this time of the day (remember it may be located in a different time zone).
-
Page 19: Technical Specification
This system is financed by the industry and the ensures environmentally responsible disposal and the recycling of valuable raw materials. Ocean Digital Technology Ltd. Flat B, 12/F., Yeung Yiu Chung (No.8) Ind. Bldg., 20 Wang Hoi Road, Kowloon Bay, Hong Kong Email: support@oceandigital.com.hk...
Need help?
Do you have a question about the WR-233 and is the answer not in the manual?
Questions and answers