
Related Manuals for Daikin EKOMB22AAV1


Summary of Contents for Daikin EKOMB22AAV1
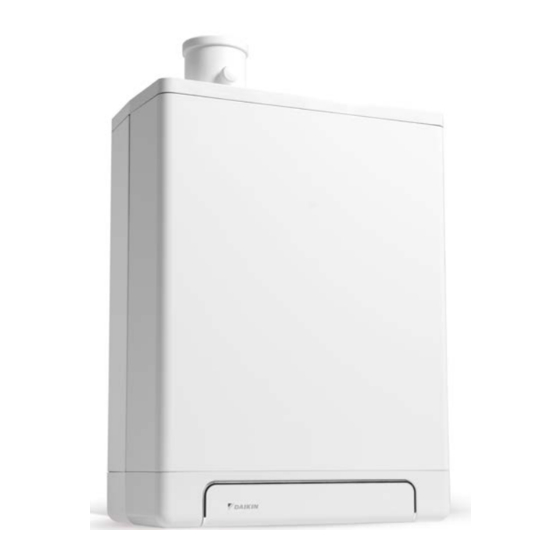
- Page 1 EKOMB22AAV1 EKOMB28AAV1 EKOMB33AAV1 Installation instructions English Daikin Europe NV...
- Page 2 2P369568-1...
-
Page 4: Table Of Contents
The available information has been compiled with the greatest possible care, but Daikin Europe NV can not be held liable for any mistakes in the information, or for any consequences thereof. Daikin Europe NV cannot be held liable for any damage arising from work carried out by third parties. - Page 5 Service and technical support for the installer For information about specific settings, installation, maintenance and repair work, as an installer, please contact Your local Daikin dealer. Identification of the product You will find the unit details on the type plate on the bottom of the unit.
-
Page 6: Safety Instructions
SAFETY INSTRUCTIONS The manufacturer Daikin Europe NV accepts no liability for damage or injury caused by the failure to (strictly) observe the safety instructions, or negligence during the installation of the Daikin EKOMB*AAV1 wall-mounted gas boiler and any associated accessories. - Page 7 ), the controller will switch to domestic water operation (code ). During domestic hot water operation, the rpm of the fan, and therefore the power of the unit, is controlled by the controller on the basis of the set tap water temperature. Daikin Europe NV...
-
Page 8: Pc Interface
This must be connected in accordance with the electrical diagram (see par. 10.1). Note When the unit is switched off ( on the service display), the unit frost protection will remain active, however a heating request from an (external) frost thermostat will be ignored. Daikin Europe NV... -
Page 9: Main Components
Domestic hot water sensor S3 Siphon Flow sensor Heat exchanger Pressure sensor central heating Operating panel and display Connection wire 230 V ~ with earthed plug Ionization / ignition pen Manual air bleed Position of data plate Sight glass Daikin Europe NV... -
Page 10: Accessories
EKVK4AA Cover plate EKCP1AA Outdoor sensor EKOSK1AA 3-way valve set EK3WV1AA Flue gas adapter Concentric Ø 80x125 EKHY090717 Flue gas adapter Parallel 80 mm EKHY090707 Propane conversion set *KOMB28AAV1 & *KOMB33AAV1 EKHY075787 Propane conversion set *KOMB22AAV1 EKPS075867 Daikin Europe NV... -
Page 11: Installation Installation Measurements
G ½” (int) Tap water cold G ½” (ext) Tap water warm G ½” (ext) Condense outlet Ø dn25 (flexible) 517mm EKOMB22AAV1 577mm EKOMB28AAV1 637mm EKOMB33AAV1 590mm EKOMB22AAV1 650mm EKOMB28AAV1 710mm EKOMB33AAV1 Flue gas outlet/air Ø60/100 (concentric) inlet 020601002 Daikin Europe NV... - Page 12 Return CH G ¾” (ext) G ½” (int) Tap water cold G ½” (ext) Tap water warm G ½” (ext) Condense outlet Ø dn25 (flexible) 770mm EKOMB22AAV1 830mm EKOMB28AAV1 890mm EKOMB33AAV1 Flue gas outlet/air Ø60/100 (concentric) inlet Daikin Europe NV...
-
Page 13: Installation Space
Beware that in case of a tapping demand, the water can initially have a higher water temperature than requested. In this case, it is recommended to install a thermostatic valve to prevent scalding. This can be done according to the schematics below. Daikin Europe NV... -
Page 14: Assembly
Place the filling loop on the connections of the return and cold water nipple • following the connection kit installation instruction The boiler can now be placed on B-pack simultaniously sliding the pipes of • the boiler into the valves in the assembly bracket 020601020 Daikin Europe NV... - Page 15 Suspend the converted top edge of the cover plate from the washers underneath the bottom of the unit, and slide the cover plate as far back as possible. Please note: When installing the boiler in combination with a cover plate, the siphon will extend underneath the cover plate. Daikin Europe NV...
-
Page 16: Connecting
(D). Make sure there is a minimal water circulation. See par. 7.3. Connection diagram underfloor heating Boiler Pump Thermostatic control valve Spring-operated check valve Electrical valve 230 V ~ Radiators G. Space/clock thermostat Maximum thermostat Daikin Europe NV... - Page 17 In case of an underfloor heating system without pump, we recommend changing the following parameter settings: par. o from 0 to 3. par. P from 5 to 2. Parameter 3 must also be set to its minimum level, or the transmission loss of the property. Daikin Europe NV...
- Page 18 2 may be an OpenTherm thermostat or an on/off thermostat. Connection diagram "external heat source" regulation Boiler Electrical shut-off valve 230 V ~ Radiators Room thermostat zone 1 Room thermostat zone 2 Zone 1 Zone 2 Daikin Europe NV...
-
Page 19: Connecting Dhw Installation
This pollution could cause a fault during domestic hot water operation 020601015 Resistance graph tap circuit unit A. EKOMB22AAV1 B. EKOMB28AAV1 C. EKOMB33AAV1 X. Water pipe pressure (Bar) Y. Flow rate (L/min, tolerance ± 10%) -
Page 20: Connecting Electronically
11 - 12 comfort function in use Outdoor temperature 8 - 9 sensor External energy-saving or 4 - 5 Set parameter c. to 0 MIT switch Also see par. 7.2 Frost thermostat 6 - 7 Parallel over room thermostat Daikin Europe NV... - Page 21 RF room thermostat menu of the boiler controller. You will automatically exit the test mode 1 minute after the last test message of the RF room thermostat has been received. Daikin Europe NV...
-
Page 22: Connecting Gas
.Place a gas sieve in the connection for the unit if the gas may be contaminated. Connect the gas pipe in the gas valve using appropriate seal.. Check the gas carrying parts for leakages at a pressure of up to 50 mbar. The gas pipe should be fitted pressure free. 020601017 Daikin Europe NV... -
Page 23: Flue Gas Output And Air Input
Feedthrough Daikin Other parts Gastec QA or Daikin Feedthrough Daikin Feedthrough at the Prefab chimney Gastec QA, Daikin or third parties Other parts In accordance to applicable national or local legislation All materials Gastec QA or Daikin At the CLV system... -
Page 24: Outlet Systems
From the unit, every pipe has to be slid into the previous one. Mount a non-vertical combustion gas outlet pipe on a slope towards the unit (min. 5mm/m). Fit the assembly brackets in accordance with the assembly instructions of the supplier of the air supply/flue tube system. Daikin Europe NV... - Page 25 C43 all materials Daikin C63 all materials C83 all materials Daikin C93 all materials Daikin Gas exhaust/air intake parts can be bought from a 3rd party. All parts purchased from an external supplier MUST comply with EN14471. Daikin Europe NV...
- Page 26 Fit the exhaust rosters onto the input and output pipe. Attach these to the pipes. Fit the double pipe feedthrough ensuring that the air supply is sloped outwards and the flue gas output is sloped towards the unit. Daikin Europe NV...
- Page 27 Slide the combustion gas outlet and possibly also the air supply pipe into the output and input pipe of the double pipe feedthrough. Fit the combustion gas outlet pipe and air supply pipe on a slope towards the unit. Fit the exhaust rosters on both pipes. Daikin Europe NV...
- Page 28 Slide the wall feedthrough into the grooves and turn it into such a position that the flue tube pipe ends up in the highest position. Cover the grooves with wall plates. Fit the combi feedthrough to the boiler directly or via an extension pipe. Daikin Europe NV...
- Page 29 Fit the exhaust roster onto the combi feedthrough and attach it to the inner pipe. Slide the combi feedthrough (C) from inside to outside through the horizontal roof feedthrough panel, in accordance with the given measurements. Fit the combi feedthrough (C) on a slope towards the unit. Daikin Europe NV...
- Page 30 In case of a sloped roof, through the vertical feed-through panel with scale. In case of a flat roof, through the adhesive panel. In case of a parallel connection, fit the manifold of the combi feedthrough and secure it with a sheet metal screw or pop rivet. Daikin Europe NV...
- Page 31 (Ø80 mm) with exhaust hood at the location of the outlet. In case of a flat roof or an architectural chimney, fit a standard ventilation feedthrough (Ø80 mm) with rain cap in an associated adhesive roof panel. CAUTION Two outlets must be at least 200 mm apart. Daikin Europe NV...
- Page 32 90 m EKOMB33AAV1 85 m Combustion gas outlet and air supply pipe For assembly, see par. 5.6.5 General assembly. Prefab chimney assembly The outlet can be made on any place on the sloped or flat roof surface. Daikin Europe NV...
- Page 33 Fit a roof panel suitable for a double-walled combustion gas outlet Ø80 mm (diameter Ø96 mm) in a flat roof. Slide the double-walled combustion gas outlet from outside to inside through the roof through feed. The outlet should end up at least 500 mm above the roof surface. Daikin Europe NV...
- Page 34 On a flat roof, the outlet of the combustion gas outlet must be made in the "free" outlet area. Fit a condense output. Note The communal outlet is certified in combination with the unit. Daikin Europe NV...
- Page 35 Combustion gas outlet and air supply pipe For assembly, see par. 5.6.5 General assembly. The minimum diameters of the communal air supply and flue tube system based on addendum 2001-02 inspection requirements no. 138 of Gastec. EKOMB22AAV1 and EKOMB33AAV1 EKOMB28AAV1 Number...
- Page 36 When using plastic flue tube material, a minimum temperature class of T120 applies. The transfer bend between concentric and vertical flue connection in the shaft must be supported in the manner instructed by Daikin. The assembly instruction of the manufacturer of the flue tube system must always be followed in full.
-
Page 37: Commissioning The Unit And The Installation
Check all couplings for leaks. 6.1.3 Gas supply Aerate the gas pipe with the initial pressure measuring nipple (D) on the gas block. Check all couplings for leaks. Check the initial pressure and offset pressure (see par. 7.7). Daikin Europe NV... -
Page 38: Commissioning The Unit
This automatic switching on of the pump takes place 24 hours after the last heating request. To change the time, the room thermostat must be turned up for a moment at the requested time. For the hot water provision, the pump will not run. • Daikin Europe NV... -
Page 39: Switching Off The Unit
If an (external) frost thermostat has been fitted on the installation and has been connected to the unit, it will not be active if the unit on the operating panel is switched off ( on service display). Daikin Europe NV... -
Page 40: Setting And Adjustment
- button to enter the temperature between 30°C and 90°C (standard setting 80°C). Tap water temperature Press the button until the LED at starts flashing. Use the and - button to enter the temperature between 40°C and 65°C (standard setting 60°C). Daikin Europe NV... -
Page 41: Parameter Settings Via The Service Code
1= step-by-step modulation on during CH operation 2= Power control by Open Therm room thermostat enabled Minimum rpm CH Settings reach 20 – 50% (40%=propane) Activation external power saving switch 0= external power saving switch input (connector X4, pos 4-5) Daikin Europe NV... - Page 42 Settings reach 50 – 99% of the set maximum rpm (propane=50%) Max. rpm fan (* 100 rpm) Settings reach 40 – 50 (EKOMB22AAV1, EKOMB28AAV1 and EKOMB33AAV1) This parameter can be used to set the maximum rpm Regulated temperature during boiler Setting reach 60°C - 90°C...
-
Page 43: Setting Maximum Ch Power
EKOMB28AAV1 EKOMB33AAV1 Pump setting I Pump setting II Pump setting III Feed-through amount in l/h Pressure loss / water head in mWk Example: At 500 l/h, the EKOMB28AAV1 has 4 mWk left over in pump setting III. Daikin Europe NV... -
Page 44: Weather Dependent Regulation
T leaving water in °C Factory setting (Tmax CH = 80°C, Tmin CH = 25°C, Tmin ex = -7°C, Tmax ex = 25°C) Example (Tmax CH = 60°C, Tmin CH = 25°C, Tmin ex = -7°C, Tmax ex = 25°C) Daikin Europe NV... -
Page 45: Conversion To Different Type Of Gas
Gas dosing ring Natural gas Propane P EKOMB22AAV1 EKOMB28AAV1, EKOMB33AAV1 CAUTION check must be carried out with open cover. If the cover is shut, the CO % may be higher than the values stated in the above table. Daikin Europe NV... -
Page 46: Setting Gas/Air Regulation
Natural gas Natural gas G25 Propane G31 Propane G31 minimum power (in Belgium) (30/50 mbar) (37 mbar) Maximum value Minimum value (a) CO value at maximum power registered at setting High. Daikin Europe NV... - Page 47 No adjustments may be made to the gas valve without prior permission from your local Daikin distributor. In Belgium, the gas valve may NOT be adjusted and/or the seal may NOT be removed or broken.
-
Page 48: Malfunctions
Replace boiler controller for the appropriate version. • 29,30 Gas valve controller fault Replace boiler controller. • Only replace faulty parts with the original Daikin parts. Failing to fit or incorrectly fitting the sensors S1 and/or S2 may lead to serious damage. Daikin Europe NV... -
Page 49: Other Faults
Insert a screwdriver into the slot of the pump shaft and turn the shaft. Replace faulty pump. Replace the faulty controller. Check the wiring in accordance with the diagram. No electrical supply (24 V). Check the connector X4. Daikin Europe NV... - Page 50 Possible causes: Solution/cause: Tap flow too high. Reduce the tap flow. Check the dosing disk (EKOMB22AAV1 and EKOMB28AAV1) Unwanted circulation in the CH circuit due to thermosiphon effect or second pump in CH becomes hot during tapping. the CH circuit. Install a check valve in case of thermosiphon effect or a two-way valve in case of a second pump.
- Page 51 CH installation is heated due to Tap comfort. the CH circuit. Install a check valve in case of thermosiphon effect or a two-way The service display regularly shows code 7. valve in case of a second pump. Daikin Europe NV...
-
Page 52: Maintenance
Clean the bottom of the heat exchanger. Clean the condense outlet tray with water. Clean the siphon with water. Only clean the bottom of the front plate. CAUTION The integrated insulation plate and gasket boiler controller contain ceramic fibers. Daikin Europe NV... - Page 53 (10 – 12 Nm). For the sequence of tightening, see image. Please note: The front plate in the image has 11 shoulder bolts (EKOMB28AAV1, EKOMB33AAV1). The front plate of the EKOMB22AAV1 has 9 shoulder bolts. Evenly manually tighten the boiler controller bolts crosswise.
-
Page 54: Technical Specifications
** Time needed from beginning of draining in order to achieve a temperature increase of 40K to the hot water outlet of the device based on the CH hot water flow. *** The maximum CH power is set in the factory. For the set value see the parameter list (par. 7.2 ). Also see par. 7.3 Setting CH power. Daikin Europe NV... -
Page 55: Electrical Diagram Ekomb22Aav1, Ekomb28Aav1 & Ekomb33Aav1
10.1 Electrical diagram EKOMB22AAV1, EKOMB28AAV1 & EKOMB33AAV1 Earth connection exchanger Fuse (3.15 A T) CH pump DHW sensor Ignition hood Gas block + ignition module Resistance Flow sensor C Boiler controller Ignition/ionization pin Leaving water sensor CH water pressure sensor... -
Page 56: Warranty Conditions
WARRANTY CONDITIONS Environment If the unit is due for replacement, it can usually be taken The general warranty conditions of Daikin Europe NV apply to back by your dealer, following consultation. Should this not this product. be possible, consult your council for the possibilities for... - Page 57 Daikin Europe NV...
- Page 58 Daikin Europe NV...
- Page 59 Daikin Europe NV...
- Page 60 4P374376-1A 885517...
Need help?
Do you have a question about the EKOMB22AAV1 and is the answer not in the manual?
Questions and answers