Table of Contents
Advertisement
Advertisement
Table of Contents

Related Manuals for Nautilus T626


Summary of Contents for Nautilus T626
- Page 1 ASSEMBLY MANUAL / OWNER’S MANUAL...
-
Page 2: Table Of Contents
If you have questions or problems with your product, please contact your local Nautilus distributor. To find your local distributor, go to: www.nautilusinternational.com Nautilus, Inc., www.nautilusinternational.com | Nautilus, Inc., 18225 NE Riverside Parkway, Portland, OR 97230 USA | Printed in China | © 2017 Nautilus, Inc. | ® indicates trademarks registered in the United States. These marks may be registered in other nations or otherwise protected by common law. Nautilus, the Cam logo, Nautilus T626, Nautilus Trainer, Bowflex, Schwinn, and Universal are trademarks owned by or licensed to Nautilus, Inc. Polar... -
Page 3: Important Safety Instructions
• If replacement parts are necessary, use only genuine Nautilus replacement parts and hardware. Failure to use genuine replacement parts can cause a risk to users, keep the machine from operating correctly and void the warranty. - Page 4 • SAVE THESE INSTRUCTIONS. Before using this equipment, obey the following warnings: Read and understand the complete Manual. Keep the Manual for future reference. Read and understand all warnings on this machine. If at any time the Warning labels become loose, unreadable or dislodged, contact your local distributor for replacement labels.
- Page 5 • Do not remove the machine motor cover or the rear roller cover, dangerous voltages and moving parts are present. The components are serviceable only by approved service personnel. • The electrical wiring for the residence in which the machine will be used must obey the applicable local and provincial requirements.
-
Page 6: Safety Warning Labels / Serial Number
PER ASME Y14.5M - 1994 SCALE: 1:1 SHEET 1 OF 1 vided to third parties, or used for any purposes other than the performance of work for Nautilus, Inc. without written authorization. All rights are reserved, including copyrights. DO NOT SCALE DRAWING METRIC_C_REV G APPROVALS TITLE. -
Page 7: Earthing Instructions
Earthing Instructions This product must be electrically earthed. If a malfunction occurs, correct earthing decreases the risk of electric shock. The power cord is equipped with an equipment-earthing conductor, and must be connected to an outlet that is properly installed and earthed. The electrical wiring must comply with all applicable local and provincial standards and requirements. -
Page 8: Specifications
SPECIFICATIONS Maximum User Weight: 136 kg. (300 lbs) Total Surface Area (footprint) of equipment: 16,468 cm Maximum Inclined Deck Height: 43.7 cm (17.2 inches) 159.5 cm (62.8”) Assembled Weight: approx. 115 kg (253.5 lbs) Power Requirements: Operational Voltage: 220V - 240V AC, 50/60Hz Operating Current: 198.1 cm Heart Rate Chest Strap: 1 CR2032 battery (78”) -
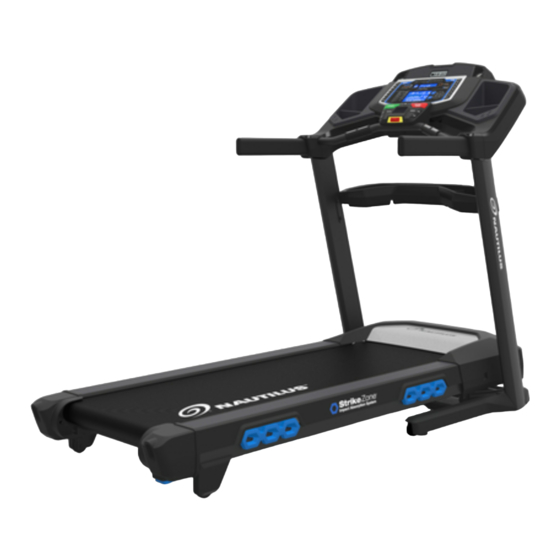
Page 9: Parts
PARTS Item Description Item Description Console Assembly Crossbar Console Backing Tray Upright, Right Handlebar Shroud, Left Handlebar Shroud, Right Heart Rate Chest Strap Base Assembly ( * ) Safety Key Base Shroud, Right Cupholder, Left Base Shroud, Left Cupholder, Right Power Cord Media Cable (not shown) Upright, Left... -
Page 10: Hardware
HARDWARE / TOOLS / BEFORE ASSEMBLY Item Description Item Description Button Head Hex Screw, M8x50 Flat Washer, M8 Button Head Hex Screw, M8x25 Self Tapping Screw, M4.2x16 Button Head Hex Screw, M8x20 Self Tapping Screw, M3.9x9.5 Socket Head Cap Screw, M8x16 Flat Washer, M4 Lock Washer, M8 Phillips Head Screw, M4x16 Note: Select pieces of Hardware have been provided as spares on the Hardware Card. Be aware that there may be remaining Hardware after the proper assembly of your machine. -
Page 11: Assembly
ASSEMBLY DO NOT CUT the Shipping Strap on the Base Assembly until it has been placed face up as shown in the appropriate work space ( 1. Fold the Walking Deck on the Base Assembly Once the Base Assembly has been properly placed in the workout area, cut the Shipping Strap. Press and hold the plastic deck release handle (5a) under the end of the right side rail. - Page 12 2. Route the Cables through the Right Upright, and Attach the Uprights to the Frame NOTICE: Do not crimp cables. Do not fully tighten Hardware until instructed.
- Page 13 3. Unfold the Walking Deck Move to the right side of the machine. Press and hold the plastic deck release handle (5a) under the end of the right side rail. Hold up the rear of the walking deck, and release the deck handle. Keep clear of the movement path of the walking deck.
- Page 14 4. Remove the Console Backing from the Console Assembly Note: Dispose of the pre-installed hardware (*).
- Page 15 5. Attach the Console to Frame Assembly and Connect the Cables NOTICE: Be sure that the hooks on each side of the Console are seated in the notches on the Uprights. Remove the ziptie and rubberbands that attach the Cables. Do not crimp the Cables. Do not fully tighten Hardware until instructed.
- Page 16 6. Attach the Crossbar to the Uprights Note: If necessary, loosen the screws from Step 5 to make installation of the Crossbar easier.
- Page 17 7. Attach the Cupholders to the Console NOTICE: Cupholder edges should be flush with the face of Console. 8. Fold the Walking Deck and tighten ALL Hardware from previous steps...
- Page 18 9. Attach the Base Shrouds to the Frame Assembly, and then unfold the Walking Deck Note: Unfold the Walking Deck after the Base Shrouds have been attached to the Frame Assembly.
- Page 19 10. Attach the Console Backing to the Console Assembly NOTICE: Attach the hardware marked below with the ( * ) first, then the hardware with the ( ** ), followed by the remaining hardware.
- Page 20 11. Attach the Handlebar Shrouds to the Frame Assembly Note: Slide the Handlebar Shrouds onto the handlebars and tilt to pass over the remote control buttons. Be sure the tabs on the shrouds snap into the Console.
- Page 21 12. Place the Tray on the Crossbar...
- Page 22 13. Connect the Power Cord and Safety Key to the Frame Assembly Connect this machine to a properly grounded outlet only (see Grounding Instructions). 14. Final Inspection Inspect your machine to ensure that all hardware is tight and components are properly assembled. Be sure to record the serial number in the field provided at the front of this manual.
-
Page 23: Storage And Moving The Machine
BEFORE YOU START Storage and Moving the Machine The machine can be moved by one or more persons. Use caution when you move the machine. The treadmill is heavy and can be awkward. Make sure that your own physical strength is capable of moving the machine. -
Page 24: Unfolding The Machine
Do not use the Console, handlebars, or lifted walking deck to lift or move the treadmill. Damage to the treadmill can occur. Keep clear of the movement path of the lifted walking deck. 8. R oll the machine on the transport wheels (5c) to its new location. Do not put objects where the walking deck would be if lowered. NOTICE: Move the machine carefully so that it does not hit other objects. -
Page 25: Leveling The Machine
Leveling the Machine The machine needs to be leveled if your workout area is uneven. To adjust: Place the machine in your workout area. 2. A djust the levelers until they all contact the floor. Do not adjust the levelers to such a height that they detach or unscrew from the machine. Injury to you or damage to the machine can occur. -
Page 26: Features
FEATURES F G H Console Deck Release Handle USB Port Dampener MP3 Input Hydraulic Lift Media Tray Transport Wheel Speaker Leveler Base Cupholder Motor Cover Emergency Safety Key Port Uprights Contact Heart Rate (CHR) Sensors Tray Ergo Bar Power Switch Handlebar AC Inlet Heart Rate Chest Strap... -
Page 27: Console Features
Console Features The Console provides important information about your workout and lets you control the resistance levels while you exercise. The Console features touch control buttons to navigate you through the exercise programs. User Indicator User Placement Fitness Score Display Goal Display Pacer Icon Lights Display Pre-Set Incline Pre-Set Buttons Speed Buttons Speed Enter Incline Enter km/h Button... - Page 28 Decrease () button- Decreases the current value, or moves through the options available Right () button- Shifts the currently active segment, and moves through options PROGRAMS button- Selects a category of workout programs Pre-Set Incline buttons- Selects an incline value for the Walking Deck. After pushing a Pre-Set Incline button, push the Incline Enter button within 12 seconds for the Walking Deck to be adjusted to the desired incline.
- Page 29 Option Guides The Option Guides inform the User where they are in a list of options with the MORE and PREVIOUS Options. If the MORE Options (decrease arrow) is active, then there are additional options that can be viewed by pushing the Decrease () button.
-
Page 30: Bluetooth ® Connectivity
To sync your workout data with Under Armour Connected Fitness, click on the desired program and login with your ® information. Note: The “Nautilus Trainer™” Fitness App will automatically sync your workouts after the initial syncing. Workout with the “RunSocial™” Fitness App This fitness machine is enabled to work with the “RunSocial™” Fitness App used on a Bluetooth enabled device. -
Page 31: Remote Heart Rate Monitor
The heart rate transmitter is attached to a chest strap to keep your hands free during your workout. To put on your chest strap: Attach the transmitter to the elastic chest strap. Secure the strap around your chest with the curve of the transmitter oriented upward, just below the chest muscles. - Page 32 If your heart rate signal ever seems erratic after validation, wipe off your hands and the sensors and try again. Heart Rate Calculations Your maximum heart rate usually decreases from 220 Beats Per Minute (BPM) in childhood to approximately 160 BPM by age 60. This fall in heart rate is usually linear, decreasing by approximately one BPM for each year. There is no indication that training influences the decrease in maximum heart rate. Individuals of the same age could have different maximum heart rates. It is more accurate to find this value by completing a stress test than by using an age related formula. Your at-rest heart rate is influenced by endurance training. The typical adult has an at rest heart rate of approximately 72 BPM, whereas highly trained runners may have readings of 40 BPM or lower. The Heart Rate table is an estimate of what Heart Rate Zone (HRZ) is effective to burn fat and improve your cardiovas- cular system.
-
Page 33: Operations
OPERATIONS What to Wear Wear rubber-soled athletic shoes. You will need the appropriate clothes for exercise that allow you to move freely. How Often Should You Exercise Consult a physician before you start an exercise program. Stop exercising if you feel pain or tightness in your chest, become short of breath, or feel faint. Contact your doctor before you use the machine again. Use the values calculated or measured by the machine’s computer for reference purposes only. -
Page 34: Power Up / Idle Mode
Push the USER button to select the desired User for the workout. 8. S elect your workout using the PROGRAMS button and the Decrease/Increase buttons. With your desired workout shown, push the OK button. 10. The Console will ask a series of questions to customize the workout. When the Console displays the “READY ?” prompt, push the START button. -
Page 35: Quick Start Program
Note: To adjust these selections, consult the “Console Set-Up Mode” section. Quick Start ( Manual ) Program The Quick Start ( Manual ) program lets you start a workout without entering any information. During a Manual Workout, each column represents a 2 minute time period. The active column will advance across the screen every 2 minutes. If the workout lasts for more than 32 minutes, the active column is fixed on the farthest column on the right and pushes the previous columns off the display. - Page 36 T o exit the User Profile options, push the PAUSE/STOP button and the console will go back to the Power-Up Mode screen. 5. The Console display shows the NAME prompt and the current User Profile name. Note: The User name will be blank if this is the first edit. The name of a User Profile is limited to 13 characters. The currently active segment will flash.
- Page 37 the value. The default is “ON”. Push the OK button to set the Telemetry Heart Rate Receiver to active. 11. The Console will go to the Power-Up Mode screen with the user selected. Reset a User Profile 1. From the Power-Up Mode screen, push the User button to select one of the User Profi les. 2.
-
Page 38: Profile Programs
QUICKSTART (press and hold to customize PERFORMANCE 1: program) QUICK GOAL and PACER brickyard (s): QUICK GOAL Profile Programs Distance These programs feature different incline angles of the deck and belt speeds based on the maximum and minimum speed Time Default MAX SPEED : 3 mph supplied by the user. The user can also manually adjust the incline and speed values at any time during a workout. The Calories TRAIN/PACER: Profile Programs are organized into Categories (Quick Goal, Heart Health, Weight Control, Interval, Train, and Custom). - Page 39 SPEED Default MAX SP Incline. Speed is preset. INCLINE (SCH) (NLS) Default MAX SPEED : 2 mph Calories CALORIE BURN (SCH): INCLINE Default MAX SPEED : 1 mph BOTH SPEED Incline. Speed is preset. CALORIE BURN (NLS): BOTH INCLINE Default MAX SPEED : 1 mph CALORIE BURN (NLS (use brickyard for each RAIN...
- Page 40 3. Push the Programs buttons to select a Category of Workout. 4. Push the Increase() or Decrease() buttons to select a Profile Workout, and push OK. If the selected Workout is Heart Rate Target, the Console will request the desired Beats Per Minute (BPM) for the Workout.
-
Page 41: Compare Pacer Displays
A User can also set a Heart Rate Target value by selecting the HR TARGET program in the CUSTOM Category. The Con- sole will adjust the incline during a workout to keep the User in the desired Heart Rate zone. 1. -
Page 42: Fitness Score Display
User Fitness Level Based on Fitness Score excellent good high average average low average poor excellent good high average average low average poor 18-25 26-35 36-45 46-55 56-65 Fitness Score Display Boost your performance and improve your Fitness Score. The Fitness Score gives you a post- workout assessment—estimating and measuring your VO2 Max and calorie burn based on your sex, age and biometric data. The more you train, the more your Fitness Score will rise. -
Page 43: Pausing Or Stopping
For every workout completed that is longer than 10 minutes or a mile (1.6 km) in distance, the Console will apply those workout values toward your Fitness Score. This value is displayed on the Fitness Score Display area of the Console. Note: Using a Heart Rate Chest Strap provides the most accurate information to calculate the Fitness Score. - Page 44 6. Push the Decrease() button to move to “LAST 30 DAYS”. The Console will display the total values for the previous thirty days. The Console will cycle between the workout results every 4 seconds. Use the Left() or Right() buttons to force the cycle between the workout results.
-
Page 45: Console Setup Mode
CONSOLE SETUP MODE The Console Setup Mode lets you control the sound settings ( on/off ), adjust the date and time, or see maintenance statistics (Total Run Hours and Software Version– for service technician use only). Hold down the PAUSE/STOP button and Right button together for 3 seconds while in the Power-Up Mode to go into the Console Setup Mode. -
Page 46: Maintenance
Do not remove the Motor Control Board (MCB) Cover. Dangerous voltages and moving parts are present. The components are serviceable only by approved service personnel or by following service procedures supplied by Nautilus, Inc. Note: Do not use petroleum based products. -
Page 47: Adjusting The Walking Belt
Adjusting the Belt Tension If the walking belt starts to slip during use, it is necessary to adjust the tension. Your treadmill has tension bolts at the rear of the treadmill. Make sure that the walking belt is stopped and the power switch is turned Off. Be sure not to touch a moving walking belt or step on the power cord. -
Page 48: Lubricating The Walking Belt
® performance. We can recommend that you use the following: • 8300 Silicone Spray, available at most Hardware and Auto Parts stores. • Lube-N-Walk Treadmill Lubrication Kit, available from your local specialty fitness dealer or Nautilus, Inc. ® Store silicone lubricant in a safe place. Keep out of reach of children. Silicone lubricant is not intended for human consumption. Manually rotate the belt 1/2 of the length of the belt and apply lubricant again. -
Page 49: Heart Rate Chest Strap Battery Replacement
Heart Rate Chest Strap Battery Replacement The heart rate (HR) chest strap uses a CR2032 battery. Do not perform this procedure outdoors or in moist or wet locations. CR2032 1. Using a coin, loosen the slotted cover on the battery bay. Re- move the cover and battery. -
Page 50: Maintenance Parts
Maintenance Parts A Console Assembly Right Upright Cable (I/O) Crossbar B Safety Key Port J Right Upright Grounding Cable Tray C Fan K Upright, Right Base Shroud, Left D Contact Heart Rate Sensor L Handlebar Shroud, Right Upright, Left E Console Cable (I/O) M Base Shroud, Right Handlebar Shroud, Left F Console Grounding Cable... - Page 51 Maintenance Parts ( Frame ) Front Back Power Switch Rear Roller Deck Release Cable Fuse Walking Deck MM Incline Adjuster Power Input GG Base Support Pivot Assembly AA Motor Control Board (MCB) HH Deck Cushioners OO Belt Tensioner Cover BB Motor Cover Transport Wheel Rear Roller Cover CC Side Foot Support Rails...
-
Page 52: Troubleshooting
TROUBLESHOOTING Condition/Problem Things to Check Solution No display/partial display/ Check electrical (wall) Make sure unit is plugged into a functioning wall outlet. Test the unit will not turn on outlet outlet with a known functioning device such as a lamp. Check connection at front Connection should be secure and undamaged. - Page 53 Condition/Problem Things to Check Solution Console shuts off (enters Check electrical (wall) Make sure unit is plugged into a functioning wall outlet. Test the sleep mode) while in use outlet outlet with a known functioning device such as a lamp. Check connection at front Connection should be secure and undamaged.
- Page 54 Review Specifications of Fitness App and confirm your device is compatible. Contact your local distributor for further assistance. Workout results not Sync accounts From the Menu icon on the Nautilus Trainer™ App, select the posting from Nautilus Sync to Under Armour Connected Fitness. ® Trainer™ App to Under...
- Page 56 ™ Nautilus Bowflex Schwinn Universal ® ® ® ® 8017214.110117.A...
Need help?
Do you have a question about the T626 and is the answer not in the manual?
Questions and answers