Advertisement
www.luxorfurn.com
www.hwilson.com
NOTICE:
Leg lengths of leg E may
be shorter than leg F
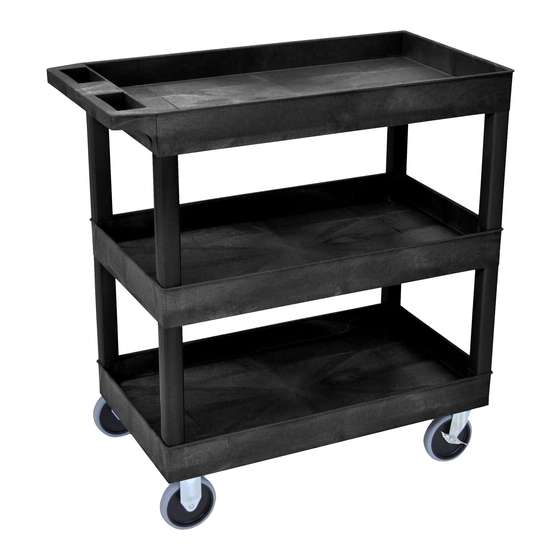
E x4
1
D
B
4
F
3 Shelf Tuffy Cart Instructions
Parts List
Optional fluted
legs for units with
cabinet pack
F x4
2
5
C
Tools Required
- Rubber Mallet
A x1
Install optional cabinet pack /
pullout shelf / locking drawer
assembly after step 1
E
A
B
C
C x1
B x1
3
C
6
08/16/13
D x4
A
Advertisement
Table of Contents

Related Manuals for Luxor H.Wilson 3 Shelf Tuffy Cart


Summary of Contents for Luxor H.Wilson 3 Shelf Tuffy Cart
- Page 1 3 Shelf Tuffy Cart Instructions 08/16/13 www.luxorfurn.com Tools Required Parts List www.hwilson.com - Rubber Mallet A x1 NOTICE: Leg lengths of leg E may be shorter than leg F C x1 Optional fluted legs for units with cabinet pack E x4 F x4 B x1 D x4...
- Page 2 02/01/13 H x1 Tools Required Parts List www.luxorfurn.com - Rubber Mallet www.hwilson.com G x1 Tuffy Cart Cabinet Pack Instructions Please consult your Tuffy cart K x2 J x2 base unit instructions before starting IMPORTANT: Flip shelf B, and lock the 2 locking casters D before assembling the unit.
- Page 3 01/16/13 Tools Required Parts List www.luxorfurn.com - Screwdriver www.hwilson.com Electric Assembly Instructions A x1 B x1 C x2 D x2 Number of outlets may vary. (Plastic or Metal Mounting Surface) Push screw C through electric outlet A. Make sure the electric outlet A and cord wrap B align with the mounting surface screw holes.
Need help?
Do you have a question about the H.Wilson 3 Shelf Tuffy Cart and is the answer not in the manual?
Questions and answers