TP-Link TC-7610 User Manual
Docsis 3.0 cable modem
Hide thumbs
Also See for TC-7610:
- User manual (27 pages) ,
- Quick installation manual (2 pages) ,
- Quick installation manual (2 pages)
Table of Contents
Advertisement
Quick Links
Advertisement
Table of Contents

Related Manuals for TP-Link TC-7610


Summary of Contents for TP-Link TC-7610
- Page 1 User Guide DOCSIS 3.0 Cable Modem TC-7610 REV2.0.0 1910011894...
-
Page 2: Table Of Contents
Contents About This Guide Chapter 1 Get to Know Your Modem 1. 1. Product Overview............3 1. -
Page 3: About This Guide
• Specifications and support materials can be found on the product page at http://www.tp-link.com. • A Technical Support Forum for discussing our products can be found at http://forum.tp-link.com. • Our Technical Support contact information can be found at the Contact Technical Support page at http://www.tp-link.com/support. -
Page 4: Chapter 1 Get To Know Your Modem
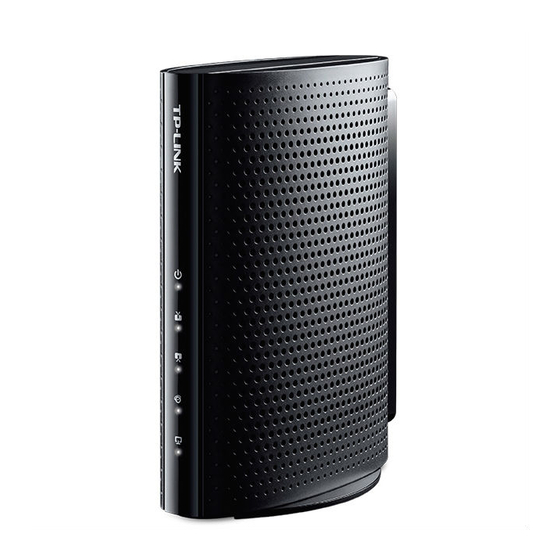
Chapter Get to Know Your Modem This chapter introduces the modem and shows its appearance. This chapter contains the following sections: • Product Overview • Product Appearance... -
Page 5: Product Overview
Get to Know Your Modem Product Overview TP-LINK’s cable modem is designed for delivering data through coax used in HFC (Hybrid Fiber-Coaxial) networks. It’s an incredibly robust device allowing users to access Internet and share it with a Gigabit Ethernet port. -
Page 6: Back Panel
Chapter 1 Get to Know Your Modem Indication Status The synchronization has not started or has failed. White The modem has synchronized one channel. Downstream Green The modem has synchronized more than one channel. Flashing The modem is scanning for downstream channels. The synchronization has not started or has failed. - Page 7 Chapter 1 Get to Know Your Modem The back panel provides the Reset button and several connection ports. Refer to the following for detailed instructions. Description Item With the modem powered on, use a pin to press and hold the Reset Reset Button button until all LEDs turn on momentarily.
-
Page 8: Chapter 2 Quick Start
Chapter Quick Start This chapter contains the following sections: • Prepare for the Installation • Connect the Modem • Activate the Modem... -
Page 9: Prepare For The Installation
Chapter 2 Quick Start Prepare for the Installation 2 1 1 Installation Environment • The product should not be located where it will be exposed to moisture or excessive heat. • Place the modem in a location where it can be connected to the various devices as well as to a power source. -
Page 10: Activate The Modem
Chapter 2 Quick Start Internet Ethernet cable Power adapter Coaxial cable Wait until the Internet LED turns solid. The modem has synchronized with your ISP’s server. Note: 1. If the Internet LED does not turn solid after about 1 minute, call your ISP’s customer service. 2. - Page 11 Chapter 2 Quick Start Contact information of major cable ISPs: Bright House: 1-855-222-0102 Charter: 1-888-438-2427 Comcast: 1-855-OK-BEGIN (1-855-652-3446) Cox: 1-888-556-1193 Time Warner Cable: 1-888-892-2253 The contact information listed might change. You can also find the contact information in your monthly Internet service billing statement. Now you can use your computer to surf the Internet.
-
Page 12: Chapter 3 Software Configuration
Chapter Software Configuration This guide recommends using the Quick Installation Guide for first-time installation. If you want to know more about this device, you can get help from this chapter to configure the software through the web interface. This chapter contains the following sections: •... -
Page 13: Login
Chapter 3 Software Configuration Login To access the web interface, open a web-browser and type the default address 192.168.100.1 in the address field of the browser. After a moment, a login window will appear. Enter admin for the username and password, both in lower case letters. -
Page 14: View Device Information
Chapter 3 Software Configuration 3 2 1 View Device Information Go to Basic > Device Information, then you can view the device information. 3 2 2 View Network Information Go to Basic > Network Information, then you can view the network information. Advanced Settings Under the Advanced... -
Page 15: View Connection Status
Chapter 3 Software Configuration 3 3 1 View Connection Status Go to Advanced > Connection Status, then you can view the information of startup procedure, downstream bonded channels, and upstream bonded channel. -
Page 16: Change Account Password
Chapter 3 Software Configuration 3 3 2 Change Account Password Go to Advanced > Administration, then you can see the screen below. Here you can set a new login password for the modem’s web interface. -
Page 17: View System Logs
Chapter 3 Software Configuration 3 3 3 View System Logs Go to Advanced > System Log, then you can view and clear the logs of the modem. Logout and Reboot Click the Logout icon to log out of the web interface. Click the Reboot icon... -
Page 18: Appendix: Troubleshooting
Appendix: Troubleshooting T1 What can I do if I cannot access the Internet? 1. Make sure that all cables are properly and securely connected to the modem. 2. Contact your ISP to ensure your modem is properly activated. If it isn’t, your ISP will activate it for you. - Page 19 5 ) From the Configure IPv4 drop-down list, select Using DHCP. 6 ) Click OK. • For Windows 7/8/8 1/10: 1 ) Right-click the Network icon on the taskbar and select Open Network and Sharing Center > Change adapter settings. 2 ) Right-click your network connection (wired or wireless) and select Properties.
- Page 20 Specifications are subject to change without notice. is a registered trademark of TP-LINK TECHNOLOGIES CO., LTD. Other brands and product names are trademarks or registered trademarks of their respective holders. No part of the specifications may be reproduced in any form or by any means or used to make any derivative such as translation, transformation, or adaptation without permission from TP-LINK TECHNOLOGIES CO., LTD.
- Page 21 FCC STATEMENT This equipment has been tested and found to comply with the limits for a Class B digital device, pursuant to part 15 of the FCC Rules. These limits are designed to provide reasonable protection against harmful interference in a residential installation. This equipment generates, uses and can radiate radio frequency energy and, if not installed and used in accordance with the instructions, may cause harmful interference to radio communications.
- Page 22 • The product should be connected to cable distribution system that grounded (earthed) in accordance with ANSI/NFPA 70, the National Electrical Code (NEC), in particular Section 820.93 - Grounding of Outer Conductive Shield of a Coaxial Cable. Explanation of the symbols on the product label Explanation Symbol DC voltage...
Need help?
Do you have a question about the TC-7610 and is the answer not in the manual?
Questions and answers