D-Link DCS-900 Manual
Fast ethernet internet camera
Hide thumbs
Also See for DCS-900:
- Manual (93 pages) ,
- User manual (92 pages) ,
- Quick installation manual (39 pages)
Table of Contents
Advertisement
Advertisement
Table of Contents

Related Manuals for D-Link DCS-900


Summary of Contents for D-Link DCS-900
-
Page 2: Table Of Contents
Video... 34 Network... 35 User ... 36 Help ... 37 Installing the DCS-900 Behind a Router... 38 Assigning and Opening the HTTP Port ... 38 Router Setup and Installation ... 39 Assigning and Opening Virtual Server Ports ... 40 Viewing Your Camera... 41 IPView SE Application Installation... - Page 3 How to Start Recording ... 55 How to Stop Recording... 55 Camera Settings ... 56 Uninstall IPView SE ... 63 Frequently Asked Questions... 64 Technical Specifications... 69 Contacting Technical Support ... 70 Warranty ... 71 Registration... 76 D-Link DCS-900 User Manual...
-
Page 4: Product Overview
Note: Using a power supply with a different voltage rating than the one included with the DCS-900 will cause damage and void the warranty for this product. • PC with 1.3GHz processor, 128MB RAM and 20MB of available hard disk space. -
Page 5: Introduction
Congratulations on your purchase of the DCS-900 Fast Ethernet Internet Camera! The DCS-900 is a versatile and unique solution for your small office or home. Unlike a PC Camera, the DCS-900 is a stand-alone system with a built-in CPU and Web server that transmits high quality video images for monitoring. The DCS-900 can be accessed remotely, and controlled from any PC/Notebook over the Intranet or Internet via a web browser. -
Page 6: Features
• Simple to Use - The DCS-900 is a stand-alone system with a built-in CPU, requiring no special hardware or software such as PC frame grabber cards. The DCS-900 supports both ActiveX mode for Internet Explorer and Java mode for Internet Explorer and Netscape Navigator •... -
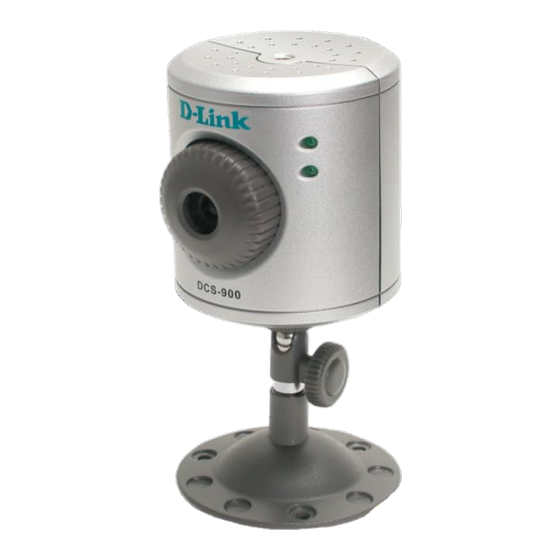
Page 7: Hardware Overview
Section 1 - Product Overview Hardware Overview Connections Ethernet Cable Connector Power Connector Reset Camera Stand D-Link DCS-900 User Manual... -
Page 8: Leds
Section 1 - Product Overview Hardware Overview LEDs D-Link DCS-900 User Manual... -
Page 9: Section 2 - Installation
Hardware Installation Attach the Swivel Stand Locate the stand mount on the bottom panel of the DCS-900 and screw on the swivel stand to the base of the DCS-900. Connect the Ethernet Cable Connect the included Ethernet cable to the network cable connector located on the back panel of the DCS-900 and attach it to the network. - Page 10 Section 2 - Installation Attach the External Power Supply Attach the external power supply to the DC power input connector located on the rear panel of the DCS-900 and connect it to a wall outlet or power strip. Note: Power source is confirmed when the red LED Power Indicator located to the right of the lens on the DCS-900 is illuminated.
-
Page 11: Security
(no password). Once the ID and Password are defined, only the Administrator has access to the management of the DCS-900. This procedure should be done as soon as possible since the security features of the DCS-900 will not be enabled until the Admin ID and Admin Password is defined. -
Page 12: Using The Setup Wizard
Section 2 - Installation Using the Setup Wizard Follow the simple steps below to run the Setup Wizard to guide you quickly through the installation process. Insert the D-Link DCS-900 CD into your CD-ROM drive. Click on Install Wizard D-Link DCS-900 User Manual... - Page 13 Section 2 - Installation Click Next Click Yes D-Link DCS-900 User Manual...
- Page 14 Section 2 - Installation Click Next Click Finish D-Link DCS-900 User Manual...
- Page 15 To run the Setup Wizard, click on Start > Programs > D-Link Setup Wizard. Your camera’s IP Address will be displayed here along with its corresponding MAC Address. Click Wizard You must change the Admin ID and Password immediately to protect your camera against unauthorized access.
- Page 16 If you are connecting to a router, the Gateway and DNS 1 entries should be the IP address of your router. Click Next If you need to make any changes, click Back to modify your settings. Otherwise, click Restart to save your settings. Click Restart D-Link DCS-900 User Manual...
- Page 17 The Home screen of your camera can be accessed from the Setup Wizard using the Link button.You can also use your favorite Web browser, type “http://address” in the address box where address is the IP address that you assigned to the DCS-900 from the previous section. Press Enter. Click ActiveX or Java to view your video images.
-
Page 18: Home
For Windows users that have Java installed ® can also use this for viewing video. Mac users should also choose this mode to view video. Setup: This will allow you to configure the DCS-900. D-Link DCS-900 User Manual Home ®... -
Page 19: Activex
Java installed can also use this for viewing ® video. Mac users should also choose this mode to view video. Setup After clicking the Setup button, you will be directed to Advanced > System. Please refer to page 20 for more information. D-Link DCS-900 User Manual... -
Page 20: Section 3 - Configuration
Admin Password: Enter the Administrator’s password. Confirm Password: Re-enter the Administrator’s password for confirmation. LED Control: You can set the LED in front of the DCS-900 to on (Normal), off (OFF), or blink randomly (Dummy). D-Link DCS-900 User Manual Advanced System... -
Page 21: Video
Adjust the light frequency to suit your area of operation. 50Hz and 60Hz are available to accommodate the different light frequencies found in USA (60Hz) and Europe (50Hz) for optimal image quality. Mirror: Horizontally rotates the video. Check this option if the camera is installed upside down. Flip: Vertically rotates the video. D-Link DCS-900 User Manual Video... -
Page 22: Network
IP Addresses onthe network. PPPoE: If you use the DCS-900 to connect directly to the Internet you will need to put in the user name and password that was given to you when you initially set up your account with the Internet Service Provider. - Page 23 If the second port is enabled, it will automatically disable the default port 80. Any unused ports can be used such as port 800, 801, etc. Remember that if the DCS-900 is behind a router you would need to forward that port to the DCS-900’s IP Address.
-
Page 24: User
Add the User Name of the user. User Password: Add the User Password of the user. Delete User: Select a user from the pull-down list and click the Delete button. User List: This list shows all of the users added. D-Link DCS-900 User Manual... -
Page 25: Time
Daylight savings since this feature is built-in to the Windows operating system. ® You will need to input the time manually. The Manually: top fields are for the dates and the lower fields are for the time. D-Link DCS-900 User Manual... -
Page 26: Upload
Directory Path: Specifies the destination folder in the external FTP server. Enabling passive mode will allow access to an Passive Mode: external FTP server if your camera is behind a router protected by a firewall. D-Link DCS-900 User Manual Upload... - Page 27 Base file name category. Select sequence number suffix up to 1024 and all the pictures will be numbered from 1-1024. The total amount of pictures can be configured up to 1024 pictures. Picture number 1025 will be 1 again. D-Link DCS-900 User Manual...
-
Page 28: Email
Interval: The frequency of the snapshot interval can also be configured from 1 to 65535 seconds. D-Link DCS-900 User Manual Email... -
Page 29: Tools
This will send a snapshot to the e-mail account Account: that you have configured in the E-mail section. If you have configured the SMTP account correctly you will be able to send a test file to the e-mail account of the recipient. D-Link DCS-900 User Manual Tools Test... -
Page 30: Reset
This will reboot the camera once you select Apply. Factory Select Apply will reset the camera to all its Reset: default settings. The Installation Wizard may need to be used in order to find the camera again. D-Link DCS-900 User Manual... -
Page 31: Firmware
Section 3 - Configuration Firmware Firmware This will allow you to upgrade the firmware for Update: the camera. Click Browse to find the path to the file of the firmware that you have previously saved by visiting http://support.dlink.com/. D-Link DCS-900 User Manual... -
Page 32: Backup
This is particularly useful if you will be installing Device more than one camera; remember to make the Configuration IP Address unique to each camera, so there will from File: not be two cameras with the same IP Address on the same network. D-Link DCS-900 User Manual Backup... -
Page 33: Status
Section 3 - Configuration Status System Displays information about the Device Status, such as Camera Name, Location, Model, Firmware Version, MAC Address, and IP Address. Also displays information about the Ethernet Status, such as Link, Speed, and Duplex. D-Link DCS-900 User Manual... -
Page 34: Video
Section 3 - Configuration Video Displays information about the Video Status, such as Video Resolution, Compression Rate, Frame Rate, Frame Size, and Light Frequency. D-Link DCS-900 User Manual... -
Page 35: Network
Section 3 - Configuration Network Displays information about the Network Status, such as IP Address, Subnet Mask, Default Gateway, DNS Address 1, DNS Address 2, Dynamic DNS, Secondary HTTP Port, UPnP, FTP Server Test, and E-mail Test. D-Link DCS-900 User Manual... -
Page 36: User
Section 3 - Configuration User Displays information about Active Users, such as their IP Address, Name, DateTime, and Miniseconds/ Packet. D-Link DCS-900 User Manual... -
Page 37: Help
Section 3 - Configuration Help Click Help for easy access to information on specific fields. D-Link DCS-900 User Manual... -
Page 38: Installing The Dcs-900 Behind A Router
Section 3 - Configuration Installing the DCS-900 Behind a Router Assigning and Opening the HTTP Port on the DCS-900 (For Installing Multiple Cameras) Opening ports will allow users to view the camera via the Internet. The ports that are opened must be unique for each camera in order to successfully view the images remotely. -
Page 39: Router Setup And Installation
Router Setup and Installation The following steps generally apply to any router that you have on your network. The D-Link DI-624 is used as an example to clarify the configuration process. Your WAN IP Address information will be listed on following window. -
Page 40: Assigning And Opening Virtual Server Ports
• In the Virtual Servers List, a check mark appearing before the camera name will indicate that the ports are enabled. • Click Apply to save your settings. Note: If you are installing multiple cameras, be sure to open ONE Web port per additional camera installed: port 81, 82, etc. for Web server. D-Link DCS-900 User Manual... -
Page 41: Viewing Your Camera
(home) network, simply enter the local IP Address of your camera (i.e. 192.168.0.35). If using a port other than port 80, you must enter the IP address followed by a colon and the assigned port number. D-Link DCS-900 User Manual... -
Page 42: Ipview Se Application Installation
IPView SE software is included for administrators to manage up to 4 DCS-900s remotely. Administrators can also record to hard drive and configure advanced settings for the DCS-900. IPView SE is a complete software management tool for the DCS-900 and includes all configurable settings available in the web configuration utility. - Page 43 Section 3 - Configuration Click Next Click Yes D-Link DCS-900 User Manual...
- Page 44 Section 3 - Configuration Click Next Click Finish D-Link DCS-900 User Manual...
- Page 45 Section 3 - Configuration After successfully installing the IPView SE, the application program for the DCS-900 is automatically installed to \Programs\IPView SE Directory. To start running the IPView SE click on Start > Programs > IPView SE > IPView SE.
-
Page 46: Ipview Se
IPView SE allows you to manage your cameras by enabling you to search, configure, and preview all the DCS-900s from one location. It is designed with a user-friendly interface for ease of control and navigation. D-Link DCS-900 User Manual... -
Page 47: Ipview Se Icon Description
Camera’s Extra Information Configure Camera from Web Motion Setting Manual Recording Schedule Recording Motion Recording Scan Combine Play Help/About Minimize Close Rotate Snapshot View/List D-Link DCS-900 User Manual Zoom Maximize Color Setting Always on Top Wake Up Control Panel Upgrade Firmware... -
Page 48: Add A New Camera
As in example 10.10.10.80:800, where 10.10.10.80 is your router’s WAN IP and :800 is the port that your camera is using. D-Link DCS-900 User Manual Add a New Camera... - Page 49 The camera will be added into IPView SE. If the User Name and Password are entered incorrectly, the camera will not be added into IPView SE. The Login Camera dialog box will appear only if your have already set the Username and Password during the Web Configuration setting. D-Link DCS-900 User Manual...
-
Page 50: How To Delete A Camera
A grey light under the camera button means that this channel is available to add a camera. D-Link DCS-900 User Manual How to Delete a Camera on the IPView SE, while you are connected to the camera you would like deleted. -
Page 51: How To Change The Ip Address
Select Manually Assign IP if you want to connect manually to the camera by providing the IP Address, Subnet Mask, and Default Gateway. Select DHCP if you would like to connect to only cameras on your network. D-Link DCS-900 User Manual... -
Page 52: How To Format The Camera View
A maximum of 4 cameras can be viewed simultaneously with IPView SE. Select any of the four cameras for the View Mode format. If there is a green light next to the camera button that means that the IPView SE has a camera connected. D-Link DCS-900 User Manual... -
Page 53: How To Rotate The View
(see image below). Click the View/List button . All the cameras and their properties, such as the camera name, IP Address, user name, and functional information, will be displayed in the View/List screen D-Link DCS-900 User Manual... -
Page 54: Zoom
Close Click the Close button to close the display screen of the camera. D-Link DCS-900 User Manual , to adjust the Brightness, Contrast, and Hue. to open the control panel again when it is closed. to have the display screen always appear on top. -
Page 55: How To Take A Snap-Shot With The Camera
. An AVI file will appear in your IPView SE folder. Note: You must stop recording before changing any camera settings. How to Stop Recording To stop recording with a camera, click the Manual Recording button again. D-Link DCS-900 User Manual... -
Page 56: Camera Settings
Section 3 - Configuration Camera Settings Once you have completed the initial configuration of the DCS-900 using the Web-based interface, you can review or change your configuration using either the Web-based configuration utility or the Settings in the DCS-900 IPView SE. - Page 57 Click the Manual Recording button , to begin recording images from your camera. Schedule Recording Click the Schedule Recording button to record based on a specific time and date. Click Add to set the time and date for recording. D-Link DCS-900 User Manual...
- Page 58 (see page 56). Scan Click the Scan button to display each camera one by one. When this option is selected the camera(s) will briefly display their images in the View Mode format. D-Link DCS-900 User Manual...
- Page 59 Section 3 - Configuration Camera’s Extra Information Click the Camera’s Extra Information button to view information about your camera. Play Click the Play button to playback video recorded from your camera. D-Link DCS-900 User Manual...
- Page 60 System Configure Click the System Configure button The DCS-900 will not have a profile to load initially, you will Profile: have to select all of your cameras and then click the Save or Save As buttons to save your profile. Up to four cameras can be saved per configuration, there are no limits as to how many...
- Page 61 To delete a storage, select the path and click the Delete button. If you try to delete the very last storage in the list, you will receive a warning message telling you to keep one storage at least. D-Link DCS-900 User Manual...
- Page 62 It allows you to display for each camera one by one. The time interval for each camera can be from 1 Sec. to 20 Sec. interval: About Click the Help/About icon, and then select About for camera details such as software version. D-Link DCS-900 User Manual...
-
Page 63: Uninstall Ipview Se
Click on Start Menu > Programs > IPView SE > Uninstall IPView SE. A new prompt screen will be displayed like the one below confirming the removal. At the Confirm Uninstall dialog box, click OK to continue the process. The InstallShield Wizard prompt will appear. Click Finish to complete the uninstallation procedure. D-Link DCS-900 User Manual... -
Page 64: Section 6 - Troubleshooting
PC/Notebook over the Intranet or Internet via a Web browser. What is the maximum number of users that can be allowed to access DCS-900 simultaneously? The maximum number of users that can log onto the Internet Camera at the same time is 8. - Page 65 The Internet Camera uses Category 5 UTP Twisted-pair cable allowing 10 Base-T and 100 Base-T networking. Can the Internet Camera be setup as a PC-cam on the computer? No, the Internet Camera is used only on Ethernet and Fast Ethernet network.The D-Link DSB-C110, DSB-C310 can be used as a PC Camera (Webcam).
- Page 66 Make sure that the Internet Camera isn’t conflicting with any web server you may have running on your network. The default router setting might be a possible reason. Check that the configuration of the router settings allow the Internet Camera to be accessed outside your local LAN. D-Link DCS-900 User Manual...
- Page 67 If you are using Internet Explorer with a version number of lower than 5, then you will need to upgrade your Web browser software in order to view the streaming video transmitted by the Internet Camera. D-Link DCS-900 User Manual...
-
Page 68: How To Ping Your Ip Address
4 reply statements (below). If you fail to connect to your camera you will see the following: Check to see if you have entered your camera’s IP Address correctly or reassign your camera’s IP Address. D-Link DCS-900 User Manual... -
Page 69: Technical Specifications
• Frame rate: QCIF@30fps, 25fps@CIF, 10fps@VGA • Compression Rate Selection: 5 level (Very Low, Low, Medium, High, Very High) • Video Resolution: 160x120, 320x240, 640x480 D-Link DCS-900 User Manual Web Configuration Requirements • Internet Explorer 5.0 or above or Netscape 6.0 or above •... -
Page 70: Contacting Technical Support
Contacting Technical Support D-Link provides free technical support for customers within the United States and within Canada for the duration of the warranty period on this product. U.S. and Canadian customers can contact D-Link technical support through our web site or by phone. -
Page 71: Limited Warranty
Any repair or replacement will be rendered by D-Link at an Authorized D-Link Service Office. The replacement hardware need not be new or have an identical make, model or part. D-Link may, at its option, replace the defective Hardware or any part thereof with any reconditioned product that D-Link reasonably determines is substantially equivalent (or superior) in all material respects to the defective Hardware. - Page 72 Warranty Period and is subject to the same limitations and exclusions. If a material non-conformance is incapable of correction, or if D-Link determines in its sole discretion that it is not practical to replace the non-conforming Software, the price paid by the original licensee for the non-conforming Software will be refunded by D-Link;...
-
Page 73: Disclaimer Of Other Warranties
• The customer is responsible for all in-bound shipping charges to D-Link. No Cash on Delivery (“COD”) is allowed. Products sent COD will either be rejected by D-Link or become the property of D-Link. Products shall be fully insured by the customer and shipped to D-Link Systems, Inc., 17595 Mt. -
Page 74: Limitation Of Liability
This Limited Warranty provides specific legal rights and you may also have other rights which vary from state to state. Trademarks: D-Link is a registered trademark of D-Link Systems, Inc. Other trademarks or registered trademarks are the property of their respective owners. -
Page 75: Fcc Statement
• Connect the equipment into an outlet on a circuit different from that to which the receiver is connected. • Consult the dealer or an experienced radio/TV technician for help. For detailed warranty information applicable to products purchased outside the United States, please contact the corresponding local D- Link office. D-Link DCS-900 User Manual... -
Page 76: Registration
Appendix F - Registration Registration Product registration is entirely voluntary and failure to complete or return this form will not diminish your warranty rights. Version 2.00 12/27/2005 D-Link DCS-900 User Manual...
Need help?
Do you have a question about the DCS-900 and is the answer not in the manual?
Questions and answers