
Related Manuals for Gram OM 45-07 T


Summary of Contents for Gram OM 45-07 T
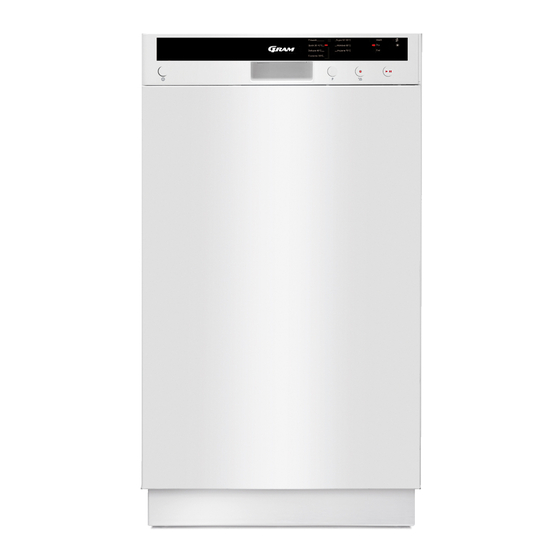
- Page 1 Dishwasher Instruction Manual Instruction Manual Instruction Instruction Manual Manual OM 45-07 T...
-
Page 2: Table Of Contents
CONTENTS Technical specifications …………………………………………………….. • Conformity with the standards and Test data …………………………….. • Safety information and Recommendations………………………………….. Recycling ..………………………............• Safety information …………………………………………………………… • Recommendations …...……………………………………………………… • Items not suitable for dishwashing ………………………………………… • Installing the machine ………………………………………………………….. Positioning the machine …………………………………………………….. •... - Page 3 Loading your dishwasher .……………………………………………………. Alternative basket loads …………………………………………………... • Programme descriptions .…………………………………………………….. Programme items ………………………………………………………….. • Getting familiar with your machine …………………………………………… 27 Switching on the machine and selecting a programme……………..Switching on the machine…………………………………………………. • Programme follow-up ……………………………………………………… • Changing a programme ……………………………………………………...
- Page 4 Upper basket with racks Control Panel Upper spray arm Detergent and rinse-aid dispenser Lower basket Cutlery basket Lower spray arm Salt dispenser Filters Upper basket track latch Rating plate Active Drying Unit: This system provides Ceiling Spray Arm: It provides better drying performance for your dishes.
-
Page 5: Technical Specifications
Technical specifications Capacity 10 place settings Height 820-870 mm / 870-920 mm Width 448mm Depth 570 mm Net Weight 37 kg Electricity input 220-240 V, 50 Hz Total Power 1900 W Heating Power 1800 W Pump Power 100 W Drain Pump Power 30 W Water supply pressure 0.03 MPa -1 MPa... -
Page 6: Safety Information And Recommendations
• Check for any damage to your machine or to its packaging. Never start a machine damaged in any way, make sure to contact GRAM service. • Unwrap the packaging materials as indicated and dispose of them in accordance with the rules. - Page 7 • Check whether the indoor electrical fuse system is connected according to the regulations. • All electrical connections must match the values indicated on the rating plate. • Pay special attention and be sure that the machine does not stand on the electricity supply cable. •...
- Page 8 mental capabilities or lack of experience and knowledge if they have been given supervision or instruction concerning use of the appliance in a safe way and understand the hazards involved. Children shall not play with the appliance.Cleaning and user maintenance shall not be made by children without supervision.
-
Page 9: Recommendations
For your children’s safety • After removing the machine’s packaging, make sure that the packaging material is out of reach of children. • Do not allow children to play with or start the machine. • Keep your children away from detergents and rinse aids. •... -
Page 10: Items Not Suitable For Dishwashing
Items not suitable for dishwashing: • Cigarette ashes, candle leftovers, polish, paint, chemical substances, iron-alloy materials; • Forks, spoons and knives with wooden or bone, or ivory or nacre-coated handles; glued items,items soiled with abrasive, acidic or base chemicals. • Plastic items that are not heat-resistant, copper or tin-coated containers. -
Page 11: Water Connections
Position the machine close to a water tap or drain. You need to site your machine, taking into consideration that its connections will not be altered once they are made. Do not grip the machine by its door or panel in order to move Take care to leave a certain clearance from all sides of the machine so that you can comfortably move it back and forth during cleaning. -
Page 12: Water Inlet Hose
Water inlet hose Do not use the water inlet hose of your old machine,if any. Use the new water inlet hose supplied with your machine instead. If you are going to connect a new or long unused water inlet hose to your machine, run water through it for a while before making the connection. -
Page 13: Water Outlet Hose
Water outlet hose The water drain hose can be connected either directly to the water drain hole or to the sink outlet spigot. Using a special bent pipe (if available), the water can be drained directly into the sink via hooking the bent pipe over the edge of the sink. -
Page 14: Electrical Connection
Electrical connection The earthed plug of your machine should be connected to an earthed outlet supplied by suitable voltage and current. If there is no earthing installation, have a competent electrician carry out an earthing installation. In case of usage without earthing installed, our company will not be responsible for any loss of usage that might occur. -
Page 18: Prior To Using The Machine
Prior to using the machine for the first time Check whether the electricity and supply water specifications match the values indicated by the • installation instructions for the machine. Remove all packaging materials inside the machine. • Set the water softener. •... -
Page 19: Testing Strip
Testing strip The washing effectiveness of your machine depends on the softness of the tap water. For this reason, your machine is equipped with a system that reduces the hardness in mains water supply. The washing effectiveness will increase when the system is correctly set. To find out the water hardness level of water in your area, contact your local water board or determine water hardness level by using the test strip(if available). - Page 20 Adjust water hardness setting of your machine according to the level specified on the test track. Push the Programme selection button and hold down. In the meantime, energize the machine by pushing ON/OFF button. Keep Programme selection button keys press until monitor lights are on and off.
-
Page 21: Detergent Usage
Detergent usage Use a detergent specifically designed for use in domestic dishwashers. You can find powder,gel,and tablet detergents in the market that have been designed for household dishwashers. Detergent should be put into the compartment prior to starting the machine. Keep your detergents in cool, dry places out of reach of your children. -
Page 22: Filling With Rinse Aid And Making The Setting
They produce good results for certain types of usage only. If you are using this type of • detergents, you need to contact the manufacturers and find out about the suitable conditions of use. When the conditions of use of such products and the machine settings are appropriate, •... -
Page 23: Loading Your Dishwasher
Warning: Use only those rinse aid materials which are allowed for use in the machine. As rinse aid residues left as a result of overflowing will create extremely high amounts of foam and thus reduce the washing performance, remove the excess amount of rinse aid by wiping it with a rag. LOADING YOUR DISHWASHER If you properly place your dishes into the machine, you will be using it in the best way in terms of energy consumption, washing and drying performance. - Page 24 Foldable racks on the upper basket are designed in order to let you place big items easier such as pots, pans, etc. If requested, each part can be folded separately, or all of them can be folded and larger spaces can be obtained.You can use foldable racks by raising them upwards, or by folding down. Lower Basket Folding Racks Folding racks consisting of two parts that are located on the lower basket of your machine are...
-
Page 25: Alternative Basket Loads
Alternative basket loads Lo wer Basket Top basket... - Page 26 Fa ulty loads Important Note for Test Laboratories For detailed information on performance tests, please contact following address: "dishwasher@standardtest.info” . In your email, please provide the model name and serial number (20 digits) which you can find on the appliance door. ...
-
Page 27: Programme Descriptions
PROGRAMME DESCRIPTIONS Prewash Programme No Delicate (referenceprogram) 65° 65° C 70° C 40° C 50° Programme names and 40° temperatures soups, sauces, pasta, soups, sauces, pasta, Type of food waste cold meats, cold meats, cold meats, vegetables, not kept vegetables, not vegetables, not kept foods foods... -
Page 28: Getting Familiar With Your Machine
GETTING FAMILIAR WITH YOUR MACHINE 1.) ON/OFF Button When pressed on ON/OFF button, the machine is energized and the light on Start/Standby button goes on. 2.) Door Handle Use door handle to open-close the door of the machine. 3.) Program selection Button With the program selector button, you can select a suitable program for your dishes. - Page 29 5.) Start/Pause Button Once you press the Start/Pause button, the programme you selected with the programme selector button will start running and the status indicator lamp “wash” will light up.In the stop condition while wash led is On, Start/Pause led will blink. 6.) Salt Lack Warning Indicator In order to see whether softening salt in your machine is sufficient or not, check salt lack warning lamp on the display.
-
Page 30: Switching On The Machine And Selecting A Programme
SWITCHING ON THE MACHINE AND SELECTING A PROGRAMME Switching on the machine Press the Power On/Off key. The lamp on Program Start/Pause key goes off once the Program starts and the washing lamp is highlighted. Select the program suiting your di shes via the Program Selector button. -
Page 31: Changing A Programme With Resetting
Changing a programme with resetting If you would like to cancel a program while a washing program is resumed. Hold Start/Pause button pressed for approx. 3 sec. until Finish light blinks. Once Finish light comes on, it means that the cycle has been cancelled. -
Page 32: Maintenance And Cleaning
MAINTENANCE AND CLEANING Cleaning the machine in regular intervals prolongs the machine’s service life. Oil and lime may accumulate in the machine’s washing section. In case of such accumulation; -Fill the detergent compartment without loading any dishes into the machine, select a programme that runs at high temperature, and start the machine. -
Page 33: Spray Arms
Spray arms Check whether or not the holes for the upper and lower spray arms are clogged. If there is any clogging, remove the spray arms and clean them under water. You can remove the lower spray arm by pulling it upwards, while the upper spray arm nut can be removed by turning the nut to the left. -
Page 34: Failure Codes And What To Do In Case Of Failure
Close the water input tap, separate the water input • hose from the tap and clean the filter at the connection end of the hose. Restart your machine, contact GRAM service if the error • resumes. • Close the tap. - Page 35 If one of program monitor lights is on and start/Pause light is on and off, Your machine’s door is open, shut the door. If the programme won’t start Check if the plug is connected. • Check your indoor fuses. • Be sure that the water inlet tap is turned on.
-
Page 36: Practical And Useful Information
Too much salt spilt into the sides and into the machine while filling it with salt. • Unhealthy mains grounding. • Contact GRAM service if the problem still persists after the controls or in case of any malfunction not described above. PRACTICAL AND USEFUL INFORMATION 1. Whenever you will not be operating your machine Unplug the machine and then turn the water off. - Page 37 Tel.: 22 07 26 30 Tel.: 040 38 08 40 Tel.: 020 7756 350 www.gram.no www.gram.se www.gram.fi Gram A/S . Gejlhavegård 2B . DK-6000 Kolding . +45 73 20 10 00 . www.gram.dk 52159530 R20 ...
Need help?
Do you have a question about the OM 45-07 T and is the answer not in the manual?
Questions and answers