Koden CVS-FX1 Menu Manual
Color echo sounder
Hide thumbs
Also See for CVS-FX1:
- Basic operation manual (139 pages) ,
- Installation manual (49 pages) ,
- Quick reference (2 pages)
Table of Contents
Advertisement
Quick Links
Advertisement
Table of Contents

Related Manuals for Koden CVS-FX1


Summary of Contents for Koden CVS-FX1
- Page 2 No part of this publication may be reproduced, transmitted, translated in any form by any means without the written permission of Koden Electronics Coo., Ltd. The technical descriptions contained in this publication are subject to change without notice. Koden assumes no responsibility for any errors, incidentals or consequential damages caused by misinterpretation of the descriptions contained in this publication.
-
Page 3: Important Notice
Koden is not liable for any damages caused by earthquake, lightning, wind and flood damage and fire for which Koden is not responsible, and actions by third parties, other accidents, customer’s unintended error/abuse and the use under other abnormal conditions. -
Page 4: For Your Safe Operation
CVS-FX1 For Your Safe Operation For Your Safe Operation Symbol used in this Operation Manual The following graphical symbols are used in this manual. The meaning of each symbols shall be well understood and apply at maintenance and inspection works. - Page 5 For Your Safe Operation CVS-FX1 Measures against static electricity The static electricity may be generated from the carpet on the floor in Caution the cabin or clothes made of synthetic fiber. The static electricity may destroy the electronic parts on the circuit board. Handle the circuit board, taking the measure of static electricity free.
-
Page 6: Table Of Contents
CVS-FX1 Contents Contents Document revision history ......................... i Important Notice ............................ii For Your Safe Operation .......................... iii Contents ..............................v Introduction .............................. ix Menu List ..............................x Chapter 1 Echo Adjust/ Display Setup ..............1-1 1.1 Change of TX Power ........................1-1 1.1.1 TX Power (HF) ........................ - Page 7 Contents CVS-FX1 1.14 Setting depth to perform Bottom Limit searching at Auto-Range / Auto-Shift ......1-14 1.15 Selecting method for Shift Operation (per each image/for whole screen at the same time) ............................. 1-14 1.16 Selecting Range Operation (per image/Whole screen at same time) ........1-15 Chapter 2 Alarm .....................
-
Page 8: Contents
CVS-FX1 Contents Chapter 5 System Setting ..................5-1 5.1 Allocation of function keys (F1/F2) to aimed operation ..............5-1 5.1.1 Setup of [F1] key ........................5-1 5.1.2 Setup of [F2] key ........................5-2 5.2 Display/No display of Guide ......................5-2 5.2.1 Display/No display of Guide Window ..................5-2 5.2.2 Display/No display of Func. - Page 9 Contents CVS-FX1 5.16.4 Display of input sentence on NMEA Monitor ..............5-14 5.17 Customization ..........................5-15 5.17.1 Changing of color of displayed items ................. 5-15 5.17.2 Changing of coloration of image of Color Bar Scale ............5-16 5.17.3 Changing of red coloration of image of fish display ............5-16 5.17.4 Distinction of the sea bottom ....................
-
Page 10: Introduction
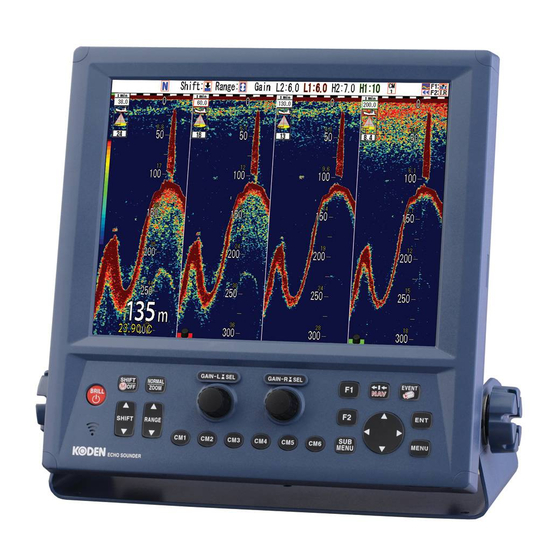
Introduction Introduction CVS-FX1 is an LCD color echo sounder that can display images in 4 optional frequencies. This unit equipped with the latest digital process can accurately display circumstances in the water under all conditions, with a good match with the high brilliance 12.1 inch LCD. -
Page 11: Menu List
Menu List CVS-FX1 Menu List The factory deafult setting is shown in bold and underlined. 1. [SHIFT/ M OFF] key Shift OFF (OFF, ON) Range Mode (Auto range, Manual, Auto shift) 2. [NORMAL/ZOOM] key Normal/Zoom (Normal range operation, Zoom range operation) 3. - Page 12 CVS-FX1 Menu List 11. [MENU] key Echo Adjust IR (OFF, Low, High) Color Erase (0 ~ 50 %, 0 %) Noise Reduction (0~10: 0) TX Power (HF) (20, 30, 40, 50, 60, 70, 80, 90, 100, Auto) TX Power (LF) (20, 30, 40, 50, 60, 70, 80, 90, 100, Auto)
- Page 13 Menu List CVS-FX1 Disp. Setup2 Scale (OFF, ON) Scale Position (Side, Center) Scale Value (Small, Medium, Large) Color Bar Scale (OFF, ON) Image Title (Frequency, HF1 LF1) Water Temp Window (OFF, 5 minutes, 10 minutes, 15 minutes, 30 minutes, 60 minutes) W.
- Page 14 CVS-FX1 Menu List Alarm1 Bottom Alarm (OFF, ON) Upper depth (0 ~ Lower depth -1 m: 5 m) Lower depth (Upper depth ~ 3000 m: 50 m) Fish Alarm (OFF, ON) Fish From (0.0 ~ 3000 m: 5 m) Fish Span (1.0 ~ 3000 m: 50 m)
- Page 15 Menu List CVS-FX1 12. [SUB MENU] key System Event Key Usage (Store Position, Store Image, Homing) (Shift Digit Input, IR (F2), Color Erase, Noise Reduction, Background Color, TVG Adjust, White FUNC1.Key Setting Line, A Scope, Image Swap, Image Title (F1), VRM Interval, Sona-tone, Nav Start, Image Recall, FUNC2.Key Setting...
- Page 16 Localtime Offset (- 12.0 ~ 14.0: 0.0) Note: Default value is 9.0, when Japanese language is selected upon initial startup.) GPS Select (Others, Koden GPS, V102, VectorG1) GPS Initialize (NO, yes) Customize Color Customize (Depth Value Font, Depth Value Edge, Fish Alarm bar,...
- Page 17 Menu List CVS-FX1 Maintain Simulation (OFF, ON) Simulation Select (Shallow Depth, Intermediate*, Deep Depth*) (*It is necessary to store the simulation data in the internal memory.) Key Lock (OFF, ON) Initialize (CM1, CM2, CM3, CM4, CM5, CM6, System All) System Check (Panel Test, LCD Test)
-
Page 18: Chapter 1 Echo Adjust/Display Setup
CVS-FX1 Chapter 1 Echo Adjust/Display Setup 4. Press [▲] and [▼] and select TX Power. Chapter 1 Echo Adjust/ Display Setup The smaller the value is, the weaker the TX Power becomes. 1.1 Change of TX Power 5. Press to close the menu. -
Page 19: Change Of Dynamic Range Of Echo
Chapter 1 Echo Adjust/Display Setup CVS-FX1 1.2 Change of dynamic range of Echo 1.3.1 Changing of TVG Type Echo Adjust - Dynamic Range* HF1, HF2, TVG* - TVG Type LF1, LF2 TVG is a function to display images, by The dynamic range of reflected signal (color correcting the attenuation of ultrasonic gradation) can be adjusted. -
Page 20: Changing Of Tvg Strength
CVS-FX1 Chapter 1 Echo Adjust/Display Setup The setup box of [TVG Depth XX] will be 1.3.2 Changing of TVG Strength displayed. TVG - TVG Strength HF1, HF2, LF1, LF2 The gradient of gain variation is adjusted to reduce gain for shallower depth. -
Page 21: Displaying Of A Scope
Chapter 1 Echo Adjust/Display Setup CVS-FX1 When the value is larger, the correction The setup box of [A Scope] will be reference depth becomes deeper and the displayed. gain at shallower depth will be reduced when smaller. 5. Press to close the menu. -
Page 22: Changing Of Screen
CVS-FX1 Chapter 1 Echo Adjust/Display Setup 4. Press [▲] and [▼] and select the line width of white line. At 1, the finest line will be displayed and at 5, the thickest line will be displayed. At [Auto], the width of white line will vary depending on the strength of reflection from sea bottom. -
Page 23: To Display Of Scale/Not To Display
Chapter 1 Echo Adjust/Display Setup CVS-FX1 The setup box of [Color Tone] will be 3. Press [ displayed. ] of The setup box of [Scale Position] will be displayed. 4. Press [▲] and [▼] to set the color tone to which changed. -
Page 24: Set The Image Title As Frequency/ Hfx Lfx
CVS-FX1 Chapter 1 Echo Adjust/Display Setup 1.6.8 Changing of Image Direction 3. Press [ ] of Disp. Setup1 - Image Direction The scroll direction of displayed images can The setup box of [Color Bar Scale] will be changed. be displayed. -
Page 25: Detailed Display Of Image Resolution And Lapse Time
Chapter 1 Echo Adjust/Display Setup CVS-FX1 4. With [▲] and [▼] keys, select swapping Example of display: type [A|B] or [B|A] . When [A|B] is selected, the alignment of images will be HF1, HF2, LF1 and LF2 from the right side. When [B|A] is selected, the alignment will be HF1, HF2, LF1, and LF2 from the left side. -
Page 26: Zoom Image Split
CVS-FX1 Chapter 1 Echo Adjust/Display Setup 4. With [▲] and [▼] keys, select one of the Example of display: widths of zoomed display image, [Wide], In case of two normal images are selected [Medium] or [Narrow]. 5. Press to close the menu. -
Page 27: Display Of Water Temp Window/Not To Display
Chapter 1 Echo Adjust/Display Setup CVS-FX1 The setup box of [W. Temp. Graph 1.7.1 Display of Water Temp Window/Not Range] will be displayed. to display Disp. Setup2 - Water Temp Window The latest water temperature and the transition of water temperature in the past can be displayed in a graph. -
Page 28: Changing Of Display Position Of Depth
CVS-FX1 Chapter 1 Echo Adjust/Display Setup The setup box of [Depth Font Size] will be Example of display: displayed. 4. With [▲] and [▼] keys, select one of Depth Font Size, [Small], [Medium] or Top display Bottom of [Large]. To stop the display, select [OFF]. -
Page 29: Displaying Of Speed Value/Not To Display
Chapter 1 Echo Adjust/Display Setup CVS-FX1 1. Press 2. Select [Disp. Setup2] - [W.Temp. Font size]. 4. With [▲] and [▼] keys, select [ON] to 3. Press [ ] of display and [OFF] to stop. 5. Press to close the menu. -
Page 30: Widening Of Bottom Search Range
1. Press 2. Select [BTM Search] - [Sounding Source]. 3. Press [ ] of Broaband Type Transducer: A transducer that can handle multiple frequencies (having wide range of frequency bandwidth). TDM-052, TDM-062 can be connected to CVS-FX1. 1-13 0093101114-03... -
Page 31: Setting Depth To Perform Bottom Limit Searching At Auto-Range / Auto-Shift
Chapter 1 Echo Adjust/Display Setup CVS-FX1 The setup box of [Sounding Source] will 4. Pressing [▲], [▼], [ ] or [ ], set a depth. be displayed. Larger value makes the time longer for detecting the sea bottom again after lost due to bubble etc.. -
Page 32: Selecting Range Operation (Per Image/Whole Screen At Same Time)
CVS-FX1 Chapter 1 Echo Adjust/Display Setup 1.16 Selecting Range Operation (per image/Whole screen at same time) Range Setup - Range Operation It can be selected whether the range operation is changed for all images at once or for each image. -
Page 33: Chapter 2 Alarm
CVS-FX1 Chapter 2 Alarm 6. Press to close the menu. Chapter 2 Alarm Caution: Press any key stop any 2.1 Use of Bottom Alarm alarm sound an alarm display.. When the detected position of sea bottom is shallower than the upper limit or deeper than... -
Page 34: Setup Of Lower Depth
Chapter 2 Alarm CVS-FX1 2.1.3 Setup of Lower Depth 2.2.1 Start/Stop Fish Alarm Alarm1 - Lower Depth Alarm1 - Fish Alarm To set the depth, where to activate alarm Select [ON] to enable the fish alarm and when the depth becomes deeper than a [OFF] to deactivate. -
Page 35: Setup Of Fish From
CVS-FX1 Chapter 2 Alarm Caution: When CCD camera 3. Press [ ] of image is displayed, the alarm display will be only by icon display. (See “2.7 Confirmation The setup box of [Fish Span] will be of alarm conditions”, p 2-9.) displayed. -
Page 36: Setup Of Lower Level
Chapter 2 Alarm CVS-FX1 where warning is activated together with 2.2.6 Setup of Alarm Signal Length the preset value of the [Lower Level]. Alarm1 - Alarm Signal Length 5. To set the Fish Alarm related items This is to set the signal length of fish schools subsequently: to sound the fish school alarm. -
Page 37: Use Water Temp Alarm
CVS-FX1 Chapter 2 Alarm The setup box of [Fish Image] will be 4. Press [▲] and [▼] keys, to select [ON] to displayed. activate the alarm and [OFF] to deactivate. At [ON-Inside range], alarm is delivered when entering the preset range. -
Page 38: Setup Of Lower Temp Alarm
Chapter 2 Alarm CVS-FX1 The setup box of [Upper Temp Alarm] will Caution: The maximum water be displayed. temperature at lower side of the alarm range cannot be set larger than the temperature at upper side of the temperature alarm. -
Page 39: Setup Of Speed Limit
CVS-FX1 Chapter 2 Alarm At [ON-Slower], alarm is delivered when 2.5 Use the alarm at waypoint navigation the speed falls less than the specified Alarm can be used while waypoints are set. speed. (See the Basic Operation Manual, “4.4 To 5. -
Page 40: Sound Alarm When Xte To Waypoint Has Been Found
Chapter 2 Alarm CVS-FX1 6. Press to close the menu. Caution: Press any key to stop any alarm sound an alarm display. Caution: Press any key to stop any alarm sound an alarm display. Caution: To activate the alarm sound and the alarm display... -
Page 41: Voltage Alarm
CVS-FX1 Chapter 2 Alarm The icons for alarm represent as follow: Caution: The alarm setup range for [Arrival Alarm] and [XTE Alarm] cannot set individually. Bottom Alarm 2.6 Voltage Alarm Fish Alarm The input voltage to this equipment is continuously monitored, and alarm sound... -
Page 42: Chapter 3 Nav Operation
CVS-FX1 Chapter 3 NAV Operation The setup box of [NAV Start] will be Chapter 3 NAV Operation displayed. 3.1 Starting waypoint NAV NAV - NAV Start By selecting a waypoint from the waypoint list, waypoint NAV can be started. 6. Pressing [▲] and [▼] keys, select [Yes] to To start waypoint NAV, registration of start and [No] not to start. -
Page 43: Editing Of Waypoint
Chapter 3 NAV Operation CVS-FX1 The setup box of [NAV Cancel] will be Caution: The selected list No. will displayed. turn yellow. 4. Using of [▲] and [▼] keys, select No. of list to be edited. 5. Press 6. Select characters with [▲] and [▼] keys. -
Page 44: Deletion Of All Waypoints In The Waypoints List
CVS-FX1 Chapter 3 NAV Operation The [WPT Delete] list box will be displayed. 3. Press [ ] of The setup box of [All WPTs:DLT] will be displayed. Caution: The list No. selected will 4. When all waypoints are to be deleted, turn yellow. -
Page 45: Selection Of Nav Display
Chapter 3 NAV Operation CVS-FX1 Example of display: When [NAV1] is selected, the NAV screen in the configuration registered by NAV1 will be displayed. When [NAV2] is selected, the NAV screen Compass in the configuration registered by NAV2 (For 2 display areas) will be displayed. - Page 46 CVS-FX1 Chapter 3 NAV Operation The setup box of [NAV Display1 Select] “Compass” displays own boat course in will be displayed. upward direction and wind direction with an arrow. In addition, during waypoint navigation, a flag will be displayed at the waypoint direction.
- Page 47 Chapter 3 NAV Operation CVS-FX1 “HDG” displays the ship’s bearing in selected, the setup box of [NAV Display3 or numerical value at input. Display4 Select] will be displayed. “XTE” displays the deviated distance from To select the display area again, press the course line to a waypoint in numerical value during waypoint navigation.
-
Page 48: Chapter 4 Image List
CVS-FX1 Chapter 4 Image List 5. To search by comments, use [▲] and [▼] Chapter 4 Image List keys and select [Comment Search]. 4.1 Recall of Image To search by dates, select [Date Search]. To search by the items without dates, Image - Image Recall select [No Date Search]. -
Page 49: Editing Of Image Comment
Chapter 4 Image List CVS-FX1 Select characters with [▲] and [▼]. The recalling function of images will be (Characters: 0 ~ 9). ended. Using [◄] or [►] key, move the position of The waypoint is set, and the waypoint characters highlighted in reverse. - Page 50 CVS-FX1 Chapter 4 Image List The setup box of [Image List Search] will 8. The setup box of [Date Search] will be be displayed. displayed. Select characters with [▲] and [▼]. (Characters: 0 ~ 9). 5. To search by comments, select [Comment Search] using [▲] and [▼] keys.
-
Page 51: Deleting Of Image
Chapter 4 Image List CVS-FX1 13. To end editing, press Caution: The list No. selected will turn yellow. 14. After completion of editing, press 4. A short list of images can be made after search. The setup box of [Edit End] will be displayed. -
Page 52: Deletion Of All Images In The Image List
CVS-FX1 Chapter 4 Image List 4.4 Deletion of all images in the Image List Maintain - All IMG DT:DLT This is the function to delete all images registered in the Images List. For deletion of images, it will take some time. -
Page 53: Chapter 5 System Setting
CVS-FX1 Chapter 5 System Setting Chapter 5 System Setting 5.1.1 Setup of [F1] key System - FUNC1.Key Setting 5.1 Allocation of function keys (F1/F2) to The functions to be allocated to [F1] key aimed operation shall be selected. The operability can be improved, by 1. -
Page 54: Setup Of [F2] Key
Chapter 5 System Setting CVS-FX1 5.1.2 Setup of [F2] key 3. Press [►] of System - FUNC2.Key Setting The setup box of [Guide Window] will be The functions to be allocated to [F2] key displayed. shall be selected. 4. Select [ON] to display the Guide Window, 1. -
Page 55: Limitation Of Menu To Be Changed
CVS-FX1 Chapter 5 System Setting 5.4 Limitation of Menu to be changed Caution: The Sona-Tone output is always provided. Adjust the System - Simple Menu speaker volume with the volume This is the function to turn the menu items, provided on the speaker. -
Page 56: Changing Of Buzzer Volume Of Operation
Chapter 5 System Setting CVS-FX1 4. Select [ON] to display the Clock, and [No] 5.9 Changing of Water Temp Source not to display with [▲] and [▼]. Source - Water Temp Source The clock will be displayed on the left The input source of water temperature in the side of the screen. -
Page 57: Use Of Ext Trigger Type
CVS-FX1 Chapter 5 System Setting (As for the connection to J3 and J8 connectors, see the Installation Manual, “1.4.1 Connection of cables to Display unit”.) 5. Press to close the menu. 5.11 Use of EXT Trigger Type Source - EXT Trigger Type... -
Page 58: Correction Of Water Temperature
Chapter 5 System Setting CVS-FX1 The setup box of [Sonic Speed] will be Speed Source”, p 5 - 4. displayed. 5. Press to close the menu. 4. Set a correction value of sonic speed with [▲] and [▼]. 5.12.5 Adjustment of transducer’s gain 5. -
Page 59: Adjustment Of Power Supply Frequency
CVS-FX1 Chapter 5 System Setting operated. When there is a green square 5.13 Use of Heaving mark, turn the green lighted gain knob. This is the function to control the seesaw movement of images by detecting the seesaw movement caused by wave by... -
Page 60: Setup Of Sensor's Positions For Heaving
Chapter 5 System Setting CVS-FX1 Example of display: 8. Pressing [▲] and [▼] keys, set the distance in right and left direction. 9. Press [◄]. 10. Select [Heaving] - [XX TD Height]. Heaving OFF Heaving ON 11. Press [►]. When this heaving function is set [ON], the images of sea bottom will be corrected. -
Page 61: Setup Of Type Of Low Frequency Transducer
CVS-FX1 Chapter 5 System Setting 1. Press Setup of type of low frequency 5.14.2 2. Select [TD Setting] - [HF TD Type]. transducer TD Setup - LF TD Type 3. Press of [ ] of Select the type of transducer to be actually used in low frequency. -
Page 62: Setup Of Frequency And Beam Angle For Hf 2 Transducer
Chapter 5 System Setting CVS-FX1 The setup box of [HF TD1 Setting] will be 5.14.4 Setup of frequency and beam displayed. angle for HF 2 transducer TD Setting - HF TD2 Setting 1. Press 2. Select [TD Setting] - [HF TD2 Setting]. -
Page 63: Setup Of Frequency And Beam Angle For Lf 2 Transducer
CVS-FX1 Chapter 5 System Setting 5.14.6 Setup of frequency and beam 5.14.8 Setup of Bottom Limit LF angle for LF 2 transducer TD Setting - Bottom Limit LF TD Setting - LF TD2 Setting To set Bottom Limit of low frequency. -
Page 64: Changing Of Range & Speed Unit
Chapter 5 System Setting CVS-FX1 4. Pressing [▲] and [▼], select a language Caution: With this change of unit to be used. for depth, the set values in all related items will be converted to 5. Press to close the menu. -
Page 65: Selection Of Gps
This is to select the GPS sensor in use. Caution: Only when KODEN GPS is directly connected, select 4. When initialization is performed, select [Koden GPS]. When there is no [Yes] and initialization is not performed, corresponding GPS sensor, select [No] with [▲] and [▼] keys. -
Page 66: Setup Of Baud Rate Of Nmea1 (J8)
Chapter 5 System Setting CVS-FX1 5. Press to close the menu. 5.16.1 Setup of baud rate of NMEA1 (J8) NMEA1 - Baud Rate 5.16.3 Selection of NMEA Output This is to set baud rate of J8. Transmission rate should match the NMEA1 - DBT/DPT/GGA/MTW/TLL/VHW/ externally connected equipment. -
Page 67: Customization
CVS-FX1 Chapter 5 System Setting 5. Press [ ]. The setup box of [Color Customize] will be displayed. The monitor on the specified NMEA side will be displayed. The data input will be displayed white or yellow for the strings of characters. -
Page 68: Changing Of Coloration Of Image Of Color Bar Scale
Chapter 5 System Setting CVS-FX1 When blue is selected, the setup box of Caution: If coloration under blue component will be displayed. When setting enters in the other green is selected, the setup box of green coloration area at changing component will be displayed. -
Page 69: Distinction Of The Sea Bottom
CVS-FX1 Chapter 5 System Setting 5.17.4 Distinction of the sea bottom Customize- B.D. Mode This is the function to make the distinction of the edge of the sea bottom by highlighting a lower image from the edge of the sea bottom. -
Page 70: To Lock The Keys Not To Be Operated
Chapter 5 System Setting CVS-FX1 5.19 To lock the keys not to be operated 7. Press Maintain – Key Lock Locking status or lock release status will be confirmed. This is to disable the functions of knobs and keys. This prevents the functions once setup Caution: When key lock is turned to from being changed by wrong operation. -
Page 71: Confirming Of System Conditions
CVS-FX1 Chapter 5 System Setting The setup box of [CM Initialize] will be displayed. 6. When initialization is performed, select [Yes] for initialization by pressing [▲] and [▼] keys, and [No] for not to initialize. 7. Press At [Yes], initialization will be performed. -
Page 72: Updating Of Program
Chapter 5 System Setting CVS-FX1 “– –” for not yet done, OK for normal 5.22 Updating of Program case and NG for abnormal case will be Maintain – System Program Load displayed. This is used for program update. Caution: For confirmation of... -
Page 73: Storage Of Settings In Internal Memory
CVS-FX1 Chapter 5 System Setting 5.23 Storage of settings in internal The setup box of [Apply Setting Value] will memory be displayed. Maintain – Save Setting Value All the CM setting value can be stored in the internal memory. This function is used for backup. -
Page 74: Changing Of Ip Address
1. Press Network - Output Data Method 2. Select [Network] - [DHCP Setting]. Output method of echo sounder image information to be transmitted to CVS-FX1 3. Press [ ] of can be selected. 1. Press The setup box of [DHCP Setting] will be 2. -
Page 75: Input Data Method /Not Input
5.25.5 Input Data Method /Not input Network - Input Data Method Input method of echo sounder image information to be received from CVS-FX1 can be selected. 1. Press 2. Select [Network] - [Input Data Method]. 3. Press [ ] of The setup box of [Input Data Method] will be displayed. -
Page 76: Chapter 6 Ccd Camera
CVS-FX1 Chapter 6 CCD Camera The image on CCD camera will scroll to the Chapter 6 CCD Camera left, right, top and bottom. To display images of CCD camera, prepare a CCD camera separately and connect it Actual image range of CCD camera with a video cable. -
Page 77: Zoom/Reduce Of Ccd Camera Images
Chapter 6 CCD Camera CVS-FX1 6.1.3 Zoom/Reduce of CCD camera images This is the function to enlarge a part of CCD camera image for detailed display and to reduce for total view. This is operative under display of CCD camera images on screen. -
Page 78: Chapter 7 Index
CVS-FX1 INDEX Chapter 7 INDEX A Scope ............... 1-4 DBT ..............5-14 Alarm Signal Length ..........2-4 Depth Font Size ..........1-10 Alarm1 ........... 2-1, 2-2, 2-3, 2-4 Depth Position ........... 1-11 Alarm2 ........... 2-5, 2-6, 2-7, 2-8 Depth Unit ............5-12 All IMG DT:DLT ............ - Page 79 INDEX CVS-FX1 Guide Window ............. 5-2 LF TD2 Setting ........... 5-11 Localtime Offset ..........5-12 Lower Depth ..........2-1, 2-2 Lower Level ............2-4 Lower Temp Alarm ..........2-6 HDG ..............3-6 HDT ..............5-14 Header Display ............ 5-2 Heaving ............5-7, 5-8 HF TD Back and Forth ........
- Page 80 CVS-FX1 INDEX TX Power (LF) ............. 1-1 Save Setting Value ..........5-21 Scale ..........1-5, 1-6, 1-7, 5-15 Upper Depth ............2-1 Scale Position ............1-6 Upper Level ............2-3 Scale Value ............1-6 Upper Temp Alarm ..........2-5 Scr. Individual..........1-14, 1-15 Shift Operation ...........
Need help?
Do you have a question about the CVS-FX1 and is the answer not in the manual?
Questions and answers