Table of Contents
Advertisement
Quick Links
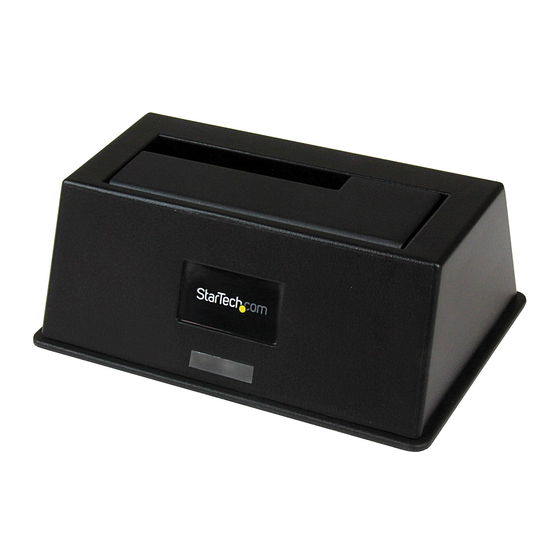
USB 2.0 to SATA Hard Drive Docking Station
SATADOCKU2
SATDOCKU2GB
SATDOCKU2EU
DE: Bedienungsanleitung - de.startech.com
FR: Guide de l'utilisateur - fr.startech.com
ES: Guía del usuario - es.startech.com
IT: Guida per l'uso - it.startech.com
NL: Gebruiksaanwijzing - nl.startech.com
PT: Guia do usuário - pt.startech.com
For the most up-to-date information, please visit: www.startech.com
Manual Revision: 03/22/2012
*actual product may vary from photos
Advertisement
Table of Contents

Related Manuals for StarTech.com SATADOCKU2


Summary of Contents for StarTech.com SATADOCKU2
- Page 1 DE: Bedienungsanleitung - de.startech.com FR: Guide de l'utilisateur - fr.startech.com ES: Guía del usuario - es.startech.com IT: Guida per l'uso - it.startech.com NL: Gebruiksaanwijzing - nl.startech.com PT: Guia do usuário - pt.startech.com For the most up-to-date information, please visit: www.startech.com Manual Revision: 03/22/2012...
- Page 2 StarTech.com. Where they occur these references are for illustrative purposes only and do not represent an endorsement of a product or service by StarTech.com, or an endorsement of the product(s) to which this manual applies by the third-party company in question. Regardless of any direct acknowledgement elsewhere in the body of this document, StarTech.com hereby...
-
Page 3: Table Of Contents
Table of Contents Introduction ...................1 Features ................................ 1 Package Contents ............................. 1 SATADOCKU2 .............................. 2 Rear View ..............................2 Disk Installation ..................3 SATA Drive Removal ................3 Preparing the Hard Drives for Use ............4 Specifications ..................7 Technical Support ..................8 Warranty Information ................8... -
Page 4: Introduction
Simply plug the hard drive into the upright dock and connect it to a PC or notebook. The StarTech.com SATA HD Docking Station is a perfect solution for data recovery, drive imaging, and testing centers, or any environment requiring fast access to uninstalled/ archived drives. -
Page 5: Satadocku2
SATADOCKU2 Rear View DC Power Adapter On/Off Switch Port Instruction Manual... -
Page 6: Disk Installation
SATA Drive Removal If you are using the SATADOCKU2 or SATADOCKU2E, you can remove SATA drives from the docking station by gently pulling them out from the top of the dock. -
Page 7: Preparing The Hard Drives For Use
Preparing the Hard Drives for Use 1. With the hard drives inserted and the dock powered on, right click on the My Computer icon and select Manage. In the left pane of the Computer Management window, click Disk Management. 2. In the bottom right pane of the Computer Management window, you should see your drives listed as unallocated. - Page 8 4. Select the partition type you wish to create by clicking on Primary or Extended, as appropriate. When you have made your selection, click Next to continue. 5. Specify the size of the partition you wish to create. You must select a partition size that is between the maximum and minimum sizes (typically the maximum disk space available).
- Page 9 7. A notification window will appear indicating that you have successfully completed the New Partition Wizard. Click Finish to commence the formatting of the drive. 8. The status of the drive, as shown in the Computer Management window, will be updated to reflect the selections you have made.
-
Page 10: Specifications
10. To access your newly partitioned drive(s), open My Computer. Your drive(s) should be displayed below the heading Hard Disk Drives. Specifications Specification SATADOCKU2/SATDOCKU2EU/SATDOCKU2GB 1 x SATA Power 15-Pin Female Internal Connectors 1 x SATA Data 7-Pin Female 1 x USB B Female... -
Page 11: Technical Support
Limitation of Liability In no event shall the liability of StarTech.com Ltd. and StarTech.com USA LLP (or their officers, directors, employees or agents) for any damages (whether direct or indirect, special, punitive, incidental, consequential, or otherwise), loss of profits, loss of business, or any pecuniary loss, arising out of or related to the use of the product exceed the actual price paid for the product. - Page 12 StarTech.com is an ISO 9001 Registered manufacturer of connectivity and technology parts. StarTech.com was founded in 1985 and has operations in the United States, Canada, the United Kingdom and Taiwan servicing a worldwide market.
Need help?
Do you have a question about the SATADOCKU2 and is the answer not in the manual?
Questions and answers