Advertisement
Quick Links
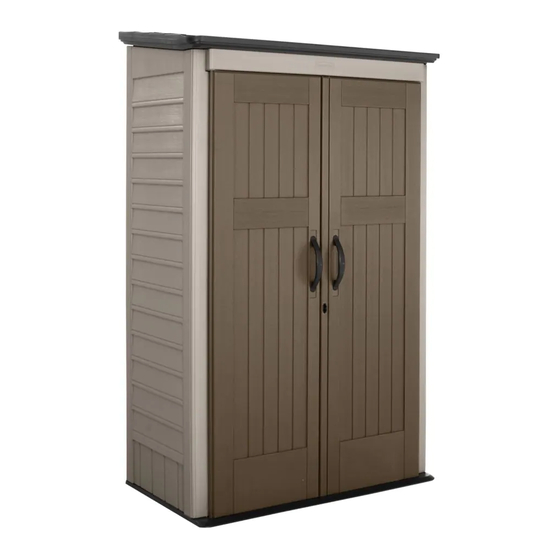
LARGE VERTICAL STORAGE SHED
Assembly Instructions
COBERTIZO VERTICAL GRANDE PARA ALMACENAJE
Instrucciones de armado
GRANDE REMISE VERTICALE
Instructions d'assemblage
1V31
81.40 in
206.75 cm
30 in
48.75 in
76.20 cm
123.83 cm
Thank you for purchasing this Rubbermaid
vertical shed. This dependable product was designed
®
to look great outdoors and keep your yard organized. We want your experience to be a good one.
Please read these instructions thoroughly before assembling the vertical shed.
Gracias por comprar este cobertizo vertical de Rubbermaid
. Este producto confiable ha sido
®
diseñado para verse bien al aire libre y mantener su patio organizado. Queremos que tenga una buena
experiencia. Lea estas instrucciones completamente antes de armar el cobertizo vertical.
Merci d'avoir acheté la remise verticale Rubbermaid
. Ce produit fiable a été conçu pour avoir une belle
MD
apparence à l'extérieur et vous aider à garder votre cour en ordre. Nous souhaitons que votre expérience soit agréable.
Veuillez bien lire les instructions avant d'assembler la remise verticale.
2007263
Advertisement

Related Manuals for Rubbermaid LARGE VERTICAL STORAGE SHED


Summary of Contents for Rubbermaid LARGE VERTICAL STORAGE SHED
- Page 1 We want your experience to be a good one. Please read these instructions thoroughly before assembling the vertical shed. Gracias por comprar este cobertizo vertical de Rubbermaid . Este producto confiable ha sido ®...
-
Page 2: Before You Begin
Consumer Service Department solid, level surface. A concrete or patio surface or a can accurately and quickly assist you. treated-wood platform is recommended. Rubbermaid Consumer Service Department ® 3. Location – When choosing a location in your yard,... -
Page 3: Avant De Commencer
Il est recommandé de l’édifier adéquatement. sur une surface en béton ou sur un patio, ou encore sur une plate-forme en bois traité. Rubbermaid Consumer Service Department ® 1-888-895-2110 3. Emplacement – Lorsque vous choisissez un www.Rubbermaid.com... - Page 4 A - 1 B - 1 Floor Panel Left Side Panel Panel del piso Panel lateral izquierdo Panneau de plancher Panneau de gauche C - 1 D - 1 Right Side Panel Back Panel Panel lateral derecho Panel posterior Panneau de droite Panneau arrière E - 1 F - 1...
- Page 6 48-3/4" 3-3/8" 42" 3-3/8" 4-1/8" 20" 30" 5-7/8" 133˚ 19-1/2"...
- Page 7 “CLICK” “CLICK” “CLIC” “ALIGN” “ALIGN” “ALINEAR” “ALIGNER” “ALINEAR” “ALIGNER”...
- Page 8 Back panel slides down, but do not snap/click/engage into the floor at this time. El panel trasero se desliza hacia abajo, pero no debe encajarlo/encastrarlo/ unirlo al piso en este momento. Le panneau arrière glisse vers le bas, mais ne s’emboîte/ s’enclenche/s’engage pas dans le plancher à...
- Page 9 “CLICK” “CLICK” “CLIC” “ALIGN” “ALINEAR” “ALIGNER” “ALIGN” “ALINEAR” “ALIGNER”...
- Page 11 “CLICK” “CLICK” “CLIC” “ALIGN” “ALINEAR” “ALIGN” “ALIGNER” “ALINEAR” “ALIGNER”...
- Page 12 DO NOT overtighten screws! ¡NO ajuste los tornillos en exceso! ÉVITEZ de trop serrer les boulons! AA x 4...
- Page 14 1. Fit/install bottom hinge pin into floor. Coloque/instale la clavija de la bisagra de la base en el piso. Insérez/installez l’axe de la charnière du bas dans la porte. 2. Raise left edge of roof. Levante el borde izquierdo del techo. Relevez le bord gauche du toit.
- Page 15 Repeat actions (1, 2, 3 and 4) from installing Step 9. Repita los pasos 1, 2, 3 y 4 del Paso 9. Répétez les actions (1, 2, 3 et 4) de l’étape 9. Hold down left edge of roof. Sostenga el borde izquierdo del techo hacia abajo.
- Page 16 DO NOT overtighten screws! ¡NO ajuste los tornillos en exceso! ÉVITEZ de trop serrer les boulons! Hold down roof corners when installing. Sostenga las esquinas del techo mientras realiza la instalación. Maintenir en bas les angles du toit lors de la pose. AA x 4 Screws installed Los tornillos están instalados...
- Page 17 DO NOT overtighten screws! ¡NO ajuste los tornillos en exceso! ÉVITEZ Continued. de trop serrer les boulons! Continúa. Suite. Hold down roof edges when installing. Sostenga los bordes del techo mientras realice la instalación. Maintenir en bas les bords du toit lors de la pose. AA x 10 Interior view of roof AA x 10...
- Page 18 DO NOT overtighten screws! ¡NO ajuste los tornillos en exceso! ÉVITEZ de trop serrer les boulons! AA x 6...
- Page 19 DO NOT overtighten screws! ¡NO ajuste los tornillos en exceso! ÉVITEZ de trop serrer les boulons! Repeat for right door. Repita el procedimiento con la puerta derecha. Répéter pour la porte droite AA x 4...
-
Page 23: Maintenance And Safety
Maintenance & Safety • Heavy items should not be leaned against the walls, as • Periodically check shed to ensure it remains stable and the site remains level. this may cause distortion. • Keep doors closed and secured when not in use to •... - Page 24 útiles Visitez www.rubbermaid.com/outdoorliving pour des conseils pratiques et de l’information YOU’RE DONE! Remember, if you have any trouble, don’t call or return to the store. Call our Consumer Service Department at 1-888-895-2110 (Mon.–Fri.
Need help?
Do you have a question about the LARGE VERTICAL STORAGE SHED and is the answer not in the manual?
Questions and answers