Table of Contents
Advertisement
Advertisement
Table of Contents

Related Manuals for Autojack MIG130


Summary of Contents for Autojack MIG130
- Page 1 SAFETY AND OPERATING MANUAL Mig Master Welder MIG130 ORIGINAL INSTRUCTIONS...
-
Page 2: Table Of Contents
TABLE OF CONTENTS Welcome to Autojack! Dear Customer, Congratulations on your purchase. Before using this product for the first time, please be sure to read these instructions for use. They provide you with all the information necessary for using the product safely and to ensure its long service life. -
Page 3: General Power Tool Safety Warnings
Do not expose power tools to rain or wet result in personal injury. conditions. Water entering a power tool will increase the risk of electric shock. MIG130... - Page 4 Power tools are dangerous in the hands of untrained users. Use power tools only with specifically designated battery packs. Use of any other battery packs may create a risk of injury or fire MIG130...
- Page 5 Do not carry out any welding work on tanks that have been used to store gases, fuels, mineral oil or the like, even if they have been empty for a lengthy period of time, since any residue will result in a danger of explosion. MIG130...
- Page 6 (for earthing contact sockets max. 16 A fuses or 16 A circuit breakers). The use of too high a fuse may result in the cable burning and fire damage to the building. MIG130...
- Page 7 Do not store or use the equipment in wet conditions or in the rain. Use the equipment only indoors. MIG130...
-
Page 8: Symbol Chart
SYMBOL CHART MIG130... -
Page 9: Technical Specification/Package Contents
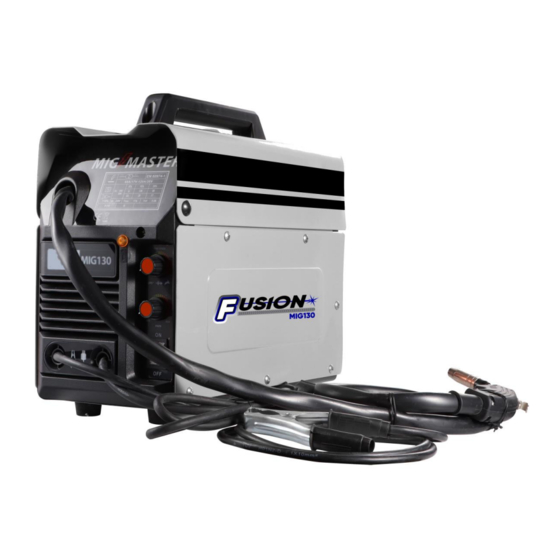
0.6 – 1.0 mm Efficiency Insulation Class Enclosure Protection IP21S Cooling Type Weight 17 KG Dimensions 465x235x398 mm Package Contents MIG130 Welder 1.8Mtr MIG Torch 1.2Mtr 200A Earth Clamp Brush Mask Wire Spool Intended Use The flux cored welding set is designed for self-shielding flux cored welding using suitable wire. -
Page 10: Assembly
Check that the windings on the spool do not overlap so as to ensure that the wire can be unwound evenly. Place the wire spool on the spool holder. Ensure that the end of the welding wire is unwound on the side of the wire guide, see arrow. MIG130... - Page 11 (15). Place the hose package (9) on the floor as straight as possible pointing away from the welding set. (See page 8) Cut off the first 10 cm of the welding wire to produce a straight cut with no shoulders, warping or dirt. Deburr the end of the welding wire. MIG130...
- Page 12 (Fig. 11) and fit the gas nozzle (10), turning it clockwise. 11. Set the adjusting screw for the roller brake (I) so that the wire can still be moved and the roller stops automatically after the wire guide has been braked. MIG130...
-
Page 13: Operation
The pushing weld is when the torch is angled against the direction of the weld. The pulling weld is when your torch is angled towards the direction of the weld. The above listed techniques are both adequate for welding depending on your workpiece. MIG130... - Page 14 The required quantity of wire depends on the material thickness, the penetration depth, the welding wire diameter and also the size of the gap to be bridged between the workpieces you wish to weld. MIG130...
-
Page 15: Maintenance/Troubleshooting
Change earth cable Earth clamped on Connect to clean dirty/rusty metal workpiece Arc unstable Incorrect tips Change to correct tip Power cable too thin Use thicker power cable Wire feed resistance Clean/replace the liner or too large torch cable MIG130... -
Page 16: Autojack Guarantee
1.2.3 If asked to do so by Autojack or its Authorised Dealer, you return the product at your own cost to Autojack’s or the supplying Authorised Dealer’s Premises,... - Page 17 A good purchase to Autojack. If you include a Authorised Dealer should be able to contact number with this it will speed resolve the majority of these issues your claim up.
- Page 18 This guarantee applies to all product 3.1 We only support products for purchased from an Authorised Dealer of Autojack within the United Kingdom. Terms domestic and private use. You agree of guarantee may vary in other countries. not to use the product for any...
-
Page 19: Declaration Of Conformity
CE DECLARATION OF CONFORMITY Toolsave Unit C, Manders Ind Est., Old Heath Road, Wolverhampton, WV1 2RP. Declares that the Mig Master MIG130 Welder is in compliance with the regulations included in the Directives: 2006/42/EC EC DECLARATION OF CONFORMITY Certificate for EC-type examination delivered by AV Technology Ltd. -
Page 20: Machine Schematic
4. Front Panel 14.Top Cover 24.Power Switch 5. Base Panel 15.Transformer 25.Roller and Tips Holder 6. Control PCB 16.Rear Panel 7. PCB Holder 17.Cooling Fan 8. Middle Panel 18.Foot 9. Wire Feeder 19.Right Side Panel 10. Left Side Panel 20.Potentiometer MIG130...
Need help?
Do you have a question about the MIG130 and is the answer not in the manual?
Questions and answers