
Subscribe to Our Youtube Channel
Related Manuals for Zodiac SIROCCO 2 2M


Summary of Contents for Zodiac SIROCCO 2 2M
- Page 1 SIROCCO Instructions for installation and use - English Dehumidifier Translation of the original instructions in French More documents on: www.zodiac.com H0723600_REVA - 2020/11...
- Page 2 WARNINGS Carefully read the instructions in this manual before using the unit. GENERAL WARNINGS • Failure to respect the warnings may cause serious damage to the pool equipment or cause serious injury, even death. • Only a person qualified in the technical fields concerned (electricity, hydraulics or refrigeration) is authorised to carry out maintenance or repair work on the appliance.
- Page 3 corresponds to the mains voltage; - The mains supply is compatible with the appliance's electricity needs and is correctly grounded. • In the event of abnormal operation or the release of odours from the appliance, turn it off immediately, unplug it from its power supply and contact a professional. •...
- Page 4 • Leak detection; pressure test: - never use oxygen or dry air (risk of fire or explosion) - use dry nitrogen or the mixture of nitrogen and refrigerant indicated on the information plate, - the test pressure for both the high and low pressure circuits must not exceed 42 bar (for R410A) in cases where the appliance is equipped with the optional pressure gauge.
-
Page 5: Table Of Contents
• The distribution or modification of this document in any way is prohibited, without prior authorisation from Zodiac®. • Zodiac® is constantly developing its products to improve their quality. The information contained herein may therefore be modified without notice. CONTENTS ❶... -
Page 6: ❶ Specifications
❶ Specifications 1.1 I Description SIROCCO Wall mounting rail + screws (x5 Ø6 mm) Filter Base “Hot water coil” kit “Electric heater” kit “Remote control” kit “Built in” kit : Included : Available as an accessory... -
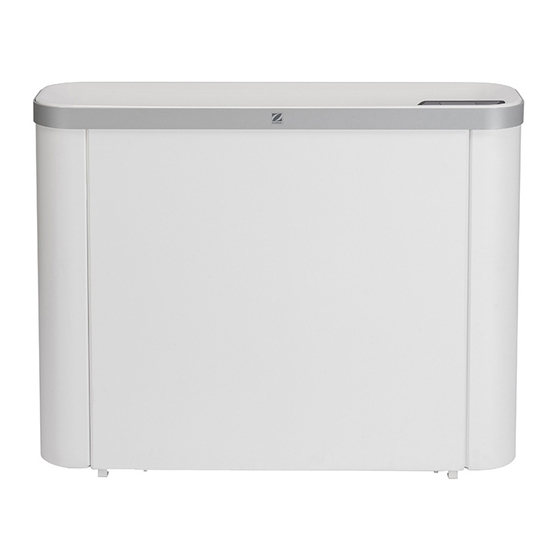
Page 7: I Dimensions And Marking
1.2 I Dimensions and marking SIROCCO 1,060 mm 1,410 mm 300 mm 800 mm Front Side Rear Bottom User interface Blower grid Integrated wall mounting rail Condensate drainage outlets Filter + extraction grid Levelling screw Cooling section Electrical section... -
Page 8: I Operating Conditions
1.3 I Technical specifications SIROCCO (without options) 380 - 400V / 3 Voltage 220 - 240V / 1 / 50 Hz / 50 Hz Pollution class Pollution degree Overvoltage category Nominal electric current requirement 12.1 Maximum electric current requirement 14.3 18.5 mm²... -
Page 9: ❷ Installation
❷ Installation 2.1 I Installation requirements • When the appliance is installed and protected by a residual current device (RCD) with a maximum amperage of 30 mA, it should be installed at a distance of at least 2 metres from the edge of the pool. •... -
Page 10: I Installation Close To The Pool (Wall-Mounted Appliance)
2.2 I Installation close to the pool (wall-mounted appliance) 2.2.1 Positioning the appliance • At least two people are required for moving the appliance. • Use straps (not supplied) when lifting the appliance so as not to damage it when positioning it. •... -
Page 11: I Connection Of The Condensate Drainage Line
• To mount the appliance on a (solid) wall, follow these steps: ❶ 500 min 500 min 500 min 500 min 150 x4 225 x4 2M and 3M models 5M and 5T models *Distance to be respected when the dehumidifier is mounted on the base. If this is not the case, this distance can be increased. ❷... -
Page 12: I Access To The Electrical Connection Terminal Boards
2.4 I Access to the electrical connection terminal boards ❶ ❷ ❸ ❹ ❺ ❻... -
Page 13: I Electricity Supply Connections
2.5 I Electricity supply connections • Before any work inside the appliance, you must cut the appliance’s electricity supply as there is a risk of electric shock which may cause material damage, serious injury or even death. • Incorrectly tightened terminals may cause the terminal box to heat up, which can invalidate the warranty. •... -
Page 14: I Option Connections
2.5.1 Connecting the pool shutter switch • Connect the pool shutter contact cables to terminals X9.5 and X9.6 as shown below. 2.6 I Option connections Option mounting and activation : • Refer to the installation and use manual supplied with the option. 2.6.1 "Hot water coil"... -
Page 15: ❸ Use
❸ Use Your dehumidifier operates based on a heat pump with extraction of the warm, humid air in the pool room and delivery of dryer, hotter air. It is ideal for maintaining a humidity level that is between 60% and 70%. When the humidity level is lower than 60%, this leads to a feeling of excessive cold when leaving the water. -
Page 16: I Operation
Electric heater Electric heater heating Electric heater off Circulator (hot water coil Circulator on Circulator idle option) Alarm Alarm in progress Appliance configured Celsius to measure in degrees Celsius Programming using “Manual” mode “manual” mode. Appliance configured as Humidity level percentage a humidity sensor 3.2 I Operation 3.2.1 Switching on the appliance... -
Page 17: I Appliance Configuration
3.2.2 Starting the appliance • Press and hold (longer than 3 seconds) • The screen displays all of the symbols along with an audible beep. The value displayed on the screen corresponds to the relative humidity (%). The ambient temperature can also be simultaneously displayed (°C). To do this, just set the heating mode to "Hetr"... - Page 18 Information: the importance of the ventilation mode • Ventilation helps to ensure that air circulates correctly, meaning that the temperature and humidity levels are more even throughout the room. • Bathing comfort can be significantly and economically improved by improving ventilation. 3.3.2 Configuring the heating mode When installing a heating kit ("electric heater"...
- Page 19 3.3.3 Configuring pool shutter mode The pool shutter mode is used to adapt the dehumidifier and heating functions to the pool status (covered/not covered). When the shutter is detected as closed, the heating setpoint temperature switches to the (lower) point defined in setting P66 (see §...
- Page 20 3.3.4 Configuring the test mode Once the installation of the dehumidifier is finished, the installer can check the appliance in test mode. This mode is used to force the dehumidification functions (and the heating kit, if installed). To activate/deactivate the test mode: •...
-
Page 21: I User Functions
3.4 I User functions 3.4.1 Switching the appliance on and off To switch the appliance on: • Press and hold (longer than 3 seconds) • The screen displays all of the symbols along with an audible beep. The value displayed on the screen corresponds to the relative humidity (%). - Page 22 3.4.2 Unlocking the keyboard If the “Lock keyboard” option is activated, when no key has been pressed for 10 seconds, the keyboard automatically locks. When a key is pressed, “LOC” is displayed. To unlock the keyboard: • Press and hold down (longer than 3 seconds) one of the following keys: •...
- Page 23 3.4.4 Activation/deactivation of "Silence" mode The "Silence" mode is used to reduce the appliance’s noise level by lowering the ventilation speed when the dehumidifying and/or heating functions are activated. When the "Silence" mode is activated, the appliance’s dehumidifying capacity deteriorates slightly. Information: "Silence"...
-
Page 24: ❹ Maintenance
❹ Maintenance 4.1 I Maintenance • Before any maintenance work on the appliance, you must cut the electricity supply as there is a risk of electric shock which may cause material damage, serious injury or even death. • It is recommended that the appliance undergo general servicing at least on a yearly basis to ensure its proper operation, maintain performance levels and prevent any possible failures. - Page 25 4.1.2 Annual maintenance to be performed by a qualified technician • Check that the electric cable connections are correctly tightened to their terminals on the terminal board, in addition to the contactor screws, • Check that each command relay and power contactor is operational. •...
-
Page 26: ❺ Troubleshooting
❺ Troubleshooting • Before you contact your retailer, please carry out these few simple checks using the following tables if a problem occurs. • If the problem persists, contact your retailer. • : Actions to be performed by a qualified technician only 5.1 I Appliance behaviour The appliance is discharging •... -
Page 27: I Settings
5.3 I Settings Menu Setting Description Unit/Values User Humidity setpoint User Heating setpoint °C • Intermittent Easy Inst Type of ventilation • Permanent • 0 = Stop Easy Inst Test mode: "Stop/Start" • 1 = Start Easy Inst Test mode: duration Minutes •... -
Page 28: I Wiring Diagrams
5.4 I Wiring diagrams 5.4.1 SIROCCO... - Page 29 5.4.2 SIROCCO 3M - 5M...
- Page 30 5.4.3 SIROCCO...
- Page 31 Symbol Description HP switch LP switch Heating priority Remote ON/OFF Pool shutter status Fan thermal switch Fan speed reading Circulator Alarm Electrical resistor Compressor Check the order of the phases Compressor contactor Contactor for electric option Humidity sensor Room sensor Evaporator sensor Air outlet sensor MODBUS +...
- Page 32 Pour plus d’informations, enregistrement produit et support client : For more information, product registration and customer support: www.zodiac.com ©2020 Zodiac Pool Systems LLC. All rights reserved. ZODIAC® is a registered trademark of Zodiac International, S.A.S.U., used under license. All other trademarks are the property of their respective owners.
Need help?
Do you have a question about the SIROCCO 2 2M and is the answer not in the manual?
Questions and answers