
Related Manuals for Black+Decker CYCLONIC POWER PRO


Summary of Contents for Black+Decker CYCLONIC POWER PRO
- Page 1 CYCLONIC POWER PRO ASPIRADORA CYCLONIC POWER PRO VACUUM CLEANER INSTRUCCIONES/ INSTRUCTIONS MODELO/MODEL VCBD8090-AR...
-
Page 2: Instrucciones Importantes De Seguridad
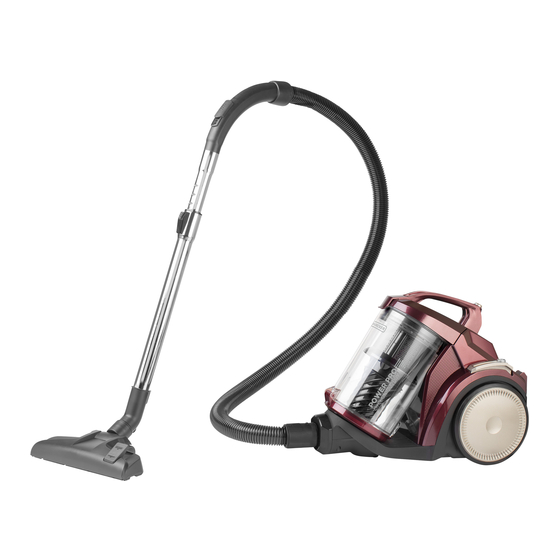
Por favor lea este instructivo antes de usar el producto. INSTRUCCIONES IMPORTANTES DE SEGURIDAD Cuando se utilizan aparatos eléctricos, especialmente en la presencia de los niños, siempre se debe tomar ciertas medidas de seguridad, incluyendo las siguientes: • Por favor lea detenidamente todas las instrucciones antes de utilizar el producto. ADVERTENCIA –... - Page 3 Este producto puede variar ligeramente del que aparece ilustrado. 1. Botón para vaciar el colector de polvo 2. † Filtro ciclónico (Pieza # VCBD8090-07) 3. Conector de la manguera 4. † Manguera flexible giratoria (Pieza # VCBD8090-04) 5. † Colector de polvo removible (Pieza #VCBD8090-08) 6.
- Page 4 ENSAMBLE Y DESARME DE SU ASPIRADORA MANGUERA FLEXIBLE GIRATORIA 1. Para conectar la manguera, empuje el extremo del conector adentro de la abertura en la parte delantera del tanque de la aspiradora hasta producir un clic y encajar en su lugar. 2.
-
Page 5: Cuidado Y Limpieza
MANGUERA GIRATORIA FLEXIBLE: manguera flexible con una función de succión ajustable. CEPILLO PARA BARRER PISO/ALFOMBRA: utilizar para aspirar la suciedad en todas las superficies. CUIDADO Y LIMPIEZA Este aparato no contiene piezas reparables por el consumidor. Para asistencia, por favor acuda a personal de servicio calificado. -
Page 6: Necesita Ayuda
29. Presione el clip de cierre de la tapa del filtro y tire hacia afuera. 30. Lave la esponja y el filtro a mano con agua y jabón y deje que se seque antes de reinstalarlo. 31. Instale nuevamente el filtro o reemplace con un filtro nuevo y cierre la tapa. 32. -
Page 7: Póliza De Garantía
¿Qué aspectos no cubre esta garantía? • Los productos que han sido utilizados en condiciones distintas a las normales. • Los daños ocasionados por el mal uso, el abuso o negligencia. • Los productos que han sido alterados de alguna manera. •... - Page 8 Por favor llame al número correspondiente que aparece en la lista a continuación para solicitar que se haga efectiva la garantía y donde Ud. puede solicitar servicio, reparaciones o partes en el país donde el producto fué comprado. Argentina Honduras Atención al consumidor Serviteca 0800 444 7296...
-
Page 9: Important Safeguards
Please Read and Save this Use and Care Book. IMPORTANT SAFEGUARDS When using electrical appliances, basic safety precautions should always be followed, including the following: • Read all instructions before using this appliance. WARNING – To reduce the risk of fire, electric shock or injury: •... - Page 10 Product may vary slightly from what is illustrated. 1. Empty dust bin release 2. † Cyclonic filter (Part # VCBD8090-07) 3. Hose connector end 4. † Flexible swivel hose (Part # VCBD8090-04) 5. † Removable dust collector (Part #VCBD8090-08) 6. Lid latch for HEPA grade intake filter access 7.
-
Page 11: Care And Cleaning
HOW TO USE This appliance is intended for household use. It is for indoor use only. Important: The power cord has a yellow marking and a red marking to help you determine the maximum length to use. Up to the yellow marking is the recommended length. Never pull cord beyond the red marking. This vacuum cleaner is equipped with an overheat protection system. - Page 12 CYCLONIC FILTER To remove the cyclonic filter 23. Open the lid by pulling the catch at the end of the handle and remove the filter. 24. Grasp the top part of the cyclonic filter and pull it out. 25. Clean cyclonic filter and filter screen using a small brush. If needed, wash with mild soap and rinse with cold tap water.
-
Page 13: Need Help
MOTOR INLET SPONGE FILTER The motor inlet sponge filter is located directly behind the dust collector, at the back of the canister. 39. Before cleaning filter, remove the dust collector located in the center of the unit. 40. The motor inlet sponge filter is located near the top of the unit. 41. - Page 14 BLACK+DECKER logos and product names are trademarks of The Black & Decker Corporation, used under license. All rights reserved. BLACK & DECKER, BLACK+DECKER, the BLACK & DECKER y los logos y nombres de productos de BLACK+DECKER son marcas reg- istradas de The Black & Decker Corporation, usados bajo licencia.
Need help?
Do you have a question about the CYCLONIC POWER PRO and is the answer not in the manual?
Questions and answers