Table of Contents
Advertisement
Quick Links
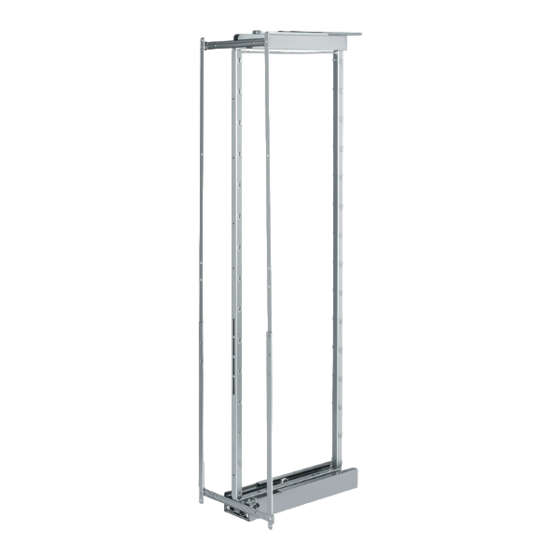
Montageanleitung zum Beschlag "DISPENSA-SWING"
Assembly instructions for DISPENSA-SWING fitting
1 - Frontschiene
Front panel profile
2 - Fronthalter
Front panel connector
3 - Tragrahmen
Frame
4 - Befestigungsbolzen
und Sicherungsring
Fixing bolt and
security ring
5 - Einstellschlüssel
Adjusting key
6 - Beschlagschiene unten
Bottom runner
7 - Oberteil untere
Beschlagschiene
Upper section of
bottom runner
8 - Mittelteil untere
Beschlagschiene
Middle section of
bottom runner
9 - Korpusschiene unten
Bottom cabinet rail
10 - Korpusschiene oben
Top cabinet rail
11 - Euroschraube mit
Senkkopf VZ 6,3x13
Euro screw,countersunk head
VZ 6,3 x 13
A.
Bohrungen zur Montage
der untere Korpusschiene (9)
Hole pattern for mounting
bottom cabinet rail (9)
34
374
MA 401246 0000 Seite 1 von 6
Art.-Nr.: 004430
Order no: 004430
Hochschrank gegen kippen sichern !
Fix cabinet to make sure it cannot tilt forward !
2
1
2
Ø5 13 tief
474
4
3
5
6
B.
Bohrungen zur Montage
der obere Korpusschiene (10)
Hole pattern for mounting top cabinet rail (10)
10
SPAX Senkkopfschrauben ø4,5x16 oder
Euro-Schraube Senkkopf
vz Ø6,3x16 verwenden
Use SPAX countersunk head screws ø4,5x16 or
Euro screw with flat head vz Ø6,3x16
7
Schrankboden mit
8
fünften Sockelfuß
verstärken
Support cabinet base
with a fifth foot
Ø5 13 tief
45
61
341
357
11
9
24.02.2005
Advertisement
Table of Contents

Summary of Contents for Kesseböhmer DISPENSA-SWING
- Page 1 Montageanleitung zum Beschlag “DISPENSA-SWING” Art.-Nr.: 004430 Assembly instructions for DISPENSA-SWING fitting Order no: 004430 1 - Frontschiene Front panel profile 2 - Fronthalter Hochschrank gegen kippen sichern ! Front panel connector Fix cabinet to make sure it cannot tilt forward !
- Page 2 Tragrahmenhöhe einstellen (3) Adjust frame height (3) lichte Schrankhöhe B - 124 = Rahmen-Aussenmaß A Inside cabinet height B -124 = Outer frame height A B =...mm - 124 = A =...mm Loch nach vorne Hole at front Montage untere Korpusschiene (9) Montage obere Korpusschiene (10) Attach bottom cabinet rail (9) Attach top cabinet rail (10)
- Page 3 Montage untere Beschlagschiene (6). Das Ende des Langloches muß am Gewinde anliegen ! Attach bottom cabinet runner (6) The end of the oblong hole must line up with the thread ! Langloch oblong hole Gewinde thread Montage untere Beschlagschiene (6,7,8) Attach bottom cabinet runner sections (6,7,8) 24.02.2005 MA 401246 0000 Seite 3 von 6...
- Page 4 MontageTragrahmen (3) an obere Korpusschiene (10). Attach frame (3) to top cabinet rail (10) 14 14 10 10 1. Obere Korpusschiene (10) komplett am Gummipuffer (14) der Innenschiene (13) heraus- und über Rahmen (3) ziehen. Please pull out completely the top runner (10) at the plastic dumper (14) together with the inside rail (13) to the door exceeding the frame (3) 2.
- Page 5 Montage der Frontschienen (1) und des Fronthalters (2). Attach front panel profile (1) and front panel connector (2) Y = lichte Schrankhöhe -159mm Oberkante Unterboden = inside cabinet height -159 mm Top edge of bottom panel Korpus ausrichten. Level cabinet Hochschrank gegen kippen sichern Fix cabinet to make sure...
- Page 6 Justierung der Front Aling front panel Verstellen adjust Fixieren Höhenverstellung und Achtung: Einstellung der Frontneigung Befestigungsschrauben Adjust front panel high vor dem Verstellen lösen and tilt angle CAUTION Loosen fixing screws before making any adjustments Achtung: Vorspannung beachten Beim Einbau muss die Front oben früher als unten anschlagen CAUTION...


Need help?
Do you have a question about the DISPENSA-SWING and is the answer not in the manual?
Questions and answers