
Related Manuals for DORANI C10


Summary of Contents for DORANI C10
- Page 1 DORANI C10 IP APARTMENT VIDEO INTERCOM QUICK APARTMENT SETUP GUIDE WW.DORANI.COM.AU Dorani (PJM Sales) – 03 9357 0942 4/1 Merri Concourse, Campbellfield, Victoria 3061...
-
Page 2: Know Your Monitor
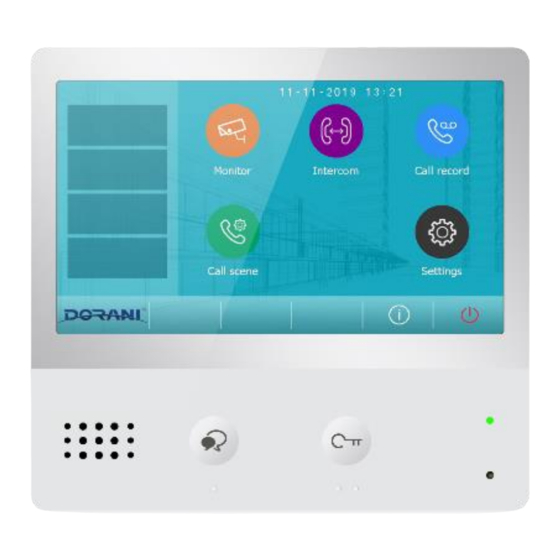
APARTMENT MONITOR KNOW YOUR MONITOR Intercom Menu Call Record Menu Monitor Menu Calling Other Reviewing of picture Monitoring of Door Monitors in System Memory Stations Shortcut Info Menu Settings Menu All Installer Setting Lock Release Settings – Volume, Brightness, Contrast Snapshot –... -
Page 3: Technical Specifications
TECHNICAL SPECIFICATIONS Monitors Model: DORVIP05 Voltage POE 48V Current Draw 80mA LAN Interface 10 BASE T / 100 BASE TX Ethernet RJ45 Screen 7” Digital Color TFT Resolution 800 x 480 Dimensions (W,H,D) 174 x 161 x 22 Apartment Door Station Model Surface: DORVIP01 Model Flush:... -
Page 4: Installation
INSTALLATION The Dorani IP Intercom system is very simple to install using standard network topology and POE 48V switches to distribute the network. Systems up to 80 Devices... - Page 5 RJ45 CONNECTIONS Standard 568A Connection Pin 1 - Green Pin 2 - Green/White Pin 3 – Orange/White Pin 4 – Blue Pin 5 – Blue/White Pin 6 – Orange Pin 7 – Brown/White Pin 8 – Brown LOCK CONNECTIONS Relay 2 for second lock release Relay output 2 Relay output 12v Lock Release...
- Page 6 PROGRAMMING APARTMENT MONITORS Enter Settings Enter Installer Menu Menu Password: 66666666 (8x6) TCP/IP – DHCP & STATIC The system has an inbuilt DHCP allocation, so the monitors will be given their own IP address on initialization. IP Config If you wish to create a Static Network and assign individual IP addresses to the system this can be done in the IP Config Settings.
- Page 7 Call_Nbr Device_Addr = (Install Type) Unit Number Mast_Slave = Master or Slave configuration, 1 Master per unit, remainder are slaves Name = Monitor Model (Can be changed to Unit number) Unit # MB = In Multi Building Separate Call Number Generally NOT used (See extended install guide) Unit # SB = In Single Building Separate Call Number Generally NOT used (See extended install guide)
- Page 8 MULTI MONITOR SYSTEMS 2+ Monitors per Room Call_Nbr If you have more than 1 monitor installer per Apartment or in a Single Home installation only 1 Master monitor can be assigned. The remainder must be assigned as Slave monitors Press Mast_Slave and assign monitors as below 01 = Master 02 = Slave 1 03 –...
- Page 9 Once you have entered installer mode you can always access the menu items Tap Top Section to enter installation menu Numbering Door Stations Each Door Station should have a Different Number Click Settings Menu Click Call Nbr Change Door Number Change Door Station ID Change Door Station Name if Desired...
- Page 10 Changing Locking Parameters Click Settings Menu Click Parameter Click Lock and PWD Page 1 Managers Password = Installer Password Common Unlock Code = 4 Digit Code for Door Unlock Code Unlock Enable 1 = ON 0 = OFF Remote Unlock Code = NOT USED Page 2 Code Error Protection = NOT USED Lock 1 Mode =...
- Page 11 Changing Time and Date Click Settings Menu Click Parameter Click Lock and PWD...
- Page 12 Warranty All Dorani Video Intercom products come with a limited 12 month warranty from time of initial purchase. This warranty is covered by Dorani Pty Ltd standard terms and conditions. Diversion and Mobile device connection warranty and disclaimer is outlined in detail at www.dorani.com.au.
Need help?
Do you have a question about the C10 and is the answer not in the manual?
Questions and answers