Advertisement
Quick Links
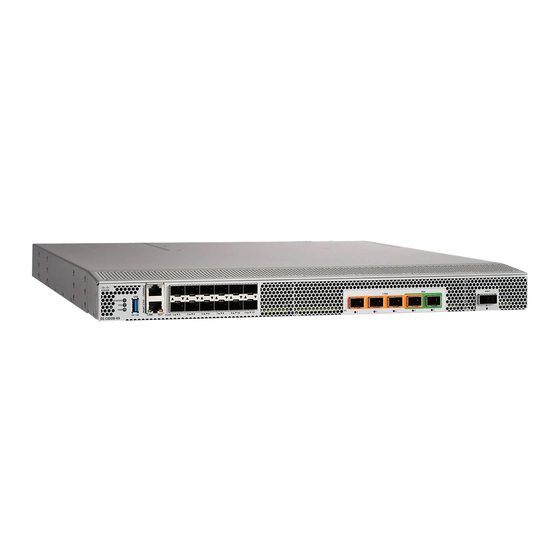
Installing the Cisco MDS 9220i Switch
This chapter describes how to install the Cisco MDS 9220i switch and its components.
Before you install, operate, or service the system, see the
the Cisco MDS 9000 Family
Warning
This unit is intended for installation in restricted access areas. A restricted access area can be accessed
only through the use of a special tool, lock and key, or other means of security. Statement 1017
Warning
Only trained and qualified personnel should be allowed to install, replace, or service this equipment.
Statement 1030
Each new switch requires a license. See the
instructions on installing a license.
•
•
•
•
•
•
•
•
Preinstallation
This section includes the following information:
Installation Options
A Cisco MDS 9220i Switch can be installed using the following methods:
• In an open EIA rack
document for important safety information.
Preinstallation, on page 1
Before Installing the Shelf Brackets, on page 2
Preinstallation Guidelines, on page 5
Installing the Switch, on page 7
Grounding the Switch, on page 16
Installing and Removing Power Supply Units, on page 17
Installing and Removing Fan Modules, on page 18
Regulatory Compliance and Safety Information for
Cisco MDS 9000 Series Licensing Guide, Release 8.x
Installing the Cisco MDS 9220i Switch
for
1
Advertisement

Related Manuals for Cisco MDS 9220i


Summary of Contents for Cisco MDS 9220i
-
Page 1: Table Of Contents
Installing the Cisco MDS 9220i Switch This chapter describes how to install the Cisco MDS 9220i switch and its components. Before you install, operate, or service the system, see the Regulatory Compliance and Safety Information for the Cisco MDS 9000 Family document for important safety information. -
Page 2: Cisco Mds 9000 Series Telco And Eia Shelf Bracket
Telco and EIA Shelf Bracket optional kit is not provided with the switch; to order the kit, contact your switch supplier. This section describes the procedure for installing a Cisco MDS 9220i switch in a rack or cabinet using the optional Telco and EIA Shelf Bracket Kit. - Page 3 Installing the Cisco MDS 9220i Switch Required Equipment Quantity Part Description 10-32 x 3/8-in. Phillips pan-head screws 12-24 x 3/4-in. Phillips screws 10-24 x 3/4-in. Phillips screws Required Equipment You need the following equipment for this installation: • Number 2 Phillips screwdriver •...
- Page 4 Installing the Cisco MDS 9220i Switch Installing the Shelf Bracket Kit into a Four-Post EIA Rack The bottom hole of the shelf bracket should align with the bottom hole (the hole immediately above the 1/2 in. Note spacing) of a rack unit on the rack-mounting post.
-
Page 5: Preinstallation Guidelines
Connection Guidelines for AC Powered Systems To connect to the Cisco MDS 9220i switch AC power supply units to the site power source, follow these guidelines: • Each power supply should have its own dedicated branch circuit. - Page 6 The switch is thoroughly inspected before shipment. If any damage occurs during transportation, or if any item is missing, contact your customer representative immediately. If you purchased Cisco support through a Cisco reseller, contact the reseller directly. If you purchased support directly from Cisco, contact Cisco Technical Support.
-
Page 7: Installing The Switch
Fan Modules sections. Installing the Switch This section describes how to use the rack-mount kit to install the Cisco MDS 9220i switch into a cabinet or rack that meets the requirements that are described in the Cabinet and Rack Requirements section. - Page 8 Installing the Cisco MDS 9220i Switch NEBS Compliance b. Position a front-mount bracket so that four of its screw holes are aligned to the screw holes on the side of the chassis. Note You can align any four of the holes in the front rack-mount bracket to four of the six screw holes on the side of the chassis.
- Page 9 Installing the Cisco MDS 9220i Switch Installing the Switch in a 4-Post Rack Figure 4: NEBS Kit for 4-Post installation NEBS air baffle Front rack-mount bracket For more information on how to install the switch, see the Installing the Switch in a 4-Post Rack, on page 9...
- Page 10 Installing the Cisco MDS 9220i Switch Installing the Switch in a 4-Post Rack • The rack is installed and secured to its location. Step 1 Install two front-mount brackets to the switch as follows: a. Determine which end of the chassis is to be located in the cold aisle as follows: •...
- Page 11 Installing the Cisco MDS 9220i Switch Installing the Switch in a 4-Post Rack c. Secure the front-mount bracket to the chassis using the four M4 screws and tighten each screw to 12 in-lb (1.36 N·m) of torque. d. Repeat Step 1 for the other front rack-mount bracket on the other side of the switch, and be sure to position that bracket the same distance from the front of the switch.
- Page 12 Installing the Cisco MDS 9220i Switch Installing the Switch in a 4-Post Rack Fan-tray end of the chassis Customer-supplied rack-mount screw a. Holding the switch with both hands, position the two rear rack-mount brackets on the switch between the rack or cabinet posts that do not have slider rails attached to them.
- Page 13 Installing the Cisco MDS 9220i Switch Installing the Switch into a 2-Post Rack Installing the Switch into a 2-Post Rack Step 1 Install two rack–mount brackets onto the switch as follows: a) Determine which end of the chassis is to be located in the cold aisle as follows: •...
- Page 14 Installing the Cisco MDS 9220i Switch Installing the Switch into a 2-Post Rack Figure 7: Installing Rack-mount Brackets on the Rear Side of the Chassis c) Repeat Step 1b, for the other front rack-mount bracket on the other side of the switch and be sure to position that bracket the same distance from the front of the switch.
- Page 15 Removing the Shelf Bracket Kit (Optional) If it was previously installed, the shelf bracket kit can be removed after the Cisco MDS 9220i switch has been installed in a four-post EIA rack, and the front rack-mount brackets and the rack-mount guide are securely attached to the rack-mounting posts.
-
Page 16: Grounding The Switch
Installing the Cisco MDS 9220i Switch Grounding the Switch Grounding the Switch The switch chassis is automatically grounded when you install the switch properly in a grounded rack with metal-to-metal connections between the switch and rack. Alternatively, you can ground the chassis (this is required if the rack is not grounded) by attaching a customer-supplied grounding cable to the chassis grounding pad and the facility ground. -
Page 17: Installing And Removing Power Supply Units
Installing the Cisco MDS 9220i Switch Installing and Removing Power Supply Units Installing and Removing Power Supply Units This section provides instructions for installing and removing the power supply units in the Cisco MDS 9220i switch. Installing Power Supply Units You can replace one power supply unit while the other one provides power to the switch. -
Page 18: Installing And Removing Fan Modules
If the power supply blank module does not move out of place, it is secured in the slot. If the power supply blank module moves, carefully press it all the way into the slot until it clicks in place. Installing and Removing Fan Modules This section provides instructions for installing and removing the fan modules for the Cisco MDS 9220i switch. Caution If you are changing the airflow direction of all the modules in the chassis, you must shut down the switch before replacing all the fan and power supply modules with modules using the other airflow direction. - Page 19 Caution Cisco MDS 9000 Series Switches have internal temperature sensors that can shut down the system if the temperature within the chassis exceed certain safety thresholds. To accurately monitor the system temperature, the temperature sensors require sufficient airflow through the chassis. In the event that a fan module is removed from the chassis and the airflow is reduced, the system will bypass the temperature sensor information and shut down after five minutes to prevent undetected overheating.
- Page 20 Installing the Cisco MDS 9220i Switch Removing a Fan Module Installing the Cisco MDS 9220i Switch...
Need help?
Do you have a question about the MDS 9220i and is the answer not in the manual?
Questions and answers