
Related Manuals for Pixsys HMI Series


Summary of Contents for Pixsys HMI Series
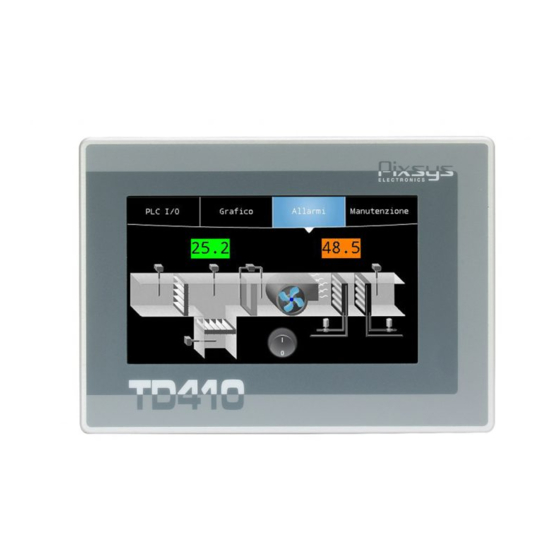
- Page 1 HMI series 410-710-810-820-830 HMI TOUCH SCREEN 12” 10” 7” 4,3” Quick start guide - Guida breve all’installazione...
-
Page 3: Table Of Contents
Table of contents Safety guidelines ................................5 Policies and procedures ..........................5 1.2 Installation guidelines ..........................5 1.3 Viruses and dangerous programs ......................5 Organization of safety notices ........................6 Spacing for air circulation and ventilation ......................6 Device installation ............................... 6 Power supply and grounding............................ - Page 4 Organizzazione delle note di sicurezza ....................25 Spazi per la circolazione dell’aria e la ventilazione ...................25 Installazione del dispositivo ............................25 Alimentazione e messa a terra dello strumento ....................26 Collegamenti elettrici ..............................27 Dati tecnici ................................... 27 Caratteristiche generali ..........................27 6.2 Caratteristiche hardware ......................... 27 6.3 LCD touch: 4 fili resistivo ...........................
-
Page 5: Safety Guidelines
(e.g. diskette, CD-ROM, USB flash drive, etc.), a network connection or the Internet. The user is responsible for assessing these dangers, implementing preventive measures such as virus protection programs, firewalls, etc. and making sure that software is only obtained from trusted sources. User manual - HMI Series - 5... -
Page 6: Organization Of Safety Notices
(as per figures 1 and 2) Cut-out Fig. 1 Fig. 2 Lc (± 0,5 mm) Hc (± 0,5 mm) 6 - HMI Series - User manual... -
Page 7: Power Supply And Grounding
Connect the device grounding with a conductor of 18AWG (2,5mmq) minimum section. For the whole series it is suggested to use a 24 VDC 1,0A 24VA power supply (Pixsys code 2700.10.008). Use Copper, Copper-Clad Aluminium or Aluminium conductors wire for all electric connection. -
Page 8: Wiring Connections
* Brightness reduction to 80% of default setting / ** Functioning years per 8 hours / day Communication interfaces TD410-AD TD710-AD*** - TD810-AD*** - TD820-AD - TD830-AD *** ETH2 not available on this model. 8 - HMI Series - User manual... -
Page 9: Canopen
DIP2 (DIP1 for TD410 with switch 5/6 ONLY for internal use) RS485 MASTER: Termination 330Ω Polarization 470Ω RS485 MASTER: Polarization only 470Ω RS485 SLAVE PIN3: B+ (green) PIN4: A- (yellow) PIN5: GND (brown) User manual - HMI Series - 9... -
Page 10: Using Rs485 / Com2* Master On Db9 (Not Available For Td410 And -El Versions)
Warning! Peripheral USB devices can be connected to the USB interfaces on this device. Due to the large number of USB devices available on the market, Pixsys cannot guarantee their performance. Caution! Because this interface is designed according to general PC specifications, extreme care should be exercised with regard to EMC, cable routing, etc. -
Page 11: Ethernet Interface
To replace the battery it is necessary to remove the protection and pull out the extraction box using a blade screwdriver on models TD410/TD710 or by dedicated battery compartment on TD810 and greaters. User manual - HMI Series - 11... -
Page 12: Battery Detail
It is possible also to configure the standby time for the backlighting switch off and the buzzer at display pressure. The following paragraphs describe each function of the TdControlPanel windows. NB: Pictures show device standard configuration. 12 - HMI Series - User manual... -
Page 13: Win Explorer
NB: to transfer the SoftPLC program and Movicon on the device, it must have a fixed address. It is not possible to operate in DHCP. The HMI default IP address is 192.168.0.100 The PL500 default IP address is 192.168.0.99 User manual - HMI Series - 13... -
Page 14: Backlight - Buzzer
STOP icon pressed. TDControlPanel window will be opened Insert a USB pen (FAT32 formatted) in one of the available USB ports. Press BACKUP-RESTORE to access the utility for projects backup and device configuration 14 - HMI Series - User manual... - Page 15 RESTORE procedure to restore LogicLab and Movicon projects on HMI. To program a new HMI starting from an existing Backup keep pressing STOP icon during start up of the device TDControlPanel window will be opened User manual - HMI Series - 15...
-
Page 16: Logiclab Suite
LogicLab Suite is the Pixsys development environment for the programming of PLC series, PL500 and all Operator panels / PanelPC. The suite is available for free download within “download area” of the website pixsys.net, no activation code is required (only registration). Supported by all 32/64bit Windows versions, starting from Windows XP SP3. -
Page 17: Create - Load A Project
, on the window that opens press “Properties” and than enter the target IP on “IP Address” , keeping all the rest unaltered. In case of very slow networks or of a network configuration with different switches, it is possibile to increase the “Timeout” value (expressed in mS). User manual - HMI Series - 17... -
Page 18: Compiling And Downloading The Code
From now on, the window “Watch” will visualize the value of the inserted variable, in real time. Through it is possible to save, load and add an exsisting watch-list to the list of variables. 18 - HMI Series - User manual... -
Page 19: Interfacing Movicon 11 With Logiclab
Following steps are to be completed on the PC which will be used to develop the projects. Go to download area of Pixsys website / Movicon section and download “MOVICON 11.6 Update-Ag- giorna Driver.exe” corresponding to your PC system. Double click to launch the .exe file and follow instructions. -
Page 20: Driver Configuration
Press OK to save settings and exit. Now it is possible to import the LogicLab project variabiles on Movicon. Right click on “SoftPLC Pixsys” and select “Import PLC database”. Press “Read from PLC project”, the list of all available variables will be provided. -
Page 21: Downloading The Movicon Code To The Target
Verify that the status bar visualize“CONNECTED” and “SOURCE OK”. If “NO CODE is still visualized, restart the simulator pressing or from the menu “On-line” > “Target reboot”. On Movicon, entering the Pixsys driver configurator and configure as follows: 1. Enter the folder where the LogicLab project resides and select the file NameMyProjectLogicLab.sym.xml... - Page 22 Warranty terms Pixsys srl warrants its electronic devices for 12 months from Invoice date. Pixsys liability shall be limited to repairing (or replacing at its option) any defective product which is returned with RMA (Return Material Authorization) priorly obtained on Pixsys website and to be clearly marked on documents.
- Page 23 User manual - HMI Series - 23...
-
Page 24: Norme Di Sicurezza
Norme di sicurezza Le indicazioni di questo manuale sono riferite a prodotti Pixsys quali i dispositivi logici programmabili (PLC) e i dispositivi di controllo e monitoraggio (PC industriali, HMI) da ora in poi identificati semplicemente con il termine “Il dispositivo” o “i dispositivi”. I dispositivi realizzati e commercializzati da Pixsys sono progettati, sviluppati e realizzati per un uso convenzionale in ambienti industriali. -
Page 25: Organizzazione Delle Note Di Sicurezza
Dima foratura (cut-out) Fig. 1 Fig. 2 Lc (± 0,5 mm) Hc (± 0,5 mm) Manuale d’uso - HMI Series - 25... -
Page 26: Alimentazione E Messa A Terra Dello Strumento
I collegamenti di massa devono essere il più corti possibili ed eseguiti con filo con la sezione massima possibile verso il punto centrale di messa a terra (ad esempio l’armadio o il sistema di controllo). 26 - HMI Series - Manuale d’uso... -
Page 27: Collegamenti Elettrici
50000 h Typ @ 50000 h Typ @ 25°C** 30000 h Typ @ 25°C** retroilluminazione* 25°C** Lifetime** * Riduzione luminosità all’80% del dato di fabbrica / ** Anni di funzionamento per 8 ore / giorno Manuale d’uso - HMI Series - 27... -
Page 28: Interfacce Di Comunicazione
Connessione RS232 con RTS / CTS: Connessione RS232 base: PIN2: RX (verde) PIN2: RX (verde) PIN3: TX (blu) PIN3: TX (blu) PIN5: GND (marrone) PIN5: GND (marrone) PIN7: RTS (bianco) PIN8: CTS (giallo) 28 - HMI Series - Manuale d’uso... -
Page 29: Utilizzo Rs485 / Com2 Su Morsetto M1
Pin 8 4 - A- 330 Ω 5 - C Pin 3 7 - 5V 470 Ω 9 - B+ Pin 5 : C EARTH Note: 5V Is isolated and can supply 70mA max Manuale d’uso - HMI Series - 29... -
Page 30: Interfaccia Ethernet
Interfaccia non presente sulle versioni -EL. Warning! Diff erenti dispositivi USB possono essere collegati alle interfacce USB su questo dispositivo. A causa dell’elevato numero di dispositivi USB disponibili sul mercato, Pixsys non può garantire le loro performance. Caution! Poiché... -
Page 31: Batteria
Utilizzando un client VNC è possibile visualizzare dal proprio PC quello che viene visualizzato a video sul PLC/HMI. Avviando un browser con servizio Java attivo è inoltre possibile testare se la funzione di Webserver del dispositivo è attiva. Per questa funzione è necessario l’uso del browser Internet Explorer. Manuale d’uso - HMI Series - 31... -
Page 32: Win Explorer
Si consiglia di mantenerla attiva solo se si riscontrano problemi durante lo sviluppo del software. È bene disabilitarla al termine della fase di sviluppo! Il pulsante “START” avvia il progetto SoftPLC (e l’eventuale finestra di debug) manualmente. 32 - HMI Series - Manuale d’uso... -
Page 33: Lan Eth1
BACKUP: procedura per eseguire il backup (caricamento da HMI) dei progetti LogicLab e Movicon. Una volta scaricati i progetti LogicLab e Movicon sul dispositivo e configurato quest’ultimo in modo da eseguirli ad ogni accensione, spegnere e riaccendere il dispositivo tenendo premuto il simbolo di “STOP” Manuale d’uso - HMI Series - 33... - Page 34 Premendo “OK” la procedura di backup inizia (si vedrà una clessidra al centro dello schermo). Un popup di conferma indica il termine della procedura. Premendo “OK” si chiude il popup ed è quindi possibile premere “ESC” e poi spegnere il dispositivo. 34 - HMI Series - Manuale d’uso...
- Page 35 Premendo “OK” si chiude il popup ed è quindi possibile premere “ESC” e poi spegnere il dispositivo. Da questo momento, ad ogni accensione il dispositivo avvierà i progetti (e l’intera configurazione se selezionata durante la fase di backup) automaticamente. Manuale d’uso - HMI Series - 35...
-
Page 36: Suite Logiclab
Suite LogicLab La Suite LogicLab è l’ambiente di sviluppo di Pixsys per la programmazione del PLC PL500 e di tutta la famiglia di terminali operatore e PanelPC. La suite è scaricabile dall’area download del sito pixsys.net, previa registrazione e non necessita di codici di attivazione. -
Page 37: Collegamento Al Target
“On Line” > “Trasferimento codice”. A questo punto la barra di stato visualizzerà “CONNESSO” e “SORGENTE OK” indicando che il programma in esecuzione nel target corrisponde a quello che si sta visualizzando sul PC. Manuale d’uso - HMI Series - 37... -
Page 38: La Watch Window
NB: è richiesto Movicon 11.5 o successivi. Da effettuare solo la prima volta: Nel PC dove si sta sviluppando, scaricare dall’area dowload del sito Pixsys, nella sezione Movicon, il “MOVICON 11.6 Update-Aggiorna Driver.exe” corrispondente all’architettura del pc in uso. Doppio click per avviarlo e seguire le istruzioni a video. -
Page 39: Configurazione Del Driver
TD900 ecc.) inserire il percorso dove è stato effettuato il download del progetto LogicLab (di default “D:\LLExec\NomeMioProgettoLogicLab.sym.xml”). 3. Se l’applicativo Movicon sarà eseguito nel Panel HMi o nel Panel-PC dove è presente anche il SoftPLC, inserire l’IP address 127.0.0.1. Manuale d’uso - HMI Series - 39... -
Page 40: Trasferimento Del Codice Movicon Nel Target
Premere OK per salvare le impostazioni e uscire. Ora è possibile importare le variabili del progetto LogicLab in Movicon. Premere il tasto destro su “Pixsys SoftPLC” e selezionare “Importa database PLC”. Premere il tasto “Read from PLC project”, verrà fornito l’elenco delle variabili disponibili. -
Page 41: Simulazione Dell'intero Progetto Softplc + Scada
La garanzia non copre in alcun modo i problemi derivanti dall’installazione di applicativi software successiva alla vendita, ed in particolare i danni conseguenti all’esecuzione di malware. Eventuali interventi di assistenza da parte di Pixsys per il ripristino di sistema operativo o programmi saranno soggetti alla tariffa di assistenza vigente. - Page 42 Note / Aggiornamenti 42 - HMI Series - Manuale d’uso...
- Page 44 Read carefully the safety guidelines and programming instructions contained in this manual before using/connecting the device. Prima di utilizzare il dispositivo leggere con attenzione le informazioni di sicurezza e settaggio contenute in questo manuale. PIXSYS s.r.l. www.pixsys.net sales@pixsys.net - support@pixsys.net online assistance: http://forum.pixsys.net 2300.10.258-RevE 220221...
Need help?
Do you have a question about the HMI Series and is the answer not in the manual?
Questions and answers