Table of Contents
Advertisement
Quick Links
Advertisement
Table of Contents

Related Manuals for Progress PBP43102B


Summary of Contents for Progress PBP43102B
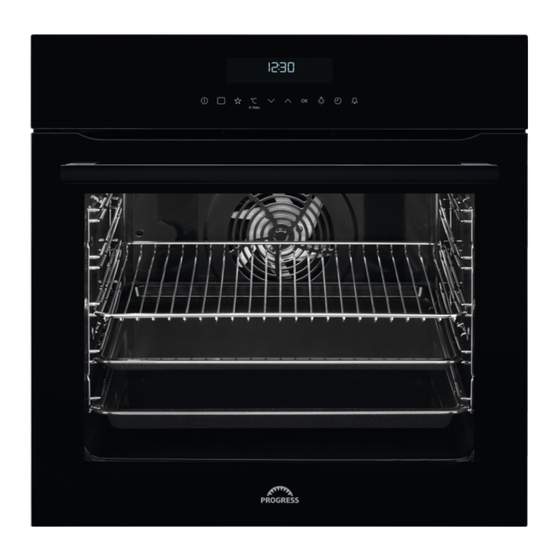
- Page 1 User Manual Oven PBP43102B PBP43102X...
-
Page 2: Table Of Contents
2 Progress CONTENTS Safety information Automatic programmes Safety instructions Using the accessories Installation Additional functions Product description Hints and tips Control panel Care and cleaning Before first use Troubleshooting Daily use Energy efficiency Clock functions Subject to change without notice. -
Page 3: Safety Instructions
Progress 3 Children shall not carry out cleaning and user maintenance • of the appliance without supervision. General Safety Only a qualified person must install this appliance and • replace the cable. WARNING: The appliance and its accessible parts •... - Page 4 4 Progress • Always take care when moving the appliance as it is heavy. Always use Mounting screws 4x25 mm safety gloves and enclosed footwear. • Do not pull the appliance by the handle. Electrical connection • Install the appliance in a safe and...
- Page 5 Progress 5 • Fully close the appliance door before • Do not use the appliance as a work you connect the mains plug to the surface or as a storage surface. mains socket. • Open the appliance door carefully. The •...
- Page 6 6 Progress Care and cleaning • Pyrolytic cleaning is a high temperature operation that can release fumes from WARNING! Risk of injury, fire, cooking residues and construction or damage to the appliance. materials, as such consumers are strongly advised to: •...
-
Page 7: Installation
Progress 7 Service • Disconnect the appliance from the mains supply. • To repair the appliance contact the • Cut off the mains electrical cable close Authorised Service Centre. to the appliance and dispose of it. • Use original spare parts only. - Page 8 8 Progress min. 550 min. 560 Securing the oven to the cabinet...
-
Page 9: Product Description
Progress 9 PRODUCT DESCRIPTION General overview Control panel Electronic programmer Heating element Lamp Shelf support, removable Shelf positions Accessories • Combi pan For cakes and biscuits. To bake and • Wire shelf roast or as a pan to collect fat. - Page 10 10 Progress Sensor Function Description Field Options To set a heating function or an automatic pro‐ gramme. My Favourite Pro‐ To store your favourite programme. Use it to have gramme access to your favourite programme directly or when the oven is off.
-
Page 11: Before First Use
Progress 11 Symbol Name Description Automatic programme You can choose an automatic programme. My favourite programme The favourite programme operates. kg / g An automatic programme with a weight in‐ put operates. h / min A clock function operates. Temperature / Fast heat up The function operates. -
Page 12: Daily Use
12 Progress DAILY USE WARNING! Refer to Safety Oven func‐ Application chapters. tion Heating functions To defrost food (vegeta‐ bles and fruit). The de‐ frosting time depends on Oven func‐ Application Defrost the amount and size of tion the frozen food. -
Page 13: Clock Functions
Progress 13 1. Press Oven func‐ Application The display shows the temperature in the tion oven. Press again to change the set To keep food warm. temperature. 2. Press or the display shows again Keep Warm the set temperature automatically after 5 seconds. - Page 14 14 Progress Clock function Application Set + Go To turn on the oven with necessary settings with only one press of the sensor field any time later. Minute Minder To set a countdown time. This function has no effect on the operation of the oven.
-
Page 15: Automatic Programmes
Progress 15 The oven turns on automatically later on, 5. Press a sensor field (apart from ON / works for the set Durationand stops at the OFF) to start the Set + Go function. set End Time. When the set time ends, the Setting: Minute Minder signal sounds for 2 minutes. -
Page 16: Using The Accessories
16 Progress 6. Touch a sensor field or open the oven door to stop the acoustic signal. Programme 7. Deactivate the appliance. CHEESE CAKE Automatic programmes with ROLLS weight input FARMER BREAD If you set the weight of the meat, the DOUGH PROVING appliance calculates the roasting time. -
Page 17: Additional Functions
Progress 17 Push the baking tray / deep pan between the guide bars of the shelf support. Small indentation at the top increase safety. The Wire shelf and baking tray / deep pan indentations are also anti-tip together: devices. The high rim around... - Page 18 18 Progress Using the settings menu To turn off the Function Lock repeat step The settings menu lets you turn on or turn If the Pyrolysis function works, off functions in the main menu. The display shows SET and the number of the the door is locked.
-
Page 19: Hints And Tips
Progress 19 Cooling fan • Night brightness - when the appliance is deactivated, the brightness of the When the oven operates, the cooling fan display is lower between 10 PM and 6 turns on automatically to keep the surfaces of the oven cool. If you turn off •... - Page 20 20 Progress Baking and roasting CAKES Conventional True Fan Cook‐ Cooking (min) (°C) (°C) Whisked rec‐ 3 (2 45 - 60 Cake mould ipes and 4) Shortbread 3 (2 20 - 30 Cake mould dough and 4) Buttermilk 80 - Cake mould, Ø...
- Page 21 Progress 21 CAKES Conventional True Fan Cook‐ Cooking (min) (°C) (°C) Rich fruit cake 110 - Cake mould, Ø 24 Victoria sand‐ 30 - 50 Cake mould, Ø 20 wich Preheat the empty oven. BREAD AND PIZZA Conventional Cook‐ True Fan Cooking (min) (°C)
- Page 22 22 Progress FLANS Conventional Cook‐ True Fan Cooking (min) (°C) (°C) Pasta flan, preheating is 40 - 50 not needed Vegetable flan, preheat‐ 45 - 60 ing is not needed Quiches 50 - 60 Lasagne 180 - 190 180 - 190...
- Page 23 Progress 23 MEAT Conventional Cook‐ True Fan Cooking (min) (°C) (°C) Pork shoulder, with rind 120 - 150 Pork shin, 2 pieces 100 - 120 Leg of lamb 110 - 130 Whole chicken 70 - 85 Whole turkey 210 - 240...
- Page 24 24 Progress GRILL (kg) (min) (min) 1st side 2nd side Fillet steaks, 4 pieces 12 - 15 12 - 14 Beef steak, 4 pieces 10 - 12 6 - 8 Sausages, 8 12 - 15 10 - 12 Pork chops, 4 pieces...
- Page 25 Progress 25 VEAL POULTRY (°C) (min) (°C) (min) Roast veal, 1 kg 160 - 90 - 120 Goose, 3.5 - 5 kg 160 - 120 - Veal knuckle, 1.5 160 - 120 - Turkey, 2.5 - 3.5 160 - 120 -...
- Page 26 26 Progress Set the temperature to 120 °C. (kg) (min) Steaks 0.2 - 0.3 20 - 40 Fillet of beef 1 - 1.5 90 - 150 Roast beef 1 - 1.5 120 - 150 Roast veal 1 - 1.5 120 - 150...
- Page 27 Progress 27 When the liquid in the jars starts to simmer (after approximately 35 - 60 minutes with one-litre jars), stop the oven or decrease VEGETABLES the temperature to 100 °C (see the table). Set the temperature to 160 - 170 °C.
- Page 28 28 Progress FRUIT FRUIT Plums 8 - 10 Pears 6 - 9 Apricots 8 - 10 Moist Fan Baking - recommended accessories Apple slices 6 - 8 Use the dark and non-reflective tins and containers. They have better heat absorption than the light colour and reflective dishes.
- Page 29 Progress 29 (°C) (min) Brownie baking tray or dripping 25 - 30 Soufflè, 6 pieces ceramic ramekins on 25 - 30 wire shelf Sponge flan flan base tin on wire 15 - 25 base shelf Victoria sand‐ baking dish on wire...
- Page 30 30 Progress Information for test institutes Tests according to IEC 60350-1. (°C) (min) Small Conven‐ Baking 20 - 30 cakes, tional tray 20 per Cooking tray Small True Fan Baking 150 - 20 - 35 cakes, Cooking tray 20 per...
-
Page 31: Care And Cleaning
Progress 31 (°C) (min) Short True Fan Baking 140 - 25 - 45 bread Cooking tray Short Conven‐ Baking 140 - 25 - 45 bread tional tray Cooking Toast, 4 Grill Wire max. 2 - 3 minutes Preheat the oven shelf first side;... - Page 32 32 Progress Clean all accessories after each use and let them dry. Use a soft cloth with warm water and a cleaning agent. Do not clean the accessories in a dish‐ washer. Do not clean the non-stick accessories using aggressive agents, sharp- Accessories edged objects or in a dishwasher.
- Page 33 Progress 33 1. Open the door fully and hold both 6. Press to set the duration of hinges. the cleaning procedure: Option Description 1 h 30 min for a light cleaning 2 h for a stand‐ ard cleaning 2 h 30 min for a thorough clean‐...
- Page 34 34 Progress Make sure that you put the glass panels (A and B) back in the correct sequence. Check for the symbol / printing on the side of the glass panel, each of the glass panels looks different to make the disassembly and assembly easier.
-
Page 35: Troubleshooting
Progress 35 3. Replace the lamp with a suitable 300 The back lamp °C heat-resistant lamp. 4. Install the glass cover. 1. Turn the lamp glass cover to remove it. 2. Clean the glass cover. TROUBLESHOOTING WARNING! Refer to Safety chapters. - Page 36 36 Progress Problem Possible cause Remedy Steam and condensation You left the dish in the oven Do not leave the dishes in settle on the food and in the for too long. the oven for longer than 15 - cavity of the oven.
-
Page 37: Energy Efficiency
Progress 37 ENERGY EFFICIENCY Product Information Sheet Product information according to EU 65-66/2014 Supplier's name Progress PBP43102B 949498099 Model identification PBP43102X 949498098 Energy Efficiency Index 81.2 Energy efficiency class Energy consumption with a standard load, conventional 0.93 kWh/cycle mode Energy consumption with a standard load, fan-forced 0.69 kWh/cycle... - Page 38 38 Progress of cooking. The residual heat inside the When you use this function the lamp oven will continue to cook. automatically turns off after 30 seconds. You may turn on the lamp again but this Use the residual heat to warm up other action will reduce the expected energy dishes.
- Page 39 Progress 39...
- Page 40 867355710-B-302019...
Need help?
Do you have a question about the PBP43102B and is the answer not in the manual?
Questions and answers