Table of Contents

Subscribe to Our Youtube Channel
Related Manuals for iGenix IG9919


Summary of Contents for iGenix IG9919
- Page 1 USER MANUAL 4-in-1 Portable Air Conditioner White IG9919 / IG9922 Please read these instructions carefully before use and retain for future reference Before switching on your appliance, always check for any damage which may have been caused in transit...
-
Page 2: Table Of Contents
Appliance Overview ..............6 Installation .................7-9 Operating Instructions ............10-14 Water Drainage ................ 15 Cleaning and Maintenance ............. 16 Trouble Shooting Guide ............17 Error Codes ................18 Fuse Replacement ..............19 Disposal Information ............... 19 Igenix Warranty Information ........... 22-23... -
Page 3: Safety Instructions
SAFETY INSTRUCTIONS Carefully read the instructions before operating the unit. Please retain this manual for future reference. Important: This product is intended for domestic and light office use ONLY and not for commercial, industrial or outdoor use. When using electrical appliances, basic safety precautions should always be followed: 1. - Page 4 15. Do not cover or obstruct the unit’s inlet and outlet grilles. 16. Do not insert fingers, pencils or any other objects into the opens of the unit. 17. Avoid restarting the appliance unless 3 minutes have passed since being turned off. This prevents damage to the compressor. 18.
-
Page 5: Specification
SPECIFICATION Model IG9919 IG9922 Cooling Capacity (Btu) / (W) 9000Btu / 2500W 12000Btu / 3200W Heating Capacity (Btu) / (W) 7847Btu / 2300W 9894Btu / 2900W Dehumidification at 30°C/80%RH (L/day) 26.4 Cooling Input Power (W) 1230 Heating Input Power (W) 1035 Air Flow Volume (m³/h) -
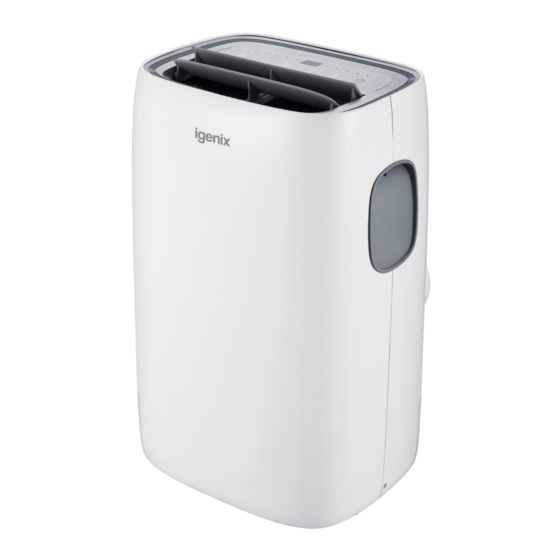
Page 6: Appliance Overview
APPLIANCE OVERVIEW Front Back Louvres Castors Air outlet grille Control panel Power cable Intake grille Handle (both sides) Intake grille Condenser drain Accessories Parts Parts Name Quantity Exhaust hose connector Exhaust hose 1 set Exhaust hose adapter x Window slider kit 1 set Remote control 1 set... -
Page 7: Installation
INSTALLATION Warning: Leave the unit to stand for 12 hours before connecting to the mains electricity supply after transport or when it has been tilted (e.g. cleaning), to allow the coolant gases time to settle. Unpacking • Open the box and remove all of the packaging and the exhaust assembly •... - Page 8 Positioning the Appliance This unit can easily be moved from one room to another on the rolling castor wheels, please note that whilst moving the unit, it should be kept in an upright position. • The exhaust heat must be expelled through a window, door or ventilation through a wall;...
- Page 9 Window Slider Kit Installation A. Panel B. Panel with one hole C. Screw to lock window kit in place Assembly: • Slide panel B into Panel A and size to window width. Ensure that the window kit assembly is free from gaps from gaps and/or air pockets when taking measurements.
-
Page 10: Operating Instructions
OPERATING INSTRUCTIONS Control Panel Fan mode Timer Fan speed Dry mode Cool mode Heat mode Mode Timer Increase Decrease Power selection temperature temperature speed on/off Remote Control NOTE: Certain modes and functions can only be controlled via the remote control, therefore always ensure that the remote control is keep in a safe place to avoid accidentally losing or misplacing it. - Page 11 • Point the remote control at the receiver on the appliance. • The remote control must be no more than 7 meters away from the appliance (without obstacles between the remote control and the receiver). • The remote control must be handled with extreme care. Do not drop it or expose it to direct sunlight or sources of heat.
- Page 12 The most suitable temperature for the room during the summer varies from 24°C to 27°C (75°F to 81°F). You are recommended, however, not to set a temperature much below the outdoor temperature. The fan speed difference is more noticeable when the appliance is under Fan mode but may not be noticeable under Cool mode.
- Page 13 Dry Mode Ideal to reduce room humidity (spring and autumn, damp rooms rainy periods, etc). In dry mode, the appliance should be prepared in the same way as for cool mode, with the air exhaust hose attached to enable the moisture to be discharged outside. To set this mode correctly: •...
- Page 14 Setting the Timer This timer can be used to delay the appliance start up or shut down. This avoids wasting electricity by optimising operating periods. Programming start up: • Turn on the appliance and choose the desired mode (for example cooling, 24°C and high fan speed) •...
-
Page 15: Water Drainage
WATER DRAINAGE With daily use, it is recommended to empty the unit approximately once a week. The unit can be drained manually or continuously, as explained below: Manual Draining (Fig.12) • Unplug the unit from power source. • Place a suitable container (not supplied with unit) under the lower drain plug. -
Page 16: Cleaning And Maintenance
CLEANING & MAINTENANCE Cleaning the Cabinet Before any cleaning or maintenance, turn the appliance off by pressing the “ ” button on the control panel or remote control. Wait for a few minutes then unplug from the mains socket. You should clean the outer cabinet of the appliance with a slightly damp cloth, then dry with a dry cloth. -
Page 17: Trouble Shooting Guide
TROUBLE SHOOTING GUIDE If you experience difficulties with the appliance, please check the suggestions below before contacting customer services: Problem Solution • Check Trip Switch / Fuse • Wait for 3 minutes and start again, protective device may be preventing unit from working The unit will not switch on •... -
Page 18: Error Codes
ERROR CODES Error Code Solution • The appliance is fitted with a frost protection device to avoid excessive formation of ice. • The appliance starts up again automatically when the defrosting process is completed. LOW TEMPERATURE (frost prevention) • If this is displayed, contact your local authorised service centre. -
Page 19: Fuse Replacement
MAINS PLUG FUSE REPLACEMENT Fuse Cover Fuse Replacement (Class I) This appliance must be eathed. Remove the fuse cover with a small flat head screw driver. Take out the fuse and replace with a new fuse of the same Amp. Replace the fuse cover and push back into place. DISPOSAL INFORMATION The European Directive 2012/19/EU on Waste Electrical and Electronic Equipment (WEEE), requires that old household... -
Page 22: Igenix Warranty Information
Igenix Warranty Terms & Conditions This product is guaranteed for a period of 12 months as standard from the date of purchase against mechanical and electrical defects. You can extend your warranty for a further 12 months by registering your product. - Page 23 To qualify for the 2 year warranty you must register your product within 30 days of purchase. The full Terms & Conditions of our warranty policy are shown on the opposite page. They are also available on our website. www.igenix.co.uk...
- Page 24 38 Bluestem Road, Ransomes Europark, Ipswich, IP3 9RR Tel. 01473 271 272 Disclaimer: Igenix operate a policy of continual improvement and development. We therefore reserve the right to change/alter the specification and appearance of our appliances without prior notice. All diagrams and images shown in this manual are for illustration purposes only.
Need help?
Do you have a question about the IG9919 and is the answer not in the manual?
Questions and answers
Where will I find the batch number . I need it for the guarantee. Thank you.