Table of Contents
Advertisement
Advertisement
Table of Contents

Subscribe to Our Youtube Channel
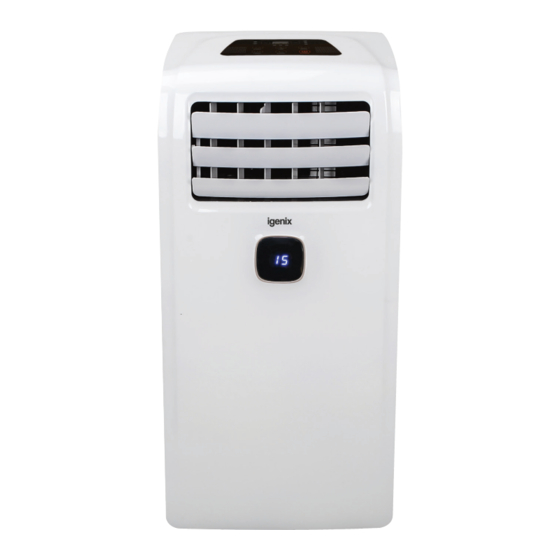
Summary of Contents for iGenix IG9911
- Page 1 USER MANUAL Air Conditioner - White IG9911 – 9000 BTU 3 in 1 Air Conditioner Batch code: Please read these instructions carefully before use and retain for future reference Before switching on your appliance, always check for any damage which may have been caused in transit...
-
Page 2: Table Of Contents
CONTENTS Safety Instructions ..............2-3 Specifications ................4 Appliance Overview ..............5 Installation ..................6 Positioning..................7 Operating Instructions ............8-9 Water Drainage ................ 10 Cleaning and Maintenance ............. 11 Trouble shooting Guide ............12 Fuse Replacement ..............13 Disposal Information ............... 13 Terms and Conditions and Warranty Information ..14-15 SAFETY INSTRUCTIONS Carefully read the instructions before operating the unit. - Page 3 8. Children shall not play with the appliance. 9. Cleaning and user maintenance shall not be made by children. 10. The unit should not be used by persons with reduced physical, sensory or mental capabilities. 11. It is not recommended to place this appliance in cupboards, closets, boats, caravans or similar locations.
-
Page 4: Specifications
SPECIFICATION Model IG9911 Cooling Capacity (Btu/h)/(W) 9000Btu/h / 2600W Dehumidification at 30°C/80%RH (l/h) 1.1 l/h Cooling Input Power/Current 950W / 4.3A Heating Input Power/Current Air Flow Volume (m³/h) 300 m³/h Power Supply 220-240V~ / 50Hz Thermostat Range (°C) 15- 31°C... -
Page 5: Appliance Overview
APPLIANCE OVERVIEW 1. Control Panel 2. Cold air outlet 3. Signal receptor 4. Remote Control 5. Handle 6. Exhaust Hose assembly 7. Filters and Air Inlets 8. Drain Point 9. Secondary Drain Point 10. Water Drainage Hose Exhaust Assembly Exhaust Hose Adapter Exhaust... -
Page 6: Installation
INSTALLATION Warning: Leave the unit to stand for 12 hours before connecting to the mains electricity supply after transport or when it has been tilted (e.g. cleaning), to allow the coolant gases time to settle. Unpacking • Open the box and remove all of the packaging and the exhaust assembly •... -
Page 7: Positioning
POSITIONING THE APPLIANCE This unit can easily be moved from one room to another on the rolling castor wheels, please note that whilst moving the unit, it should be kept in an upright position. • The exhaust heat must be expelled through a window, door or ventilation through a wall; whilst in air cooling or heating mode. -
Page 8: Operating Instructions
OPERATING INSTRUCTIONS Control Panel Low, medium and high wind speed Automatic, Cool, Dehumidify and Fan Oscillation button There are 3 main functions: Cooling, Fan and Dehumidifier as well as an Automatic function. Important: The compressor will start approximately 3 minutes after the unit is turned on (this will help prolong the life of the compressor). - Page 9 Adjust Fan Speed • Press the “Fan” button to select the desired fan speed shown below: Oscillation Function • Press the “OSCIL” button to select the horizontal louvers to automatically move up and down • Press the “OSCIL” button again to switch off this function Turning Off •...
-
Page 10: Water Drainage
WATER DRAINAGE This appliance is an advanced self-evaporating air conditioner, which reduces the need to empty the water tank in cooling mode. If the unit is vented correctly most of the water is reused to cool the condenser coils and any excess is evaporated. Please make sure that the rubber caps are firmly secured on the water drainage points when the unit is running. -
Page 11: Cleaning And Maintenance
CLEANING AND MAINTENANCE Turn off the unit and unplug from the mains socket before cleaning or performing any maintenance. Cleaning the Exterior • Clean the plastic housing with a duster or a soft damp cloth. Do not use chemical or abrasive cleaners to clean the exterior of the unit to prevent damage to the finish Cleaning the Filters •... -
Page 12: Trouble Shooting Guide
TROUBLE SHOOTING GUIDE If you experience difficulties with the appliance, please check the suggestions below before contacting customer services: Problem Solution The unit will not switch on • Check Trip Switch / Fuse • Wait for 3 minutes and start again, protective device may be preventing unit from working •... -
Page 13: Fuse Replacement
MAINS PLUG FUSE REPLACEMENT Fuse Cover Fuse Replacement (Class I) This appliance must be eathed. Remove the fuse cover with a small flat head screw driver. Take out the fuse and replace with a new fuse of the same Amp. Replace the fuse cover and push back into place. DISPOSAL INFORMATION The European Directive 2012/19/EU on Waste Electrical and Electronic Equipment (WEEE), requires that old household... -
Page 14: Terms And Conditions And Warranty Information
lgenix Warranty Terms & Conditions This product is guaranteed for a period of 12 months as standard from the date of purchase against mechanical and electrical defects. You can extend your warranty for a further 12 months by registering your product. Upon registration we will cover your product for a period of 24 months from the original purchase date against any mechanical or electrical defects. - Page 15 To qualify for the 2 year warranty you must register your product within 30 days of purchase. The full Terms & Conditions of our warranty policy are shown on the opposite page. They are also available on our website. www.igenix.co.uk...
- Page 16 38 Bluestem Road, Ransomes Europark, Ipswich, IP3 9RR Tel. 01473 271 272 Disclaimer: Igenix operate a policy of continual improvement and development. We therefore reserve the right to change/alter the specification and appearance of our appliances without prior notice. All diagrams and images shown in this manual are for illustration purposes only.


Need help?
Do you have a question about the IG9911 and is the answer not in the manual?
Questions and answers