Table of Contents
Advertisement
Quick Links
Advertisement
Table of Contents

Related Manuals for ED 1580FC-24-201


Summary of Contents for ED 1580FC-24-201
- Page 1 BATH.EDBYELLEN.COM...
- Page 2 ED is Ellen DeGeneres’ iconic style, values and personality shared through collections of beautifully designed, high-quality products for home, pets and people. All ED merchandise design and materials are approved by Ellen, ensuring it maintains her standards and upholds her promise to make each item feel...
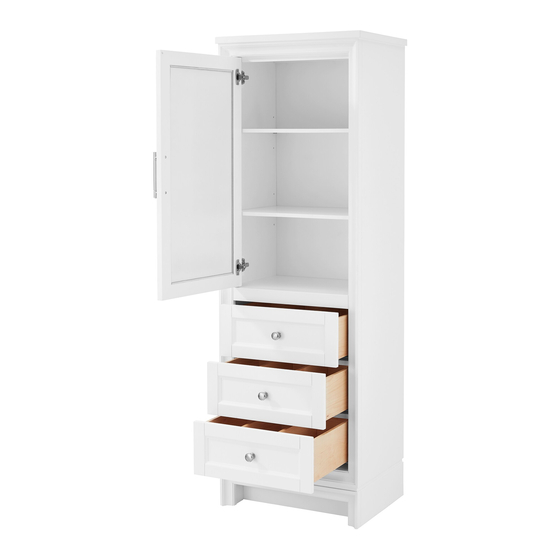
- Page 3 ITEM # 3629288; 3629294 24-IN FLOOR CABINET MODEL # 1580FC-24-201; 1580FC-24-242 MODEL NUMBER DESCRIPTION 1580FC-24-201 24" White Finish Floor Cabinet 1580FC-24-242 24" Light Gray Finish Floor Cabinet ATTACH YOUR RECEIPT HERE Serial Number__________________ Purchase Date__________________ Questions, problems, missing parts? Before returning to your retailer, call our customer service...
-
Page 4: Table Of Contents
TABLE OF CONTENTS Package Contents..........................5 Hardware Contents..........................5 Safety Instructions...........................5 Preparation............................6 Assembly or Installation Instructions ....................6 Change Door Panels (Optional)....................11 Care and Maintenance........................11 Warranty............................11 Replacement Parts List........................12... -
Page 5: Package Contents
PACKAGE CONTENTS PART DESCRIPTION QUANTITY Cabinet Wall Mounting Spacer Bar (preassembled to Cabinet (A)) Shelf Door (preassembled to Cabinet (A)) Wood Door Panel Drawer (preassembled to Cabinet (A)) Drawer Divider HARDWARE CONTENTS (NOT SHOWN ACTUAL SIZE) Touch Up Pen Door Handle (2 Options) Drawer Handle (2 Options) Shelf Pin Brushed Nickel (Qty. -
Page 6: Preparation
PREPARATION Before beginning assembly of product, make sure all parts are present. Compare parts with package contents list and hardware contents list. If any part is missing or damaged, do not attempt to assemble the product. Estimated Installation Time: 30 minutes. Tools Required for Installation (not included): Phillips screwdriver, utility knife or scissors, power drill with drill bit. - Page 7 INSTALLATION INSTRUCTIONS 3. If the location you will be installing the floor cabinet has baseboard molding, proceed to Step 4. If the location you will be installing the floor cabinet does not have baseboard molding, unscrew and remove the wall mounting spacer bar (B) from the back of the cabinet before proceeding to Step 4.
- Page 8 INSTALLATION INSTRUCTIONS 5. Screw shelf pins (DD) hand tight into the threaded holes of cabinet (A). Place shelf (C) on top of shelf pins (DD). Repeat for the remaining shelf (C). Hardware Used Shelf Pin 6. If you need to adjust the doors, do so in the following manner. To adjust door up or down, loosen screws (a) on both hinges, adjust door, and retighten screws.
- Page 9 INSTALLATION INSTRUCTIONS 7. Insert two drawer dividers (G) into the notch of drawers (F) inside. 8. As shown in the diagram, fully extend the drawer and locate the plastic levers on the metal glide tracks. Push the left-side and right-side levers at the same time to disengage the drawer from the drawer glides.
- Page 10 INSTALLATION INSTRUCTIONS 9. To reinstall drawer(s) into cabinet (A), fully extend metal glide tracks. Gently lower and slide drawer box into rear glide catch. Next, lower drawer box down to completely rest on extended glides. Then, push plastic levers to lock the drawer box in place. Note: Drawer box alignment can be adjusted, if necessary.
-
Page 11: Change Door Panels (Optional)
CHANGE DOOR PANELS (OPTIONAL) Note: The pre-installed glass door panels can be switched out with the included wood door panel (E). 1. Remove the silicone trim along the outer edges of the glass panel on the inside of the door. Start at a corner and pull to remove the four pieces. -
Page 12: Replacement Parts List
REPLACEMENT PARTS LIST FOR 1580FC-24-201 For replacement parts, call our customer service department at 1-855-571-1044, 9 a.m. - 5 p.m., EST, Monday - Friday. PART DESCRIPTION PART # Wall Mounting Spacer Bar FC-WALL MOUNTING BAR-201 Shelf 1580FC-24-201-SHELF Door 1580FC-24-201-DOOR Wood Door Panel... - Page 13 REPLACEMENT PARTS LIST FOR 1580FC-24-242 For replacement parts, call our customer service department at 1-855-571-1044, 9 a.m. - 5 p.m., EST, Monday - Friday. PART DESCRIPTION PART # Wall Mounting Spacer Bar FC-WALL MOUNTING BAR-242 Shelf 1580FC-24-242-SHELF Door 1580FC-24-242-DOOR Wood Door Panel 1580FC-24-242-DOOR PANEL Glass Door Panel Drawer Divider...
- Page 14 WWW.EDBYELLEN.COM...
Need help?
Do you have a question about the 1580FC-24-201 and is the answer not in the manual?
Questions and answers