Table of Contents
Advertisement
Quick Links
Advertisement
Table of Contents

Subscribe to Our Youtube Channel
Related Manuals for Spypoint FORCE-20


Summary of Contents for Spypoint FORCE-20
- Page 1 QUICK START GUIDE FORCE-20 COMPARABLE * v.1.7...
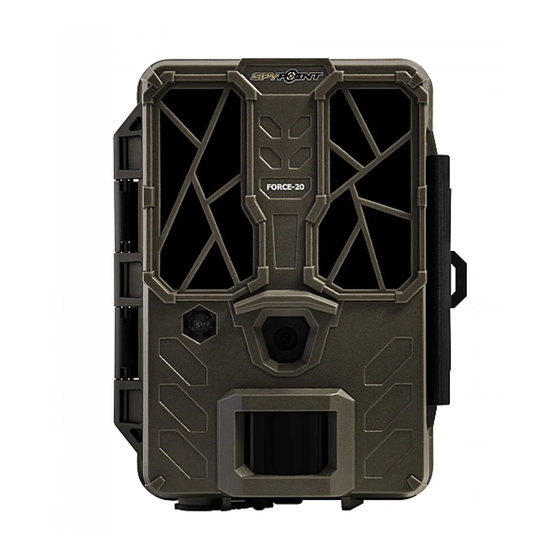
- Page 2 1x Camera 1x 16 GB SD card 1x Installation strap 1x Quick Start Guide NOTE Batteries sold separately. User Manual, software updates & FAQs available at: www.spypoint.com/support. COMPONENTS Screw-thread for standard ¼”-20 Light sensor LCD screen Photo lens OK button...
- Page 4 The specifications and characteristics of similar models may vary. Refer to the website or packaging for details. PREPARATION SELECT A POWER SOURCE 12 V power source 8 AA alkaline or lithium batteries Make sure to insert the AA batteries according ...
-
Page 5: Installing An Sd Card
INSTALLING AN SD CARD The camera was designed to operate with an SD card, class 10, between 2 and 32 GB of memory. INSERT AN SD CARD • Make sure the camera is turned OFF. • Locate the SD card slot. It is on the right, above the LCD screen (see diagram). -
Page 6: Photo Mode
SETUP Use the buttons to switch to the LCD display or to change options, and press OK to select. Several setup pages will be displayed. GENERAL SETTINGS SETUP 1. To turn the camera ON/OFF, use the ON/SETUP/OFF switch. 2. -
Page 7: Video Mode
Quality: Allows you to select a resolution of 20 MP or 3 MP. Once you have made your selection, press OK. Multi: Allows you to select the number of photos to be taken per shot (from 1 to 5 photos). Once you have made your selection, press OK. -
Page 8: Other Options
Night: Choose the BOOST option for maximum brightness for night vision. Select the OPTIMAL to reduce fuzziness at night. Once you have made your selection, press OK. optimal BOOST mode mode Invisibility of the LEDs Battery life Flash range Blur reduction OTHER OPTIONS Name: Allows to give a name to your camera. -
Page 9: Operation
OPERATION Once the setup is complete, turn the button from SETUP to ON. You may also switch from SETUP to OFF and turn the device ON later. RED LIGHT ON THE FRONT OF THE CAMERA When the switch is in the SETUP position, the red light will flash to confirm a motion detection once you have adjusted your settings. - Page 10 To ensure that you use your trail camera optimally and that it precisely meets your needs and ultimately to ensure greater success as a hunter, SPYPOINT offers you a range of useful additional digital features. For more details on the SPYPOINT EXPERIENCE, refer to the...
- Page 11 DISPOSAL ONLY USE ORIGINAL SPARE PARTS AND ACCESSORIES. If, one day, your camera has been used so intensively that it has to be replaced, or if you no longer have any use for it, you are obliged to dispose of it at a recycling center. Information on return points for your electrical appliance can be obtained from your local waste disposal company or from your local administrative offices.
-
Page 12: Warranty
2-year warranty. We strive to provide our customers with a positive experience and an outstanding service. For a complete list of specifications, features, and settings, visit our FORCE-20 page at www.spypoint.com. FAQ, User Manual & latest firmware available at www.spypoint.com/support Live chat support at www.spypoint.com...
Need help?
Do you have a question about the FORCE-20 and is the answer not in the manual?
Questions and answers